The Grow Awards 2026 🏆 


Likes
Comments
Share
@Kitties_and_Colas
Follow
The CP are becoming pretty top heavy and i find myself picking 1-2 from the ground each visit, I waited the containers with stones to see if this would help. The 3 remaining CP stand as tall as me in their containers (6ft) and are 107 days from seed, i'm expecting a pretty decent yield from them in October :)

Likes
16
Share
@Mopish
Follow
17 Jan - 23 Jan
19 Jan
Kush del Arriero: Looking good in color and size, planning to flush next week, hope those possible nanners don't develop enough, not removing due to harvest time being so close and this one being the one that will probably give me the best yield. Some buds and leaves getting purple colors.
Choco Cookie: Still very small, hope they grow a little more before harvest. Some buds and leaves getting purple colors.
Banana Cake: Small buds, decent trichomes.
I hope that KDA won't cause much trouble to the other two plants, I hope I'm wrong about the nanners... Keeping my plans, finish with nutrients this Sunday and flushing for 7-14 days after that.
I'll add a few more pics later today.
Sat 22
Yesterday a friend with more experience in these things took a look at my plants, he seemed impressed by what I've accomplished on my first grow so far. He also confirmed that the weird things on the KDA buds aren't nanners... phew !
He also confirmed my plans for flushing tomorrow are good.
Likes
10
Share
@Sundance
Follow
This week continues with nice flowering with strong smell. One plant is light green, I don't know why. I also added on more light to my grow tent.

Likes
224
Share
@yan402
Follow
This two were part of another diary and got moved out due to space reasons at VW8 and moved back indoors at VW20
https://growdiaries.com/diaries/218151-auto-god-s-glue-grow-journal-by-yan402
13.09.25 VW21 Both are looking good and are developing tighter nodes than when they were outside, I'm going to have to keep cutting them back every once and a while I also applied nematodes against thrips and fungus gnats.
20.09.25 VW22 some spots and some yellow leafs, I think it's a root problem, probably root bound, but both seem healthy and are getting thicker so maybe just top up with Coco coir and give a slight different nutrient schedule less Tri Part Bloom could do the trick MAYBE lol.
27.09.25 VW23 Topped up the pots with extra coco coir and trimmed the side roots a bit, both plants were root bound 📹
03.10.25 VW23 did a HST/LST session 📹
12.10.25 VW25 Done a major HST session to try and keep them in line with the Sunset Sherbet GF I have going in the same tent, rest in the video 📹
17.10.25 VW25 ffj/fpj/fish 30 → 60 ml
19.10.25 VW26 it just became a one plant diary, keeping #5, #6 gets it's own diary for testing nutrients.
20.10.25 VW26(?) Feed tweak: added 3 g Calcium Nitrate/ 30 L (≈ 15 ppm N + 10 ppm Ca)
24.10.25 VW26 did a defoliation and trimming session 📹
25.10.25 VW26 I'll be repoting tomorrow, 26.10.25 VW27 rest in the video📹
27.10.25 VW27 Epsom Salt 0 → 2.5, Calcium Nitrate 3 → 9 g
01.11.25 VW28 CalMag 60 → 30ml, TriPartBloom 20 → 30ml, Magnesium 2.5 → 3.5g
04.11.25 VW28 no more yellowing between the veins and no new spots, the changes to the schedule worked, rest in the video 📸
09.11.25 VW29 Did what I'm hoping is a last cleanup 🎥
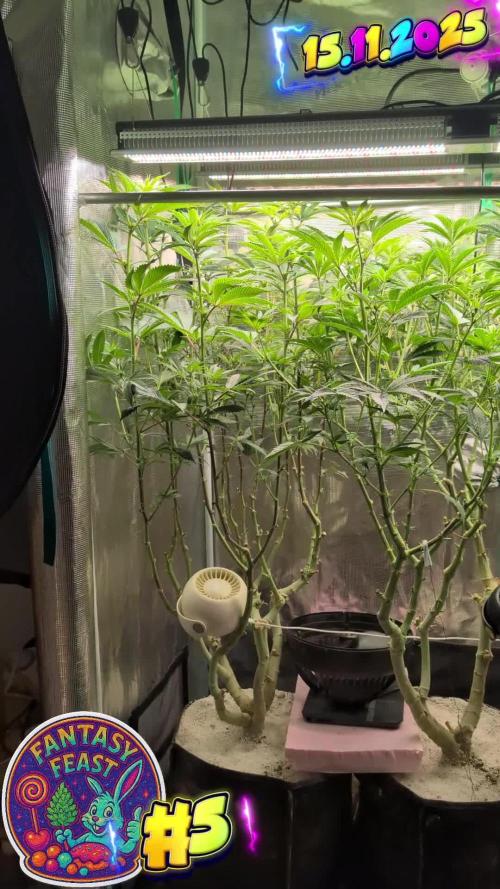
12.11.25 VW13 Did another cleanup in the tent 🎥, also switched to the FERMAKOR PK Micro schedule, (10.11.25) added Phosphoric acid as a pH down in preparation for flowering
🌱💦🌱💦🌱💦🌱💦🌱💦🌱
Day to day tasks & actions 🌿
🌱💦🌱💦🌱💦🌱💦🌱💦🌱
15.11.25 VW29 – no feed no water
16.11.25 FW1– no feed no water
(*RUNOFF reused for indoor house plants)
🍶💧🍶💧🍶💧🍶💧🍶
💧 Nutrients in 30 L #1 Veg — FERMAKOR
🍶💧🍶💧🍶💧🍶💧🍶
💧 Calcium Nitrate (Calcinit / Nitcal): 45 → 40 g
= 1.33 g/L → 207 ppm N + 253 ppm Ca
🍶 PK Concentrate (FERMAKOR Base): 30 → 40 ml
= 1.00 → 1.33 ml/L → balanced 1:1 P:K + light micros (from extract)
💧 Home-made FFJ/FPJ (Fish + Veg): 30 ml
= 1.00 ml/L
🍶 Epsom Salt (MgSO₄·7H₂O): 8 g
= 0.27 g/L → 26 ppm Mg + 35 ppm S
💧 Fetrilon Combi 1 (Micros): 0.5 g
= 0.017 g/L → Fe 0.7 ppm • Mn 0.7 ppm • Zn 0.3 ppm • Cu 0.3 ppm • B 0.1 ppm • Mo 0.02 ppm
🍶Phosphoric Acid (pH down) + Citric Acid (chelation): as needed
→ First set pH with phosphoric acid, then add a little citric only if you want extra chelation
💧 Target pH: 5.8 – 6.0 (drop test yellow-green)
📦 TOTAL: 60 → 70 ml / 48.5 g inputs per 30 L
= 2.00 → 2.33 ml/L + 1.62 g/L
⚙️✂️⚙️✂️⚙️✂️⚙️✂️⚙️
✂️ Tools & equipment ✂️
⚙️✂️⚙️✂️⚙️✂️⚙️✂️⚙️
✂️ 2× MarsHydro SP3000
⚙️ MarsHydro 150mm ACF Ventilator
✂️ Trotec dehumidifier (big unit)
⚙️ Mini no-name dehumidifier
✂️ Kebab skewers (LST – stainless)
⚙️ Wire + roast skewers (LST assist)
✂️ Scissors (HST)
⚙️ Vacuum (for spills & cleanup)
✂️⚙️✂️⚙️✂️⚙️⚙️✂️⚙️✂️⚙️✂️⚙️
🍒🍭🍬🌈🍒🍭🍬🌈🍒🍭🍬🌈🍒
🦄Fantasy Feast ( Seeds)🦄
🌈🍒🍭🍬🌈🍒🍭🍬🌈🍒🍭🍬🌈🍒
Species: Hybrid (Regular)
Genetics: The mother is Unicorn Whip by Dirty Bird Genetics. The father is Charcuterie by Cannarado Genetics.
Effect: Unknown Mixed effect body and head high
Flavor: Some phenos are Skunky gassy fruity, some are fruity sour citrus with a chemical touch and a touch of skunk
Flowering: Estimated 8–10 weeks
Resistance: Strong — Testing phase done
YouTube Link: https://youtube.com/-m8h?si=A7x4Zlr2kj-_ga31
Likes
11
Share
@Beedog
Follow
Every plant in garden day 56 Noticed yellowing mid week 7 don’t think it fade having some ph issues my run off is 7.2 after flush then watered again still up at 7 so hopefully going to water at like 6 6.1 from now till it goes down growth continues tho some buds getting big ☺️


Processing
Likes
15
Share
@tomeugironella
Follow
Hi guys ! Wow this grow is going just so well ! The smell is already really strong , a fruity skunky smell invades my house ( luckly i dont have nearly neighbours ) wich i like a lot ! They are just cobered in trichomes and starting to get fatty ! Let me know ur thoughts guys ! Happy smokes !


Likes
209
Share
@BioBuds
Follow
After the disaster with germinating the expert seeds Gorrillas, I was a bit disheartened, was so looking forward to them. But we just follow up strong by planting a Dutch Passion Skywalker Haze instead. Will be starting that diary this week, lets hope she germinates.
And it looks like we might be lucky, one tiny seedling came up from the 5 expert seeds, looks like a bit of a runt now and doesnt grow as fast as the Dutch Passion Orange Hill Special. I wil put another Orange Hill in the tent if this doesnt work out.
Last week was a hot week and rising temperatures inside and out of the tent, I decided to to remove the driver from the SP-3000 and put it outside of the tent. This light looks even sleeker and sexier this way. Also a dream to deinstall, 5 minutes.
But my victory last week was my invention of my custom top down oscillating fan. Which comprises of a standing oscillating towerfan, hung horizontal by just making a little hole in the foot and hanging it sideways. It works like a charm.
The tower has optional oscillation so I can choose to just cool the light or sway through the entire tent.
Very happy with that and still very happy with the light by @MarsHydroLED, thanks so much.
Dont forget their End of Summer Sale: https://www.aliexpress.com/store/911997108/ huge discounts at the moment if you are in the market for a tent or a light!

Likes
27
Share
@w33dhawk
Follow
Hallo liebe growmies, ich hoffe euch geht es allen gut! die Woche war wieder eine erfolgreiche Woche 😁 ich muss sagen ich bin erstaunt wie gut die runde bis jetzt läuft und wie schön sich meine Ladys entwickelt haben, bis jetzt habe ich noch keine Mängel vernehmen können und die Damen sind meines Erachtens nach auf dem besten Weg zur sicheren ernte aber nun zur Woche
Am 08.03.23 also einen Tag bevor diese Woche begann habe ich den compost Tee angesetzt dafür habe ich 2,5L Wasser was ich ja eh in der Tonne ab stehen lasse entnommen und habe es in einen leeren behälter von destilliertem Wasser getan, dem ganzen habe ich 2x luftstein hinzu gefügt mit Belüftung's Pumpe (Eheim 200) eine kleine mini heizung für 8 L Aquarien (regelbar) auf 20 Grad eingestellt. Dem ganzen habe ich dann 15g/L wasser compost Tee (37,5g bei 2,5L Wasser) hinzu gefügt bactrex drauf 1g/L wasser (2,5g bei 2,5L Wasser) und 5ml/L orgatrex ( 12,5ml bei 2,5/L wasser) gab es auch noch hinzu das ganze habe ich dann 24 h belüftet und bei ca 20 Grad Wassertemperatur gebraut (Bactrex gab es jetzt 1x bei dieser gabe hinzu,bei dem nächsten compost Tee fällt bactrex dann weg) hab jeder Pflanze von dieser Lösung jeweils 0,5L an die Pflanzen basis gegossen vorher habe ich die Ladys aber natürlich Gewässer mit 2,5L Wasser und Dann Die Lösung oben drauf. Danach saß ich Dann knapp 4 Std vor dem Zelt und hab ausgeschnitten unten rum (alle Blätter und Triebe unter dem netzt entfernt) danach hab ich noch ca 1 Std damit verbracht Triebe von oben heraus zu entfernen die zu dicht an anderen standen ( war echt nicht einfach da nicht zu viel weg zu schnippeln) aber ich glaube ich bin auf nem guten Weg. Den Rest der Woche habe ich nur noch gehofft das sich die Pflanzen gut erholen von dem was ich ihnen angetan habe, und hab die Fächer Blätter so gut wie es geht täglich runter gedrückt unters netzt damit genug Licht eindringen kann in den Baldachin, aber irgendwie hat die Damen das harte ausrasieren nicht wirklich gestört da wie auf den Bildern zu sehen ist, ist der stretch immer noch in gange ist, aber schon deutlich weniger geworden zum Ende dieser Woche.
Am Sonntag dem 12.03.23 gab es nur Wasser zum trinken hab jetzt 3,5L Wasser gegossen und somit den Topf komplett mit Wasser gefüllt es kamen dabei ungefähr 20 ml Wasser unten raus, was halb so wild ist, aber immer hin Weiss ich jetzt die gieß menge um den Topf gleichmäßig zu füllen.
Ich wünsche euch allen eine schöne erfolgreiche Woche! Cu ihr growmies!


Likes
2
Share
@TTerpz
Follow
Buds starting to form!!!!
Day 2 of week 8
4/3/25 UPDATE:
Flushed with Fox farm sledgehammer ph’d at 6.8
Soils were low at 5.8
4/5/25 update: fed with nutes
4/7/25: watered with plain water ph’d at 6.5
4/8/25: did a slight heavy defoliation to get ready for week 9!
Likes
26
Share
@Ukfarmer420
Follow
So I'm on day 14 of flower now and there doing brilliant.
They will probably finish there stretch after this week.
Another fan coming tomorrow.
Day 16 of flower, added new fan for under the netting 👌 plants are rocking now lol still stretching had to raise the light 🤣 temts and humidity are on point, absolutely stinks in the room, and I'm loving it 😀.
Day 18 of flip and there getting fatter, starting to produce trichomes now they smell really skunky, I really need to do a defoloation for those lower buds but ill do it day 21 and then its done.
Temp and humidity have been good so far highest humidity when lights off was 67% with my fan ac controller set on fan speed 7 and I just watered them that night.
Day 20. So today I just performed a major defoliation on the ladys as there was alot of leafs blocking bud sites.
I been struggling with humidity these lst few days 😫 so tomorrow I got a big dehumidifier coming tomorrow to hopefully help But other than that everything is going good and entering the week 6 of the biobizz feed charge.
Likes
3
Share
@Joaka
Follow
se acerca la ultimas semanas, esta semana se dejo de aplicar fertilizante con nitrogeno. se ve una translocacion sana hasta el momento. se espera que en las proximas semanas incremente el nivel de tricomas.
Queda poco!!!
Pd: pido disculpas a aquellos que siguen de cerca este diario, no pude actualizar a tiempo en las ultimas semanas, espero poder actuaizar de forma oportuna las ultimas semanas.

Processing
Likes
10
Share
@CrackinBeans
Follow
Well I'm a bit upset last week I ended up dropping my ph meter in a tank of nutes I was mixing and by the time I got it out the meter was junk. I was planning on flushing the crystal but had to wait another week for the meter.
I suppose the good thing to take from this was I found out why I was having issues with my plants. When the new ph meter came in I went to check my run off and my nutes that I had all ready mixed up. It turns out that my meter i had been using this whole grow was off by about -2-2.5 so this whole time I had been feeding the plants at around 3ph smfh. I cant believe they look how they do knowing what went on this whole time.
Fastbuds crystal meth is 3days into flush and i will be cutting it down this weekend most likely.
Mephisto hubbabubbasmelloscope is smelling like sweet sweet candy and is thick in resin
Bighead seeds freeze berry/ blueberry crumble has a dank pungent stank to it and also is frosty but larrfy
Big bomb is still growing thick and have bud sites everywhere
Now I'm ready for the next batch and ready to get dialed in!


Likes
Comments
Share
@grower0007
Follow
Great strain! I was to get such plan with tree leaves instead of two.
Likes
101
Share
@Ferenc
Follow
Day 80, 2nd of December 2020:
Hi there! Ladies are cool everything is alright. In one week buds strated doubeling and the developement is dope haha.
The 2 Zamnesia ladies are pretty Gelato is so nice bushy and the smell is great as well.
Kalini Asia will be a green pheno I think and she my be hermied a bit on me.... I am still waiting to see I see some strange develepement lets say.
Sweet Seeds girls are dope unfortunately Red Mandarine and Tropicanns poison don't show any sign of colouting yet but it is okay even if they green phenos.... It may happen in the end of the flowering cycle let's see.
Basically that's all I wanted to share.
Oh yes... this one:
All good the lamp is now on 11 hours and off 13 hours. Every week 15 minutes was taken off and after 4 weeks here we go. Strated 12/12 and now 13/11 wanted try to imitate the nature as the light days are getting shorter.
Fertilization has changed no more epsom salt from this week and I will stop giving nitrogen as well from next week.
Great job Sweet Seeds and Zamnesia! Nice genetics :) Lovely plants!


Likes
27
Share
@CannbellFarms
Follow
I’m overjoyed with the phenos this strain is producing, strong vibrant purples with some serious flavour profiles!
Scent Profiles we have:
Candy Lemon Sherbet 🍬🍋
Sweet & Piney Diesel 🍭🌲⛽️
Sweet & Tangy Tropical Punch 🏝️🥊
Alongside this, these beauties are the frostiest and the most insanely dense koala looking nugs I’ve ever produced!
Likes
5
Share
@GrowFunMD
Follow
Harvested Plant #2 and Plant #3 at 11 weeks. Still have #4 and #5 to go. They are just about ready. Been waiting until the leaves turn purple. These plants have been flushing for weeks because I thought they were going to be done sooner, but they haven't missed a beat. They have a very strong, sweet smell. I highly recommend Cobbler Crisp!!!
Likes
263
Share
@Vincent_Van_Grogh
Follow
For a first time grower, the SCROG is definitely a bitch and a half... But worth it once you see 75-80% of your tent filled with buds, praying upwards to the light.
Thankfully, they have slowed down vertically. So no more twice a day SCROG adjustments for a while --- hopefully anyway.
I'm having a hard time with lowering RH. Although a fellow grower has suggested not to worry with RH as long as you apply BT bacteria... True?
Any advice on RH management on late flower stage for a noob? I'm always willing to learn!
Happy growing everyone! May your plants be merry and happy! 🌿 🌱 😎
NOOB GROWER THOUGHTS, WEEK 7 --
GrowDiaries along with other online forums on growing are filled with helpful individuals who are generous with their time. But maaan, sometimes you really come across people who take this shit waaaay too seriously. Lol! Reddit, here, autoflower network... Everywhere! I suppose that's true in any community. You will always have people of that same ilk. Just funny... I thought wine snobs were bad... GrowSnobs are worse!!!!
Have you ever encountered a GrowSnob?