Likes
Comments
Share


@cannacat777
Follow
8/26 - sporty looking great, praying hard! Posh is working on it. But look who finally showed up to the party! I’m calling her Baby spice. She sprouted 12 days after going in the soil. Way to be a fighter girl!
This is going to be a tricky thing to manage I feel like my gals are tracking a week apart. I’ll keep this journal’s timeline on sporty spice. -1 week for posh and -2 weeks for baby spice. spice girls let’s grooooow!
8/30 - exactly two weeks from sprout for Sporty and Posh. Pretty wild how big a difference there is between the two. Baby is getting her footing. Now.
Sporty already pushing 4-5 nodes and I saw a tiny root through the drain hole. Wanted to pot her up! About 8 cups pro mix, one cup perlite. About 1.5 tbs of Gaia green 4-4-4, some worm castings and sprinkled mycorrhiza around where the rootball would be. God speed girly!
9/3. Potted up Posh today. About a half gallon pro mix, plus about 1.5 tbsp of the Gaia green 4-4-4. Plus about a cup of worm castings, perlite, and mycorrhiza. Sporty is looking very happy, 5 nodes and counting. Added back my second light, let’s go girls!!!
9/5. Wrapping up week 2 here, so far I’ve been really impressed with the pro mix Gaia green and soil support so far. The girls seem happy and healthy. See you in week 3!

Likes
76
Share


@Deranged420
Follow
Day 57 - Gave 17oz of water, rotated but not liking the leaves. Spritzed leaves with water...
Day 58 - Moved light to 22" cause I am not liking the leaves...
Day 59 - No amber tricomes yet that i can see, raising light may have helped. She looks better after removing much of the brown leaves as suggested, Thank you!! Going to try the Molasses treatment for 2 days then just let go. 18oz of Molasses solution @ 1 tsp per 36oz... Rotated and Spritzed leaves with water...
Day 60 - 17oz of water, Rotated and spritzed leaves with water.
Day 61 - Rotated and spritzed leaves with water. (Sorry no pics)
Day 62 - 17oz of water @ rotated
Day 63 - 34oz of water @ rotated

Likes
31
Share


@SkunkyDog420
Follow
Hallo zusammen 🤙.
Habe sie heute geerntet. Sie riecht sehr lecker nach Vanille 😋.
Wir sehen uns in 2 Wochen mit dem Erntebericht.


Likes
78
Share


@Wastent91
Follow
Ehi ragazzi come va questa settimana?! Tutto bene?! La mia settimana è stata un alti e bassi di momenti di merda ... Purtroppo la ragazza tropicanna ho dovuto toglierlgla di mezzo xké faceva un odore davvero potente ed era esageratamente grande! Purtroppo stupidamente mi sono fatto prendere dal panico dalla situazione accaduta al mio amico che aveva i miei messaggi e numeri sul telefono.. vabbè è andata così ormai.. mentre devo dire che la Cherry cola della fastbuds sta diventando davvero una ragazza tozza e massiccia , con internodi stretti ma robusti! Sta crescendo molto bene , le God sto un po' di orgatrex e bactrex per continuare a fare vivere i microorganismi presenti nel suolo ! Ho trovato delle foglie con macchie marroni e arricciate che sembrano indicare un deficit di fosforo , ma sinceramente non sono ancora così esperto da capirlo velocemente.. spero continui a crescere e riempire tutta la grow , a giudicare dalle foglie a ventaglio davvero imponenti le cime saranno altrettanto grandi spero! Grazie alla luce di Mars hydro sempre di qualità superiore e agli strain di Fadtabuds posso dire che questa bellissima esperienza è potuta divenire realtà !
Likes
101
Share


@Ferenc
Follow
Day 73, 25th of November 2020:
Hi! Well they are getting nice maturing buds getting bigger and all good.
I love the red colour of the Red Hot Cookies. Unfortunately, Tropicanna Poison and Red Mandarnine does not show any signs of purple or red colour.
Kalini Asia neither albeit, the bonsai version gets purple.
Gelato is little beauty. So yes, basically not much to say.
Fertilization is still the same every second day with the ratio and mixture above stated.
The lamp is on 11.15 min and off 12.45 min.
Last week was 15 min longer light cycle....
So every week 15 min shorter light cycle until the 5th week. So far -45 min. It switches on at 6 am and off at 17.15 pm.


Likes
29
Share


@TheCannaProphet
Follow
----------------------------------
~SEEDSMAN PEYOTE FORUM~
----------------------------------
Characteristics
BREEDER/BRAND: Seedsman
GENETICS: GSC Forum Cut x Peyote Purple
VARIETY: Indica / Sativa
FLOWERING TYPE: Photoperiod
SEX: Feminized
THC CONTENT: 20%+
GROWS: Indoors, Outdoors
FLOWERING TIME: 65 days
MEDICAL CONDITIONS: Glaucoma, Headaches, Migraines, Stress
MEDICINAL PROPERTIES: Yes
EFFECT: Powerful
__________________________________________________________________________________________________________________________________________________________________________________________________________________________________________________________________________________________________________________________________________________________________________________________________________________________________________________
~🤩This run is part of a Seedsman Seeds sponsored PEYOTE FAMILY COOPERATIVE GROW, I'm also cultivating a Peyote Gorilla and Peyote Zkittles that each have their own diaries.💚~
'Peyote Forum is an Indica-sativa hybrid cross between the legendary taste sensation Forum Cookies, a phenotype of GSC (Girl Scout Cookies), and the highly potent Peyote Purple cannabis strains. This is a must-have strain for your collection which produces very high THC content..
Forum Cookies is a 75% sativa strain which retains the qualities of the original Girl Scout Cookies while adding extra cerebral sativa effects. Despite the dominance of sativa the buds it produces are very dense and rich in resin-exuding trichomes which glisten against the forest green bud-leaves and orange pistils. Some plants may display purple colors in the buds and smaller leaves at maturity.
While yields aren't enormous they are certainly decent and the sheer quality more than makes up for this fact. Flowering takes 65 days give or take. Flavors are pungent and similar to the original GSC showing a pungent Skunk character with notes of nuts and sweet spices and suggestions of earth and pine. THC production will vary between 19 - 28% depending on conditions, lighting intensity and the skill of the grower. The effect is physically relaxing while offering a cerebral twist which is uplifting, relieving stress while also helping with the symptoms of glaucoma, migraines and headaches.
Peyote Purple, however, is an Indica-dominant strain with 90% Indica genetics. Its ancestry can be traced from a single purple phenotype which was back-crossed for several generations in order to stabilize its qualities. This plant takes 8 - 9 weeks of flowering before it is ready to harvest producing average yields of way-above-average weed. The THC content is very high with plants reaching between 18 - 28%. Its name is attributed to its headiness as this Indica offers some pronounced cerebral effects with a relaxing yet uplifting high which can leave smokers sleepy and somewhat unfocused with heavier use. Therapeutically it is recommended for the treatment of chronic pain, cramps, Insomnia, muscle spasms and stress.
Brought together in Peyote Forum growers can expect some very potent, tasty dank buds with high levels of THC and an uplifting high.'
*description credit to Seedsman Seeds
__________________________________________________________________________________________________________________________________________________________________________________________________________________________________________________________________________________________________________________________________________________________________________________________________________________________________________________
THE SETUP:
~Planted into Jiffy Peat Pellets that were hydrated with de-chlorinated water with SuperThrive added then ph'd to 6.0 @ 80℉
~Grown 100% organic in 10g fabric pots with Mother Earth 70/30 Coco/Perlite medium amended with 2tbs/g of Down To Earth 4-4-4 / 2 cups/g of Earthworm Castings / 1tbs/g of Dr. Earth Flower Girl 3-9-4, 1tbs/g of Dr. Earth Bat Guano, 3/4 cup of Down To Earth Azomite and 1 tsp/g Down To Earth Fish Bone Meal.
~24hr light cycle during Germination / 19/5 light cycle for Vegetation and 12/12 for Flower
~Straight water ph'd @ 6.2-6.8 when needed and weekly Compost Tea's.
__________________________________________________________________________________________________________________________________________________________________________________________________________________________________________________________________________________________________________________________________________________________________________________________________________________________________________________
WEEKLY UPDATES:
10/4- Week Eight of flower is here and we're almost ready to wrap thing up with this girl!
Her flowers are continuing to bulk up and are covered in glistening trichomes. She appears to be starting to fade which is exactly what I'm hoping to see, meaning that she's just about used up the nutrients in her medium.
I watered today with 1.5g of de-chlorinated water which was then ph'd to 6.6 @ 72℉ turned her pot and shot a few pictures of her.
10/6- Today I watered her with 1.5g of her usual straight de-chlorinated water that's ph'd to 6.5 @ 72℉ and turned her pot.
She's definitely starting to fade, is still stacking her flowers, bulking up and has an incredible amount of trichomes which I'm beginning to monitor daily.
10/8- The routine of watering every other day continues like clockwork. Yesterday was a 'no water' day and I did a basic check over of the plant, removed a couple of yellowed lower leaves and turned her pot.
Today she got the usual 1.5g of straight de-chlorinated water that's ph'd to 6.5 @ 72℉ and had her pot turned. I've also begun to check her trichome development with a digital USB microscope to try to identify the ideal harvest time which will be in the next 12-14 days +/-.
10/10- Well, Week Eight has come, gone and has been a trial once again of my patience with this Ten Week cultivar!
She's beginning to really get frosty now and I know from experience, good things come to those who wait... then wait a bit more. I anticipate that she's not going to make the 65 days in flower 'suggested' by the breeder and will probably go a bit longer, closer to 70 +/- days, but we'll have to see what her trichomes have to say!
I've cut the wattage back on the HLG 650R to 500w at the wall now to simulate the way that sunshine becomes weaker as fall approaches due to the lower angle of the sun in the sky. This helps outdoor plants to know that winters on the way and they need to hurry up and complete their life cycle. Cutting the wattage back creates the same effect on the indoor plants, especially when coupled with lowered temperatures in the tent.
I have also noticed that her water uptake has slowed. After her heavy watering on the 8th, her pot still had some weight to it and she was looking great so I went ahead and skipped watering her today, watering her tomorrow at lights on with her usual.
Next week promises to be exciting so don't forget to check in! Harvest time is right around the corner and I'm getting stoked to see the results! 😎🙏💚
~Thanks for stopping in! This epic run is in the home stretch with harvest fast approaching...Stay lifted and be Blessed! 😎🙏~

Likes
2
Share


@valiotoro
Follow
Hello everyone 😎
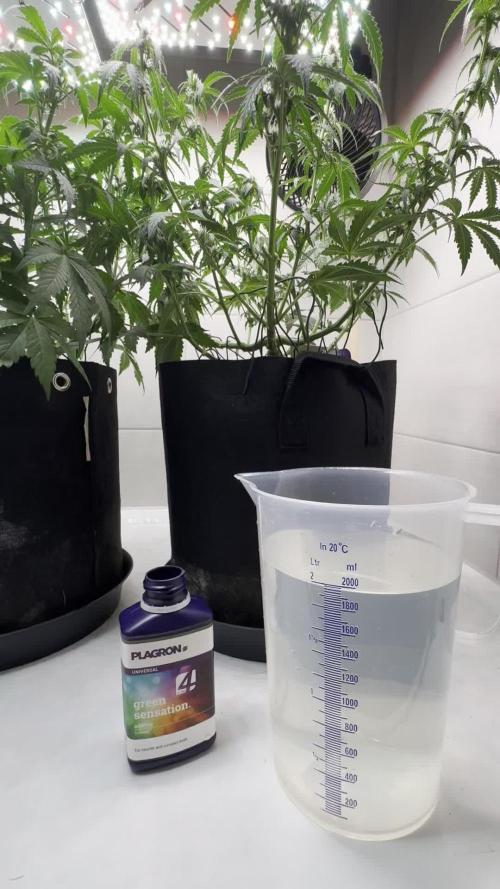
Week 5 of flower for the KK auto from Dutch Passion ❤️🔥
Spider Farmer SE-7000 70%
For the nutrient 4ml/L terra bloom & 1ml/L power buds from plagron
Have a nice day 🤩

Likes
93
Share


@MadeInGermany
Follow
Welcome
to the
Zamnesia Spring Cup 🏆.
Harvest day 68
Hey all together 🤗.
Today there is a short update on the harvest before the last update comes with the finished harvest 😄.
I can only say it again and again, the buds look beautiful, and it was very pleasant to cut in terms of the leaf / bud ratio 😍.
After standing in the darkroom for 48 hours, it was finally harvested 😝.
The buds were all sterile with Tool trimmed neatly by hand ✂️.
Then they came back into the darkroom on the net, where they are now gently dried for the next 7-14 days at 62% humidity and 22 degrees temperature, before they are first put in jars with Boeveda pack 62%, which takes another 2 weeks is exchanged for Boveda 58%.
But more about that in the last update, until then I wish you all a lot of fun with the update, stay healthy 🙏🏻 and let it grow ☘️🍀
You can buy this Strain and Nutrients at :
www.Zamnesia.com
Typ:
Sour Diesel (Zamnesia)
Zamnesia Spring Cup 🏆🏆🏆
Type:
Runtz
☝️🏼
Genetics:
Zkittlez x Gelato
👍
Vega lamp: 2 x Todogrow Led
Quantum Board 100 W
💡
Bloom Lamp : 2 x Todogrow Led
Cxb 3590 COB 3500 K 205 W
💡💡☝️🏼
Soil : Canna Bio
☝️🏼
Nutrients : Monster Bud Mix
☝️🏼🌱
Water: Osmosis water mixed with normal water (24 hours stale that the chlorine evaporates) to 0.2 EC. Add Cal / Mag to 0.4 Ec Ph with Organic Ph - to 6.0 - 6.3
💦💧
Likes
27
Share

@SundancerS
Follow
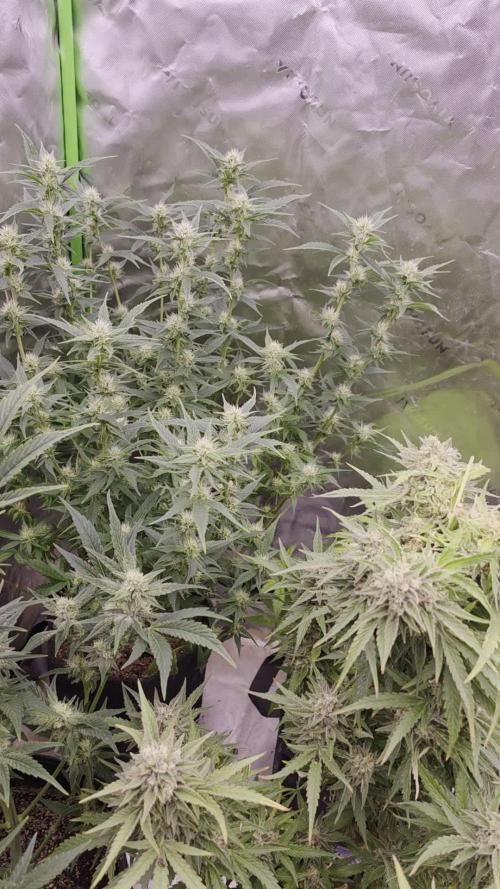
Blütewoche 2 und die Sticky Broccoli hat beschlossen, dass Bescheidenheit völlig überbewertet ist: Von 19 auf 45 Zentimeter in nur einer Woche ist ein neues Stretch-Level. Einige Triebe mussten noch weichen, aber mit rund 95 % ihrer finalen Anzahl wirkt die Architektur jetzt ziemlich durchgeplant.
Das Wachstum ist weiterhin gesund und vital, die Blüte nimmt sichtbar Fahrt auf und die kleinen „Puschl“ werden von Tag zu Tag sichtbar größer. Mit einem EC-Wert von 1,8 läuft die Nährstoffversorgung stabil und sie nimmt sauber die Nutrients auf wobei sie keine Zicken zeigt. Auffällig sind die neuen, deutlich schmaleren Blätter, ein Hauch Sativa-Attitüde im Vergleich zum kräftigeren Startlaub.
Insgesamt präsentiert sie sich strukturell gut organisiert, auch wenn sie flächenmäßig langsam Ansprüche anmeldet. Durst hat sie wie nach einem Halbmarathon; das Substrat trocknet schneller, als man „Drain“ sagen kann. Ihre Seitentriebe breiten sich ambitioniert aus und sie muss offenbar noch lernen, dass sie nicht allein in der Duschekabine steht. Der Stretch dürfte bald seinen Höhepunkt erreichen, danach sollte mehr Energie in die Verdichtung der Budsites gehen.
Viel Tempo, viel Potenzial und eine Diva mit Wachstumshormonen, die genau weiß, dass jetzt ihre große Bühne beginnt.
Wie findet ihr den krassen Strech in einer Woche?


Likes
7
Share


@Chubbs
Follow
420 Fastbuds Week 1
Gorilla Cookies Auto
These girls are growing amazing. For the first week of veg they look great. Drip system is working good keeping the soil moist. Looking forward to the weeks to come.
All in all Happy Growing
Likes
11
Share

@MadeInGermany
Follow
Info:
Unfortunately, I had to find out that my account is used for fake pages in social media.
I am only active here on growdiaries.
I am not on facebook instagram twitter etc All accounts except this one are fake.
Flowering day 47
since time change
to 12/12 h.
Hi everyone :-) .
A lot has happened this week.
The lady has developed wonderfully 😊.
The buds keep getting thicker and smell better :-).
This week I added 1 g GHSC enhancer per l Coco.
in total it was poured twice with 1.2 l each time.
Fresh osmosis water was prepared and filled into canisters.
The tent was completely cleaned and each plant was checked individually under the magnifying glass.
Otherwise a few little things were done like yellow boards against sciarid mosquitoes and blue boards to prevent tripods.
have fun with the update.
Stay healthy 🙏🏻
You can buy this Strain at :
https://www.amsterdamgenetics.com/product/kosher-tangie-kush/
Type:
Kosher Tangie Kush
☝️🏼
Genetics:
Kosher Kush
X
Tangie
👍
Vega lamp:
2 x Todogrow Led
Quantum Board 100 W
💡
Bloom Lamp :
2 x Todogrow Led
Cxb 3590 COB 3500 K 205W
💡💡☝️🏼
Soil :
Canna Coco Professional +
☝️🏼
Fertilizer:
Green House Powder Feeding
☝️🏼🌱
Water:
Osmosis water mixed with normal water (24 hours stale that the chlorine evaporates) to 0.2 EC. Add Cal / Mag to 0.4 Ec Ph with Organic Ph - to 5.5 - 5.8 .


Processing
Likes
13
Share


@Dunk_Junk
Follow
5cm vertical growth this week.
Flowers starting to plump up.
Likes
13
Share


@Terpz_Hunter
Follow
Light de-fol today and a re adjustment of the lst lines as more prominent branches establish themselves so happy with this lady she really lends herself to lst.

Likes
13
Share


@masterofsmeagol
Follow
7/13 It's maine-ing out. Overcast and misting. I guess it rained last night but not much. Today is my watering day although I think they could've made it until tomorrow. These drastic temp changes makes it hard to get a STEADY routine in place. I watered everything in the 20's a gallon the 10's 1/2 gallon. The 10th planet in the front was still heavy so I didn't water it. I'll keep an eye on it. Temps are much milder. I noticed a few more septoria leaves on the 10th planet which I promptly defoliated. This pheno is flowering. I could've put this week as flowering as several plants have started. I also saw ONE leaf on my chem dog that had septoria on it. ONE f-ing leaf! I was planning on treating this early anyway so I mixed one gallon of plant doctor 3 tsp gallon/gallon which was the recommendation. I'll monitor this plant and continue treating it the next two weeks. I may do foliar too but the mixture is different. It's a systemic so I don't think that matters as much. Considering getting mulch to protect from spores on the soil. My plants look GORGEOUS. I Hate to use such a nice plant as a guennie pig but I'm not going to sit here and watch it progress. I'm lucky it's really not that bad and that it's on a reveg. There's so many leaves that I would be forced to prune anyway. I'm seeing two MAYBE three leaves a morning but I want to get this under control. Last year u let a plant with septoria go and it finished but went to extracts. I've got a pretty good feeling about this plant doctor. I've used it before with good results. Only time will tell though.🤞
EDIT: WENT OVER AT ABOUT 1PM. ITS 2 NOW AND BLUE SKIES AND SUNNY. IM SUPER GLAD I WATERED AND EVEN MORE SO THAT I APPLIED THE PLANT DOCTOR HOW I DID. THE GIRLS ALL LOOKED AMAZING. THE TENTH PLANET I TREATED WITH PLANT DOCTOR LOOKS THE BEST IVE EVER SEEN IT. I FOUND ON LEAVE DEEP ON THE INTERIOR WITJ A SMALL SPOT BUT ITS SOMETHING IM SURE I MISSED THIS MORNING. IF THIS WORKS THIS GOOD ILL BE APPLYING IT TO EVERYTHING EVEN IF ITS JUST PREVENTATIVE.
7/14 Rained last night andcwas still sprinkling when I went over. Amazingly the 10th planet that I treated with the plant doctorcmix had ZERO visible signs of septoria. I did find one leaf on Mt chem dog and two on my mk ultra with the big leaves. It could've been calcium deficiency but I really doubt it because I think I saw THAT as well. I'm going to wait a day or two and if there are still no negative results and the plant is still looking good I'm going to treat AT LEAST the two others that MAY be infected. It's a systemic and can be used proactively and supposably breaks down into p and k after stimulating immune response. I'll monitor a little longer but as it stands I think I'm going to treat the other two just in case. I also need to start feeding. I've watered a lot more than I normally do so obviously the soil won't last as long. This has been some tricky weather but I'm happy with how things are progressing. I probably should've changed this to the first week of flower as several plants are popping pistols everywhere.
EDIT: WENT OVER AROUND NOON AND MIXED UP TEO GALLONS OF PLANT DOCTOR PLANNING TO TREAT THE TWO PLANTS BESIDE THE 10TH PLANET. EVERYTHING LOOKED SO PERFECT AND TOMORROW IS MY WATER DAY SO I DECIDED TO HOLD OFF AND APPLY IT WHEN IT NEEDS WATER ANYWAY. I DID NOTICE THAT PLANTS SEEM TO BE FLOWERING MORE AGGREWWIVELY THAN BEFORE. THINGS ARE GETTING INTERESTING.


Likes
55
Share