
Likes
Comments
Share


@Diips
Follow
been quite busy, due to my birthday and a new semester, which resulted in my Orange Apricot grew too close to the light and i mistakingly turned ny lights to 100% for a few days which ended up in light burn, so i had to re-adjust my setup and raised the lights.. also threw some netting on the orange apricot glue and some lst clips in an effort to hold them down abit..
still havent got the time to remove the burned leafs, but everything else looks perfect.
ive also raised the Sweet cheese closer to the light.


Likes
21
Share


@Bak2Blk
Follow
Yall see the yellowing of the leaves closest to the top? I've since switched my nutes over to Tiger Bloom and I've thrown in some Cal-mag into the mix. They'd gotten kinda droopy but since I changed their nutes up a bit, they've been perky af even tonight as it's getting close to lights out. I switched them over to flower on Sunday. They're already starting to stretch in just a few days which tells me that they're feeling much better. My last video... even though it's not loaded correctly is from tonight. It's 11pm, lights are out in an hour and they're still perky. Love it!! 😍😍😍
4/6/23: Yall.... the plant in the back right hermied!!! OMFG. The 2 tallest branches had seeds on them... just popped up because they weren't there yesterday or at least I didn't notice. The seeds were concentrated at the top, I didn't find any on the rest of the plant but with as bushy as they are, there may be more. I cut those 2 tallest branches down to below where the seeds were but I will be watching that plant and the rest like a hawk for more seeds. I didn't find any on the other 3 plants but still I'm saddened. Unsure of why this one plant is hermie'ing. Smh

Likes
13
Share


@Broffel
Follow
Its going amazing, start this week with flawless finish.
Day 52 and it going amazing, buds getting bigger and bigger.
I also made a clone of the purple lemonade and she is doing also amazing in my small grow tent

Likes
1
Share


@pareto
Follow
Had to harvest the lower buds because of aphids... Rest looks great though.
Will harvest this week
--------------------------------------------------------------------------------------------------------------------------------------------------------------------------------
Set up cost (fixed costs)
-Lamp: 40€
-Timer: 3,5€
-Pot: 4€
-Total fixed costs: 47,5€
Given 5 years (or 15 grows) usage time translates to around 3,17€ per grow in materials.
Variable costs:
-Seed: 10€
-Soil: 6€
-Fertilizer: 3,50€
-Power (100 days 20h/day): ~28,8€ (exact figure after harvest)
-Total variable costs: ~48,3€
-Total costs per grow: ~51,47€

Likes
2
Share


@Lightskinjonesy
Follow
Most phenos were on the bubba kush side with loud pine, mint and sour lemon og terps and a couple sweet pine & mint. Two were sour diesel terps with an og pine & mint undertone. Have yet to sample while they cure but look all indica

Likes
46
Share


@Biggy2k20
Follow
She is fattening up slowly but surely, pure water from now on. The light times have also been reduced to 10 hours to speed up the growth as I need the grow room quite quick and this strain is taking longggg and she stinks the whole street out when the windows are open! ( I can't smell it because I'm used to it lol)
Some light over the horizon as pistils are starting to turn brown at lower levels somewhat and trichomes becoming more cloudier whilst earlier trichomes turn an Amber like colour. Fox tail issue has been somewhat resolved by increasing ventilation and reducing light power via the dimmer.
Here's to flushing!!
609 ppm and 1168 us/cm 25.0 degrees celcius

Likes
45
Share


@KrautFabrik
Follow
Day 60: flush 💦
Pictures are taken on day 62 📸
---------------------------------------------
She is doing great 😂i got nothing to say🤷♂️😂
It seems like the nematodes are killing the fungus gnats larvae. Most get killed by the fly paper and no new ones are coming 😁👍
Happy growing 🍌🌱

Likes
1
Share


@sunshinegroww
Follow
She had some defoliation performed looking very good i think stretch is over so she will get clean up at the end of the week
Likes
15
Share


Likes
19
Share


@Hempy_The_Kid
Follow
Week 13 took my second plant. 30 gram top wet. Will take 3rd plant in a day or 2. 4th plant still week behind but looks more like 2. Plants only drinking ph water @ 1 gallon every 3-4 days.
Likes
10
Share


@Jofflepov
Follow
These Thunderfucks were planted outside, early may. They survived a dynamic spring and didn't grow in full potential. Still they thrived on their own and produced solid purple/green buds. Very smelly, a multilayered odeurscape with nuts, citrus, gassy and mint. A characteristic modern autohybrid with solid genetics.
One plant developed budrot in one bud. I was early and saved the plant. I drycure it apart from the others tough. Reason is the dense budgrowth and a full day of rain followed bij some cloudy days. I tried to shake the buds dry from water but didn't succeed completely. Plants were on their end and I was pushing them, still hoping for some sunny days. Well sun came back but too late for that branch on plant 3, the only plant who didn't turn purple and has the most minty smell.
Plants needed close observation and LST/defoliation, not a very easy grow but very rewarding in yield and pure fun.
At the end this is a very characteristic premium plant, gave me lots of fun and only a small portion of diva behaviour.
Recommended.
Likes
6
Share

@FourTwenty_Plants
Follow
So I flipped the girls about 11 days ago so on the 27.04
They are already starting to stretch and the nodes get longer and longer, space is alsmost filled out everywhere.
The Zoap is the smallest in height but got the biggest space filled out, Chimera is the tallest followed closely by the Super Buff
Likes
13
Share


@GrowGuy97
Follow
Day 28 - She is growing great, extremely sturdy stock & seems to be taking g nutrients well! She is definitely starting to turn a darker color on top! Very curious to see how this turns out! Thanks for following & happy growing friends ✌️🏼🌱
Day 29 - All is well, purple is starting to come in on the top bud😍
Day 30 - Got watered today with PH at 6.3
Day 31 - ✌️🏼🌱
Likes
7
Share

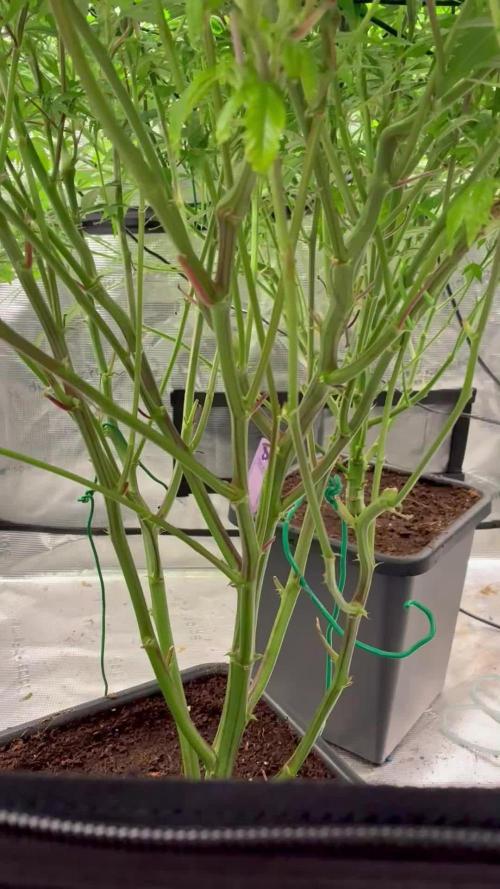
@BlackForestGrower
Follow
Genetics & Appearance:
Lemon Cherry Pop stands out with its vibrant appearance — dense, resin-coated buds showing shades of deep green and purple under a frosty layer of trichomes. The name says it all: colorful, fruity, and full of character.
Aroma & Flavor:
This strain delivers an irresistible blend of sweet cherry and zesty lemon notes. On the exhale, a subtle creamy undertone lingers, giving it a candy-like finish. The terpene profile is lively and well-balanced, perfectly blending citrus brightness with sugary fruitiness.
Effects & Potency:
Lemon Cherry Pop is highly potent, offering an uplifting, euphoric onset that transitions smoothly into a deep, relaxing body effect. It provides a balanced high that can elevate mood and creativity before settling into calm and content relaxation — perfect for winding down or enjoying a peaceful evening.
Yield:
The yield is relatively low, making this a connoisseur strain rather than a high-production variety. However, the top-shelf quality of the buds more than compensates for the limited

Likes
13
Share


@Enki_Weed
Follow
🌸 Woche 5 der Blüte
Die Early Skunks sind jetzt mitten in der Blüte und entwickeln sich richtig stark. Der Stretch ist so gut wie durch und die Pflanzen haben ein schönes, gleichmäßiges Blätterdach aufgebaut. Die Blüten werden von Tag zu Tag sichtbarer und setzen schon ordentlich Harz an.
Das DWC-System läuft stabil: frische Nährlösung, klare Werte und die Wurzeln strahlend weiß. Genau so soll es in dieser Phase aussehen. Die Pflanzen nehmen sehr gut auf und zeigen keinerlei Mängel oder Stress – Farbe, Struktur und Wachstum sind voll im grünen Bereich.
Das Klima bleibt konstant und das Setup arbeitet sauber zusammen. Licht, Luft und CO₂ greifen perfekt ineinander, wodurch die Pflanzen richtig Tempo machen.
Fazit:
Sehr starke Woche. Gesunde Pflanzen, satte Farbe, stabile Blütenentwicklung. Alles bereit für die nächsten Wochen, in denen die Buds jetzt richtig zulegen werden. 🌱🔥


Likes
19
Share


@Basementganja
Follow
Fast to flower some decently large nugs! This girl is the only one that survived my "initial torture test" for my sf4000(dimmed to 75% (333watts) in quarter of my 3x3 tent)! She was very resistant to "too much light intensity" as a seedling, and didn't mutate! Once the light was at an ideal height, she started vegging very strong, but 1 week of important time had been lost. She started to flower, and stacked up a bunch of dense buds very nicely! I'm very excited to be growing this strain again next run!-with more training.
Likes
28
Share


@Roberts
Follow
I had a little pH dip the other day and the leaves showed some magnesium deficiency. I am not super worried. These leaves are far from final ones. She has grown pretty well beside that pH issue. It should be solved now. I was feeding a little strong. I still kinda am. She is doing good under the G300W Spider Farmer light. I have it like 25 percent right now everything looks good now. Thank you Spider Farmer, and Amsterdam Marijuana Seeds. 🤜🤛💪🌱
Www.amsterdammarijuanaseeds.com
Thank you grow diaries community for the 👇likes👇, follows, comments, and subscriptions on my YouTube channel👇. ❄️🌱🍻
Happy Growing 🌱🌱🌱
https://youtube.com/channel/UCAhN7yRzWLpcaRHhMIQ7X4g
Spider Farmer G300w: https://amzn.to/3S2zvsd
Spider Farmer 10X20 Heat Mat Kit - https://amz.fun/lsa0J
Spider Farmer Amazon Store: https://www.amazon.com/spiderfarmer
Spider Farmer Official Site: https://spider-farmer.com
Discount code: saveurcash

Likes
45
Share


@GreenHouseLab
Follow
I tend to forget about her as im mesmerized by others, she’s the one with the best perfume currently in the room. It’s very possible she starts busting late flower, trellis is up show me what you got girl. Coated top down she is some sticky icky oooooh weee!
Yep hydro still in Veg Ive topped for a second round shit will be bonkers and going in the flower tent after this round. Will most likely initiate flowering in aboit 2 weeks or until she blows the top off this tent.
Stay Safe Stay Fresh
GHL