
Likes
Comments
Share


@skaterblasted
Follow
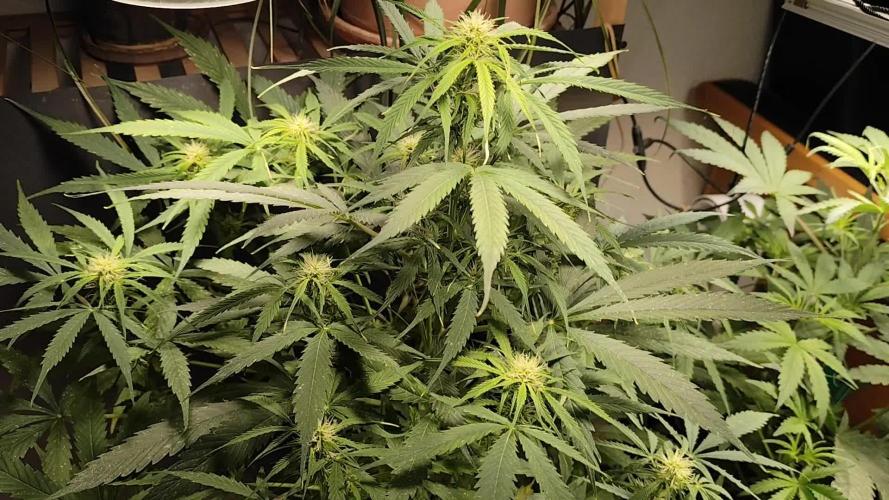
Days 92 - 98 (from sprout)
8/23/24 - 8/29/24
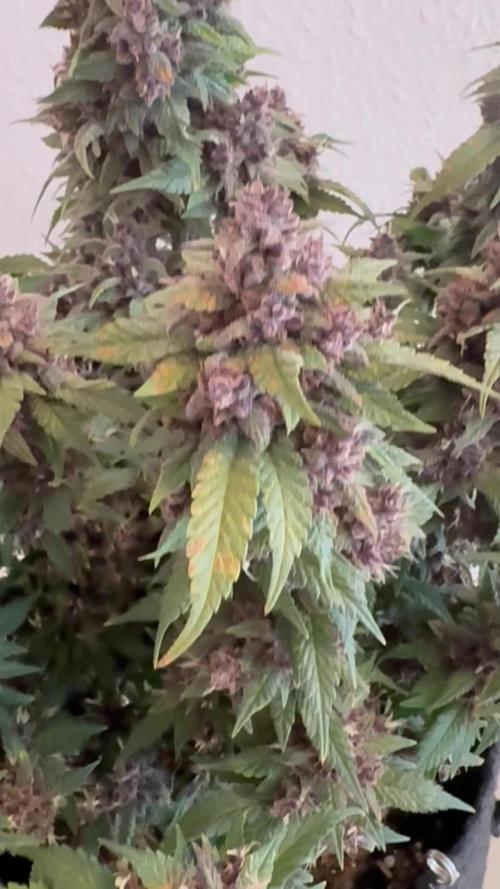
Loompa's Headband x TK fading hard this week - checking trichome color through a 15x loupe, needs more time
The Good Shit drinking a gallon of water a day but slowly backed off near end of week - my guess would be a 14-week flowering period for this genotype before harvest quality
I'm pretty much watering daily a 1/4 gallon to Blue Nose Pit or less to keep mulch layer from drying out
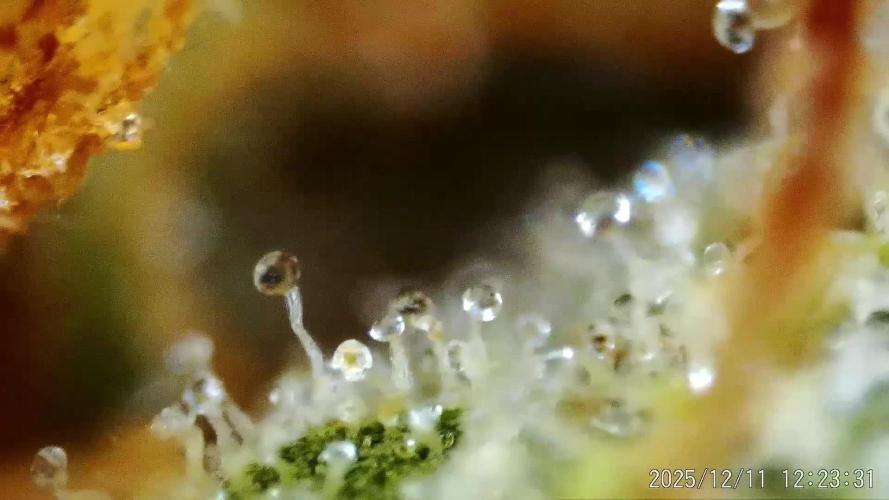
Sweet 16 S1 takes the win for most trichome coverage out of the garden, has the most up-front aroma out of the geno hunt
PAR is all over the place on this one and totally messed up, after this week I'll raise the light and focus on the appropriate PAR for canopy of The Good Shit
Pest Management slipping too, fungus gnats are repopulating and it seems the ecosystem has encountered a serious imbalance of beneficials and predators that normally kept soil/mulch in-check
Plan on short-term remedying this with a top-dress of remaining compost + em bokashi and a moderate drench of EM5 following with repeated treatments of enzymes (tweetmint)
Long term solution may need a predator/beneficials kit and/or higher quality vermicompost after knocking them back with enzymes

Likes
14
Share

@DE_BW
Follow
The plant is clearly entering the final stage of flowering. Buds have continued to stack and are now very dense and hard. Trichomes are predominantly cloudy, with very few still turning, indicating we are close to the harvest window.
The final Overdrive feeding was applied this week. Resin production is strong and the buds are fully developed. Water uptake has slowed down noticeably, which further confirms ripening.
Flushing will begin this week, with harvest planned no later than next weekend. Overall plant health is good for this late stage, with natural leaf fade setting in.

Likes
17
Share

@RakonGrow
Follow
Harter ritt diese Dame , alles viel zu schwer das es gleich umknickte beim defolieren .
Hab mal ein getrockneten Bud aus der mitte genommen und Trichom analyse (Videos und Bilder) gemacht . ja viel klar wenig milchig und einige rot . Ergo , zuviel Licht an der Spitze (abstand zum licht viel zu gering) und im Boden zu kalt ist keine gute Kombination .
dry + trimm after 4 Days result in 120g Cannabis F1 Wurlz price 1.08€ / 1g , Total Tent : 200W on 1m² with total 280g = 1.4g/W

Likes
22
Share


@Weedbadk
Follow
Día 1 y todas germinaron súper rápido 3 días
Día 5 desde puesta en sustrato
Ya todas están arriba
Estoy solo pulverizando el sustrato
Temperatura 23c humedad 75%
Likes
6
Share


@PrinceOfHerbs
Follow
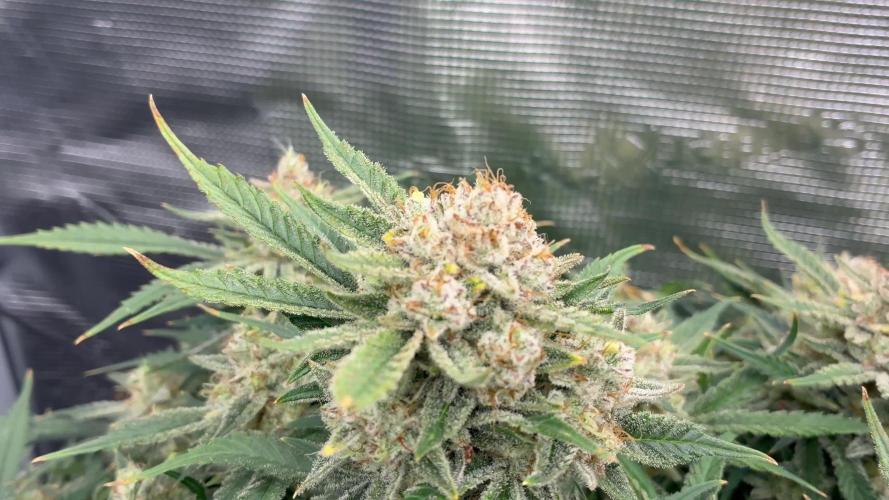
The plant is growing rapidly in flowering and is becoming very resinous with an intense odor.
It was fertilized again with the Greenhouse feeding (80g per 65L pot).
The lamp was turned up to 100%.
Since then, the edges of some leaves have curved slightly upwards.
Otherwise the plant has lush green leaves
And the lollipopping was well tolerated
Flowering day: 27

Likes
Comments
Share

@Topshelf_only
Follow
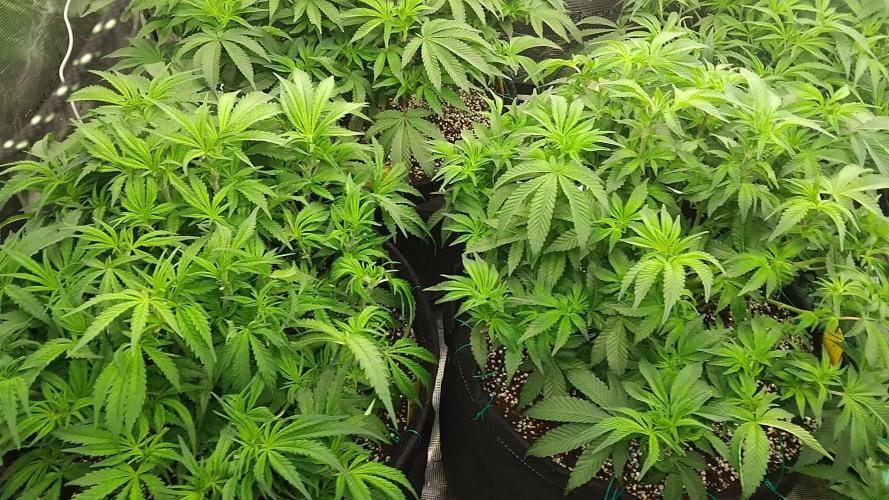
Just let thing be for the week . Still a lot of space so put 2 more of each strain in 15lt pots to fill it out.


Likes
8
Share


Likes
5
Share


@Herbie
Follow
Mrs Big B is about to have her sweet stretch to Budville so I hope I've shaped her well enough to take full advantage of the light space.
If not a traditional 'Super crop' will solve any future spacing issues. Ha ha.
Due to an accident in her younger days she's sort of become a triple stem after topping.
I'm hoping I get something cool looking as a result.
I trimmed a few lower buds that would soon be overshadowed by the canopy and not worth her effort.
Weekly does of Biobizz triple nuits and tap water just to top up and irrigate. Because shes not drinking loads yet.
My LST may need refining..... but we learn every mistake right?


Likes
13
Share


@drzoidberg
Follow
tent smells so nice these things are really filling out i am so happy with the shorty that i thought was a goner she pulled through and so much more


Likes
41
Share


@TheBulldozerSicily
Follow
Sabato 6 luglio Aggiungo 50 lt acqua per livello basso
Venerdì 20 luglio Aggiungo 50 lt acqua e il doppio dei nutrienti, vediamo che succede. Ho dato anche una bella defogliazione e pulizia rami inferiori
Martedì 23 luglio
Inizio controllo ec 3999 ph7
Cambio soluzione parto da 75 lt acqua osmosi inversa + 5lt acqua rubinetto ottenendo ec 473 ph 8.4
Aggiungo tutti I nutrienti ottenendo ec 1489 ph 6.5

Processing
Likes
54
Share


@RastaGrow
Follow
Привет друзья, уже 57-58 день цветения , шишки маленькие смолистые и очень очень тяжёлые . Ветки опускаются вниз и за веса мне приходится привязывать обычной проволоками так как у нас в стране представители гроу магазинов ориентированы на продажах витаминов, а вспомогательных инструментов не продают , приходится делать всё самому ;)
Likes
44
Share


@Joni2017
Follow
Day 64 of this week do not pass 😆😜 two of my girls are ready, but the other two are missing a day more because of the three days that were with the focus spoiled☹️️ the irrigation I have reduced it to 60-70 ml 💦 of water (I have used the dehumidifier😉) in this way they stress a little😋 the humidity is between 38% -44% temperature 26ºC. Everything else ok😄👍 this week I hope to collect the harvest🙌💪

Processing
Likes
17
Share


@kcartel
Follow
good flowering, everything is stable, a lot of inflorescences appeared this week, next week it is planned to remove the lower leaves. We had to tilt two branches from the middle, as they stretched out very much and there was a risk of burn, we are waiting for 7 weeks!
Likes
4
Share

@FourTwenty_Plants
Follow
Soooo the Purple Haze is only getting Flawless finish the rest still gets the whole fertilizer dose.
Harvest for the Purple Haze in about 10 days
Likes
26
Share

@Growbody
Follow
Hallo und herzlich willkommen zu meinem neuen Grow mit der Auto Jack, Jacky White 6th Gen. von Paradise Seeds. Die "Eltern" sind Jacky White x Ruderalis, die "Großeltern" sind Jack Herer und White Widow. Sie ist dadurch eine 75% Sativa mit zitronig-fruchtigen Aromen, genau mein Ding. Es freut mich sehr, das mir die Samen in einer sehr schönen Verpackung freundlicherweise von Paradise Seeds zur Verfügung gestellt wurden. Das ist für mich der Ansporn, eine möglichst genaue Beschreibung des Growverlaufs aufzuzeichnen.
Die URL des Strains findet ihr hier:
https://www.paradise-seeds.com/de/product/auto-jack/
Für diesen Grow verwende ich den 15Liter WideVersion Stofftopf von ROOTiES, die Sonnenerde Bio Hanferde, den BioBizz Wurmhumus, Sonnenerdes Bio Faser, BIONOVA + zamnesias MonsterBud Mix Living Soil, zamnesias Smast Start und Plagrons Seedbooster Plus. Hat sich alles prima bewähert.
Tag 71: 1,0 Liter Wasser. Die Auto Jack von Paradise Seeds ist bestens versorgt, auch wenn der Bericht wegen der Vorbereitungen des diesjährigen Outdoorgrows etwas mager ist. Dafür kann Sie nächste Woche umziehen.
Tag 73: 1,5 Liter Wasser.
Tag 76: 1,5 Liter Wasser.
Schön, dass du reingeschaut hast. Nächste Woche gehts weiter und ich freue mich, wenn du dabei bist 👋😎

Likes
5
Share


@AestheticGenetix
Follow
7/11/25 pistils are showing and she's been stretching so I don't think it's just showing sex but is the transition phase at this point


Likes
2
Share


@Autower
Follow
Missed a week as been busy but here they are coming into week 10 time to start hitting them with some overdrive for a few weeks before flushing with ph,d water
Likes
17
Share


@fitzfarseer
Follow
this is the last week of growing I just want to say
that to this point I didn't know what I was doing .
at that time I bought a book and read it so I could understand
more about what I should do.
