
Likes
Comments
Share


@Skunkiest_bender39
Follow
Shame on me… habe den taupunkt am morgen deutlich unterschätzt. Täglich steigt die LF phasenweise bis auf 95%. Solar ist praktisch, Zelt darf aber nicht draußen stehen!
Der grow hat sehr viel Spaß gemacht, trotz einiger kleiner Fehler und Unachtsamkeiten meinerseits! Die Damen sind super und werden wieder in den Stock zurückkehren, konnte sie leider nicht voll bis zum Ende bringen ca 2 Wochen zu früh. Nächste mal weniger Pflanzen oder mehr entlauben und mehr umlauft dazu. Komme vom outdoor Growen und habe enorm viel Neues kennengelernt!
Banana’s & painkiller XL sind noch im Spiel ohne jeglichen Schaden oder Betroffene stellen von Schimmel. 🐝


Likes
10
Share


@Pozzy67
Follow
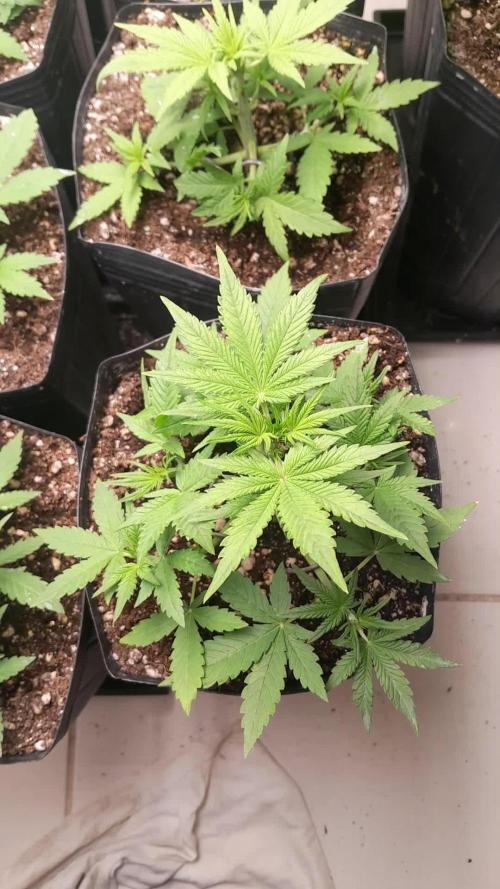
Plants are growing very nicely! Strawberry Banana has really taken off!
3/12/22
Turned on Auto Pot system! Will wait a week or so before turning on Air Domes!

Likes
2
Share


@HighOhioAn
Follow
What can I say mimosa cake auto still frosty and thick as ever which I could’ve had her dialed in sooner truly think this could be an amazing Grow cannot wait to grow her again nice dense buds frosty cola smells of mimosa cake. 🔥💯
Likes
17
Share


@HowtoBubatz
Follow
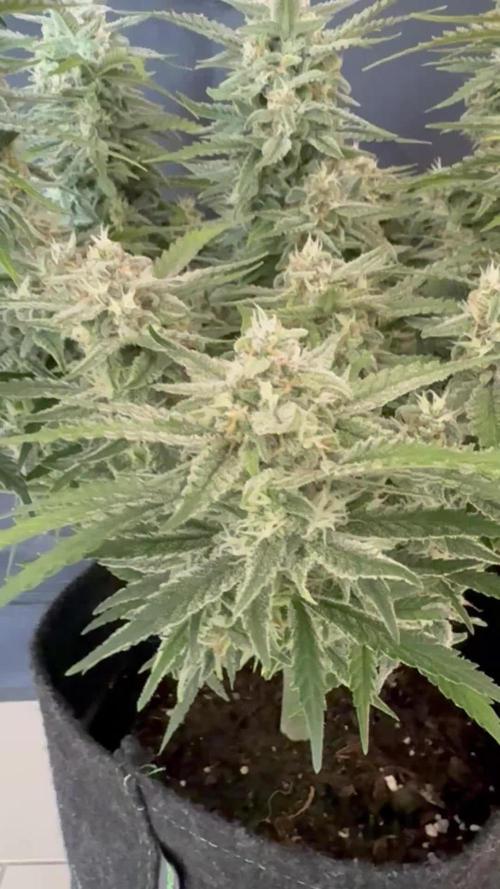
Week 7 of bloom, and I’m thrilled with how things are turning out!🌟
One of the plants has been fully flushed this week and is now ready to be harvested.🌱✂️
It’ll soon be hung up to dry, marking the end of its journey. This plant was incredibly quick, going from seed to harvest in record time—impressive!🍂😊
That leaves me with the other Banana Purple Punch, which has now started its flushing phase.
In about 1 to 1.5 weeks, it’ll spend 48-72 hours in complete darkness before being harvested. This plant is looking fantastic, and I’m excited to see how it finishes up.
Overall, I’m very satisfied with this grow. Each plant has shown its unique character and pace, making the process both rewarding and educational. Can’t wait to see the final results from the Banana Purple Punch!😊
Likes
Comments
Share


Likes
28
Share


@MadeInGermany
Follow
Flowering day 37
since time change
to 12/12 h.
Hey guys :-)
The buds have developed incredibly nicely this week.
The smell is getting more and more extreme :-) .
The whole plant itself looks perfect 👍.
The growth has slowly stopped as the full energy goes into the production of the buds.
This week it was watered 3 times with 1.2 l each (nutrients see table above)
They were individually inspected and checked for their health.
Osmosis water for the coming week was refilled in a 100 l tank 👍.
Have fun reading the diary and stay healthy 💚🙏🏻
👇🏼👇🏼👇🏼👇🏼👇🏼👇🏼👇🏼👇🏼👇🏼👇🏼👇🏼👇🏼
You can buy this Nutrients at :
https://greenbuzzliquids.com/en/shop/
With the discount code: Made_in_Germany you get a discount of 15% on all products from an order value of 100 euros.
👇🏼👇🏼👇🏼👇🏼👇🏼👇🏼👇🏼👇🏼👇🏼👇🏼👇🏼👇🏼
Water 💧 💧💧
Osmosis water mixed with normal water (24 hours stale that the chlorine evaporates) to 0.2 EC. Add Cal / Mag to 0.4 Ec Ph with Organic Ph - to 5.8 - 6.4
MadeInGermany

Likes
20
Share


@The_Ghost
Follow
Ho avuto problemi di temperatura e si sono allungate, ora ho preso il climatizzatore...

Likes
9
Share

@DE_BW
Follow
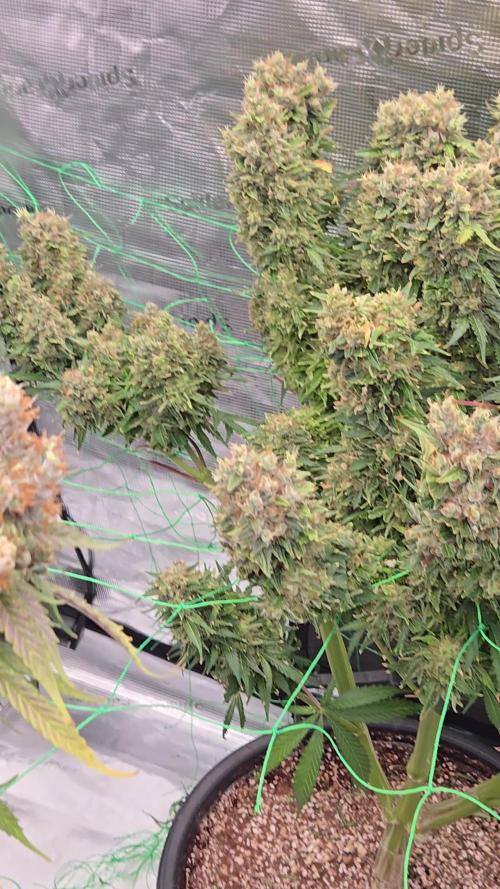
Flower Week 5: The plant is stacking hard now, with buds forming dense clusters all across the canopy and frost production going through the roof. Bud development looks insane at this point, I’ll switch to Overdrive next feeding and expect harvest in around 14 days.
Likes
6
Share

@Jardineiro_Br
Follow
Comecei a semana realizando o treinamento de baixo estresse e uma desfoliação. Nao fiz poda top, não acho que seja adequado para plantas rápidas.
VVamos ver como vai ser o resultado . Nao pretendo mais fazer intervenções no crescimento .
Likes
15
Share


@Fuzzel
Follow
The Specials continue to flower like nobodys business while the Purples are still slow in their reaction to the change in lighting. Despite the similar names these two strains do not seem to accompany each other well. I cant see how the special will not bee ready for harvest at least two weeks prior to the Purples, but we will see. At least the purples are picking up on the stretch a little so they may not fall too much behind the specials. Doesnt matter, by now I got almost every plant standing on its on little something to get an even canopy.
Also noticed a faint sweet/creamy smell developing, going in a good direction.
This weeks feeding schedule (and also a bit next week) sees a slow change from grow to bloom nutrients. I perform that change a little faster on the Specials, as they are actually already making flowers.


Likes
6
Share


@Sapper29
Follow
Awwww mannnn. She's getting pretty huge. I flipped to 12/12 on May 8th. Now we wait to see how much she stretches and for buds to start forming. So excited!!!

Likes
12
Share

@Growfather1
Follow
Hello everyone,
I the coming days i will harvest the 2 amnesia haze plants the amnesia fast is harvested 3 days ago and is drying at a humidity of 60%
I can't wait to start my new grow as for the amnesia grow it's a big disappointment.
The amnesia in the front starts to produce more bananas 🍌 and the one in the bag has another bud that is rotting.
I will update videos later and the harvest video will come in about 16 days from now.
Thanks for stopping by and have a nice week.
Best regards,
Growfather


Likes
11
Share


@emeraldlabs
Follow
Shaping up nicely with LST. Minor defoliation to remove unwanted growth sites. Down to 7 main colas, let’s get them fat.
She will wake up in flower tent tomorrow.
Check out my planet of the grapes auto diary for sprout in back of tent.
Video/photos taken 49 days after breaking soil.

Likes
5
Share


@Steevoh978
Follow
Plants growing good. Just gave them their first dose of nutrients. Seem to be taking well so far.

Likes
43
Share


@valiotoro
Follow
Hello everyone 😎
Week 3 for my girl
She is doing very well,growing at fast pace and with a beautiful green colour on the leaves.
Have a nice day 😎
Likes
3
Share


@CannaBossBizz
Follow
Put the seed in a Paper towel and in a Tupperware. Put the Tupperware in tent ON TOP of the lamp. They popped after 15 hours! Super fast. Ladies and Gentleman LET'S GROW! 🤙🏽
Likes
7
Share


@Ryno1990
Follow
Begining week 5 of veg the Purple Goat Cheese I moving along all her tops are starting to come up after being topped an she is looking nice an healthy just a little bigger then the Strawberry Banana but a nice bush just like her
The Purple Goat Cheese is doing good ending week 5 finally starting to pick up some size still the smallest tho but she's been catching up

Likes
3
Share


@LAShugars
Follow
They are all coming along nicely. I’m concerned that they are fading a little early. I’ve used the nutrients may add a bloom booster

Likes
4
Share


@Barcelona_Farmers710
Follow
Explosión de resina!!! Una genética que no me deja de sorprender un olor brutal a cítricos y su olor a Haze un gustazo pra la vista y el paladar sin duda esperamos impacientemente el dia de degustar este manjar!! Espero que os guste Salut y força al canut Farmers!🍁
Likes
16
Share


@Bousmeister
Follow
Week 6 of flowering and my ladies are starting to smell quite a bit.
Caramelino has a very funky fruity smell while the northern light has a fruity, musky smell.
Looking forward to what's ahead!
Peace
