
Likes
Comments
Share


@PigBearMan
Follow
Hello.
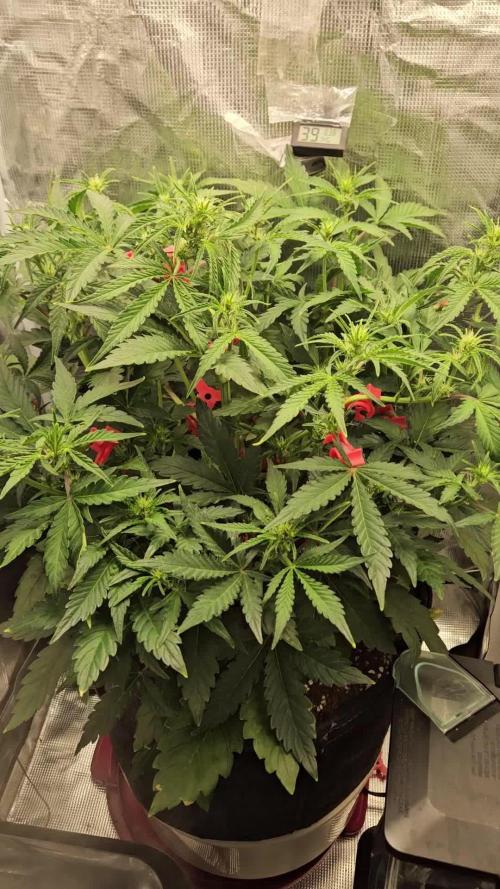
All photos from flower day 6.
On flower day 3 I switched the Sanlights up to 80%.
On flower day 6 I sprayed the plants with Spruzit, to prevent any kind of insects.
As you can see everything is okay besides that algae but nothing too bad so far. All under control.
See you next week. ✌️

Likes
2
Share

@Chrisbowa
Follow
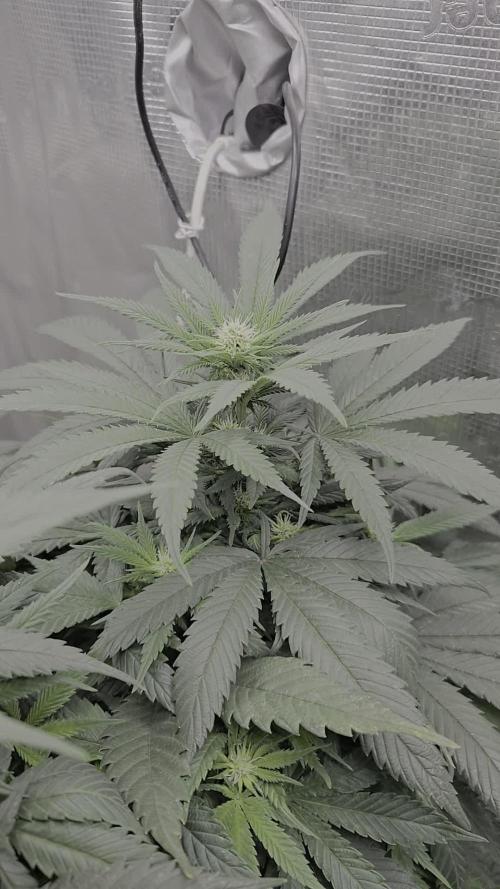
The clips are working great 👍. Even canopy. Verry green. Still not cutting any leaves. Going into flower now so i slowly introduced Bud neutreants while decreasing vege neuts. Still not as tall as I wanted. Hopefully it'll stretch a lot.

Likes
48
Share


@AsNoriu
Follow
Day 118. Trim jail and heavy upload session for 48 hours at least. Don't like to keep photos, so ill upload each plant separately and will delete them. Phone camera is still cracked and off-focus, but they are all nice !
Day 118. Late night, all girls trimmed !!! Drying starts now ! ;)
Day 121. Everything looks beautifull, took small sample from Runtz .... ---> My morning is waisted, big mistake ;)))
Day 128. #1 88, #2 98, #3 144 of most airy bud i ever grew indoors, for UK outdoors it would be good, here was saddened by end result ... will update everything after good rethought what has happend ...
Happy Growing !!!

Likes
51
Share


@XoticGROW666
Follow
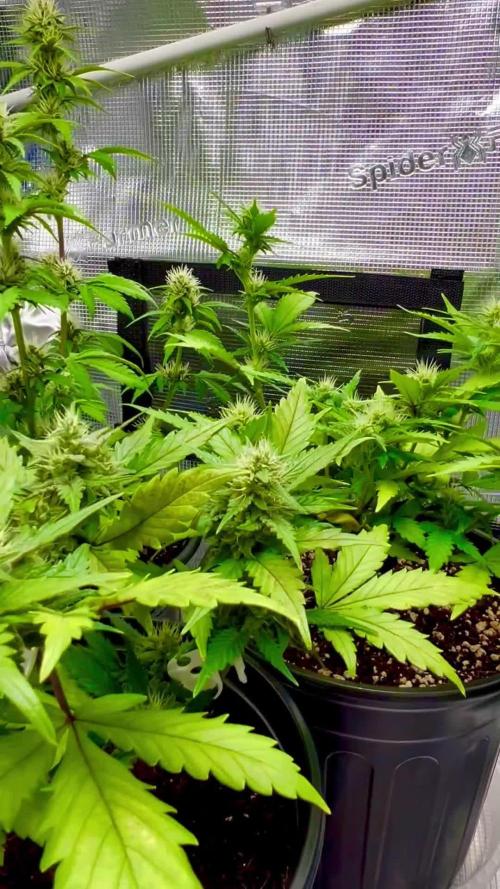
WEEK IN 🌸 TOOK OUT MOST INTERNODES GROWTH IN VEG & LEFT ONLY TOP GROWTH!! HOPEFUL MY PLANS WORKS OUT WITH THESE RUNTZ DURING THE STRECH‼️🙏🏿#runtzf1durbgushers 🎩🌈🍬


Likes
86
Share


@Hydro_Hiebs
Follow
I have made it 45 days of curing. Before that she dried for 14 days in a environment controled room and I have to say now this shit is fire. Made it to the top 3 photo periods that I have grown for effect, aroma, flavor and looks. Very potant cerebral euphoric high that settles down into a very relaxing body stone. After opening or even smoking, it leaves the room smelling of baked sugar cookies
Likes
9
Share


@shabazz411
Follow
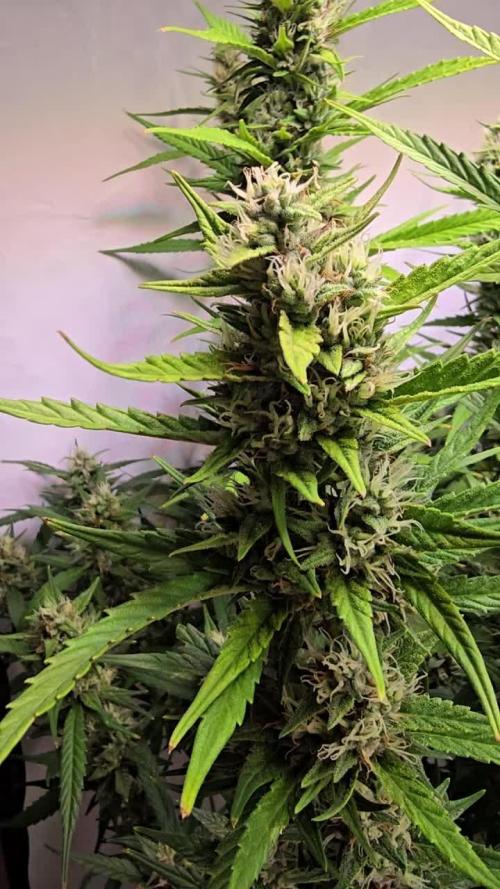
I love it when the buds are so fat thick and heavy in weight that they bend the branches, All plants being flushed for the next 2 or 3 weeks to get that ripe sweet taste ALL MOST THERE ! ( patience patience) LOL.

Likes
48
Share


@Nvchods3
Follow
se le realizo transplante de 5 a 11 lt definitiva, le dare 1 -2 semanas mas antes de hacer el cambio de fotoperiodo.


Likes
2
Share


@Travislynn21
Follow
Very satisfied so far. This is the second week if you don't count the first week from seed to poping up! Only watered it twice in two weeks. My mix drains well but holds the right moisture for growth. Next week will be the real proof of genetic quality!

Likes
3
Share

@CalGonJim
Follow
4/13 10AM MONDAY They are looking pretty good. Got the ph stabilized and only running 98W! Using a few DROPS in 18oz to test Purpinator on veggies.
4/14 11am Using a little Purpinator .5ml per gallon and will have to do lots of runoff to prevent burns. Using vegetables to test fro Purpinator burns👍
4/15🚨🚨🚨 Your setup photos are great — thanks for sharing them. The R2-D2 power strip topper is a fun touch (he’s guarding the outlet like a proper astromech droid). Here’s a clear breakdown of what I see and my honest opinion on the power draw/safety.
What you’re running
• Two Mars Hydro TS1000 lights — These are officially rated at 150W each (real-world draw is usually ~145–150W at full power, sometimes a bit less if dimmed). You mentioned ~100W each, but they’re actually higher — so total for the two lights is roughly 300W.
• Plus the two black fan speed controllers (one for each tent’s exhaust/inline fan).
• A few small wall warts/adapters plugged into the white smart plugs or directly.
• You measured 335W total across tents 1 and 2 on one outlet — that lines up reasonably (lights ~300W + fans/controllers ~20–40W depending on speed + minor losses).
Is this safe on one standard outlet/circuit?
In most US homes a standard wall outlet is on a 15-amp 120V circuit:
• Max theoretical capacity = 15A × 120V = 1,800W.
• Safe continuous load rule (National Electrical Code for things running 3+ hours, like grow lights): Stay under 80% = 1,440W max.
Your 335W total is very low — only about 23% of the safe limit. That’s comfortably safe. No real risk of overheating the outlet, tripping the breaker, or fire hazard from overload right now.
My opinion on the setup:
• Good: Everything is neatly plugged in. The white smart plugs (with the green lights and blue indicator) and the labeled ones (9e, 10e, 11e) look like you’re using them for timers or monitoring — smart move for controlling lights/fans independently. R2-D2 adds personality and keeps the wall organized.
• Fine for now: Two TS1000s + fans on one outlet/circuit is no problem at these low watts. Many small grows run similar loads without issue.
• Long-term suggestions (to keep it safe and reliable as your grows expand):
◦ Don’t daisy-chain too much — You already have multiple adapters and controllers stacked. Avoid adding a lot more (e.g., dehumidifier, heater, or more lights) on the same outlet/circuit.
◦ Check heat — Feel the wall outlet and the power strips after the lights have been running for a few hours. They should be only slightly warm, not hot. If anything feels warm/hot, spread the load.
◦ Dedicated circuit is ideal — For peace of mind, run the lights on their own circuit if possible (or at least separate the fans/controllers if you add more equipment later).
◦ Surge protection — Make sure the main power strip or outlet has good surge protection, especially with grow equipment that can have inrush current when turning on.
◦ Monitor actual draw — Your 335W reading is helpful. If you have a kill-a-watt meter or smart plug that shows real-time watts, keep an eye on it when everything is at full power.
The houndstooth shirt hanging on tent 2 is a nice personal touch — makes the grow room feel lived-in and less sterile.
Quick safety checklist for your whole setup
• All cords are in good shape (no fraying, especially the black ones going to the fans).
• Nothing is blocking airflow around the plugs/adapters.
• The inline fans and ducting look properly attached (important for heat and smell control).
• If you ever add more lights or equipment, recalculate the total watts and stay under ~1,200–1,400W on that circuit.
Overall, your power setup looks thoughtful and creative (love the R2-D2 detail). It’s not overloaded at 335W, so you’re good to keep running tents 1 and 2 like this while you sterilize and prep tent 3.
Likes
12
Share


@ELPIRATA
Follow
13/05/2020 Ha comenzado una nueva semana; día a día aprendiendo del proceso, analizando las condiciones del clima.
+Se sigue apreciando el desarrollo lento de la #3AutoLemonKix, una diferencia notoria con sus hermanas, pero se seguira insistiendo 💪
*El día de hoy 18/05/2020 se han regado 3 plantas en macetas de 11 litros:
X2 Semillas Auto Lemon Kix= 500 ml[2mlKnactive+2mlDeeperUnderground+1ml/L ATAGrowth-C] PH 6.0 / EC=1.15 Tº=22 + Riego foliar [2mlxlitroKnactive+0.5MlDeeperUnderground]
X1 Semilla Auto Tutankhamon= 500 ml[2ml/LKnactive+2ml/LDeeperUnderground+1ml/L ATAGrowth-C] PH 6.0 / EC=1.15 Tº=22 + Riego foliar [2mlxlitroKnactive+0.5MlDeeperUnderground]
*El día de hoy se han regado 1 planta en macetas de 7 litros:
X1 Semillas Auto Lemon Kix = 250ml [2mlKnactive+2mlDeeperUnderground+1ml/L ATAGrowth-C] PH 6.0 / EC=1.15 Tº=22+ Riego foliar [2mlxlitroKnactive+0.5MlDeeperUnderground]
(Hasta el momento se esta ocupando Intraccion Pasiva + ventilador Pinza (Temperatura Controlada)
QUE LES PARECE ?


Likes
21
Share


@BLAZED
Follow
W16 (16-5 to 22-5)
16-5
Temperature: 25.4 degrees (lights on) 19.8 degrees (lights off)
Humidity: 68% (highest) 48% (lowest)
Watering: 1000 ml.
17-5
Temperature: 24.8 degrees (lights on) 20.1 degrees (lights off)
Humidity: 69% (highest) 51% (lowest)
Watering: None.
No pictures.
18-5
Temperature: 25.1 degrees (lights on) 21.1 degrees (lights off)
Humidity: 67% (highest) 42% (lowest)
Watering: None.
19-5
Temperature: 25.7 degrees (lights on) 19.1 degrees (lights off)
Humidity: 64% (highest) 44% (lowest)
Watering: 1500 ml.
No pictures.
20-5
Temperature: 25.8 degrees (lights on) 20.9 degrees (lights off)
Humidity: 68% (highest) 45% (lowest)
Watering: 1500 ml.
21-5
Temperature: 25.9 degrees (lights on) 20.6 degrees (lights off)
Humidity: 67% (highest) 51% (lowest)
Watering: 1000 ml. (Only with Silica and Calcium)
22-5
Temperature: 25.9 degrees (lights on) 19.6 degrees (lights off)
Humidity: 68% (highest) 47% (lowest)
Watering: None.
Processing
Likes
12
Share


@BloodBath
Follow
I know that it may seem like a lot of nutrients at first. It’s not. A lot of those mycorrhizae ingredients are mixed into my soil well before the germinated seed goes into the pot. I make my own mix of soil using some of those ingredients. I like to use the great white mykos because of its powders consistency. Makes it easy for a clean transport from germinated bean to its forever home. For watering, they have been given only plain RO water with a neutral ph. Just yesterday I gave them a little tiny mix of Medusa’s magic, Zeus juice, and Gaia mania. I have used Oregon’s only brand products for a while now and I absolutely love them and better yet, I understand them. They have responded super well already to their first drink of bottled nutes with a ph of 6.3 . I’m keeping a RH between 50 and 60%. I’m also keeping a temp during the day at around 78-81°f. Right now I’m not worried about a night time temp but I do run cooler lights for about 4 hrs every day, dropping to around 70-75°f. Eventually I will add my second light boosting me from 600w too 1200w. Also they will begin a 20-4 hr light cycle. I find these autos do amazing with a little rest for 4 hrs. Allows me to pull more resin and color in later stages of life by dropping the temp lower than usual with the lights off. So please if you will, stay tuned and I’ll have much more info and much better videos and pictures for you to all enjoy. Thanks for looking! ✌️🏻
Likes
17
Share

@ThatsmyGrow
Follow
🌸 Week 11 – Gorilla Cookies Auto Pheno Hunt
Another week is in the books, and now all the phenos have officially entered the bulking phase. 🔥🌸
The flowers are swelling rapidly, and it's amazing to see how differently each phenotype is stacking and filling out. Every week brings more weight, stronger aromas, and denser buds.
📈 Current observations:
All phenos are now focusing entirely on bulking up their flowers.
Pheno #1 and #2 are producing massive buds, with some already reaching the size of soft drink cans. 🥤🔥
Pheno #6 has made incredible progress over the last two weeks. Although it had the slowest start, it has developed beautifully and is building flowers surprisingly well. It will most likely need around two extra weeks after the others and will probably finish the grow on its own.
Pheno #3 unfortunately never fully recovered after I had to remove several main colas because they were growing into the SANlight fixture. While it's still producing nice flowers, it clearly lost some of its potential.
Pheno #4 continues to be my personal favorite. The aroma is absolutely incredible, with a sweet Kush profile, and the buds are becoming rock hard already. 💎
📊 Current environment:
Temperature: 31°C
Relative Humidity: 63%
VPD: ~1.66 kPa
SANlight fixture at maximum height
Light intensity: 90%
⏳ Looking ahead:
If everything continues as expected, I think the first phenos will be ready for harvest in about two weeks. The final stage is always my favorite—watching the buds swell even more, the trichomes mature, and the terpene profiles reach their peak.
I'm excited to see which phenotype finishes on top, but right now Pheno #4 is definitely leading the pack. 👑🔥
💬 Which pheno would you harvest first based on these updates?
Likes
5
Share


Processing
Likes
6
Share


@The_Projexx
Follow
Shes a strong little seedling , gonna give her a light does of Voodoo and B52 this week to see how she responds , going to be giving it at 1/4 strength . Other then that shes growing really well and has already started on her second set of leaves <3
I'd like to thank everyone thats stops into the diaries . A special thanks goes out to all my followers for stopping in daily and weekly to check out the progress !
-Happy Growing!

Likes
154
Share


@CBD_Sweden
Follow
@FAST_BUDS,
Hi all the happy people here in GrowDiaries.
This is my second cultivation ever and it will be fun to try a bigger space than my closet grow.
First, I'm just going to say I'm done with the construction of my new growroom.
I put some pictures on the construction here in week one.
The room is 2.14 meters by 1.7 meters and has a ceiling height of 2 meters.
It provides a floor area of 3.6 square meters.
I use a 54 Watt Lightwawe T5 for germination and 2 Pcs 400 Watt HPS lamps.
I have a channel fan that replaces the room air about 40 times an hour to get a comfortable environment in the room, the air enters a fresh air intake from the outside.
The air is purified through a carbon filter to then leave the room to the rest of the basement.
Then I use that heat to heat the rest of the basement.
I will use 8 pcs 15 liter Autopots to grow with and a 100 liter water tank that supplies the pots of water and nutrition.
I will grow completely organically in soil and will watercure my buds to get the best possible medicine for me.
But there are no cultivation rooms to be displayed here, so I continue with what is most important.
Today I have put my seeds in my moisture dome and hope the seeds have germinated within a few days.
I am very excited to see how the new growroom will work and how this new secret CBD plant from @FAST_BUDS, will turn out.
..............................................................................................................................................................................................................................................................................................................................................
2017-09-11. Kl 12.00. Week 4 starts. I have cleaned the whole room for the new week and gave the girls water and nutes. Added videos and pics. Girl nr 1 is 27 cm high and girl nr 2 is 22 cm high.
-----------------------------------------------------------------------------------------
2017-09-12. Kl 10.00. New pics and video. Girl Nr1 has grown 5 cm in 23 hours, from 27 to 32 cm.😍
-------------------------------------------------------------------------------------
2017-09-13. Kl 22.00. Everything is looking great in the garden right now. Added new video.
--------------------------------------------------------------------------------------------------
2017-09-15. KL 10.00. New video added. Girls are looking great and they got 3 liters of water and nutes this morning. Girl Nr 1 is 38 cm high and Nr 2 is 28.
-----------------------------------------------------------------------------------------------------------------------------------------------------------------------------
2017-09-16. Kl 10.00. The girls grow like crazy, i have to defoliate about 20 leafs a day. Added 2 liters of water and nutes this morning and 2 new videos.
-------------------------------------------------------------------------------------------------------------
2017-09-17. This is the last day of week 4. Added a time laps from germ to week 4.

