
Likes
Comments
Share


@berlinbeginner
Follow
F43
a bit of nutrient burn because of the high temps.
SD2 smell : engine grease mixed with kerosine. Imagine spilling grease in a corner of a tire shop.
SD2 isnt developing normal and wont probably yield much.
SD3 smell : sweet engine grease.Very pleasant.
Sour Diesel needs getting used to in terms of smell and aroma

Likes
7
Share

@SumpfKoenig
Follow
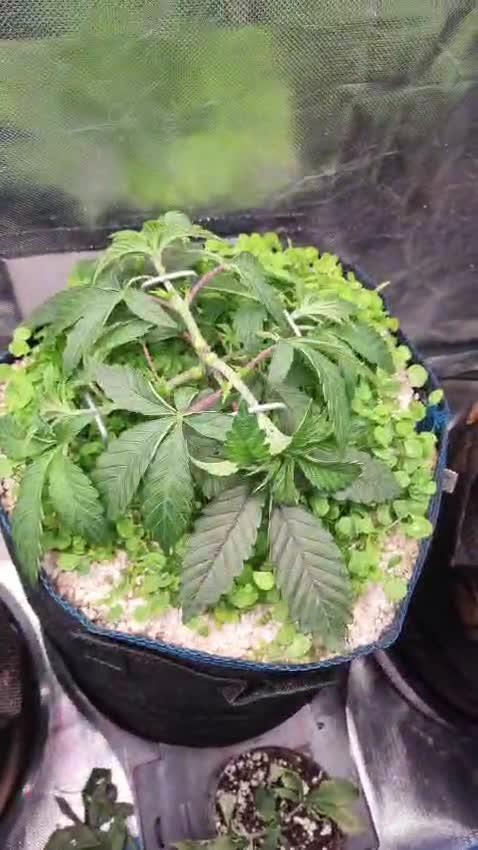
Unfortunely did not document the early veg too much, here a video from like veg week 3/4, shortly before the second topping

Likes
9
Share


@Gardenergrower
Follow
9 semanas desde el cambio a 12/12 esta semana estoy regando solo con agua y enzimas para que se terminen de comer los nutrientes que quedan en el sustrato y asi poder engordar un poco mas mis nenas ,contento con el resultado de mi primer sog ,harto trabajo ,pero muy entretenido y satisfecho siempre que quieres se puede ,hartos me decian muchas plantas que cuidar ,pero con amor y dedicacion todo se puede incluso mas ,quisiea poder contar con semillas de 1 sola variedad para realizar un sog ,quizas mas adelante y con perseverancia se pueda , ya queda menos para la gran anhelada cosecha eaeaea y seguir creciendo inmediatamente ,no hare lavado de raiz por que es un gasto innecesario de agua asi qye a pura aguita se mantendran hasta cosechar , que lo hare yo creo que en una semana mas ,saludos a todos y que no paren de plantar jamas ,abrazos comunidad de grow diaries
Likes
4
Share


Processing
Likes
29
Share


@Reaper
Follow
All details will be added every day/week if u have any questions feel free to ask.
December 4th:starting in the winter, veg and bloom will happen under 400watt hps to keep the grow room warm. the seeds have been germinating for 2 days with the wet paper towel technique, they got root and are now in soil and the rockwool cube.
for now im just waiting for the seeds to show root coming out of the rockwool, then i transplant to the netpot with clay pellets straight in the dwc, untill then they get fluorescent light (max 7 days)
these are autoflowers so they get 18 or 20 hours light.
nutrients General hydroponics
three part :micro gro bloom
and calmag
water: rainwater (25ppm)
i hope the room wont cool of too much when the lights go out.
Day 1 (December 5)
seeds start to come above the rockwool and the soil
Day 2 (december 6)
stems start to stretch i give them both pure rain water with 100ppm calmag when they feel dry.
Day 4 (december 8)
still no root visible out of the rockwool
Day 5 (december 9)
root visible outside of rockwool cube and transplant to the 55Liter rdwc
air pumps 10l/minute
Day 7 (december 11)
root comes trough netpot, i lowered the water by removing 3Liters
Likes
33
Share


@GreenAutoConsumo
Follow
Como ya he dicho, siempre ofrece resultados increíbles, la he cultivado tanto en interior como en exterior y siempre sale increíble


Likes
42
Share


@GanjaReaper
Follow
Took some nice pictures with my microscope at the begin of this week
from a underdeveloped budrot bud. So the other buds might have more and better thc on it.
This is the end of the 6th week of flowering.
Gave the plants only enzymen, because I don't know how long I can keep them going on flowering with this climate.
Therefore I rather not feed them( there are still alot of nutrients in the soil), so they are not full of nutrients when I have to suddenly harvest them.
As you can see, they take the nutrients out of the leafs as well, because they don't get nutrients from my watering.
Might give them some Humic-Blast as well, in the new week.
Will harvest them in 1 or 2 weeks depending on climate + growth of buds.
The front plant buds didn't swell that much but the plant behind keeps flowering, not much but bit by bit.
It's understandable because the day temperature is between 10-20 degrees fahrenheit and night temp is between 5-12 LOL

Likes
51
Share


@felixthegrower
Follow
Well, it was my first diary here, and I'm really happy to had found this amazing community that is so eager to help!
It gave me the opportunity to win the first giveaway in my life 😂 And it was from RQS! These seeds are in my new grow diary, and I really thankful for all the gift received! A special thank to Pol from the RQS staff!
A special thanks to everyone who watched me grow here, and I hope to contribute with the community more and more!

Likes
68
Share


@Roberts
Follow
I am just dropping a Auto Northern Dragon Fuel seed for the contest. I will be growing her in a 1.5 gallon potter of coco/perlite mix with a bit of growstone in the bottom. 🤞🏻 everything goes great. Thanks you Medic Grow, and Super Sativa Seed Club. 🤜🏻🤛🏻🌱🌱🌱
Thank you grow diaries community for the 👇likes👇, follows, comments, and subscriptions on my YouTube channel👇. ❄️🌱🍻
Happy Growing 🌱🌱🌱
https://youtube.com/channel/UCAhN7yRzWLpcaRHhMIQ7X4g


Likes
2
Share


Likes
48
Share


@PrairieFrostGrow
Follow
********* Week 7 - January 20 to 26, 2020 (Days 43 to 49 from seed popping)
She is taking shape more this week by getting taller colas and thinning out between nodes.......oh yeah, and fattening of buds😜😎 It was also not without learning though and thats what is so cool about growing this plant.......you always seem to leave a grow feeling like you could do even better next time and therefore challenging yourself to do better......and have bowl while doing it😂
Her nodes are getting taller and giving herself room for packing on weighty buds👍 If left to one cola should be a fatty!!! But then I would be freaking about potential bud-rot....so I am cool with it. Since LST though it will be interesting to see how well she fills in six😳 She has the makings of being a good producer......its up to the grower to now to keep her happy😬 and see if she packs on the weight with roughly three more full weeks to go??
Missed opportunities in CalMag showing.😰 Left a lot of leaves and two branches that should have removed. Potassium excess contributed to by grower learning Terpinator and Massive.😰 Main stem should have been a little lower......further opportunity to improve👍💪
Got a little crazy with the PPM and felt I knew more than the nutrient company and went above the recommended max by roughly 30%😰😎😭 Yeah.......dummy! My defence.....1300 isn’t too high for Advanced Nutrients in late flower😃😃 Anyway, I screwed up and saw tip burn in week 7. Gave a quick little flush with RO water and Sensyzime to clean up the roots of the salts. Didn’t get crazy though because it was just the top leaves burnt. Been building the medium up to this point so don’t want to wash it all away just yet. She seemed to react well and nodes standing up and didn’t show much outwardly as signs of overwatering😬
Reviewing some of the photos this week I have seen the first small parts of a few hairs drying and turning colour.......no full hairs and not on every bud but enough to say they are first ones.......three more weeks?? Curious.....time will tell.....seen Jan 26, day 49. (49 + 21 = 70.......makes sense.) Feed will stop next week.....by end of my week 8.
In the week a head there will be the last push to get her medium in as good a shape as my skills will warrant. I want to get a good 10 + days of flush to see her in the beauty of senescence and how she matures. Run-off has been reasonable so will keep fingers crossed 😄🤞
Little more detail....
Jan 20/20 - Day 43
- Drinking lots right now, close to 4L per day, so 2L plain water only in AM. 6.2pH,.
- Feed in PM was light as well. Sensyzime @ 2ml and LW8 & Rezin @ 1.5ml only. 2L given with 75ppm. 5.9pH
- She was given a good feeding yesterday.
- Buds sites looking taller.
Jan 21/20 - Day 44
- AM - 3L with Dual Fual A&B @ 1.5ml/L. 725ppm and 5.9pH.
- PM hit her again - full feeding minus Rhino Skin, Sensyzime and Vitrathrive and VeloKelp. 2.5L 1000ppm and 5.9pH.
- Runoff - 950ppm and 5.6pH.
- top leaves were droopy so the extra feeding in the evening.
Jan 22/20 - Day 45
- Backing off quantity a bit and down to 3L feed in PM.
- Mass & Terp @ 3ml, Rezin & LW8 & DF @ 1.5ml, CalMag @ 0.5ml = 1300ppm
- Very perky today....standing up all the way down the plant. Liked the feed yesterday.
******this was likely the mistake feed looking back********left the ppm too high and should have added in RO water to bring down around 1000ppm! At least it seems traceable and will go with that😀
Jan 23/20 - Day 46
- Supplemental feeding only today. Happy so don't rock the boat :)
- Sensyzime @ 2ml, LW8 & Rezin @ 1.5ml = 80ppm 6.1pH
- 2L only today.....still some weight to the pot
Jan 24/20 - Day 47
- 2L feed: Massive @ 2ml, DF & LW8 & Rezin @ 1.5ml = 925ppm 6.2pH
- Nute burn on Green Poison but Zkittlez seems fine and she is fine. Maybe a slight lightening on a few tips....
- happy and praying in the evening.
Jan 25/20 - Day 48
- 4L of full strength feeding for this week.
- ppm for that was 1275 so watered down to 1100ppm.....only need 1ml of base nutes at full strength to hit roughly 1,000ppm.
- Runoff: 900ppm & 6.05pH....happy with that.
- she is 28” x 28” now
- Her cola growth was strong, taller for each of the 6 She is in fattening mode….feed her 😀
Jan 26/20 - Day 49
- So no surprise when you push a girl you find her limit. Tips burnt this morning.😥😔
- 6L plain RO water pH to 6.2
- Followed right away with 2L RO water with Sensyzime @ 2ml/L.
- Runoff: 465ppm.
- She responded very well to this and all tips were up still in the evening.....no over watering signs.
- Removed about 15 fan leaves and 4 lower bud sites.
- guessing only another 1.5 weeks of feeding.
- not falling to sleep an hour before lights out anymore either😀
Happy growing fellow enthusiasts and thanks for the time to read🙏🙏
(scrolling back through diary to update........damn.......that is a lot of bottles during these weeks!! There is an upside to organics😄)
Processing
Likes
89
Share


@biggreens420
Follow
This girl is down dont do wet weight she was looking beautiful faded well smells very sweet extra sticky and buds are formed well i only remove fans when wet dry trim the rest I find it tastes and smokes better this way its cool for drying at the min so using a small heater to warm the room slightly no issues with mold looks like shes packing some weight uploaded a Christmas video dont know which one to use for the competition this or my critical will update harvest when dry and tested thanks for reading happy growing guys
Likes
101
Share


@Ferenc
Follow
Day 58, 11th of November 2020:
I set the lamp 15 minutes shorter to switch off earlier so they receive 11:45 of darkness. I would like to imitate the nature when longer nights come with time till the 4th week (when they will receive 13 hours darkness a day 15 minutes minus 4 times = 1hour) so every week 15 min longer darkness for 4 weeks and then back to 12/12 to have bigger buds from the 4th week....
Wao. Well, all good hopefully they will stop growing soon but the strech is not that much thanks for the trainings such as topping and LST....
Pistils are started appearing so they she the sex I think one more week to go and they will settle down concentrating on bud development.
What to say every 2nd day is fertilization with the mix and ratio above now we are waiting.
Anything else? Well just look atbthe pictures and decide what you think. I am pretty sure they look cool LOL.
This Gleato Zamnesia is very promising I really like the smell already she is nice but all of them I mean I am in love with all so. Kalinia Asia is nice and I am so excited for the Sweed Seeds ones the red girls OMG :)

Likes
6
Share


@NewMan
Follow
Chtěl bych vyjádřit dík Zamnesia a Plagron ze se můžu zúčastnit, a teď uz to snad rozjedeme a konečně legálně u nás 🖖
Likes
5
Share


@C4NN4815_030
Follow
All good :) very frosty and smells so good. She‘s so happy. At day 35 end of week 4 approaching week 5, i flush her to remove salt buildups since i didn’t had runoff the entire grow ever. She has crazy 2.6EC run off the ph is on the spot though. So lets see how will she react after heavy flush with runoff 1.6EC by week 5. i am now lowering my nuts half of the manufacturers recommendation.

Likes
4
Share


@Barcelona_Farmers710
Follow
Muy buenos resultados para el poco cuidado por falta de tiempo! Una maravilla.
Likes
5
Share


Likes
8
Share


@johnnybuds
Follow
Las plantas asimilaron bien el calcio y siguieron adelante, se realizó un trasplante en el día 20, de 300cc a 5lts airpot con solo coco, ahora solo queda esperar a empezar el lst💪💪💪

Likes
12
Share


@evlvd
Follow
Trichomes beginning to fill in and more bud is forming! Got a bit of a burn going on but im trying to resolve before it gets too late. Could be from the ipm soil drench i did along with over feed. Current ph is 5.8 even tho my input is 6.5-7.0. Now i gotta raise the input until everything is flushed out then a light feed to keep up the nutrients.
Likes
5
Share


@braxat420
Follow
First time trying a main-line. I left four growth points so I wouldn't have to top again. Makes sense to me, but I'm not sure if that's proper or not. Looks great today, though.