
Likes
Comments
Share


@Dictator
Follow
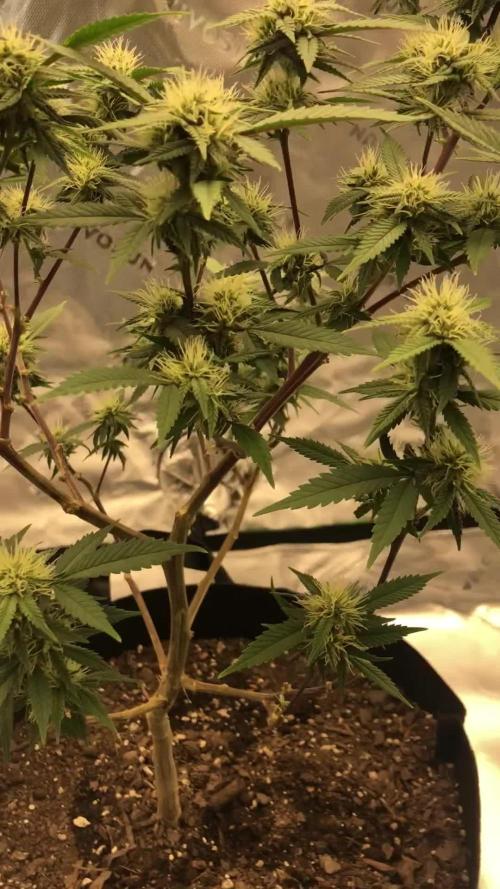
I topped this beautiful girl again and it was 32 tops in total, now I will wait 2-3 weeks for her to overcome these heavy stresses and start active growth, after which I will cover the scrog net and switch the light cycle to 12/12
💚🌋


Likes
119
Share


@Natrona
Follow
Sponsored grow
***DIVINE SEEDS *****
*****OPIUM*****
Week 5 This week 5/5-5/11
Germination April 6.
Vegetation
Week 1 water only
Week 2 water only
Week 3 added recharge and TPS1 increased ppm to 570.
Week 4 continues with recharge and TPS1. I added Fox Cal mag increasing ppm to 685 - 805.
Week 5
TPS1 9ml/gal
Recharge 5 ml/gal
Fox Cal-mag 5 ml/gal
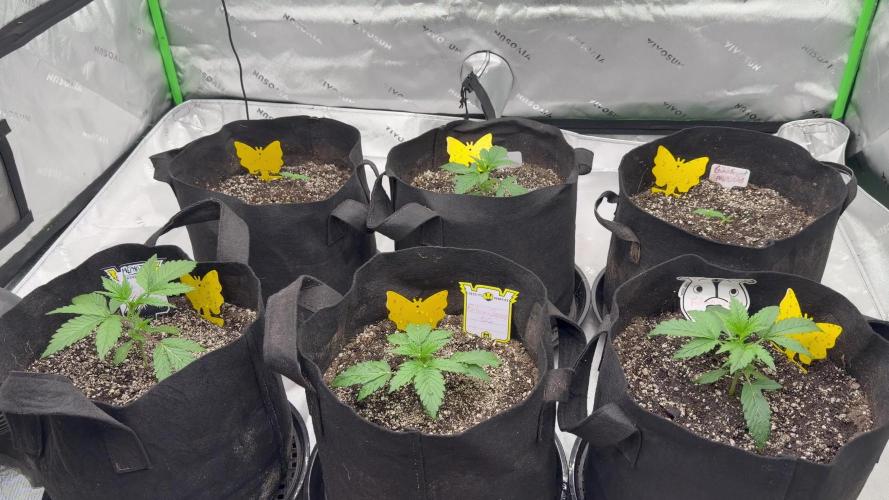
This was an exciting week for my ladies. It started out with the usual feed and defoliation and training. With my upcoming vacation, I am going to be hardening off these ladies to relocate to their outside location. I checked the expected weather forecast for the week. Looks good to start hardening off. Partly cloudy with temps in the low to mid 80s just like in their tent. So that’s good. Night temperatures were in the 50-60s. This is much cooler than what they are used to as our house is at 73. They need to get used to what mother nature will provide. Our summers are hot and humid. I had planned to bring the plants back in the sunroom but since conditions were similar, I let them stay outside every night. And every night but 2 it rained. I did not water or feed nutrients this week.
I am attempting the scrog technique on all plants. I am using a peony cage as the support structure. The cages are about 2 feet high. This may not be enough side or top support as she grows and may have to resort to tomato cages.
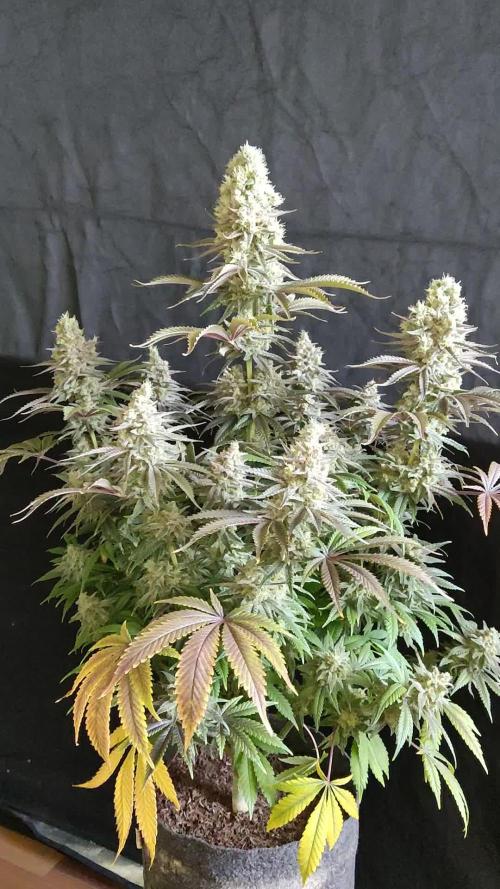
Took pics May 6,9, & 11 Opium is a vigorous lady. She will be my glamor girl. She is taller and has the typical sativa structure and has space between the nodes. There is not much leaf growth, so I don’t defoliation much. Her nodes are close but starting to spread out a bit. They remain even and balanced which show she is still in vegetation.
Thank you @DivineSeeds
Thanks for the visits, likes and comment, I appreciate all the plant love💚.
Have fun & love what you grow 💚
Sending you good vibes of love, light, and healing 💫
💫Natrona 💫
DIVINE SEEDS
***OPIUM***
Harvest:1000 g/m2
Divine Seeds developed Opium as a new champion strain, unprecedently powerful and loaded with unbelievable quantities of resin. Certainly, no average genetic base could be behind such brilliant parameters! Several Afghani Indica landraces, recognized as most potent and resinous, were bred together with a mighty Brazilian Sativa which Opium inherits its bright berry taste from. Then a great deal of work followed aiming for the highest THC level and endurability as well as a branchy structure that would provide maximal yields. Now we can proudly title Opium the best Indica you could dream of growing!
Indoors these plants mostly stay mid-height (1.5 m), reaching up to 2.0 m out of doors. Depending on your height limitations, Opium flourishes universally in grow boxes, balconies, green houses and terraces. Due to its Afghani parentage, this strain can stand hot weather if provided enough water and some shadow. Responds well to any training techniques: ScroG and SoG, LST, topping and FIM, supercropping. The start of blooming is marked with a rush of growth, when plants stretch almost 1.4x. Expect heavy colas that often require additional supports. Whilst ripening, Opium gives off a pungent earthy stench with fruity and berry undertones, also a bit of pine. Ready for outdoor harvesting in October.
The stoning psychedelic impact of Opium is like being hypnotized (unless you’ve had too much, then it feels more like a blackout). Stone-lovers will appreciate every minute with Opium: its spicy taste immerses your mind into daydreaming, while the body rests flat. Recreation with this psychedelic Indica means silent tripping from one insight to another. Mighty enough to kill chronical pains, Opium is also medically efficient against insomnia, nausea, appetite disorders, muscle spasms, headaches, irritation, fatigue, panic attacks, epilepsy. Best consumed at night time, the effects keep going for up to 4 hours.
Equipment and nutrients
Pots: 5gallon Air pots
Soil Fox Farm Happy Frog Amended with worm castings, dolomite lime and mychorihiza Recharge
Seeds provided by Divine Seeds
Divine Seeds breeding company
The link to Opium Feminized Seeds
Opium - Divine Seeds breeding company
The link to Opium Auto Seeds
Auto Opium - Divine Seeds breeding company
=================================
Equipment: AC Infinity
CLOUDLAB 844 – Advance Grow Tent 48”x48”x80”
CONTROLLER 69 PRO – Grow Tent Controller
CLOUDLINE LITE 6 - Inline Fan 6"
IONBOARD S44 – LED Grow Light Board 400W
CLOUDRAY S6 – Oscillating Circulation Clip Fan
Carbon Filter 6” 4


Likes
16
Share


@Dr_Rook
Follow
Qué largo se me está haciendo..
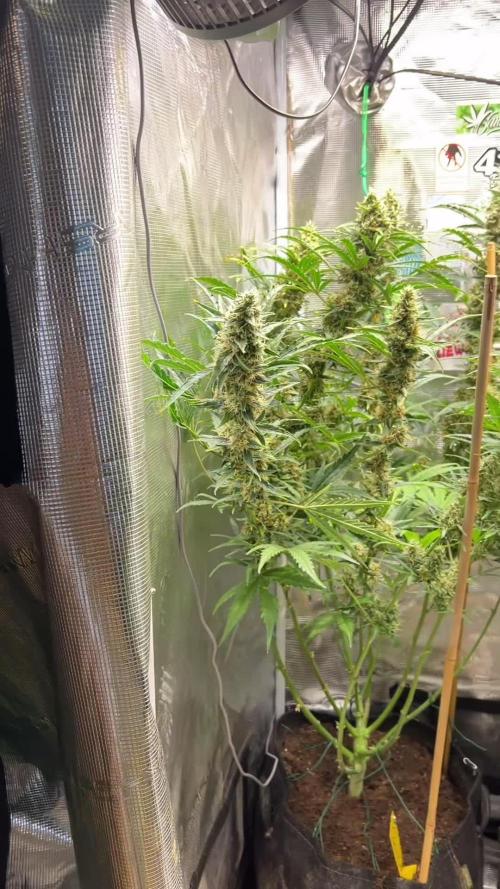
Pensaba dejarlas ya 3 días desde hoy a oscuras y posteriormente cortar, pero siendo sensato las dejaré otra semana más para que terminen de madurar los cogollos de abajo.
Claramente dejé de abonar demasiado pronto, podría haber dado 1 o 2 riegos más tranquilamente, pero bueno una cosa más que aprendo para las próximas. Van a estar 3 semanas sin abonar😅 aunque no han mostrado muchos síntomas de deficiencias

Likes
37
Share


@NewbieLearner
Follow
Coming along very well. Will begin flushing a few of the strains soon. The gorilla skittlez and the wedding cake are looking super frosty! Started harvesting the gorilla glue but will only post the whole set of pics once it is dried and cured and ready to be smoked.


Likes
5
Share


@Learntogrow818
Follow
About 3weeks left.. No problems after Nitrogen and some P deficiencies.. As a new grower best things I have picked up is not be afraid to make mistakes do tons of research and testing nutrients on a separate dummy plant, have fun patience and learn everyday.

Likes
4
Share

@Mr175budman
Follow
The leaves are turning a lovely color, and the plant is growing well without any signs of light or leaf burn.

Likes
7
Share


@ChitownCannaChica
Follow
So the bud pretty much matched the size of the pot! Super tiny grow at 80ml of soil! Pretty frosty and dense considering the size of the pot! Smells like lemon too!
Just chopped her down and will have a harvest report on my assuming 4 grams of dried bud! Fun tiny grow!
✌️💚🌿💨


Likes
3
Share


@Briangrowss
Follow
I think she start to look delicious
28/7 she really start to smell good
30/7 give her this morning the first time green sensation and build it up to 0,5 in the next week that starts tomorrow ☘️
Likes
26
Share


@Probation2Propagation
Follow
Pheno 1: strong natural tart cherries with a slight candy
Pheno 2: loud cherry candy
Pheno 3: cherry fun dip
Pheno 4: cherries mashed with earthiness
Pheno 5: the strongest cherry pheno I’ve ever smelt. Just loud cherries in your face.
I kept pheno 3 and 5. I pressed both into rosin and the terps were insane it smelt like I worked a double at the marischino cherry factory. The terps on 3 were cherries on the inhale with a candy fun dip exhale (absolutely up my alley). Pheno 5 was the most in your face cherry I’ve ever tasted. It was straight cherries throughout the inhale exhale with a slight tart/candy on the back end. I have found my cherry phenos for my future business. Thank you for riding this journey with me. Harvest results on my YouTube channel link in my bio!

Likes
55
Share


@nonick123
Follow
Día 92 (14/04) Riego con 500 ml H2O EC 0,45
Ha bajado algo la temperatura promedio
Día 93 (15/04) Riego con 500 ml H2O EC 0,45
Reviso los tricomas y aún le faltan unos días...
Día 94 (16/04) Riego con 500 ml H2O EC 0,45
Día 95 (17/04) Riego con 750 ml H2O EC 0,45
Tiene mucha sed! El tiempo está loco por aquí! Picos de 27 ºC en abril... 😵💫
Día 96 (18/04) Riego con 1.000 ml H2O EC 0,45
Día 97 (19/04) Riego con 500 ml H2O EC 0,45
Día 98 (20/04) Fiesta de la Cosecha!
Reviso los tricomas y están un 10% ambar, 85% nublados y 5% transparentes
Perfecta!

Likes
65
Share


@Dendegrow
Follow
Week 4 of the flowering phase has arrived, and last week flew by 🌬️🌱. The ladies are thriving, and the buds are now clearly visible! ✨ The flowers are starting to turn darker, which is an exciting sign 🍒.
The first trichomes are already forming, hinting at a very potent strain 💎🔥. While the cherry aroma hasn’t come through yet, removing some leaves revealed an intense, waxy scent – very intriguing! 🌿👃
I’ll keep you updated with daily posts. Drop a like and stay tuned to see how the ladies develop 🌺📸. See you next week!
Woche 4 der Blütephase ist da, und die letzte Woche ist wirklich wie im Flug vergangen 🌬️🌱. Die Ladies haben sich prächtig entwickelt, und jetzt kann man die Buds schon richtig gut erkennen! ✨ Die Blüten beginnen langsam, sich dunkel zu verfärben – ein vielversprechendes Zeichen 🍒.
Auch die ersten Trichome sind schon sichtbar, was definitiv auf einen sehr potenten Strain hindeutet 💎🔥. Das Kirscharoma ist zwar noch nicht zu erkennen, aber beim Entfernen der Blätter wurde ein intensiver, wachsähnlicher Duft wahrgenommen – super spannend! 🌿👃
Ich halte euch weiterhin mit täglichen Updates auf dem Laufenden. Lasst ein Like da und bleibt dran, um zu sehen, wie sich die Mädels entwickeln 🌺📸. Bis nächste Woche!

Likes
202
Share


@CrazyHorse
Follow
Good afternoon everybody 😊
It's getting wild, really wild 😇 From last week everything start to be hmm... massive 🤔 😜
Update:
Day 38
Original Cinderella 108 cm
Bruce Banner 83 cm
Purple Lemonade 78 cm
Day 40
I have to provide a defoliation as girls start expanding wildly 😇
Original Cinderella 114 cm
Bruce Banner 86 cm
Purple Lemonade 79 cm
All the best, You Lovely Girls Growers 💪 💪 💪

Likes
9
Share

@chrizzle
Follow
went a bit down with ‚Autoflower Supermix‘ (22ml/10L)
7.06.2026: reduced light to 18hrs because some of the upper leaves were tacoing
Likes
20
Share

@Cauli
Follow
Week 13 for Chemical Candy.
This will be a hard farewell … that lady became so beautiful, it'll be a pity to chop her.
Despite the problems (grown super near to the lamp, broken main stem while tying to bend her down) she really performed outstanding in a short time.
Buds are dense and covered in trichomes, smell is gassy with a very chemical touch – very special one. loved her 💚


Likes
5
Share


@pzwags420
Follow
Cantaloupe haze needed a good flush brought runoff from 2000 ppm to 1100ppm will continue to monitor.

Likes
36
Share


@Lordshiva83
Follow
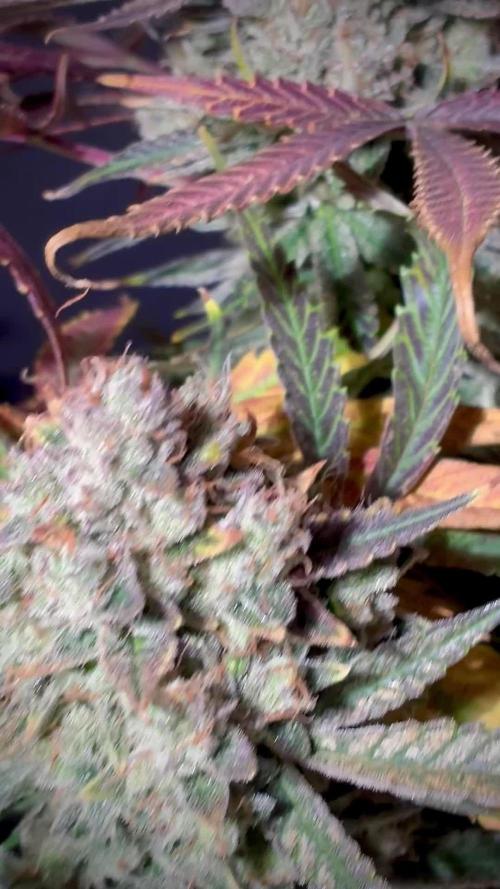
Olá companheiros✌️🌱, esta semana o diário está mais centrado na tropicanna Poison ela está no dia 55 de floração, e continuam a nascer pistilos e mais pistilos , e a menina continua a engordar, continuo à espera da Cor âmbar de alguns tricomas, mas ainda nada, esta semana que passou dei só água a 6.4Ph, a tropicanna cheira muito a terra junto com tropical doce, vou esperar mais alguns dias para a colheita, o que acham?! Aceito sugestões ✌️🤩,


