Likes
Comments
Share
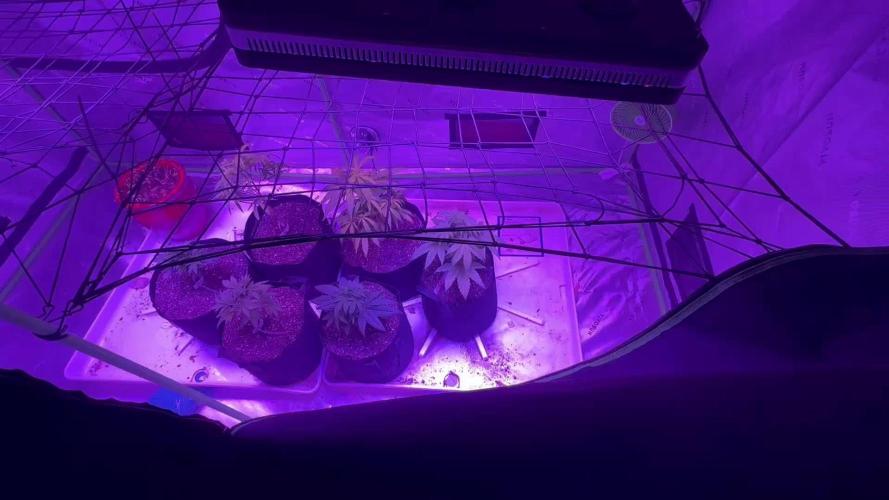
Watering 2-3 days 2 liters per plant
Likes
422
Share
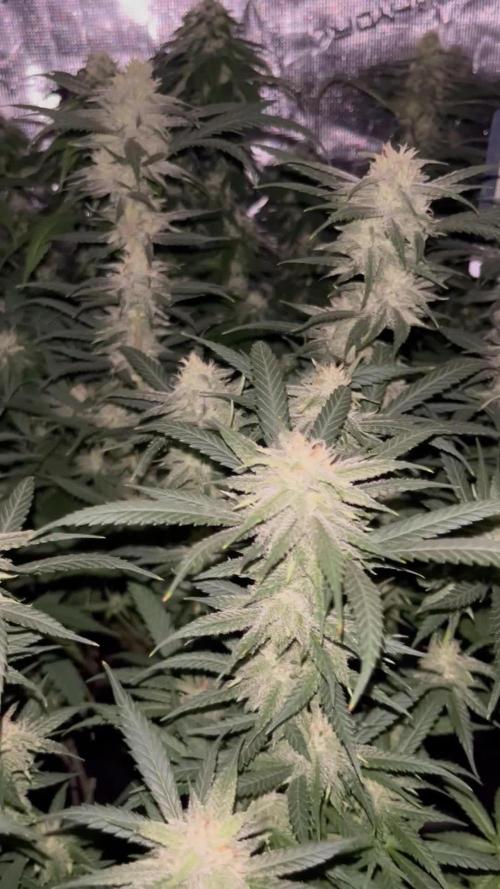
Hi all 😁 Welcome to my 🍌💜👊 week update. Hope everyone keeping well and having a great week. Thank you so much for your all support on this bananas journey 💜💚💜💚 What a amazing week. Very little to work around those beauties. The smell is so delicious already. They smells like sweet berries. Buds are loaded with trichomes, very sticky and hard as rocks especially on Athena. Trichomes are mainly clear and some parts milky. Absolutely love power of LST and how it worked on this strain. If you won't look under net it's almost impossible to see which cola belongs to main stem. Week 11 Dec 25 - Dec 31 Dec 25-26 Joyful observation Dec 27 Selective defoliation and First watering for this week. Nutes adjusted, almost 8ltr between both. Runoffs PH on both at 6.2. I am finding this PH level for this strain as perfect. Girls are looking super healthy and drinking they mixture like crazy. Dec 28-30 All is going smoothly. I can see more and more weight each day. Dec 31 Secomd watering foe this week. 8 ltr beetwen both. It's the last day of this week and also end of 2023!! See you in the new year 🍾🥂🍀 Peace and love brothers and sisters ✌️💚 Links https://2fast4buds.com/seeds/banana-purple-punch-auto https://plagron.com https://www.biobizz.com/ https://fishheadfarms.com/
Likes
4
Share
Vegi W6 12.2.2026 Gießwasser 2L, Ph-Wert 5,8, EC 3,0 14.2.2026 Gießwasser 2L, Ph-Wert 5,8, EC 3,0 17.2.2026 Entblätterung und unter Triebe entfernt. Vorbereitung für die Umstellung in die Blüte. Der Bruch im Haupttrieb ist gut verwachsen. Neues Reservoir angemischt. 18.2.2026 Gießwasser 2L, Ph-Wert 5,8, EC 3,0
Likes
9
Share
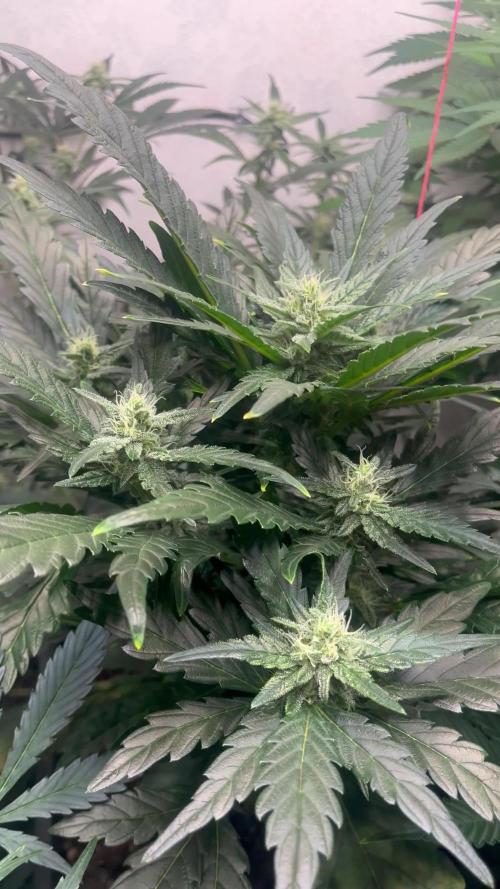
Week 13 – Ripening is now progressing slowly, as I had expected, due to my choice to provide a light stimulus that isn’t too intense but rather gentler. From flowering until now I’ve maintained 30 DLI and a steady 470 PAR. In this run, the goal has been to keep the resin thick and sticky. Humidity has been kept between 57–62% max. My lamp is an Omega Pro 300W, which I’m currently running 37% (111 W). This strategy seems to be working well: resin production has been abundant, and on this point—and not only this one—I’ve completely fallen in love with Gorilla Cookies. The aroma is exquisite, and the resin… the flowers are covered in ointment-like resin. The macro shots of the trichomes still don’t show any amber heads, so I believe harvest is probably about 10–15 days away. 🍮🤤 I think I’ll grow only Gorilla in the next run! 🦍👀 P.SThe leaf discoloration happened very quickly! The previous photos are from yesterday when it was still green — today it looks like this. Really interesting
Likes
18
Share
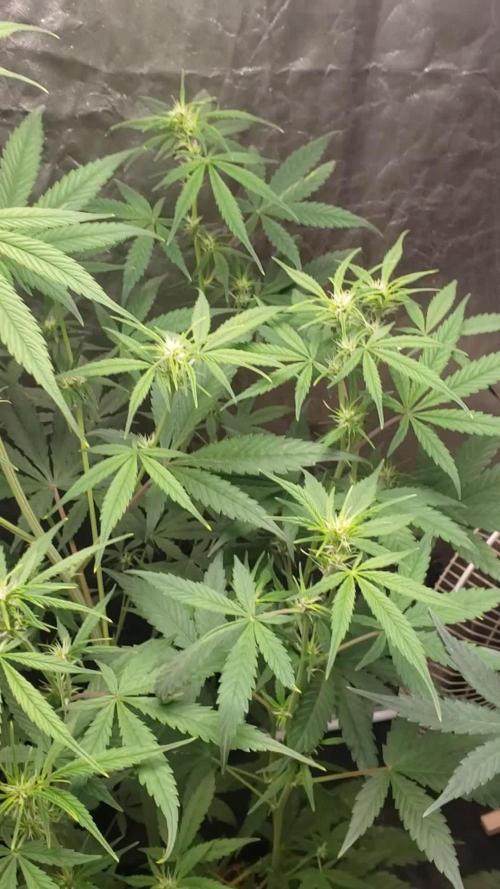
Que pasa familia, vamos con la segunda semana de vida de estas Tropicana Cookies Fast Flowering, de FastBuds. Vamos al lío , las 3 plantillas se colocaron en macetas de 0.6 litros y asomaron las 3. El ph se controla en 6.2 , la temperatura la tenemos entre 21/24 grados y la humedad ronda el 60%. Ir van creciendo y no llevan ni mal ritmo ni mal como, veremos como avanzan las próximas semanas. Mars hydro: Code discount: EL420 https://www.mars-hydro.com/ Agrobeta: https://www.agrobeta.com/agrobetatiendaonline/36-abonos-canamo Hasta aquí todo, Buenos humos 💨💨💨
Likes
11
Share
@Kirsten
Follow
☆♡ Gorilla Cookies: I've noticed a leaf fell off the bottom. I think I may've overdone the nutes. She's growing tremendously. I top dressed with the below, as the rest of my plants. I will only use PH'd water for the next several waterings, probably with Biosys or seaweed. ♡☆ 16.2.25: I decided to check out the lower canopies of all plants to see if I need to get rid of any foliage. I did get rid of a few small branches and leaves. However, whilst I was doing this, I saw more garden pegs from my LST remaining. There were about 6 or more in Pink Mist alone. Additionally, on Watermelon, there were some left in, too. I'm so annoyed to see that because the plants are really stretching, and I could've potentially disrupted this by leaving the pegs in for all this time without realising it. 🤞 that I haven't compromised things too much. We'll see. I watered today with 2ltrs of dechlorinated water PH'd to 6.3 containing the following nutrients; ♡ .8g Green Leaf Nutrients PK booster ♡ .5g Ecothrive Biosys I ordered quite a few things for the garden. I got Greenleaf Nutrients Sea K(elp) and Mega Crop Parts A+B. To go with their PK Booster I got last month. I'm excited to try it all together. Next run, maybe just using these. We'll see how it goes. 18.2.25: The plants are going crazy for water! Everything is getting used right up so fast! Today, I decided to add some more Black Strap Molasses to add some carbs and other micronutrients. I'll add the jar with the label in the photos section above. I watered a very small amount to each plant. What I put in: ♡ Black strap molasses 150g ♡ 2g Sea K(elp) Greenleaf nutrients. I dissolved everything in 4ltrs of dechlorinated water PH'd to 6.4. 19.2.25: I received the majority of the garden purchases that I made. I'm still waiting for the Ecothrive Life Cycle. I wanted to top dress, but it's been delayed unfortunately. I am using my Greenleaf nutrients products which I bought on Amazon. I got the Mega Crop 2 part system Part A and Part B. I have the Sea K(elp), and the bud explosion PK booster. I really wanted to get some of their sweet candy asking read many positive reviews. Unfortunately, for me, this is unavailable to buy currently. So that's a little disappointing. I needed to do a good watering so when my nutes were delivered today, I got excited 🤗 I watered 2ltrs of dechlorinated water per plant, PH'd to 6.4, containing the following nutrients: ♡ 1g Mega Crop Part A ♡ 1g Mega Crop Part B ♡ .5g Sea K(elp). The plants drank this up within a few hours. I'm going to try and hold off on watering in hopes that my Ecothrive Life Cycle will arrive so I can top dress and water it in then. 20.2.25: My Ecothrive Life Cycle arrived yesterday, and the plants are ready for their top dress and a good watering in. I have some Biobizz Light Mix, Canna Coco,and perlite. I'm going to use this as a base to mix my amendments in. I'm going to fill my 5 gallon bucket with about 4.5 gallons of my top dress mix. I will distribute this across 6, 4-5 gallon pots. Then I will water in well with Greenleaf nutrients Mega Crop Parts A+B and Sea K(elp). I've made a crude attempt to video mixing my top dress. Don't listen to the audio. lol, my YouTube didn't stop playing whilst I recorded this 😂 So anyway, I added the following amendments to the above base mix of 4.5 gallons; ♡ 3 TBSP Ecothrive Life Cycle ♡ 3 TBSP Vitalink Bat Guano ♡ 3 TBSP Ecothrive Charge ♡ 1 TBSP RHS Mycorrhizal Fungi granules ♡ 6 TBSP Ground Cinnamon.
Likes
3
Share
@Chubbs
Follow
Sorry for the late weekly update. Took a quick family trip. 2 out of the 3 have been chopped and this one i was giving a couple more days before it's finished. The color and smell is wild on this strain. Almost a reddish purple in color. All in all Happy Growing.
Likes
25
Share
@Jimmy89
Follow
All photos taken day 25 of flower. Started to develop a nice aroma now, I’ll have a little de leaf in a day or two to help lower humidity and uncover some flower sites. Can’t wait for it to warm up so I can switch my heaters off! ✌️
Processing
Likes
2
Share
@BigGGrows
Follow
Well i figured i would try some different this week. I main lined her and topped her on day 9. Lets watch and see how she responds. I feel as though doing this early in veg will allow her more time to adjust before flower. Towards the end of the week 2, four days after the HST....we see 2 new main top braches coming in, as well as some action at the internodal cut point which is indicating a "Fimm" job rather my prior presumption of topping the plant. None the less i am excited to see her grow, and i intend on letting her grow naturally beyond this point....just to see the results.
Likes
24
Share
The cannabis strain Grape Guava can be a purple strain, depending on its specific phenotype and genetic makeup. While not all phenotypes of Grape Guava are purple, some variations, such as the Zatix Grape Guava, are noted for their striking purple appearance due to the genetic expression of anthocyanin pigments. In a garden of green, Grape Guava gleams, With its fruity aroma, enchanting dreams. Clusters of grapes, guava's sweetness ignite, A strain so divine, in purple and white. Euphoria whispers, a lush fruity haze, Grape Guava's embrace, a tranquil daze. Off and away.@1400ppm. The increased CO2 allows plants to thrive at higher temperatures, which in turn necessitates higher humidity to maintain the ideal VPD for healthy growth and transpiration. 80F -5F = 75F LST with 70% RH = 0.72 kPa. Higher temperatures and humidity promote rapid growth, nutrient uptake, and photosynthesis while maintaining a lower stress level. Temperature influences the rate of enzymatic reactions involved in aerobic respiration. Enzymes, such as those involved in glycolysis, the Krebs cycle, and the electron transport chain, work most efficiently at an optimal temperature range. In low temperatures, enzymatic activity will slow down, thus reducing the rate of aerobic respiration. In high temperatures, enzymes can become denatured, thus impairing their function and stopping the process of aerobic respiration. Glucose is the primary fuel for aerobic respiration. The rate of aerobic respiration increases with the availability of glucose, as it is the starting point for glycolysis. If glucose levels are low, cells may rely on alternative energy sources such as fatty acids or amino acids , but these processes may yield less ATP or be less efficient. To determine this effect, carbon dioxide volume was measured (as carbon dioxide is an output of aerobic respiration) A seed germinated via skotomorphogenesis (in the dark) will generally develop faster in its initial stages to reach light, though it will be etiolated (elongated and weak) and will switch to slower, more robust photomorphogenesis (light development) once it emerges into light. While skotomorphogenesis is a rapid, growth-oriented process for soil escape, it's a temporary phase; photomorphogenesis is a more sustainable development program that prepares the seedling for photosynthesis. 18/6 with the 6 being IR instead of darkness, keeping temps overnight a neat 77F-80F. PPFD overnight 1.8. Think of my tent as a lung. What goes in must come out. When the rate of air going out exceeds the amount of air coming in, it creates a negative pressure. Tent concaves (bends in). If set up correctly, your RH will begin to drop slowly to the desired level you set, and the extraction turns off when it reaches 50% RH. The plant, as it performs cellular respiration, will always be releasing more water into the air, so the RH% of the tent overnight will always increase, so long as oxidative phosphorylation is occurring. As soon as the RH% creeps back up to 55%, the extraction turns back on, over and over, this creates a strong pressure differential which will work wonders on your grow. replicating high and low pressure fronts in nature, critical for oxygen diffusion, but more importantly, full control of your RH%. Moisture will not transfer from a saturated atmosphere to another if that air is already at or above its saturation point, meaning the air can't hold any more water vapor. Once I understood that water is produced as a by product during cellular respiration, specifically at the very end of the electron transport chain (ETC) where electrons are finally transferred to molecular oxygen, the higher the RH of the air, the more resistance there is for more moisture to be added to that environment, and effects the ease with which it does so. But none of that water comes from the pot; it's pulled from the air. If you run high daytime RH, your medium/pot is 100% reliant on transpirational root pull to move water. ZERO evaporation happens across the atmosphere if the tent air has high RH%, the medium cannot release its water through evaporation. Once a canopy develops, light no longer slowly wicks and evaporates from the topsoil. The Soil-Plant-Atmosphere Continuum (SPAC) describes the continuous pathway and process of water movement, driven by a gradient in water potential, from the soil, through the plant's roots, stem, and leaves, and finally evaporating into the atmosphere through transpiration. There is evaporation, there is transpiration, then there is evapotranspiration; Evapotranspiration (ET) is the combined total of two processes: evaporation (water lost directly from soil and surface water into the atmosphere) and transpiration (water released from plants to the atmosphere through their leaves). Evapotranspiration represents the total amount of water that moves from the medium into the air. There is no such thing as a medium with too much water, only a medium that retains too much for too long. The water must always flow efficiently from one atmosphere(Medium) to another(Air) in a timely manner. Moisture is a critical factor for bacterial growth and decay. Dictating how long it's allowed to sit in any one location for any given period is a key preferred control. To ensure a net reduction in a bacterial population, the rate of removal (ET) must exceed the rate of bacterial growth (decay rate), which is often modeled as a growth rate for the specific bacterium under the given conditions. By optimizing daytime VPD, we also optimize conditions for bacterial growth to explode exponentially above 77°F.. If water is allowed to sit in a medium without an escape within a timeframe, nothing good will happen. IF High RH is maintained overnight as well as during the day, placing 100% of water movement at the behest of daytime transpiration, roots can only pull where they can reach, and if soil is compressed above a certain point, moisture will become trapped in a medium with no way of moving day or night. This will begin the countdown for decay to take hold. When water stagnates in a medium, it loses oxygen, creating anaerobic conditions that foster the growth of harmful microorganisms like bacteria and fungi, which can produce toxins and disease vectors. Thigmomorphogenesis, the process by which plants respond to mechanical stimuli like touch by altering their growth and development, resulting in significant morphological changes to improve survival against mechanical perturbations. This complex response involves sensing touch and initiating physiological and genetic responses, leading to changes in form and structure over days or weeks. The process is triggered by physical forces such as wind, rain, or touch. Plants adapt to these stimuli by changing their shape and structure, which may include slower growth, thickened stems, or altered leaf development. Plants possess sophisticated mechanisms to detect even subtle mechanical stimuli and initiate responses. A variety of molecules, including calcium ions, jasmonates, ethylene, and nitric oxide, are involved in signaling these mechanical inputs. Touch can induce the expression of genes that encode proteins for calcium sensing, cell wall modification, and defense mechanisms. A plant exposed to constant wind may become shorter and sturdier. A plant that is touched frequently might grow slower to conserve energy and develop thicker cell walls. These changes increase a plant's resilience and ability to survive in harsh environments. Let's get Thiggy with it.
Likes
4
Share
@Ensign420
Follow
|»» LOG DISCLAIMER: Not intended as a grow guide. Grow log entries are usually posted 3 weeks later and are for my learning reference. ««| Introduction - Week 26 Summary - Ensign's log, stardate 17608.3, Wow what a week! Drying is always pretty simple and been checking daily. Buds are drying nicely and terps are smelling pretty dank!! Most of the week has been in the veg tent with tissue culture! Mixed another batch of establishment media and took proper explant cuttings. Also super-cropped the mothers to even out the canopy. Ahh yea! Getting hyped for trim day next week! Next week will also be the last week for this grow log, but am already planning out the next cycle. Anyways! Onwards to next week! [START OF WEEK 26] ========================================================== ---------- [ 4x4 MAIN TENT ] ---------- Heady OG BX1 #1 [Round4 ~Wk19] - WEEK 26 - Dry Wk1 ----------- [ 3x3 VEG TENT ] ------------ TKO - WEEK 09 - Full Veg Gorilla Goat #1 - WEEK 05 - Full Veg Heady OG BX1 - WEEK 09 - Full Veg Garlic Budder OG#1 - WEEK 05 - Full Veg 10/13/25 → 10/19/25 This Week's Estimated Goals ---------------------------------------------------------------------------------------------- DLI: ~0 mol/m²/d PPFD: ~0 μmol/m²/s VPD: ~1.5 kPa This Week's Meter Readings & Averages ---------------------------------------------------------------------------------------------- Light On/Off: 00:00 - 00:00 | Wattage: ~000.0W [LV00] Distance From Canopy: ~00” DLI: ~0.00 mol/m²/d PPFD: ~0 μmol/m²/s VPD: ~1.17 kPa Soil %: [47.4, 34.1, 35.0, 55.7, 43.7, 43.6, 44.0, 43.3] ========================================================== Day 01 - Monday - 10/13/25 - Total Days: 183 ----------------------------------- Daily Averages ~[+01:00] - Temps: 78.8°F [26.0°C] - Humidity: 64.4% - VPD: 1.19 kPa - Soil %: [49, 34, 35, 57, 44, 44, 44, 42] ----------------------------------- - [22:05]: Night check on the 4x4 tent. --- Ca-Caw!! Looking great! --- Heady OG BX1 #1 is drying along and no signs of mold. Also airflow and RH is stable and within the 60-70% range. --- Getting stoked! Trim day is 9 days away! - [22:09]: Checked the Ecowitt soil moisture sensor data: ------------------ [ 4x4 MAIN TENT ] --------------- ------ 48% - [CH01 FT » G30 - Heady OG BX1 #1] ------ 35% - [CH02 FB » G30 - Heady OG BX1 #1] ------ 35% - [CH03 BT » G20 - TKO] ------ 56% - [CH04 BB » G20 - TKO] ------------------ [ 3x3 VEG TENT ] ---------------- ------ 46% - [CH05 BL » GR7 - TKO] ------ 40% - [CH06 BR » GR7 - Gorilla Goat #1] ------ 40% - [CH07 FL » GR7 - Heady OG BX1 #1] ------ 40% - [CH08 FR » GR7 - Garlic Budder OG#1] --------- Veg: 38% - 45% | Flower: 45% - 55% --------- General: 30% [Dry] «| 45 - 60% [Moist] |» 70% [Wet] - [22:18]: Checked the 3x3 veg tent. --- Looking healthy in the veg garden! --- All of the vegging mothers are looking great and the canopy is starting to even out. --- Also clones look healthy and no need to water yet. --- The stems, err, I mean, explants, don’t show any signs of contamination. --- Staying positive, glad the growth media is sterile and the overall procedure was successful. --- Anyways! Plan to create more establishment media and cut proper explants soon! - [22:21]: Checked the humidifiers. --- Tanks are still full and no leaks found. Day 02 - Tuesday - 10/14/25 - Total Days: 184 ----------------------------------- Daily Averages ~[+01:00] - Temps: 76.9°F [24.9°C] - Humidity: 64.8% - VPD: 1.11 kPa - Soil %: [46, 34, 35, 56, 43, 43, 44, 43] ----------------------------------- - [21:44]: Night check on the 4x4 tent. --- Looking good in the dry tent! --- Heady OG is drying along and humidity levels look great! --- Nothing to do but maintain and wait to trim in 8 days! - [21:55]: Checked the Ecowitt soil moisture sensor data: ------------------ [ 4x4 MAIN TENT ] --------------- ------ 45% - [CH01 FT » G30 - Heady OG BX1 #1] ------ 34% - [CH02 FB » G30 - Heady OG BX1 #1] ------ 35% - [CH03 BT » G20 - TKO] ------ 56% - [CH04 BB » G20 - TKO] ------------------ [ 3x3 VEG TENT ] ---------------- ------ 41% - [CH05 BL » GR7 - TKO] ------ 40% - [CH06 BR » GR7 - Gorilla Goat #1] ------ 47% - [CH07 FL » GR7 - Heady OG BX1 #1] ------ 46% - [CH08 FR » GR7 - Garlic Budder OG#1] --------- Veg: 38% - 45% | Flower: 45% - 55% --------- General: 30% [Dry] «| 45 - 60% [Moist] |» 70% [Wet] - [21:59]: Checked the 3x3 veg tent. --- Looking healthy and growth is raging! --- All mothers are looking beautiful! --- Clones are getting taller and looking healthy! --- Gorilla Goat #2 needs watering. Let’s go Ensign! - [22:03]: Here is the starting initial watering range: ------ Gorilla Goat #2 » 255.4g → 300.3g and was last watered 4 days ago. --------- General Solo Range: [Dry] «| [Initial Cup Weight] + ~55-100g |» [Wet] --- Took the starting weight before watering, ------ Gorilla Goat #2 » 230.8g --- While on a scale, --- Gently misted her straw mulch with RO water. --- Tried to keep the top growth dry. --- Misted 5-10 sprays. Waited a few seconds, then misted again. --- Made sure to reference the watering weights. --- Repeated this process until the cup weighted at least 300g. --- There was no runoff. - [22:23]: Took the saturated weight after watering, ------ Gorilla Goat #2 » 345.7g --- Marked the watering date on the side of the cup. Also marked the saturated weight on the back. --- Placed her back into the tent. --- Decided to train and super-crop both clones. --- Bent the taller branches to lower the canopy. - [22:38]: Checked the humidifiers. --- Tanks are still full and no leaks found. --- Onwards Ensign! Day 03 - Wednesday - 10/15/25 - Total Days: 185 ----------------------------------- Daily Averages ~[+01:00] - Temps: 75.6°F [24.2°C] - Humidity: 63.8% - VPD: 1.09 kPa - Soil %: [48, 34, 35, 56, 44, 43, 44, 42] ----------------------------------- - [+01:33]: Quick night check on the 4x4 tent. --- Looking great in the dry tent! --- Also starting to smell dank! --- 7 more days until the big trim! - [+01:37]: Checked the 3x3 veg tent. --- Veg garden is healthy and growth is green! --- Both the Heady OG BX1 #1 and TKO mothers will need another topping soon. --- Clones in the propagation tray also look great and no need to water. --- The explant media is still looking sterile with no signs of contamination. --- Easy night in the garden. Nice! - [+01:40]: Checked the humidifiers. --- Tanks are still full and no leaks found. --- Okay! Tomorrow plan to dive back into tissue culture and prep more growth media. --- Onwards Ensign! Day 04 - Thursday - 10/16/25 - Total Days: 186 ----------------------------------- Daily Averages ~[+01:00] - Temps: 74.6°F [23.7°C] - Humidity: 62.2% - VPD: 1.11 kPa - Soil %: [46, 34, 35, 56, 43, 44, 44, 45] ----------------------------------- - [11:41]: Alright! Back to tissue culture and time to start another batch of establishment media! --- Took the plant growth regulators out of cold-storage (my fridge). ------ [ » SMOKES A BOWL « ] --- While the products warmed up, gathered the necessary supplies and setup my workstations. --- Currently, focusing on: ------ PHASE 01 » ESTABLISHMENT --------- » DAY 01 » MEDIA - PART 01 - Mixing the growth media --------- » DAY 01 » MEDIA - PART 02 - Sterilization of media and tools [via autoclaving] --- Going to use the same establishment formula, but doubling the yield. --- Also using RO water instead of distilled water. --- Here's the establishment media formula: --- [» VER.0001 |» INITIAL TROPICAL PLANTS FORMULA |» 0.5L (500mL) RO WATER «] ------ MS [Muashige & Skoog] --------- » 2.22g ------ Sucrose [Cane Sugar] --------- » 15g ------ BAP [6-Benzlaminopurine | Cytokinin] --------- » 0.5mg » 0.5mL » 500μL ------ IBA [Indole-3-Butyric Acid | Auxin] --------- » 0.05mg » 0.05mL » 50μL ------ AGAR [Jelling Agent] --------- » 3.5g ------ PH [Potential Hydrogen] --------- » 5.7 --- [» 1mg/mL CONCENTRATION ratio | 1mg = 1mL | 1mL = 1000μL «] - [12:59]: Time to prep the growth media! --- Made sure to turn OFF the lung-room's oscillating fan. --- Filled a measuring cup with 400mL of RO water. --- Dropped a clean magnetic mixing bar into the measuring cup. - [13:05]: Placed the measuring cup on the magnetic stirrer. --- Turned the unit ON and have the unit on LOW. - [13:11]: Using a precision scale (sensitive to 0.01g) along with a micro-pipette (1000μL capacity along with tips) and disposable (100mL) weigh boats, ------ Added 2.22g of MS [Muashige & Skoog] ------ Added 15g of Sucrose [Cane Sugar] ------ Added 500μL of BAP [6-Benzlaminopurine | Cytokinin] ------ Added 50μL of IBA [Indole-3-Butyric Acid | Auxin] ------ Added 3.5g of AGAR [Jelling Agent] ------ Then filled the measuring cup to the 500mL line before covering the top with plastic wrap. --- Alright! - [13:46]: Let the media mix on the magnetic stirrer for a bit. --- Have the unit set to LOW with a steady vortex. ------ [ » ~20 MINUTES LATER « ] - [14:09]: Okay! Time to pH the establishment media! --- Gently removed the bottom cap of the AC Infinity PH Meter PRO [AC-PHM7]. Placed the cap in the storage case for later. Covered the top with plastic wrap (KCL solution still inside the cap). --- Swirled the probe in a cup of RO water to rinse off the storage solution. --- Shook the excess water out and wiped the unit with a clean paper towel making sure all mineral buildup was removed (kept away from the very tip of the probe). --- Temporarily placed the meter back into the cup of RO water. --- Removed the plastic wrap of the establishment media. - [14:13]: Using the AC Infinity PH Meter PRO [AC-PHM7], --- Took the establishment media's initial pH reading. --- The pH was at 5.14 --- Using the micro pipette, ------ Added pH Up solution. --- Made sure to let the media solution mix for a bit before checking for pH readings. - [14:21]: Adjusted the media's pH until it stabilized to 5.58 --- For this batch, tried to go for a range of 5.4 to 5.8 pH. --- Also glad that I did not need to add PH down. - [14:43]: Poured the pH'd establishment media into separate polypropylene containers. --- Made sure to re-mix the media solution between container fillings. --- Ended up splitting the media solution into 12 containers. ------ 8x » 125mL Polypropylene Bottles [with screw cap lids] ------ 4x » 236mL (0.5pt) Glass Mason Jars [with polypropylene jamming lids] --- Have the lids of all vessels loosely on and set each aside for later autoclaving. --- Also filled 12 empty polypropylene bottles with RO water and placed the lids on loosely (4 bottles are re-used). - [14:58]: Prepped the tools for sterilization. --- Took a new 5.25in x 10in sterilization pouch and added the following tools: ------ 3x stainless steel forceps ------ 3x stainless steel scissors --- Before placing into the pouch, wiped each tool with a paper towel sprayed with 70% isopropyl alcohol. --- Sealed the bag and marked the date. --- Time to autoclave everything in the pressure cooker! --- Filled a Presto 23qt-Pressure Cooker with 12 cups of RO water. - [15:06]: Added a few aluminum foil balls to the bottom of the pressure cooker. --- Placed the first rack on top of the foil. --- Made sure the rack was level and stable resting above the water. --- Gently placed the containers of media into the pressure cooker and onto the first rack. Lids are still loose. --- Made sure to give space for each container and kept them away from the sides of the pressure cooker. --- Placed a second pressure cooker rack on top of the containers of media. --- Placed the containers of RO water onto the second rack. Lids are still loose. --- Placed the third rack on top of the containers of water. - [15:16]: Lastly, placed the sterilization bag of tools on top of the third rack. --- Took the pressure cooker lid and made sure the release vent was clear of debris before placing it on. --- Sealed and secured the lid. --- Pressure vessel has been sealed! --- Alright! Time to sterilize! --- While keeping the vessel level and straight up, moved the sealed pressure cooker to the kitchen for heating. - [15:23]: Placed the pressure cooker onto a butane-gas stove. --- Turned the stove ON and set it to HIGH. ------ [ » ~20 MINUTES LATER « ] --- Once steam was venting out of the release vent, --- Placed the metal rocker onto the vent. --- Shortly afterwards, the pressure top-lock sprung up to indicate the vessel was under pressure. --- Then the pressure gauge started to rise. ------ [ » ~10 MINUTES LATER « ] --- At 15psi, the metal rocker started to rock! - [15:56]: Turned down the stove down to LOW. --- Set a timer for 15 minutes and began monitoring the pressure gauge. --- Maintained the 15psi by making minor adjustments to the stove. ------ [ » ~15 MINUTES LATER « ] - [16:12]: Turned the stove completely OFF and waited until the pressure cooker's top-lock dropped down which indicated that pressure levels were safe to open. ------ [ » ~40 MINUTES LATER « ] --- Once the pressure cooker was at safe levels (0psi) and the top-lock was down, - [16:48]: Moved the pressure cooker into the lung room. --- The pressure cooker was still quite hot so was careful to keep the vessel straight up and level during transport. --- Used towels for insulation. --- Rested the hot pressure cooker onto a stack of 5-gallon buckets covered with layers of towels and folded paper bags. --- Gently opened the pressure cooker and set the lid aside. - [16:57]: While wearing nylon gloves, sprayed my hands with 70% isopropyl alcohol. --- Gently removed the bag of sterile tools placed it onto a Pyrex dish. --- Removed the top rack and set it aside. --- Then one container at a time, --- Gently tightened and secured the lids of each bottle of sterile water before placing onto the Pyrex dish. --- Removed the middle rack and set it aside. --- Then one container at a time, --- Gently tightened and secured the lids of each bottle and jar of sterile media before placing onto the Pyrex dish. --- Throughout the entire process, kept the gloves on and sprayed my hands regularly with 70% isopropyl alcohol. --- Decided to store all the bottles in the Pyrex dish. - [17:16]: Have the dish resting on a shelf in the lung room. The jars of media are set right next to the Pyrex dish on a towel. --- To prevent dust, covered everything with towels. --- Done for now and will check on the growth media tomorrow. --- If all goes well, should be taking new explant cuttings in a couple days! - [17:39]: Night check on the 3x3 veg tent. --- Looking beautiful and healthy in the veg garden! --- All moms are getting bushy and getting pretty close to the grow light. --- Since I plan to take explant cuttings soon, not going to top or train quite yet. --- Clones also looking healthy and seem unaffected by the super-cropping. Nice! - [17:57]: Checked the Ecowitt soil moisture sensor data: ------------------ [ 4x4 MAIN TENT ] --------------- ------ 45% - [CH01 FT » G30 - Heady OG BX1 #1] ------ 34% - [CH02 FB » G30 - Heady OG BX1 #1] ------ 35% - [CH03 BT » G20 - TKO] ------ 55% - [CH04 BB » G20 - TKO] ------------------ [ 3x3 VEG TENT ] ---------------- ------ 43% - [CH05 BL » GR7 - TKO] ------ 45% - [CH06 BR » GR7 - Gorilla Goat #1] ------ 42% - [CH07 FL » GR7 - Heady OG BX1 #1] ------ 44% - [CH08 FR » GR7 - Garlic Budder OG#1] --------- Veg: 38% - 45% | Flower: 45% - 55% --------- General: 30% [Dry] «| 45 - 60% [Moist] |» 70% [Wet] - [17:59]: Checked the 4x4 main tent. --- Ca-Caw!! I got Headies! --- Wow! Heady OG BX1 #1 is drying along beautifully and she is smelling dank! --- Also no signs of mold and RH levels look stable! --- 6 more days until the big trim! - [18:11]: Checked the humidifiers. --- Tanks are still full and no leaks found. --- Wow what a day! --- Still gots more to do! --- Let’s go! Let’s grow! --- Onwards Ensign! Day 05 - Friday - 10/17/25 - Total Days: 187 ----------------------------------- Daily Averages ~[+01:00] - Temps: 76.0°F [24.4°C] - Humidity: 62.0% - VPD: 1.16 kPa - Soil %: [48, 34, 35, 55, 44, 44, 44, 42] ----------------------------------- - [22:57]: Night check on the 4x4 tent. --- Ca-Caw! Headies is smelling dank! --- RH levels are getting a bit dry, but are okay. --- Wow buds are frosty with trichomes! --- With 5 days until trim day, getting stoked! - [23:04]: Checked the Ecowitt soil moisture sensor data: ------------------ [ 4x4 MAIN TENT ] --------------- ------ 47% - [CH01 FT » G30 - Heady OG BX1 #1] ------ 34% - [CH02 FB » G30 - Heady OG BX1 #1] ------ 35% - [CH03 BT » G20 - TKO] ------ 55% - [CH04 BB » G20 - TKO] ------------------ [ 3x3 VEG TENT ] ---------------- ------ 46% - [CH05 BL » GR7 - TKO] ------ 40% - [CH06 BR » GR7 - Gorilla Goat #1] ------ 45% - [CH07 FL » GR7 - Heady OG BX1 #1] ------ 50% - [CH08 FR » GR7 - Garlic Budder OG#1] --------- Veg: 38% - 45% | Flower: 45% - 55% --------- General: 30% [Dry] «| 45 - 60% [Moist] |» 70% [Wet] - [23:11]: Checked the 3x3 veg tent. --- Looking healthy in the veg garden! --- Mothers are getting bushy and tall! --- Super-cropped and trained the taller branches down to lower the canopy. --- Plan to take tissue culture cuttings tomorrow so glad there are plenty of tops to choose. Still deciding on which mother to preserve next. --- Clones in the propagation tray look healthy! --- The original Garlic Budder #2 clone needs watering. - [23:26]: Here is the starting initial watering range: ------ Garlic Budder OG#2 » 256.4g → 300.2g --------- General Solo Range: [Dry] «| [Initial Cup Weight] + ~55-100g |» [Wet] --- Took the starting weight before watering, ------ Garlic Budder OG#2 » 258.9g --- While on a scale, --- Gently misted her straw mulch with RO water. --- Tried to keep the top growth dry. --- Misted 5-10 sprays. Waited a few seconds, then misted again. --- Made sure to reference the watering weights. --- Repeated this process until the cup weighted at least 300g. --- There was no runoff. - [23:40]: Took the saturated weight after watering, ------ Garlic Budder OG#2 » [000.0]g --- Marked the watering date on the side of the cup. Also marked the saturated weight on the back. --- Placed her back into the tent. - [23:45]: Checked the humidifiers. --- Tanks are still full and no leaks found. Day 06 - Saturday - 10/18/25 - Total Days: 188 ----------------------------------- Daily Averages ~[+01:00] - Temps: 76.8°F [24.9°C] - Humidity: 60.3% - VPD: 1.25 kPa - Soil %: [47, 34, 35, 55, 44, 44, 44, 47] ----------------------------------- - [15:19]: Decided to decrease the VPD level a bit. --- Within the AC Infinity App, --- Changed the schedule name from 'Flower [12/12]' to 'Drying [0/24].' Oops. --- For the Main Tent [4x4] controller, --- Adjusted the 'Drying [0/24]' Schedule for the exhaust fan. ------ Decreased the VPD LOW trigger value from 1.5kPa to 1.4kPa --- Adjusted the 'Drying [0/24]' Schedule for the humidifier. ------ Decreased the VPD target value from 1.5kPa to 1.4kPa --- This should increase the relative humidity a bit and will maintain a 60-65% range - [16:59]: Evening check on the 3x3 veg tent. --- Wow the veg garden is raging with healthy growth! --- Even with the lower veg temps, growth has been perky and bushy! --- The TKO mother has been looking a bit on the purple-side, but I plan to increase the temps back after trim day. - [17:23]: Okay! Time to continue the tissue culture journey! --- Checked on the sterilized media, water, and tools. --- Ooo yea! The growth media in the glass jars have solidified nicely! --- The media in the bottles also look great! Found only one that did not gel properly. --- Hmm. The sterile water bottles are not looking sterile. Unlike the first batch (using distilled water), each RO bottle had tiny white particles floating in the water. --- I think this was due to the water source. The RO water used was from the plant reservoir. For the next sterilization, will try using water straight from the tap. Will discard the entire batch and try again later. - [17:34]: Anyways! Time to cut and sterilize another batch of explant cuttings. --- Using the similar protocols as last time, but with a few changes. --- Instead of distilled, using reverse-osmosis (RO) water. --- Also simplifying the workflow and will not be using the sterile water. --- Only taking cuttings from one cultivar. --- Today, attempting to preserve Heady OG BX1 #1 --- Unlike the last attempt, going to be cutting apical nodes and will leave all leaf growth on. --- Last attempt was more for monsteras and not cannabis. - [17:35]: Made sure the lung room's oscillating fan was OFF during the entire process. --- Put on a fresh pair of nitrile gloves. --- Okay! Let's grow Ensign! - [17:47]: Filled a glass beaker with 180mL of RO water. --- Using a micro-pipette, ------ Added 20mL of Clorox bleach --- Mixed the solution. - [17:52]: Poured the bleach solution into a glass mason jar. ------ Added 1 drop of Dawn dish soap. --- Dropped a magnetic mixing rod into the jar before setting it onto the magnetic stirrer. --- Turned the unit ON and set it to a low setting. --- Placed a polypropylene lid loosely on. - [18:02]: Rinsed and filled the glass beaker with 70% isopropyl alcohol. --- Filled another glass beaker with RO water before adding a drop of Dawn dish soap. Mixed the solution. --- Okay! Time to take the cuttings! --- Using a clean pair of trimmers, - [18:09]: Gently cut two clone cuttings from the Heady OG BX1 #1 mother. --- Stripped each cutting down to 2-inch apical nodes making sure to leave about 0.5 inch of stem growth for planting. ------ Prepared a total of 2 nodal cuttings. --- Dropped the nodal cuttings into the cup of soapy water. --- Swirled the cuttings in the soapy water for a bit. --- Opened the jar containing the 10% bleach solution. --- Using clean tweezers, --- Took each cutting out of the RO water and carefully submerged it into the beaker of 70% isopropyl alcohol for about 30 seconds. --- Then transferred the cutting from the isopropyl alcohol straight into the jar of bleach solution. --- Once both cuttings were in the jar, sealed the top with the polypropylene lid. - [18:23]: Flipped and set the entire bleach jar upside down onto the magnetic stirrer. --- Started using the magnetic stirrer. --- But the cuttings were getting hit by the bar so ended up turning the unit OFF. --- Instead, made sure to swirled the bottle every few minutes to agitate the cuttings. --- For a proper sterilization, the cuttings should be agitated in the hypochlorite (bleach) solution for at least 20 minutes. --- While waiting for the explants to sterilize, prepped the still air box. - [18:39]: Unfolded and placed a Safloga still-air box onto my desk. --- Thoroughly misted the inside of the air box with 70% isopropyl alcohol making sure to coat the entire chamber. --- Then isopropyl misted and placed the following items inside of the still air box, ------ x1 » Jar of Establishment Media ------ x1 » Bottle of Establishment Media ------ x1 » Glass-Bead Sterilizer ------ x1 » Roll of Plastic Wrap [pre-cut] ------ x1 » Sterilization Bag Containing: --------- x3 » Stainless Steel Forceps --------- x3 » Stainless Steel Scissors --- Made sure to fully coat the outside of the tool bag and each of the containers with 70% alcohol. --- The bag had a torn corner (Oops), so made sure to spray the inside with a few mists of isopropyl alcohol. --- For the glass-bead sterilizer, ------ Wiped the entire unit with isopropyl alcohol. ------ Before filling the unit with the included beads, misted the heating chamber with a spray of isopropyl alcohol. ------ Misted the glass beads again with a spray of isopropyl alcohol. --- Set the cleaned glass-bead sterilizer into the still air box. - [19:02]: Still air box fully prepped for explants! --- Okay! Explant nodal sterilization complete! --- While still wearing gloves, --- Misted the outside of the explant jar with 70% isopropyl alcohol before placing it into the still-air box. --- Turned the glass-bead sterilizer ON. --- Made sure to re-seal the chamber. - [19:05]: Okay! Finally time to start the tissue culture transplant! --- Let's go Ensign! --- Sprayed my gloved hands with 70% isopropyl alcohol (also put on a pair of cloth arm sleeves), --- Placed my hands through the arm holes and into the still air box to begin the process. --- Started by laying out my initial workspace: ------ » Far Left Quadrant » Jar of Sterile Establishment Media ------ » Far Center » Bottle of Sterile Establishment Media ------ » Far Right Quadrant » Glass-Bead Sterilizer ------ » Mid Center » Bleach Jar with Explant Cuttings [Main Workspace] ------ » Near Left Quadrant » Empty [Trash Area] ------ » Near Right Quadrant » Bag of Sterile Tools & Roll of Plastic Wrap --- Opened the bag of tools and placed the forceps and scissors into the pre-heated glass-bead sterilizer. --- Set the bag in the trash area (near left quadrant). --- Loosened the lids of both containers of sterile media but did not remove the lids. The lids were resting on top and could easily be lifted. --- Also took lid off of the bleach jar and gently set it on the table. --- Took the jar of sterile media and set it in the center of my workspace (to the right of the bleach jar). --- Using my left hand, took a set of scissors from the glass-bead sterilizer and gently cut the bottom of the first cutting. --- Once the bottom cut was made, placed the scissors back into the glass-bead sterilizer. --- Using my left hand, lifted the lid off of the jar of sterile media and inserted the trimmed end of the cutting straight into the growth media (using my right hand). --- Covered the jar with the lid and placed the forceps back into the glass-bead sterilizer. --- Tighten the lid of the jar and set it aside. ------ [ » REPEATED THE ABOVE PROCESS FOR THE BOTTLE OF GROWTH MEDIA « ] --- Once the last cutting was transferred from the bleach jar into the sterile media, --- Turned the glass-bead sterilizer OFF. --- Cleaned up my workplace and placed the scrap stem tips and bleach jar out of the way (near left quadrant). - [19:28]: Wrapped the lid of each explant container with plastic wrap before setting it in the center of the workspace. --- Explant transplant completed! - [19:59]: Using a label printer (Brother DT410), made a set of labels for each container: ------ Heady OG BX1 #1 | 04.24.25 | Photo | Reg ------ Formula: v0001 | ExBatch: 0002 | Lot: 01 | Pod: 01 ------ Establishment Media | Sealed On: 10/18/25 --- Opened the still air box. --- Then one container at a time, took an explant out and wrapped the lid with a label. --- Set the labeled containers onto the propagation tray (in the 3x3 veg tent). - [20:07]: Done! ------ The explants are around 37 μmol/m²/s which gives a DLI of 2.40 mol/m²/d under an 18/6 light cycle. --- Will check daily for contamination. --- Ca-Caw!! Ahh yea! --- Heady OG BX1 is now officially my first true attempt at cannabis tissue culture! --- Using this new workflow, I may try reusing the TKO media. Do plan to take new cuttings soon. May even try using the liquid media. --- Shout out to microclone and Bill Graham! His 'Tissueponics' video contains tips and tricks of the trade that have straight up changed the way I think of DIY cannabis tissue culture. --- Plan to further refine my process and will continue to refine the workflow with each attempt. - [20:15]: Checked the Ecowitt soil moisture sensor data: ------------------ [ 4x4 MAIN TENT ] --------------- ------ 54% - [CH01 FT » G30 - Heady OG BX1 #1] ------ 34% - [CH02 FB » G30 - Heady OG BX1 #1] ------ 35% - [CH03 BT » G20 - TKO] ------ 55% - [CH04 BB » G20 - TKO] ------------------ [ 3x3 VEG TENT ] ---------------- ------ 43% - [CH05 BL » GR7 - TKO] ------ 48% - [CH06 BR » GR7 - Gorilla Goat #1] ------ 42% - [CH07 FL » GR7 - Heady OG BX1 #1] ------ 45% - [CH08 FR » GR7 - Garlic Budder OG#1] --------- Veg: 38% - 45% | Flower: 45% - 55% --------- General: 30% [Dry] «| 45 - 60% [Moist] |» 70% [Wet] - [20:56]: Checked the 4x4 tent. --- Ca-Caw! Looking great my ladies! --- Humidity levels are still a bit on the dry side, but still okay. - [21:08]: Checked the humidifiers. --- Tanks are still full and no leaks found. --- Wow what a day! --- Oh yea, 4-more days until trim day!! Ca-Caw! Let’s go! Day 07 - Sunday - 10/19/25 - Total Days: 189 ----------------------------------- Daily Averages ~[+01:00] - Temps: 76.7°F [24.8°C] - Humidity: 59.4% - VPD: 1.27 kPa - Soil %: [48, 35, 35, 55, 44, 43, 44, 42] ----------------------------------- - [07:08]: Quick morning checked on the 3x3 veg tent. --- The veg garden is healthy and perky! --- All moms and clones are healthy and raging with growth! --- Both Heady OG BX1 #1 explants also look alive and green! - [19:26]: Night check on the 4x4 tent. --- Ca-Caw! We got MENDO DOPE in the trunk! --- Wow terps are getting loud and buds are drying along nicely! --- Looking frosty and coated in trichomes! --- Three more days until trim day!! - [19:33]: Checked the Ecowitt soil moisture sensor data: ------------------ [ 4x4 MAIN TENT ] --------------- ------ 46% - [CH01 FT » G30 - Heady OG BX1 #1] ------ 35% - [CH02 FB » G30 - Heady OG BX1 #1] ------ 35% - [CH03 BT » G20 - TKO] ------ 54% - [CH04 BB » G20 - TKO] ------------------ [ 3x3 VEG TENT ] ---------------- ------ 40% - [CH05 BL » GR7 - TKO] ------ 43% - [CH06 BR » GR7 - Gorilla Goat #1] ------ 47% - [CH07 FL » GR7 - Heady OG BX1 #1] ------ 41% - [CH08 FR » GR7 - Garlic Budder OG#1] --------- Veg: 38% - 45% | Flower: 45% - 55% --------- General: 30% [Dry] «| 45 - 60% [Moist] |» 70% [Wet] - [19:35]: Checked the 3x3 veg tent. --- Vegging along beautifully in the garden! --- Mothers are getting taller and probably could train, but will wait until tomorrow. --- Clones and explants also look healthy and green! --- Gorilla Goat #2 needs watering! - [19:44]: Here is the starting initial watering range: ------ Gorilla Goat #2 » 255.4g → 300.3g and was last watered 5 days ago. --------- General Solo Range: [Dry] «| [Initial Cup Weight] + ~55-100g |» [Wet] --- Took the starting weight before watering, ------ Gorilla Goat #2 » 244.9g --- While on a scale, --- Gently misted her straw mulch with RO water. --- Tried to keep the top growth dry. --- Misted 5-10 sprays. Waited a few seconds, then misted again. --- Made sure to reference the watering weights. --- Repeated this process until the cup weighted at least 300g. --- There was no runoff. - [20:04]: Took the saturated weight after watering, ------ Gorilla Goat #2 » 345.6g --- Marked the watering date on the side of the cup. Also marked the saturated weight on the back. --- Placed her back into the tent. - [21:41]: With a few days before the big trim, decided to sample a few buds! --- Cut and trimmed branch for sampling and wow she’s got terps! --- Buds are dense and have a gassy diesel funk! Ca-Caw!! Wow! --- Without even curing, pretty sure she’s the one! --- Plan to grow out another cycle (in clone of the same pheno), but I think I found my female for my first breeding project! - [22:01]: Checked the humidifiers. --- Tanks are still full and no leaks found. --- Ahh yea! Three more days until the big trim! --- Also next week will be the last for this log. --- But already stoked for the next! --- Planning on popping more seeds and continuing the pheno hunt for another female! --- Since I lost TKO this harvest cycle, plan to grow a clone cutting of the same pheno (#2). --- As for seeds, popping more regulars and going to attempt to grow some of Mr. Grow-It’s Chillout OG! --- Got a pack of F3s and am stoked to give them a try! --- Also going to sprout some beans of Dead Ops OG from Zaza Genetics! --- Chillout OG, Dead Ops OG, and another round of TKO! Let’s go! Let’s grow! --- Hunters of the dank! Ca-Caw! --- Anyways! --- Onwards to next week! [END OF WEEK 26]
Likes
10
Share
@Lushgaia
Follow
Didn’t expect to see amber already at week 6 but hey all good
Likes
21
Share
I loved every min of her. Shes is hanging to dry and will be trimmed and weighted as she dries. Cant wait to smoke her. She was so heavy in the end she needed yo yo hangers to have her supported under all her weight. I would love the chance to grow her again. Oh my god she is sooo heavy like wow i cant even with her. The rosin she produced is just fire. Lemons and vanilla and so heavy. I would grow her a million times over.
Likes
6
Share
@Comfrey
Follow
Growing well. Some insects hovering around. Soil is moist so I watered only because I wanted to give some field horsetail.
Likes
5
Share
Amo este fenotipo tanto como el otro esta genetica es magistral,cogollos compactos,pegajosos,super duros un aroma muy rico y agradable,no se puede pedir mas,este es el último riego que realizo con nutrientes a partir de ahora comienzo a lavar las raices por tanto solo regaré con agua con su ph bien ajustado a 6,5 para que ka planta se vaya alimentando de todo de lo que quede y eliminar cualquier resto que pueda quedar que empeora la calidad a la hora de fumar,exquisitez de 00 seed bank!
Likes
52
Share
Let's realign our cosmic compass and embark on a harvest report for our magnificent Cosmos F1, a pure CBD strain that has taken us on an extraordinary journey. Brace yourself for cosmic revelations and interstellar delights! After an impressive 11 weeks from seed and 7 weeks of flowering, the time has come to witness the cosmic culmination of our efforts. I carefully hung the entire Cosmos F1 plant to dry, allowing the cosmic energy to infuse every inch of this botanical marvel. It's a sight to behold, with majestic branches reaching for the cosmos, reminiscent of a cosmic dancer frozen in time. As our cosmic queen gracefully dries, her vibrant hues continue to amaze. The shades of green, intertwined with delicate hints of purple and gold, are a testament to her genetic splendor. It's as if she has absorbed the cosmic essence of the universe, transforming it into a visually stunning spectacle. Now, let's talk about the cosmic power of CBD. Our pure CBD strain holds the key to a transformative experience. With minimal psychoactive effects, this cosmic treasure offers a realm of therapeutic benefits. It's like a cosmic massage for the mind and body, soothing and relaxing, allowing us to explore the depths of cosmic tranquility. The decision to hang the entire plant for drying is a testament to our dedication to preserving the cosmic integrity of our harvest. By allowing the branches to hang freely, we encourage a slow and controlled drying process, ensuring that the cosmic essence remains intact. It's a ritual that honors the plant's journey, preserving its cosmic magic for us to enjoy. As we eagerly await the cosmic transformation, let us express our gratitude to the celestial forces that have guided us on this cosmic odyssey. The cosmos has aligned to bring us the extraordinary Cosmos F1, a gift from the cosmic garden gods themselves. We extend our heartfelt appreciation to the cosmic harmony orchestrated by @James and Royal Queen Seeds. In the coming days, our dried cosmic buds will be ready for the next stage of our journey. From cosmic concoctions to cosmic culinary delights, the possibilities are infinite. Imagine infusing the cosmic power of CBD into soothing teas, cosmic creams, or cosmic confections. The universe is our canvas, and with our cosmic harvest, we can create cosmic masterpieces. As we bid farewell to our Cosmos F1, let us cherish the cosmic memories we've shared. The vibrant colors, the pure CBD power, and the cosmic connection we've established with the universe. May our future endeavors be as cosmic and awe-inspiring as this one. Until we meet again, my cosmic friends, lets keep exploring the cosmic wonders, nurturing our cosmic gardens, and let the cosmic energy guide our cosmic creations. May our harvest be abundant, our cosmic experiences be enlightening, and our cosmic journey be filled with celestial blessings. As always thank you all for stopping by and for supporting me on this journey, i am super passion about growing and fell blessed to have you all with me on
Likes
16
Share
Esa familia , estamos otra vez y aquí actualizo la sexta semana de floración de las BlueBerry Cheese del banco de semillas ZambezaSeeds. Estas tienen buen color y el proceso de floración es el correcto su progreso es increíble. Llevo una semana aplicando el ExplotaCogollos de Agrobeta que es Brutal como compacta las flores , palabra. Que ganas ya de acabar estos proyectos y empezar con cosas serias. Os adelanto que lo próximo que que viene son Gelato y Lava Cake, y después Titán F1. Agrobeta: https://www.agrobeta.com/agrobetatiendaonline/36-abonos-canamo Mars hydro: Code discount: EL420 https://www.mars-hydro.com/ Las maximas de temperatura no superan los 26 grados y las mínimas no bajan 20, así que no me puedo quejar. Los niveles de humedad también son los correctos van entre 50%/65% de humedad relativa. Por supuesto el Ph lo estamos dejando alrededor de 6. Hasta aquí es todo, buenos humos 💨💨💨.
Likes
9
Share
@420keef
Follow
Just got my new lamp, happy to show the love my plants been getting :)
Likes
7
Share
Es hat sich viel getan. Das Wetter war gut. Die Luftfeuchtigkeit und die Temperaturen sind teilweise extrem (40 Grad / 25 %Luftfeuchtigkeit). Die Pflanzen stört es soweit nicht. Die Auto Orange hat den Anfang gemacht. Mittlerweile (Tag 36) zeigen alle ihre Vorblüte. Die Auto Orange sind beide um die 60 cm. Die Lemon Kix sind alle sehr groß geworden. Da kratzen 2 an die 90 cm. Sie fangen auch an zu riechen. Der Wasserbedarf steigt auch. Giessen muss ich alle zwei Tage. Batboost bekommen sie bei jedem mal. Bloom wird bei jedem 2 Mal gegeben. Ein gewisses LST habe ich durchgeführt. Die Pflanzenbieger kann ich höchstens 2 Tage dran lassen. Sind sie länger dran brechen mir die Triebe am Bieger. Wahrscheinlich wäre das runter binden und am Topf befestigen die beste Option.