
Likes
Comments
Share


@Unkraut
Follow
nice resinous strain, with strong scent and quite hard hitting high!
check www.sr-organics.com for some topnotch 5 in 1 fertilizer!
root, growth, bloom, micro-organisms, enzymes & vitamins all in one!
CODE: "Unkraut10" for 10% Discount! 😊

Likes
11
Share


@PatriciaGant
Follow
Dane, We all should help one another.
Human beings are like that.
We should live by each other’s happiness - not by each other’s misery.
We don’t want to hate and despise one another, share the Joint.
And mother earth is rich and can provide for everyone.
We can Grow enough Happiness, In this paradise, there is room for everyone.
We only exist to bring joy into the world and The way of life can be free and beautiful,
but we have lost the way.
Grow High and Give the world A smile.
At the end we own nothing more then all our memories, lets make them amazing for everyone,
nothing to loose only everything to win.
A last kiss goodby, a second one, softer and long as a sign, that you are woth it.
That Everyone worth who loved and give.
Enought Hippie Talk, now have a nice day and an even better grow, thx for watching by.
Likes
299
Share


@Metatronix
Follow
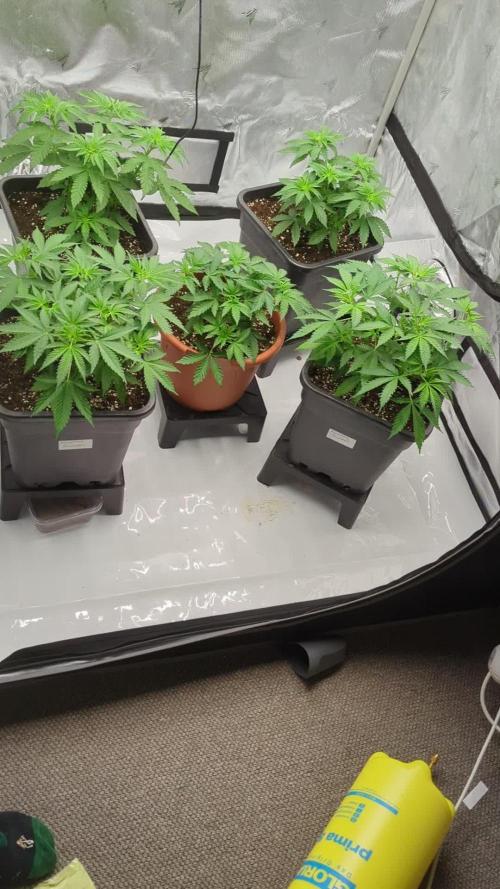
Hi, everyone 👋 a few days ago I was given a TS1000 lamp by Mars Hydro for grow purposes....this is the perfect opportunity to make and test a Bubble Bucket.
I never had one and always wanted to try one out 😎 i had half the stuff needed to build a Bubbler and at this point i"m only lacking a exhaust fan with filter.
As the TS1000 from Mars Hydro brings a powerful 150 Watt on board and 2,3umol/J 💪💪💪 I plan to start with two plants, but because my excellent Mars Hydro grow tent is a 60 x 60 cm (2'x2') I am not able to fit in two Bubblers... so i decided to grow the Amnesia CBD Auto by Dinafem in a bubbler and Blue Cheese Auto(when its sprouts :) in traditional method in soil (for comparison reasons).
If the DWC will work really well and there only place for one plant i will move the Blue Cheese Auto to a different tent... if not they will grow together.
As the Dinafem seed bank is no longer there the seeds i got are a couple years old and i used 4 seeds to sprout one seedling of Amnesia CBD Auto.
Let's start of this babies and see them flourish under the my new awesome Mars Hydro TS1000 lamp.
All the best to my fellow grower, keep it growing friends 💪😍

Likes
37
Share


@MG2009
Follow
08/11/2018
Flowering started,and plants are stretching for sure! Having trouble uploading pics please be patient. Feeding organic big bloom this week at full strength 💪 as it has worked well for these girls in the previous two years.
08/16/2018
Fed Espoma Tomato Tone, and watered in with, Fox farms big bloom, as foliar,and drench. Helping to transition into flowering. See you in a few days for week 2 of flower.
08/17/2018
Day 6 of week 1 flowering, I can smell them at 90" away.
New pics in morning.


Likes
20
Share


@CanadianFillmore
Follow
Start of week 3 of flowering for plants 2 & 3. They are showing signs of heat stress, three days last week temps in the grow room reach 35°c. Aside from some heat stress, the plants still look healthy and the bud sites are developing nicely. Light defoliation of each plant, removing the dying leaves and some of the ones showing signs of dying.


Likes
7
Share


@Reaper
Follow
may 19: day 22 flower
half strength nute scedule from GHE
without additives

Likes
25
Share


@pifflestikkz
Follow
Day 22
25/07/24 Thursday
Still no Feed/water since Tuesday.
Been a humid and overcast two days so not as much evaporation as normal.
All plants happy and healthy 💚
Video updates
Day 23
26/07/24 Friday
De-chlorinated watering pH 6 with 5ml calmag to 5L water.
Watered each with 250ml and had small run off.
I will continue to feed/water with small run offs to help prevent salt build ups.
Video update.
Day 26
29/07/24 Monday
Nice feed today, using de-chlorinated tap water pH 6.
They each had 300ml with small run off.
All looks incredibly happy and healthy!
The Auto Kabul that was mutated and twisted has pulled herself through and is just a bit shorter than the others.
Day 28
31/07/24 Wednesday
End of week😁
De-chlorinated water pH 6 today with Plagron pk13-14 5ml to 5L
Plagron power buds 5ml to 5L
Used 300ml of the 5L solution.
I will be using these on water days from now on as they are advised to be used every irrigation.
We'll see how they perform 💪💚


Likes
23
Share


@gottagrowsometime
Follow
Really happy to harvest this girl. Made sure I pushed her to the max. Just about 70 days. She was done around 65.
14hrs into pre fower and beyond.
I find that with High ppf with less hrs. Makes for much better phenos.
Really happy to say. This is SUCH A 100% TOP strain. And it'll be 500% a auto that I'll repeat
Mind you I've hardly ever repeated any strains. Except mimosa X orange punch auto and super lemon haze. And a few CBDs. So, if anything that should speak volumes to me saying this is a tip top strain.
Going to run her with one of their new autos, apple strudel is meant to have very high terps. All about the taste. And this Apricot Auto from Fastbuds has this in spades.

Likes
8
Share

@Bread_n_Buds
Follow
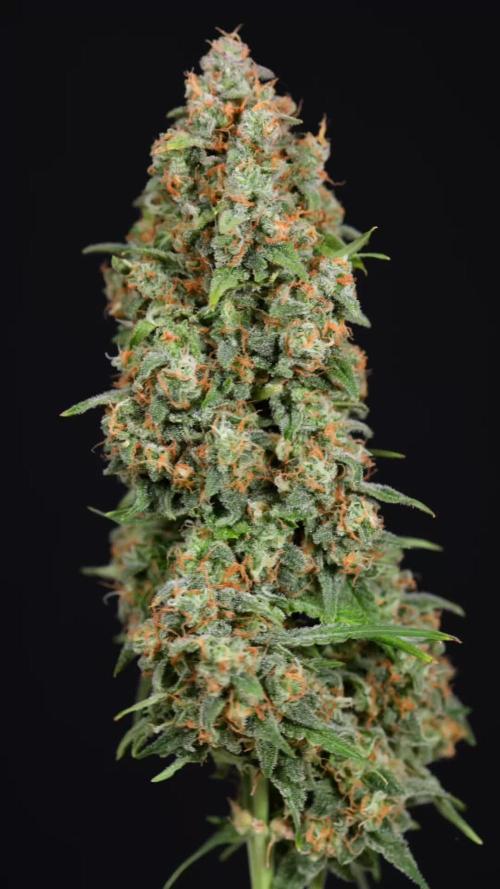
Our Watermelon Candy Automatic #1 from Zamnesia Seeds is ready, and we're excited to show it to you.
This plant has always performed well, a true powerhouse of nature as it grows, especially as it swells with high-quality central and lateral flowers.
Ripeness - The resin content is excellent. The trichomes are mostly white and milky (about 60%), with some clear (20%), and some amber (20%). Some beautiful red-headed trichomes are quite common. The pistils are almost all red (about 80%). Remember, the plant should be harvested according to your taste. Since this is a 50/50 plant, I want to maintain the sativa/day-use characteristics and not turn it into an indica bomb by over-ripening the amber colors. (Amber is a sign of THC oxidation.)
The overall shape of the plant is truly splendid.
Techniques chosen: As mentioned, we only performed pruning, lollipopping, and defoliation here. Basically, we simply cleaned the bottom parts, which, as mentioned, helps us achieve better results at the top.
We're 100% organic and 1000% Plagron, as always.
The soil we chose is the recently launched Plagron Bio LightMix, which will allow us to start with smoother and more reliable watering, without the sudden changes that liquid fertilizers can cause. A week's worth of soil is enough, so don't overdo it.
Choose your preferred style and calculate your results on the website:
www.plagron.com
Visit the new Growshop area on the Zamnesia website:
Z - https://www.zamnesia.io/it/531-growshop
A fantastic strain, not too tall but very bushy! Give it a try!
Z - https://www.zamnesia.io/en/7484-zamnesia-watermelon-candy-automatic-semi-seeds.html
Z - This feminized strain boasts everything you've come to know and love about the original cultivar, but with some welcome improvements. Combining Watermelon x Candy Kush with a pinch of ruderalis genetics results in a strain you won't want to miss, we promise.
Being an autoflowering strain, the growing options are virtually endless. So, whether you choose to grow her indoors or outdoors, one thing is certain: she'll be extremely easy to grow. Otherwise, she'll take care of herself without requiring any special care. With a little general care and pruning, you can control her growth all the way to harvest. She's perfect for beginners growing indoors, as well as more experienced growers looking for easy-to-grow, high-yielding plants.
Although she's not a particularly tall plant, her size can be easily controlled with LST, to which she responds positively. So, if you're interested in experimenting with this technique, don't be afraid to try Watermelon Candy Auto.
In just 9-10 weeks from seed to harvest, this strain grows rapidly and, just like the original, will display a bushy canopy completely covered in large buds. Regardless of your growing environment, you can expect impressive yields. Indoor plants produce 350-400 g/m², while plants left to flower outdoors produce 50-100 g/plant. These are quite substantial yields for an autoflowering strain.
With a THC level of 20%, Watermelon Candy Auto is a 50/50 sativa/indica hybrid, offering users the best of both worlds. After a few tokes, you'll feel more optimistic, and even the most stoic smokers won't be able to suppress a smile. After a few minutes, a deep sense of relaxation will take over, perfect for welcoming you home after a long day.
Overall, Watermelon Candy Auto builds on the qualities that made the original so popular, but it also has other qualities that make it a much simpler and more practical option.
You know it, but I recommend it. You'll find so much beauty here, essentially "the best nature has to offer."
Z - www.zamnesia.com
Music // www.radionula.com
+ Feng Shui Music
+ Frequency 432Hz
Likes
35
Share


@Chedderbob112
Follow
It was a roller coaster ride guys but I started with four harvested I earlier got two ounce quick dry wasent flushed properly but these ones hav been there a some nice buds here n a hopefully will get a decent seed harvest stoned @chedderbob112 s2340420 don’t hav dry weight bud av went for fullness plant
Likes
15
Share


@SouthernOnions
Follow
Fully into flush this week just running 0.6 tsp per gallon(3g/gal) of the FullTilt from FloraFlex. Next week I'll be running plain water ph'd to 6.3-6.5 for the last week of flush. That being said, Plant #1 is developing quickly though she may need an extra week or two to finish out. If she does I will probably pull her out of the autopot system and put her directly in the middle to finish out while my next run is starting in the system. Been an exciting grow watching this cotton candy do her thing, cannot wait to see what the final week has in store! Have also narrowed down my deficiency that began last week down to possibly cal/mag deficiency. Will correct this is the feeding schedule next run.

Likes
6
Share

@k0nz1
Follow
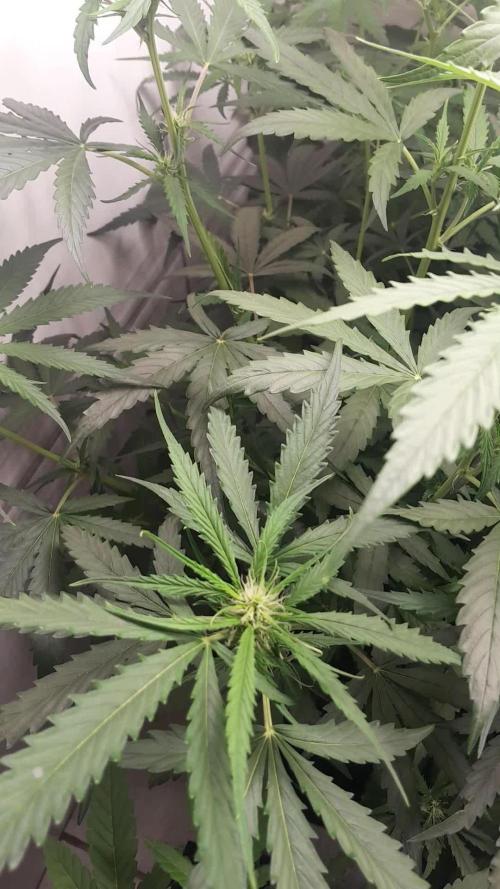
Fast Recovery from topping. Canna Nutrients and ph- for feeding. Little LST in the upcoming days. All plants are developing well.
RH 60
Temp 24 celsius
EVO 6 at 40%
VPD ~ 1.1
The new AC Infinity Setup is really good and intuitive so far.
12/12 and little defoliation next week


Likes
3
Share


@Mikewithgreenthumbs420
Follow
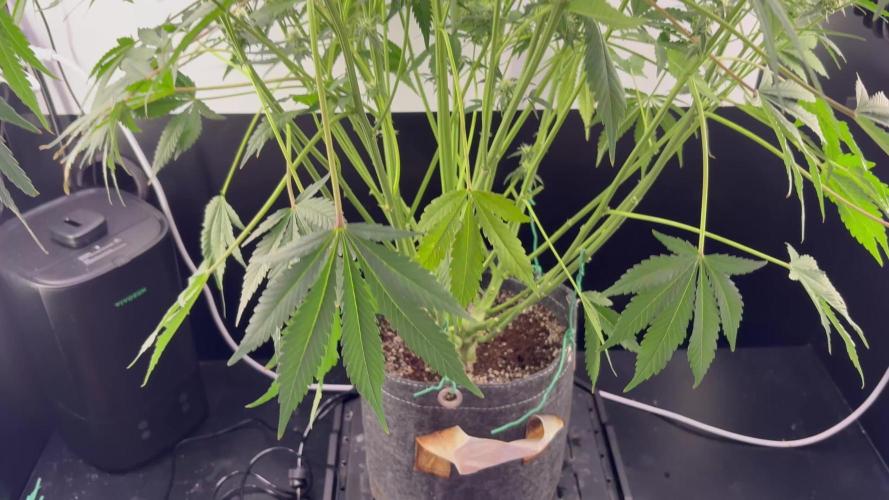
Removal to top big fan leaves and lower branch. Began some LST she’s my best auto for this run

Likes
10
Share


@HideAndFly420
Follow
Day 34 this lady is running, I can see flowers getting bigger every day, smell started really really soon this time so I already had to add the Carbon Filter.
I’d like to close the cycle in less then 80 days. It would be great
First flowering fertilisation
Ph 6.2
Ppm 631
Day 37 - 9 of flower 🌸
Started blooming fertilisation, I’m keep Giving all-in one from aptus, i think I lm substitute with super pk and I stop all in one.
Ph 6.2
Ppm 731
As I’m growing an solito in a 9.2 lt pots with all mix nutrients I’m slowing down with all in one and just giving base feedings, I ll decide later if I should give super-pk for the next weeks
Day 40, tomorrow will be feeding days. Sge’s going really well, resin is already showing up on flowers that are several as and colorfull, smell is already there 🤤
Tomorrow update with feedings parameters.
Day 41 feeding day
Aptus regulator 0,15ml/1 lt
Aptus all in one 1,25ml/1lt
Aptus Topbooster 0,3 ml
Aptus enzym + 0,5 ml
Calmag 0,3 ml /L
Ph 6,18
Ppm 756
Let’s see
Likes
26
Share

@CCSAUTOGROW
Follow
Finishing up week 9 flower. She's looking great! I have had a few small issues this week. Noticed she has a few crispy tips. I have been feeding pretty heavy and the drip system has been getting clogged up with the Big Bud coco. Not a great product to feed using a drip. So I'll be top feeding for the remainder. Her buds are ripening nicely. Thinking she's not going to end up with very large buds however she does have a lot of them so I'm super happy!!!
Likes
3
Share

@Jardineiro_Br
Follow
A Planta reagiu super bem ao LST desenvolveu muitos galhos que estao botando botões, galhos forte e.grossos para alimentar belas flores . Esta com uma boa altura devido a predominância sativa.
Likes
Comments
Share


@weedhouse420
Follow
las plantas siguen con su bloque o carencia pero ya esto se termina en nada , tienen muy buenos olores dulces y flores apretadas me gusta este cultivo y son semillas de granel baratas y con agua dura ,alguna semilla de mas calidad y agua bien controlada de ec pueden salir cosas buenas en 11L

Likes
6
Share

@MG2009
Follow
10/26/2020
6 Days into week 4, all looking great, update a little early but going out of town. Calyx are getting bigger, pistils
popping up everywhere drinking about 6 liters a week.
10/29/2020
3 days into week #5 day 3 she took 4 liters today she is drinking plenty of water! next week will topdress with 4-9-3