The Grow Awards 2026 🏆 


Processing
Likes
13
Share
@LeedsGenetics
Follow
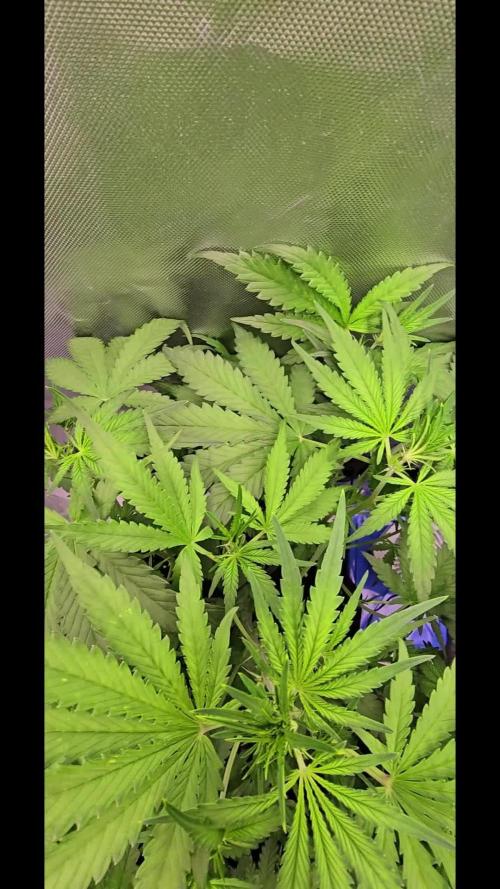
Today's the beginning of week 2 veg, Plants are under 600w MH lights now. Roots are growing and spreading out nicely as you can see them popping out the bottom of the pots. By the end of this week when all plants have roots popping out of the bottom they will be transplanted into 20ltr fabric pots.
Feeding upped to 400ml per 3 days on average.

Likes
39
Share
@eldruidamx
Follow
Day 92. Watering with fertilizers.
Day 93. Watering with clean water.
Day 94. Watering with fertilizers.
Day 95. Watering with clean water.
Day 96. Watering with fertilizers.
Day 97. Watering with clean water.
Day 98. Watering with fertilizers.


Processing
Likes
4
Share
@GrowSmith
Follow
This week temperature dropped slightly but she continues to grow with a few bud sites as you can see in the video
No need to Waterbury as it’s not that hot and humidity is high during the day

Likes
97
Share
@CANNASIM
Follow
GENERAL COMMENT
The SKR is dry and starting the cure in jars, and the NL is done.
RQS NORTHERN LIGHTS AUTO COMMENT.
This is the final week, next time will be the harvest, this girl just got mature from a day to the other, lost 70% of the top bud due to rot i haven t seen. So i could get virtually 30-40% yield from this girl
Without the locks or rot, anyhow still looking ok as far as harvest, quality will be a bit compromise, not the end of times though lol! 🙃👊🏻👍🏻

Processing
Likes
Comments
Share
@Grownewgenetics
Follow
We have two rainbows from b.s.f.seeds and one san Fernando valley, the oldest of the rainbow is on week 5 day 35 under 250 watts and the other is on day 28 week 4 and 150 watts hps , p.h. 5.5

Likes
23
Share
@GreenthumbJacobs
Follow
Sie wächst jetzt unheimlich schnell und lässt sich schön trainieren !
Also fatsbuds mir advance und plagron ist einfach brutal 😍😍

Likes
126
Share
@ScotlandDrGreen420
Follow
Day 2 : Plant is looking nice and healthy , will update pics later , as for today , snow man building with the little man :)
Day 3 : ppms sitting at a stable 650 , little dawg is looking awesome, starting to bulk right up!!
Day 4 : dawg drank 4 litres of water and 120 ppms overnight , upped ppm to 750.
Day 5: This little dawg just keeps on drinking haha... Further stretch and bud sites starting to open up.
Day 6: slight defoliation and tightened wires to open the inner branches
Likes
142
Share
@MadeInGermany
Follow
Hey everyone :-).
There is not much to tell this week :) A few came to the flowering tent, 2 are still in the vegi phase for 2 days and then come last to the flowering tent :-)
The Blue Cheese and the Kosher Tangie Kush smell very good and how they should 😍👍
It will be difficult to choose 2 mums :-).
I wish everyone a nice week 👌 Let it grow


Likes
8
Share
@Eluri
Follow
Harvest is coming and the plant is fully ready to it. Trichomes are cloudy and the buds are big and dense. The last 48 hours, plant will be in darkness to rise the number of terpenes and improve smell and flavour and I will not water it anymore. I cutted off the bigger leaves in order to make the plant know that only last hour left. I'm really proud of her and this was a really nice experience. I will repeat it someday, be sure about that.


Likes
26
Share


Likes
4
Share
@NSABND
Follow
Welcome to Day 36 .... first Day of pre flowering 😍🙏👍
Day 37 .... massive leave cuttingto get space for the queens 😶🙏
Day 38 all strains forgive me the massive leave cutting 😃👌🙏
Day 39 everything seems to be ok 😍🙏👍
Day 40 this will be good i think 😃👌
Day 41 the growtent is really good filled up 😃👌🙏
Likes
8
Share
@Scottydarkmoonbuds
Follow
These girls are just glistening and filling with trichs and resin. Such vibrant color.
Likes
26
Share
@SmokeableHobby
Follow
1/17 - Day 62 / Day 35 Flower
Pots felt dry so decided to give them about a half gallon of spring water each. This wasn't enough to induce runoff. Will save that for a bigger watering later this week. Nutrient issues continue to persist.
****************************************************
1/19 - Day 64/ Day 37 Flower - Feeding day
Pots were feeling dry again. After about a week of laying off the nutrients following the flush, I gave them a feeding today with their watering. In retrospect, I probably shouldn't have waited this long to re-introduce nutrients as some of the lag in recovery is probably due to the fact that I flushed all of the food.
The feeding solution consisted of the following:
- 1 gallon distilled water
- 5ml of FF Tiger Bloom (1/2 dose)
- 10ml of FF Big Bloom (2/3 dose)
Adjusted the solution to the following conditions before feeding:
- pH: 6.5
- TDS: 303ppm
- EC: .6
I gave each of the 5 gallon pots about a half gallon each of the solution, followed by enough spring water to induce runoff (approximately another half gallon). I tested the runoff for both of my 5 gallons and returned the following readings;
Z51:
- pH: 6.4
- TDS: 649ppm
- EC: 1.3
Z52:
- pH: 6.2
- TDS: 669ppm
- EC: 1.3
I was encouraged that both plants are close to being within my ideal range and hopefully this means that they will start to show signs of recovery in the next week.
****************************************************
1/21 - Day 66 / Day 39 Flower
I'm growing in an attic space and we've had a drop in temperature over the last couple days, my heating system was working overtime and more heat was rising into the space. I woke up today and the temp in my grow tent was registering in at 87F. I decided to play around with my temperature threshold on my fan controller, reducing the max heat threshold to 80 from 85. What I didn't account for was that I had a low humidity threshold of 30% (which I assumed meant that that fan would stop running if it hit this point). It turns out that my fan actually kicks ON when it hits that threshold... As a result. my fan was short cycling through the night where it would turn on when the heat exceeded 80 (causing humidity to decrease) then turn on again when it hit my low humidity threshold - creating wide swings in my temp and humidity. I'll tell you what, if I don't produce any viable bud this grow, I can honestly say I made up for the loss based on the education I've received.
The nutrient deficiency issues are still present but don't appear to be getting worse. The leaves on my Z51 are pretty pale, it's clear they are starving for nitrogen but I am reluctant to try and address issue at this point. I'm planning 2 more light feedings over the next two weeks so hopefully this will be enough to get them to harvest.
****************************************************
Day 1/22 - Day 67/Day 40 Flower
My girls are really starting to frost up and the colas feel noticeable more dense by the day. I would have thought that the smell would have been stronger by now. Not sure if this is a consequence of my carbon filter doing such a good job or whether the buds are having developmental issues. When I get up close and smell the buds, I get a faint aroma but not the strong sweet and gassy smells that I've read about on other journals.
I watered the 5 gallons today with a gallon of spring water each. My soil is not as airy as it once was and has started to cake up around the roots. I do my best to try and loosen up the dirt, usually to no avail.
I was short for time so I didn't have a chance to test the runoff.

Likes
30
Share
@valiotoro
Follow
Hello everyone week 6 of flower has passed for this Skywalker haze auto 💥
Green Sensation 0,5ml/L
Mars hydro SP-6500 75%
have a great day and wish you all happy growing 😎👨🌾🏻
Likes
14
Share
@MRTHC
Follow
Ok. On flower day 47 started flush. Ended up using 5gallons to bring her down from 800ppm to about mid 500ppm. Will use RO water next flush dirt better results. Recent tricomes pics shows milky clear with a hint of Amber.... This sample came from 5" down the canopy. Also the has been an emergence of new white pistils at the top colas. On day 52 she was given ice at her roots.

Likes
12
Share
@Naujas
Follow
Well, that day has come, the girl would have been really different if not for the high temperature, strong light, and a huge lack of potassium :( well, everything will be fine next time :) live and learn :) I am satisfied with the result, which is what I need :) got 200 gr of liquid :) gathered a lot of sugar leaf :) they are already in the sweet shop :D I will make an addition!! good growth and success :)

Likes
65
Share
@Grow4Releaf
Follow
_____----*Jan 13th added photos*----_____
_-** Jan16th added photos **-_
She's still chugging along entering week 3 now..
Just gave alil recharge so far , besides having some water issues here (tap got funky funky) but had some rv water filters plopped onto the tap and all is in range ec/ph wise now.
Issue averted atleast i caught it, got in the habit of checking PPM of the tap everytime just to be sure (I aerate 5gal of tap water as I use it to mix whicheve stuff I maybe using aswell.
That's about the only major thingy that really happened.
I am seeing some leaf variegation I hope it's nothing more serious havnt had any tmv before so I'll be keeping a tight eye.
Fingers crossed tho, I do have a second started that was gonna ne ran without plagron but if she's sick I got a back up.
Hoping it's nothing tho, 🙏
Until the next update , I'll throw more photos up as the week gets going.
Thanks again for checking in, best of luck to anyone that's involved in this contest !! Been fun watching all ur plants get going !
