The Grow Awards 2026 🏆 


Likes
Comments
Share
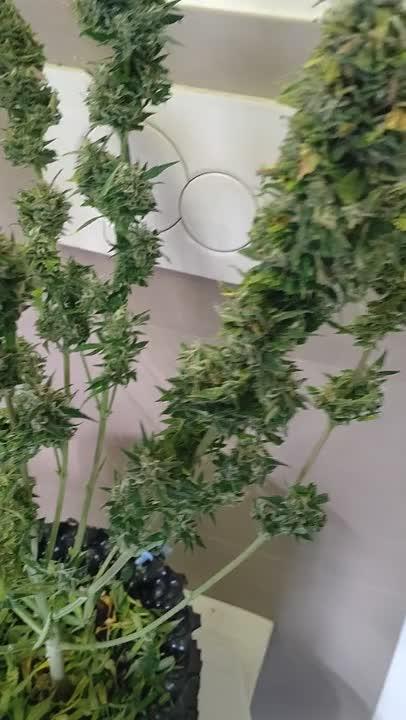
@BasedBuds_89
Follow
This baby was horribly stunted, but I decided to keep her alive and now it's covered in Crystals. May use it for consentrates.


Likes
12
Share
@2Byte
Follow
Coming up on third base! No issues at all from the recent wetness and really getting some nice purps on the GG4xGSC and the Green Gelato. Ironically nothing yet on the Ayahuasca Purple.


Likes
37
Share
@Capo420
Follow
This past week has been a blast!
After getting these ladies nutrition straightened out, they are thriving!💚🌱💚
I gave defoliated wayyy more than what I see other growers traditionally doing. After the "3rd and final haircut" I defoliated two more times 😅
Thank you the GD community for the support and resources along the way 🙏
My only concern now is the tent actually becoming too crowded.😆. Other then that I am thinking it should be smooth sailing these next 6 weeks or so. 🏴☠️😎🏴☠️
Happy Growing!
💚💪🌱😎🌱💪💚


Likes
1
Share
@PhinolaGreen
Follow
Die Ernte ist geschafft, jetzt genieße ich die Früchte meiner Arbeit.
Cookies Gelato Auto von RQS gehört wie Fat Banana Auto zu meinem ersten Tagebuch auf Growdiaries. Leider wird das Tagebuch nicht angezeigt in meiner öffentlichen Liste und der Support von der Seite wusste auch nicht weiter. Deswegen habe ich mich dazu entschieden, euch an meinem Grow von vor 2 Jahren teilhaben zu lassen 😊
Processing
Likes
10
Share
@UrbanFog
Follow
Plants continued to mature this week and all the buds are getting fat they will have there last nutrient feed this week in prep for flushing and harvest next week.
The Lemon Zkittles looks and smells amazing looks amazing. Nearly all the plants look and smell the small, good genetics and breading.
The Cxx is again a very stable genetics and flowered and smells exactly as the last grow did. Good genetics.
The Peyote Cookies and Shishkaberry also grew well and similar, good genetics.
Afghan Kush amazing buds and very earthy smell.classic
The gorilla cookies had a rather large variation in pheno types but all look amazing and each will be a pleasure to smoke.


Likes
4
Share
@Kushncheeseplz
Follow
I had to change the light this week. To smaller lights because of some fan leaves was turn at the tips away from the lights


Likes
92
Share
@DeepWaterGrower
Follow
🗓️ WEEK 8 / DAY 50-56
⚡ Light: 55 cm / 150 watt;
⌛ Schedule: 18/6;
🌡️ 24.5° C - 65% RH average;
📑 PH 6 - EC 1.5;
🌱 She's very fine, has a beautiful green color and drinks about 1 LT/day!
⚙️ Fan, extractor and pump ON 24/0. No humidifier.

Likes
15
Share
@Sup3rNov4
Follow
Lost the top two colas due to bud rot after 2 weeks of storms :( apart from that she is a fantastic strain to grow an absolute pleasure
Likes
73
Share
@Herbz_Unkraut
Follow
1 plant was very ripe, 1 plant was almost perfect to harvest and the 3rd could take another 1-2 weeks...but it was end of 10th week of flower and i had to go on vacation, so i perhaps choped 1 plant abit too early....still awesome result!


Likes
23
Share
@Kakui
Follow
V15, riego con pH 6.1 y EC 1.2, las plantas ya se han recuperado del stress de hace unos días atrás, desde el próximo riego el agua tendrá sus nutrientes completos. Se ajustó el LST en algunas plantas.
V17, definitivamente ya se recuperaron del stress por sobre fertilización, están creciendo al ritmo esperado, con bien color y hojas "felices".
V18, y bueno, de nuevo surge un imprevisto, intentando hacer LST a un tallo acabo de romperlo, le hice una especie de entablillado esperando que se recupere.
Hoy toco riego con pH 6.2 y EC 1.5, las plantas crecen bien.


Likes
8
Share
@MrGrowthSpurt
Follow
So this will be the last pictures before Harvest. The blueberry Kush is definitely ready with mostly amber colored and cloudy trichromes. The white Rhino similar, but more cloudy colored trichromes. The Caramelicious is the same as white widow about 60/40 cloudy/amber trichromes. I flushed them twice 3 gallons of purified water each fed them yesterday plain tap water ph'd to 6.3. I'm excited to see what each yeild once harvested and dried.
Today Marks Day 101, it will be day 103 when I chop. This was my first grow ever and I feel like I've learned alot yet still don't know shit, lol. Thanks to everyone who helped answer my questions it helped in keeping me from panicking and over reacting. I never knew this plant required so much energy and attention. I'm almost at the finish line to tasting the fruits of my labor and already on my next bigger and better run. Check it out "Big Push For Blueberry Kush"


Likes
41
Share
@DOOBS_N_BREWS
Follow
Third week of flowering and she's still showing great progress. Starting to show pistols now.
Day 64- NFTG mid flower feed
Day 65- No watering. Bloom Khaos Foliar spray
Day 66- Flush
Day 67- no watering. Bloom Khaos Foliar spray
Day 68- Mammoth P/Recharge/ Cal-mag feed
Day 69-70 No water

Likes
9
Share
@TricoGhost
Follow
Para ser la primera vez que cultivo no puedo quejarme, pero si alguien me pudiese ayudar
