The Grow Awards 2026 🏆 


Likes
Comments
Share
@MN-Frozen420
Follow
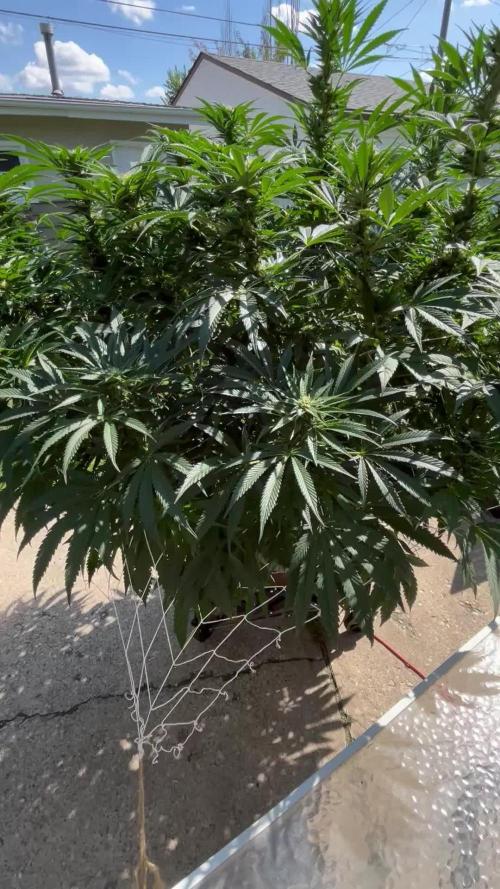
Day 70!
only a few weekes left. boy are these looking good
2 plants drinking 1 1/2 gal a day


Likes
5
Share
@Chuckwaggon420
Follow
Have got the soil good ph i am pretty sure. I have got good growth out of the last week and few inches and some fan leafs and they look just barley burned and they are way happy standing up so I am thinking (fingers crossed) that I have got it under control. Going to do a trim and take some clones in the next week. Then a train for a couple weeks and put her in in flower tent get used to that light and flower her see what I get.
Still just doing declorinated water at 6.5 let the soil do her job.
Stay tuned
Processing
Likes
11
Share
@RunningHorse
Follow
Day 71
Babes are doing amazing.
#1 is significantly taller than #2, though #2 has an almost perfect canopy.
Stripped the undergrowth on both. Flipping to flower Sept. 1st.


Likes
7
Share
@bunlarbizimkomutanim
Follow
There was a visible attack this week. The temperature is between 25-27, the humidity varies between 60-65. There was a slow development due to excessive irrigation and I could not do LST due to the distance of the room to me. I am planning to fall leaves next week.

Likes
12
Share
@DrGreenbutterThumb
Follow
At last I ha e seed popping out! Nice full sized seeds 2 hybrids of my own creation with more to come.not sure if the gelato cake pollen was still viable doesn't appear so however I have a monster cropped clone that will serve the purpose.
Likes
4
Share
@bsplayerone
Follow
Week 1 of my little bulb experiment. Plant is growing pretty well and the early structure seems sturdy. I don’t know what Im going to do for light once it out grows the Feit 9W. May just leave it in the window.

Processing
Likes
6
Share
@DeAKiller
Follow
Questa terza settimana ho dato il kit completo di nutrienti per le piante, purtroppo sono un po’ in ritardo con i tempi ma adesso la crescita andrà nel modo giusto.
Ho cambiato l’acqua ed aggiunto ottimi prodotti Americani della linea Advanced per dare da magiare hai biscotti.
Mi aspetto adesso una crescita molto più intensa.
Finalmente le radici stanno uscendo dai loro vasi è sono attualmente immerse per 1/3 in acqua.
Likes
8
Share

Likes
3
Share
@GreeneScene
Follow
Started a liquid supplement because my dry amendments aren’ didn’t activate my last grow.
Maybe I didn’t mix them deep enough or keep the top layer wet enough but i know its the end of my first run & my girls have been STARVING .
So even though I did top dress a few weeks ago I still started her on liquid amendments like my oldest girls & she’s handled all the feedings brilliantly.
She has pre flower pistals showing but only sparsely so we’re still vegging out.
She’s a beast & that’s an understatement. Definitely the biggest & most vigorous auto I’ve ever grown.
Liquid amendments I’ve been feeding are still indeed organic so no worries.
Likes
18
Share
@valiotoro
Follow
Hello everyone 😎
Week 6 of flower for the RuntzZz🌸
Love the smell super fruity & creamy🤤
For the nutrient it’s time for Green Sensation 1ml/L🚀
Max 2 more weeks for the two little one✂️
Top buds of the monster runtz harvested✔️
Solid like a diamond how I like🤩the smell is earthy & sweet🤤


Likes
5
Share
@Thiglat72
Follow
È iniziato bene il seme ha germinato due giorni dopo averlo messo nel Jiffy

Likes
71
Share
@Roberts
Follow
Quebec Blast is growing good, she is starting to develop flowers, and stretching. She is the shorter one in the room. I am figuring a stocky frosty plant at end. 🤞 I get there with no major issues. A solution change of a gallon every 4 to 5 days has been my current schedule. Future grows I wanna try to keep roots higher up through pruning to allow more solution for better stability, and longer between changes. She is in a New Level Hydro bucket, under a Spider Farmer SE5000 light at 80 percent. Thank you Spider Farmer, New Level Hydro, and Quebec Seeds. 🤜🤛❄️🌱
Thank you grow diaries community for the 👇likes👇, follows, comments, and subscriptions on my YouTube channel👇. ❄️🌱🍻 Happy Growing 🌱🌱🌱
https://youtube.com/channel/UCAhN7yRzWLpcaRHhMIQ7X4g
SE5000
https://amzn.to/3qFpAML
Spider Farmer Official Website Links:
US&Worldwide: https://www.spider-farmer.com
UK: https://spiderfarmer.co.uk
CA: https://spiderfarmer.ca
EU: https://spiderfarmer.eu
AU: https://spiderfarmer.com.au
Coupon Code: saveurcash
Www.newlevelhydro.com
Www.hygrozyme.com


Likes
199
Share
@OrganicNature420
Follow
Germination date 🌰 14/03/2021
Day 84 🌱 07/06/2021
Strain 🍁
Peyote wi-fi, Seedsman
Nutrients 💉
Advanced nutrients
PH perfect sensi grow A+B (veg)
PH perfect sensi bloom A+b (flower)
B-52 (through veg until week2 of flower)
Voodoo juice (🖕🏻)
Tarantula (🖕🏻)
Piranha (🖕🏻)
Sensizym (all the way through)
Rhino skin (🖕🏻) add first leave for an hour
Big bud coco (week2+ of flower
Bud xfactor (🖕🏻)
Nirvana (🖕🏻)
Bud igniter (first 2weeks of flower)
Overdrive (last 2weeks of flower)
Flawless finish (flush week)
RockHoldings Rockresinator(week2+ of flower)
Vitalink calmag
Set Up
⛺ amazon special 1.2m x1.2m
💡 spiderfarmer sf4000
📤📥 AC infinity 6inch
💧 10lt dehumidifier
Notes🗒️✏️
Taken a wee hit with last month's weather. Tents reaching 30c at times so bud development will be minimal. Haven't bothered with a a/c but looks like I will have to, just can't find the right machine to use. Any ideas?
Buds smell amazing and look nice big and dense. Will hold off the Rock resinator from now and just give her a normal feed until flush week. Most likely 3/4 weeks left on her which doesn't fit it with my time scale. Doubt I will do this strain again due to how long it takes.
Next grow will be the one to look out for 👀
Massive thanks to PharmaZ for sorting us out with mars hydro. New tents arrived and new light. Fc 4800 💡so going to compare it against the spiderfarmer sf4000. Simular prices the mars being slighty more expensive BUT it claims you can get 2.5gs of bud per watt compared to Spiderfarmers 1.5gs per watt. I believe its around 460w +10% but will do a proper bio on it when I have it all set up. Making a couple of changes to the grow room so ventilation should be slighty better. Can't wait for next grow 👇🏼
Sin city's WHITE NIGHTMARE x Biscotti Sundae (Frosted Biscotti)
Sin city's WHITE NIGHTMARE x Purple Yuzu (Yuzu Sorbet)
Ethos genetics Grape God x Mandarin Sunset (Banana Hammock Rbx1)
Depending on which one comes out better (purple matcha) / (peyote wifi) that will take the 4th spot in the tent for the next grow 🌱
Happy growing everyone 🌱❤️

Likes
24
Share
@Basementganja
Follow
Harvested the Clones!
I'm stoked how #4 grew out, I think she's the winner!
With limited space in my grow, I'm only going to be able to bloom out the rest of the phenos clones to week 3-4.. The show must go on..
It's the price I must pay for using non-ideal cloning methods... Next round of phenohunting will have 100% cloning success, using my new aeroponics cloning machine.


Likes
16
Share
@Northern_Ent
Follow
Aug 23: Lemon Cream Kush is doing fine.
Aug 26: quite hot now (finally summer?) with a week of 30 C starting now. Upped water volume to about 9 L a day.

Likes
11
Share
@plant
Follow
Germinated using a glass of water. After 12 hours into a bag with tissue paper. Then I hung the bag up so gravity could make the tap root grow straight down.


