
Likes
Comments
Share


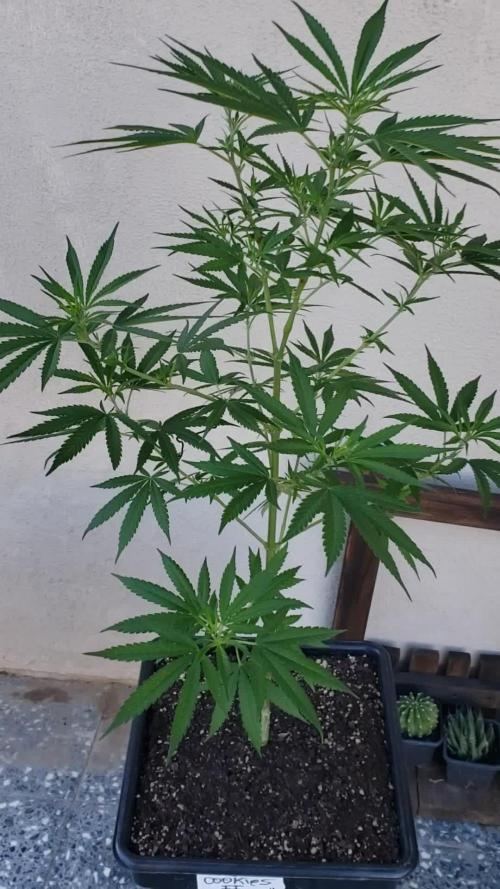
@nonick123
Follow
Día 108 (16/09) Tras el flush las plantas muestran tímidamente nuevos pistilos blancos! 😍
Hoy no es necesario regar!
Día 109 (17/09) Me he encontrado a OnionOG #1 y a Purple Punsh completamente sedientas! Con las hojas caídas!
Riego con 1,25 litros de H2O a cada una de ellas (el resto no necesitan riego)
Día 110 (18/09) Riego con 500 ml H2O
Las plantas con el bloqueo empiezan a mostrar nuevos pistilos, sobre todo en las partes inferiores
Día 111 (19/09) Riego con 250 / 500 ml H2O
Se vuelven a formar pistilos blancos en todas las plantas que han sufrido el bloqueo! 😍💥
OnionOG #1 va como un cohete formando y apilando flores 💪 🚀 😍
Día 112 (20/09) Día lluvioso. Riego ligero 250 ml H2O
Día 113 (21/09) Otro día lluvioso. Riego ligero con 250 ml
Día 114 (22/09) Detecto algunas moscas blancas apoderándose de las plantas y decido hacer una aplicación foliar de piretrinas (Spruzit a 15 ml / l)
Riego con 1 Litro de Té Floración de Lurpe Solutions. Preparación: 24 horas con bomba de aire (oxigenación) con ingredientes:
Healthy Harvest 8 ml/L + Insect Frass 16 ml/L + Kelp Hidrolizado 0,3 g/L
💦Nutrients by Lurpe Solutions - www.lurpenaturalsolutions.com
🌱Substrate PRO-MIX HP BACILLUS + MYCORRHIZAE - www.pthorticulture.com/en/products/pro-mix-hp-biostimulant-plus-mycorrhizae

Likes
6
Share


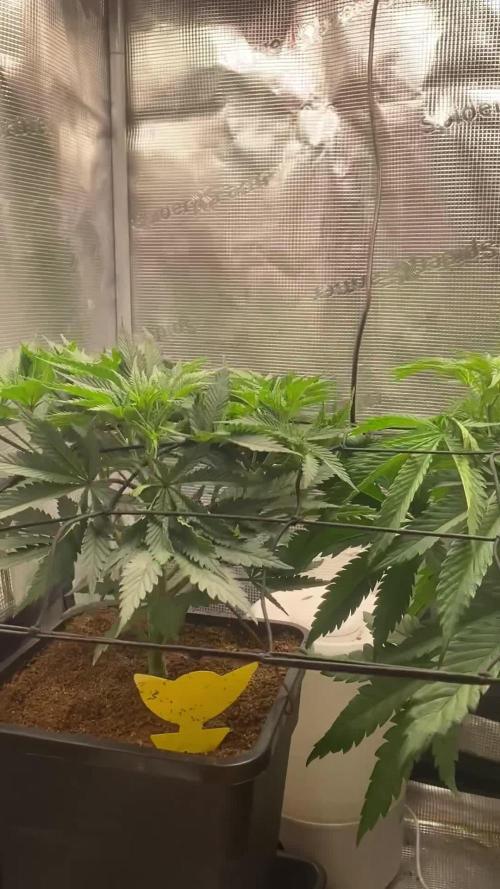
@HUMO_Cultiva
Follow
Update of Goofiez 2 of compound genetics!! On RDWC it’s literally super fast grow !! We are doing a pheno hunting of 12 plants and we seed 4 of them that are the best at the moment


Likes
7
Share

@The_Doctor_Green
Follow
Hola a todos!!
Esta semana
he regado solo con top veg 2ml x litro de agua.
La verdad no he tenido mucho tiempo para dedicarle, pero viene creciendo bien, en cuanto a tamaño no he registrado cambios, ya que poco a poco se va expandiendo hacia los laterales.
La próxima semana estaré más atento.
Saludos a todos!😃🙋♂️🤩

Likes
3
Share

Likes
Comments
Share
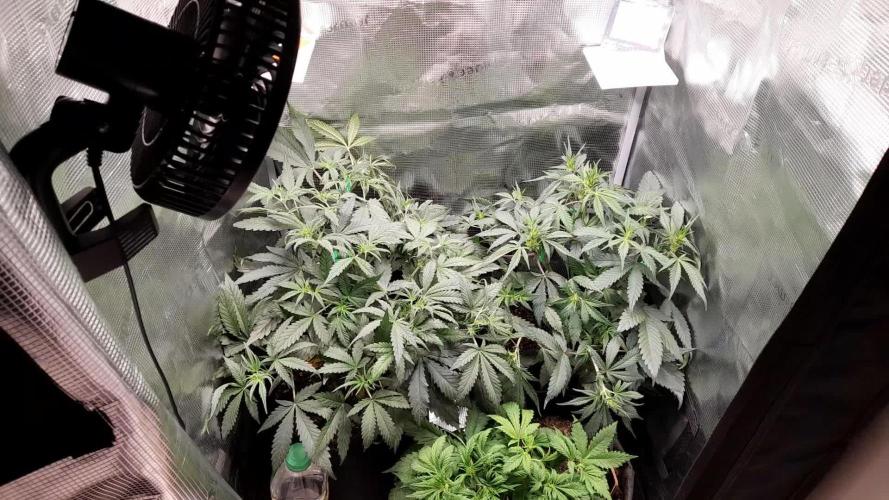

@ThreeLittleHerbs
Follow
I had no pictures of week 4, s now it's 10 days later. The plants are now 1 month and week. Applestrudel (left) and Strawberry-G (right) are close to start to bloom and already stretched a bit. I tie down the outer branches to get more light inside. 😇
Lemon Cherry (in the front) is still has thin, light-green leaves and a short and compact structure. The most branches don't get enough light, but they are too small to tie down. 😑
Light is on 100% - 100W
Likes
7
Share


@Messypies
Follow
In the second week the plant has now started to produce its first set of single bladed leafs.

Likes
57
Share


@Regenwurm
Follow
Das Wasser zum gießen ist immer wie folgt zusammengesetzt: 9 l Regenwasser +1 l Leitungswasser. Dann Düngemenge Hesi wie oben beschrieben dazugeben und im Anschluss den PH Wert anpassen auf 5,7-5,9. Am Anfang der Woche die Pflanzen hart entlaubt 😁. Sie haben es zusammen mit dem Superscropping gut weggesteckt. Beim Superscropping habe ich 2 zukünftige Blüten kaputt gemacht.... Fuck🙁, aber wird schon wieder....Innerhalb von 3 Tagen ordentlich gewachsen + viele neue Blätter produziert. Die letzten 5 Tage war die aktive Zuluft an. Da die Außentemperatur stark gefallen ist, ist die Zuluft seit gestern wieder aus. Die RLF liegt kontant zwischen 43 und 48 %. Eine der Ladies ist im Vergleich bis jetzt kleiner, diese wird nun höher aufgestellt. Ein leichter Geruch macht sich breit.... ich hoffe die Damen wachsen noch ca. 20-25 cm.

Likes
7
Share


@Chubbs
Follow
Weekly update. Sorry it was a late update this week I was out of town (Bizcon2024). Wow have they grown, I'd say doubling in size. I've upped the watering to 1000ml daily, this week I'll do a major defoliation and lollipoping. All in all Happy Growing


Likes
10
Share


@Ultraviolet
Follow
Added top funnel watering wick, most insects/bugs use damp topsoil 1-2" to reproduce. This uses gravity, 👊👊👊fiber wicks water, and spreads evenly, to keep moisture under the topsoil out of the reach of bugs.
Zinc is a chemical element with the symbol Zn and atomic number 30
Neodymium is a chemical element with the symbol Nd and atomic number 60
Thorium is a weakly radioactive metallic chemical element with the symbol Th and atomic number 90.

Likes
14
Share


@Jazzvet
Follow
This week was very well, the girl showed her first pistils and she's stronger and healthier than ever, so:
Day 30 sprayed with bioprotect
Day 31 watered with 3l of water with 6 ml of bh, bg an a-v
Day 33 The first pistils are appearing sign that blooming phase has begun.
Day 34 water with the mix
Day 35 I've turned on the dehumidifier trying to decrease the humidity and starting to defoliated some lower leaves, 3/4 leaves per day stress the plant to much.
See you next week
Happy growing

Likes
21
Share


@m0use
Follow
***Sponsored Grow*** = Medic || https://medicgrow.com || Grow = ***Sponsored Grow***
Everything is looking good on this plant this week, it has a different growth pattern then the others in the tent, its way more bendy and lengthy. When I place the steel forks on the stems to keep them from growing up this strain will go all noodle like and bend more fluidly then all the other plants. its like spaghetti or some other pasta related wet noddle thing. Still giving them a 2:1 or 2.5:1 grow vs bloom nutrient. Its helping with some of the pink stems from last week. Feeding strength is up .2 point to reach 900ppm or aorund 1.8EC will leave it here fro the remainder of Veg. Prob will do for 2 more weeks then flip to flower as I just topped them and want to give them some time to recover.
NPK ratio of 7-7-14 1:1 equal parts grow/bloom.
Grow=8-4-15
Bloom=6-10-14
Boost=1-15-30 "not yet used it yet"
Also took some clones from the plants as well, took two main cuttings from each plant, forgot to do the one so its not shown in the first video up the updated clone pics later in the week. If any of these impress me then the clones will go outside and grow there all year for a extra special harvest. Or I'll give them out to some friends and family maybe a little gorilla gardening project, but I will wait before getting ride of them all as I'm still kicking my self in the ass over the Blue Cindy loss. really liked that plant and wish its clones I gave out where still aorund.
Lights doing well. The V1 spectrum is good on the medic grow mini sun-2's 240w. No issues so far, dimmed at 80% till flower is initiated then up to 100%, Will test out 13/11 I think as the schedule to give them some more photons for an extra hour vs 12/12
.
Till next week.
***Sponsored Grow***
Official Website: https://medicgrow.com/
Facebook:
https://www.facebook.com/medicgrowled
Twitter:
https://twitter.com/medicgrow
Instagram:
https://www.instagram.com/medicgrow420/
YouTube:
https://www.youtube.com/channel/UCNmiY4F9z94u-8eGj7R1CSQ
Growdiaries:
https://growdiaries.com/grower/medicgrowled
https://growdiaries.com/grow-lights/medic-grow

Likes
12
Share


@DoDrugs420
Follow
Hypno Seeds knows what rules the world, so we created a strain to let everyone have their chance to try some Juicy Pussy Auto. An autoflowering cannabis cultivar that’s absolutely dripping in trichomes, potency, and flavor. It’s a Sativa-dominant strain due to its Thai Stick cross and is balanced out with some special Indica strains to give it its mellow, yet arousing effects and massive juicy yields of big hard nugs. Take a sip and enjoy!
Tech Specs
THC 19%-24%
CBD 0.50%
Flavor Orange Creamsicle, Pungent, Sweet
Type 35% Indica / 65% Sativa
Flowering 9 Weeks
Height 120-160 Cm
Effect Calming, Creative, Extra Sensual, Pleasant, Relaxation
Genetics Thai Stick X Indica Strains
---------------------------------------------------------------------------------------------------------------
Grow Sponsored by MARSHYDRO
HIGH EFFICIENCY WHITE LED LIGHT: Newest SMD LED technology provide highest PAR/LUMEN output(743umol@18"), designed to replace a single-ended 250watt HPS; MARS HYDRO TS 1000W Plants Growing lamp makes you get 30% higher yield compare OLD blurple led lights, Max 2.0g yield per wattage (power draw)
LOW ENERGY CONSUMPTION GROW LIGHTING : Consuming only 150W with 342 LEDS! It saves up to 50% energy than other led grow lights. Perfect for 2.5x2.5ft,Max coverage 3x3ft. Over 90% light energy can be absorbed by plants; higher intensity and more even coverage in a MARS HYDRO grow tent, reflective area, or by crossing over using multiple TS1000
SUNLIKE FULL SPECTRUM LED INDOOR GROWING: 660-665nm Red IR/3200-4200Knm/5200-6800Knm, infinite close to natural light, best for all plants all stages growing, rapid plant response from seed to flower and increase yield & crop quality
HIGH REFLECTIVE & NOISE FREE-Fanless LED GROW SYSTEM design will make your growing life easy and quiet, quickly heat dispersing material aluminum reducing light lost to aisles and walls, increase the light intensity up to 20%, allowing your plants receive more energy and without burning your plants for maximum headroom
Get your own at https://www.amazon.de/dp/B07ZVFBR34

Likes
14
Share


@BoboLacetti
Follow
I'm super happy and really looking forward to trying the Sherbelato. But I'll have to be patient for another 2 weeks

Likes
14
Share


@TeaTime
Follow
One of those pot I’m already doing the flush. Tomorrow I’m going to do the flush with cold water and leave for 2 day in the dark before to cut.
After normal flush, 3 day before I did the flush with cold and ice. And I going to leave for 72 hours in the dark.remember that it’s one of 3 pot of speed + , another pots I’m leaving for one more week .


Likes
4
Share


Likes
8
Share


@NewOfficialDrillInvaders
Follow
Very sticky strain i never use so many latex gloves when i do trimmings as much as this strain so she is great for concentrats smells amazing simillar to cherry but more like hard 🍬 🍒 kind chemicall smell 😍


Likes
95
Share


@Canna96
Follow
Hey Now, this week went good for the Cream Mandarine Auto, she keeps on stacking and I believe she has another week left to bulk up....I will switch her to ripening nutrients in another week and then flush her for a minute and then its chop time. This Cream Mandaraine Auto has been amazing, even when I left her for a week and let the EC get way too high.... I am going to pop a dutch passion/Think big and maybe a Gelato from Sweet Seeds here in the next couple days. Gonna try and stay focused on the plants but also gotta focus on fantasy football drafts LOL....If anyone gets the chance to go see Phish please do, as they are on fucking point right now. Be safe family and Blaze On!💪