The Grow Awards 2026 🏆
Likes
Comments
Share
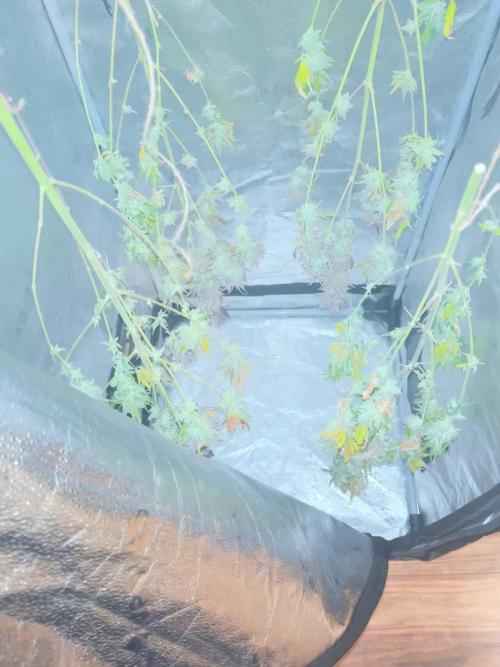
Good finish by cookies elephant trunk. I’m going to take on the elements and finish these outside. I’m going to fill tents out as dry tents Dr. Zymes as preventative and active pest control. No BT just 👁️ balled those worms
Likes
38
Share
@Aedaone
Follow
Week 1 has started off well. The seedlings got planted with only one having a long tap. The all day 1 cloudy, drizzly, wet weather allowed for the taps to run without the top of the soil drying out. The outdoors game is real. Grasshoppers are already trying to take these out. Several were killed hanging on the outside of the pot this morning(day 3). I suspected the grasshoppers were nibbling on these but it turned out to be pharaoh ants. I found some slowly dying beside the plants. The Dr. Earth Bug Stop worked. They got sprayed at sundown and apparently the ants attack at night or early morning. They were barely moving and dying at 7.45 am. Pharoah ants are plant terrorists. They can nest up to 100ft away from where they feed and once they find a food source they are determined to eat it. I'm staying organic and trying to stop these guys but here on day 5 they've eaten some more including the seed leaves off of some Peach Crescendo seedlings. It's day 6 and I think I've beat the pharaoh ants. I had to spray liquid seven on the ground in a circle around the plants. Day 6 and no more of the plants were eaten. Overall it was a good week. Everyone survived the rigors of the great outdoors and are digging deep for next week.
Likes
3
Share
@WeedM8
Follow
Hello m8 welcome to this journey with me in this diary will have very interesting strains hope u find something useful O.G. Kush Titanium - [ ] 1st week Veg: germinated in substrate lighting very close so it jets medium high humidity after the 3rd day they started sprouting - [ ] 2nd week Veg: this week my ventilator broke down and as the temperature stayed very warm nothing developed much - [ ] 3rd week Veg:fortunately this week i had fixed the ventilation and the temperature has go down a bit allowing the little plants to develop and reinforce - [ ] 4th week:very good developments in this week I already started feeding a bit two times but i didn’t have to…once was enough - [ ] 5th week Veg:this week they were very strong green i only had to water them good and keep the ventilators going no stop .They have good hight already ,but as i have to strains together. I want to transplant them when the hight of the other one have stretched… I’m thinking to transplant next week if not the next one - [ ] 6th week Veg: this week it went great fortunatly i dont have pests that eat my buds i’ve givven a fed once the substrate is very rich already the plants streached very well i will transplant today so be ready m8 i cant wait to show you the progress - [ ] 1st week Fl:they started stretching and looking very healthy just transplanted - [ ] 2nd week Fl this week I’ve been away i had a friend taking care of them they stretching very well i hope that she starts putting energy into the flo - [ ] 3rd week Fl:they are streaching very well ..getting the light very well - [ ] 4th week Fl:there we aree guys the good stage is heree good high hope dosent effect de prod - [ ] 5th week Fl:pumping very good this week a lot of changes started already being frosty - [ ] 6th week Fl:this diaries its not daily updated this week its going’s so great we are close to harvest between next week and the other one . Ill harvest them at diffrent time just because they are not all at the same point of flowi - [ ] 7th week Fl: im so satisfied from the way that this is going they didnt had any particular stress just that its 29 degrees during light and its going good so farr I haven’t constantly fed like on the peach g and pcr i hope for better taste at the end
Likes
3
Share
So this was one of the easiest autos I have grown she’s short and fat has an amazing smell and coverd in trichomes I can’t wait to try it!!!
Likes
16
Share
@Prop207
Follow
30 g 20 m 10 b ......... Did some defoliation this week. Ph plunges into the low 4's all week. Was a constant struggle.
Likes
74
Share
@AsNoriu
Follow
Day 66. First girl down, found Bud Rot, so even happy to chop her ! Fastest plant ever, 66 days from seed touching soil !!! Day 74. Second down and bud rot again !!! Lost nicest part of the plant ... In panic chopped two other girls too early and one close to good time.... But now the rest have more space ... Day 78. First girl jared. Day 84. Second girl is curing. Happy Growing !
Likes
32
Share
@JurKush
Follow
after some problems he is recovering by giving him only water and canna cure this week 31st day it seems to be recovering, today I browsed through it 😎 Day 34 it seems to have improved already. I just give him water for a few more days
Likes
77
Share
@klimfish
Follow
9/25 - Top dressed with 3-9-4 flower girl a couple days ago. It had been 3 weeks since my last feed. Also watered on 9/22 with Fish Shit, CalMag Plus, and Tree Trunk at my usual doses. The plants look amazing. Flowering is such a beautiful process. Can't wait for the next few weeks! I've been doing light defoliation every day to keep top bud sites in the light and also keep airflow going. Lesson learned, 2 plants in a tent this size with the way I train and top is plenty! Otherwise I run out of room! 9/27 - Did some defoliation and lollipopping today. Will likely water tomorrow. 9/28 - Watered today with my usual nutrient combo described in this weekly entry. 9/29 - Plants are SO happy. Leaves are up and praying! Flowers are starting to show a little density too!
Processing
Likes
7
Share
Beautiful pair of phenos of Badaz og cheese very excited about what strain is gonna offer me in terms of quality buds, so excited to see what is every of this 2 phenos gonna be like, I really hope that both of them have the exact terpenes profile and the same potency! Let's keep on working! We'll the ladies have been Transplanted on February 2nd after 17 days since planted, they were very big and the pot was completely conquered by strong roots as you can see, now both of them are in their new 11l pot home let's see how they keep developing! 💛❤️💚🔝💎
Likes
19
Share
Week 1 Day 1 - 8/12/2023 1st Water change Day! Such a special time it is when you remove the little bit of Nutes that you gave them as an appetizer and you give them their first real meal. Added 39 Gallons of Water to my system SILICA= .5mil/Gal = 19.5 = 20mil Root Drip = 1mil/Gal = 39mil Cal Mag= .25mil/Gal = 9.75 = 10mil FLoraMicro= 3.0mil/Gal = 114mil FloraGro = 2.0mil/Gal = 78mil FloraBloom = 2.0mil/Gal =78mil ORCA= .5mil/Gal = 19.5 = 20mil Week 1 Day 2 - 8/13/2023 Everything is looking good the roots are making thier way to the water and the new grow is looking nice and green. Week 1 Day 3- 8/14/2023 Everything is right on track, they are looking beautiful and in the praying postition all leaves happily lifting towards the light. Week 1 Day 4- 8/15/2023 Looking beautiful today and looked like she could use her first haircut.. gave her a TOP off. Roots are laying in the water everything is looking right on track.. Week 1 Day 5- 8/16/2023 walked in and the humidity was under 60.... ohh noooooo.. So I added 2 humidifiers to the tent and attached them to my InkBird controller which is set to 62. She had roots nicely in the water.. this grow is on!!! Week 1 Day 6- 8/17/2023 Humidity was a little low this morning, so I refilled the humidifiers. Other than that, the temp looks great, the PH looks great, the PPM looks good the plant is in the praying position and all damage from the little drowning seems to have been fixed. Happy Happy. Week 1 Day 7- 8/18/2023 Yay.. week 1 in the books, roots in the water growth has started first hair cut given and both side nodes are growing. Everything is looking good and on track.. A lot better than week one of the last grow when I had them drowning week 1. Really excited on how this grow is going to come out.
Likes
11
Share
The ladies bud growth is starting to take off! Got Some nute burn but honestly they’ve still been growing just fine. Candyland is undoubtedly the mother of all three! She is budding so beautifully! The smell is starting to get stronger and stronger everyday. cant wait to see these beauties ripe! Until next time Happy growing!
Likes
19
Share
@Coopmc
Follow
Light fruit smell starting to develop I was told she was bread for breeding and I belive it big bull is heads with thin fragile stalk m. Looks like about a week left a few discoloring a bit!!
Likes
35
Share
Bonjour à tous les padawans et les maîtres jedis Pour cette semaine je prévoit de pratiquer comme technique spéciale le LST et juste un arrosage. Pour cela comme à mon habitude j'attend le cinquième noeud ou que je juge la plante robuste. Je profite que cette semaine qui va être relativement calme pour faire un LST appliqué et vous faire un rappel de ce qui est pour moi la meilleure technique pour arroser une autofloraison et la façon dont je pratique le LST. En suivant ces quelques simples conseils vous obtiendrez un résultat optimal tout au long de votre culture : Le cannabis est une plante qui n’aime pas recevoir un léger arrosage en continu. Il est impératif de l’arroser en grosse quantité, puis d’attendre que la terre soit bien sèche avant d’arroser à nouveau! Pour calculer la quantité d’eau nécessaire à chaque plante, suivez cette règle : Le volume d’eau à donner lors de chaque arrosage doit représenter au moins environ un quart du volume du pot !! Exemples : pour un pot d’1L, donnez 0,25L d’eau à chaque arrosage pour un pot de 4L, donnez 1L d’eau à chaque arrosage pour un pot de 12L, donnez 3L d’eau à chaque arrosage pour un pot de 30L, donnez 7,5L d’eau à chaque arrosage !etc… Pour donner un tel volume d’eau, il est souvent nécessaire d’arroser en deux (voir trois) fois, lentement et uniformément sur toute la surface. Disposez de bonnes coupelles sous les pots, celles ci se rempliront d’eau qui remontera dans le pot par capillarité en moins d’une journée. Il est également très important d’utiliser un bon terreau de qualité, avec une bonne capacité de rétention d’eau mais qui assure également un bon drainage (celui ci doit contenir de la perlite, et/ou de la coco, etc..) Il vous faut alors maintenant attendre quelques jours en sous-pesant régulièrement les pot avec vos bras. Quand ils seront redevenus très légers, vous pourrez arroser à nouveau !! En effet, comme l’eau pèse beaucoup plus lourd que la terre, un pot gorgé d’eau pèse plusieurs fois le poids d’un pot d’une plante prête à être arrosée. Avec un peu d’entraînement, vous apprendrez donc très rapidement à sous-peser vos pots pour savoir quand une plante a soif. C’est une technique à la fois très facile et très efficace, et qui peut être appliquée à toutes les plantes en pots ! En arrosant de cette façon, en général vous devrez arroser vos plantes tous les 3 à 6 jours. Pour cette semaine 3 au jour 17 ma plante fais 12 centimètres et son cinquième noeud apparaît je décide donc de pratiquer un LST sur ma plante. Pour ce j'utilise du fil de fer galvanisé que je plante directement dans le substrat en faisant attention de ne pas endommagé les racines car n'oublions pas que ce qui pousse dessus pousse aussi dessous. Jour 17 je pulvérise du une solution composé d'une cuillère à café de savon noir mou dilué dans un litre d'eau en prévention d'éventuels nuisibles. Je corrige mon LST suivant la pousse de ma plante ... Pour ma par c'est la manière dont je procède. Comme promis petit rapel de: Quand commencer à appliquer la technique LST De nombreux cultivateurs commencent la manipulation dés que les plantes possèdent entre 3 et 6 nœuds ou une paire de feuilles. Durant cette première étape de la croissance, le tronc encore flexible est pliable sans risque qu’il ne se casse, même si au fur et à mesure du développement de la plante il sera de plus en plus difficile de le plier. Nous pouvons continuer à guider la croissance des branches durant toute la culture, même durant la floraison, ce qui pour cette étape représente un grand avantage face à la taille, qui n’est pas du tout recommandé une fois que la formation des têtes commence, cela stressera en effet la plante, ce qui aura pour effet de retarder la récolte. Comment appliquer la technique de guidage LST Si nous sommes prudents, la flexibilité naturelle des fibres du cannabis permet de plier leur tronc et branches avec une relative facilitée, même durant la floraison des plantes. En utilisant une corde fine, nous pouvons accrocher la pointe de la plante à la base du pot par exemple ou à un tuteur que nous aurons planté dans le substrat. Nous plierons le tronc avec précaution et nous le fixerons avec la corde, à partir de là, nous pouvons augmenter progressivement la tension de la corde, chaque jour un peu plus, jusqu’à obtenir la position souhaitée. Soyez attentif à la réaction de la plante, essayez de ne pas appliquer trop de pression sur la corde et rappelez-vous que la flexibilité des branches peut varier d’une plante à l’autre. Pour obtenir de meilleurs résultats, il suffit de suivre quelques règles simples. Pour commencer, nous devons choisir une corde fine mais pas trop pour ne pas blesser les troncs au fur et à mesure qu’ils grandissent et qu’ils deviennent plus gros. Nous pouvons utiliser des crochets en plastique souple ou de n’importe quelle autre matière flexible pour éviter d’endommager les plantes. Spécialement en intérieur, utiliser des cordons en plastique de couleur (voir les diaries de @Silky) est très pratique pour voir facilement les accroches et faciliter le travail au milieu du réseau formés par les cordes, les tuteurs, les mailles ou les supports que nous aurons dans la culture. Bien entendu, en culture extérieure et surtout en guerilla nous ferons juste le contraire et nous utiliserons des matériaux de couleur qui n’attirent pas l’attention pour que notre jardin reste discret. Pour stresser les plantes au minimum, la mieux est de réaliser ces manipulations le soir ou juste après que les lampes en intérieur s’éteignent, ce qui leur permettra de se remettre durant la nuit. Normalement, le jour suivant nous pourrons observer comme les pointes des branches que nous avons pliées se dressent de nouveau vers le haut à la recherche d’une source de lumière. Que la force soit avec vous
Likes
7
Share
Que pasa familia, vamos con la primera semana de vida de estas Black muffin F1 de Sweetseeds. Vamos al lío , las 4 semillas que germinaron con éxito se colocaron en macetas de 0.6 litros y asomaron 4, 100% ratio germinado. El ph se controla en 6.2 , la temperatura la tenemos entre 20/22 grados y la humedad ronda el 50%. Hasta aquí todo, Buenos humos 💨💨💨
Likes
57
Share
@Salokin
Follow
Hello Growmies! We've reached the remarkable week 16 with our tenacious plant, and the developments are simply astounding. Following a week of dedicated flushing, the plant continues to mature gracefully, showcasing an unwavering commitment to quality as she ripens. I'll maintain the reverse osmosis (RO) water regimen until she ceases sprouting fresh white pistils, a testament to her ongoing development. It's a delicate balancing act, providing enough support for her increasingly heavy branches burdened by significant gains, yet the plant's structural integrity remains a priority. Visually, the transformation is captivating; she's commencing a magnificent fade, with the unaffected foliage adopting a rich, deep purple hue, bordering on an almost blackish tone – a stunning display of her natural lifecycle. This chromatic shift isn't just aesthetically pleasing; it's a clear sign of the plant's life cycle progressing towards its grand finale. The chlorosis-free leaves, once vibrant and full of life, are now taking on this regal, somber palette, indicating that maturity isn't far off. Moreover, the trichome-laden buds are a sight to behold, their calyxes continue to swell, and the once slender branches now require additional support to sustain their own weight. It's evident the rigorous cultivation efforts are paying off – the plant's resilience and your attentiveness have aligned perfectly, resulting in an abundance of almost golfball-sized nuggets that shimmer with resin. Every plant tells a story, and this one is about to reach its crescendo – the careful nurturing, the attentive adjustments to the feeding schedule, and the delicate handling of her structure have all contributed to this moment. As we continue with the RO water and witness the plant's final stages, it's clear that the harvest will be one to remember. Stay lifted, Salokin.
Likes
11
Share
@blackcald
Follow
3d week go on. Topping on plant A. Add nutrients every 2d day. Down ph to 6.3. Start LST on plant A.
Processing
Likes
2
Share
Decent little stacks starting to form. Awesome aroma. Good frost production. At this point I was falling in love with the strain just due to its propensity to be grown under less than epic conditions. They took to the scrog nicely, despite the looseness of the trellis.
Likes
79
Share
@Salokin
Follow
Hello Growmies! 🌿👋 Welcome to Week 17 of our Epic Buzz journey! We're observing some noticeable progression in our plants, and we're nearly at the finish line with the next entry poised to be our final harvest week! Here’s the breakdown for our Epic Buzz phenotypes: Pheno #1 is thriving with its buds thickening up nicely, showcasing a frosty appearance that promises high-quality resin production. Pheno #2 remains a bit smaller in comparison, yet it's catching up with an increase in bud density and trichome development. Pheno #3 stands out with its robust growth and resin-packed buds that are slightly ahead in terms of maturity compared to its siblings. As we approach the harvest, maintaining optimal environmental conditions—consistent humidity and temperature—is more crucial than ever to maximize their potential. Stay tuned for our final week's update, and as always, stay lifted! 🚀🌱