
Likes
Comments
Share


@DrLaggis
Follow
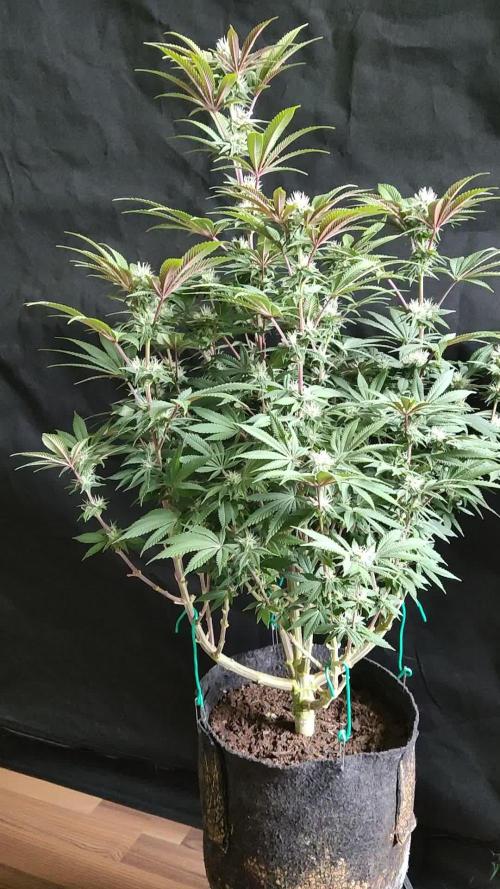
Day 72: The Finale 🌿🌟
It’s finally time. My very first grow is coming to an end—at least the cultivation phase. The plant is now ready for harvest, and I can’t believe how incredible this journey has been. I never expected to enjoy the whole process so much—from nurturing the plants to watching them grow and evolve. I’m absolutely hooked and can’t wait to dive into the next steps: harvesting, drying, curing, and of course, starting a new grow soon with fresh ideas and experiments!
While it may not be the largest yield, the quality of the buds speaks for itself. The time, love, and care I’ve put into this grow is visible, and I’m pretty proud of the results. I’ll admit, I was a bit impatient at times (which I think every first-timer can relate to 😅), but the experience was priceless.
Here are a few interesting highlights from my trimming and harvest process:
1️⃣ Dark Phase Before Harvest
Two days before harvest, I put the plant in complete darkness to encourage resin production. I'm not sure if it really made a difference, but it was worth trying!
2️⃣ Wet Trim vs. Dry Trim
I decided to go for a wet trim because the buds were really dense, and I wanted to avoid any risk of mold. I’ve read that wet trimming can speed up drying and may slightly impact the quality, but this is part of the learning experience. Next time, I’ll try a dry trim for comparison!
3️⃣ Yield Update
Wet, the total came in at 179 grams from my plant. Trimming took around three hours, and it was actually a lot of fun, despite the time commitment.
4️⃣ Curing Plan
The buds are now hanging in the tent for about 8 days. Once dried, they’ll go into jars with Boveda Packs (62% humidity) for another 3 weeks of curing. I'll update the smoke report once they’re fully cured, but I’ve already had a sample of the same strain from a friend, and I can say it’s pretty amazing.
Final Thoughts on My Grow 🌱✨
As mentioned earlier, this grow has been an absolutely incredible experience, and it has definitely set me on a path to jump right into my next grow. There were ups and downs along the way, such as over-pruning, which I believe stressed the plants a bit. Additionally, I think they could have benefited from an extra week to mature. We also faced many temperature fluctuations this summer, which impacted the plants due to external weather conditions.
I'm really pleased with the quality of the buds. The quantity is okay—I can’t fully gauge it yet—but I’m sure there’s more potential to unlock. I've gained valuable experience in what worked well and what didn’t. Overall, the countless lessons learned during this grow far outweigh the few mistakes made. I'm incredibly proud of my first results!
As this long journey comes to an end, I want to thank everyone who followed along. I hope you enjoyed all the content. In that spirit, happy growing, and see you next time! 🌟

Likes
2
Share


@SpartacaZ
Follow
L unica che mi piace sto giro sono la gorilla e la runtz....le piramidi non piacciono...


Likes
20
Share


@Alex8o
Follow
-15 till cut for mosts. Smell is very strong , especially dbl cookies and gorilla. All the strains are very solid and supersticky like never i seen😍💚.


Processing
Likes
11
Share


@ganjaman24
Follow
Sorry guys been lagging on posting because got a lot other stuff going on n I figured this plant would’ve been chopped by now but I must say she’s been filling out quite nicely..I lowered the light hours to try n see if thatll he’ll ripen her a bit faster as I’m looking to replace her with another plant


Likes
8
Share


@Whosaysgirlscantgrow
Follow
Well I’ve flipped the light schedule. We’re on 12/12. It’s only been 4 days and they’re definitely getting their stretch on! Let’s see what happens over the next week or so…


Likes
9
Share


@Gardenergrower
Follow
9 semanas desde el cambio a 12/12 esta semana estoy regando solo con agua y enzimas para que se terminen de comer los nutrientes que quedan en el sustrato y asi poder engordar un poco mas mis nenas ,contento con el resultado de mi primer sog ,harto trabajo ,pero muy entretenido y satisfecho siempre que quieres se puede ,hartos me decian muchas plantas que cuidar ,pero con amor y dedicacion todo se puede incluso mas ,quisiea poder contar con semillas de 1 sola variedad para realizar un sog ,quizas mas adelante y con perseverancia se pueda , ya queda menos para la gran anhelada cosecha eaeaea y seguir creciendo inmediatamente ,no hare lavado de raiz por que es un gasto innecesario de agua asi qye a pura aguita se mantendran hasta cosechar , que lo hare yo creo que en una semana mas ,saludos a todos y que no paren de plantar jamas ,abrazos comunidad de grow diaries


Likes
12
Share


@Coman
Follow
Harvest is coming closer but not yet. No amber trichomes yet.
Still drinking 3.4L/48 h.
Nice smell, some how hypnotizing, but not that strong. Maybe filter is doing the job.
Did some defoliation 2 days ago, light on the 2 ladys behind, and little stronger on the one in the front, cause I think she’s not fare from ripening.
Likes
2
Share


@MO_Gardens
Follow
This plant has stacked a lot due to the lights. I removed a few leafs to help light get to the under branching to promote it's growth. Feed her with a bit of liquid seaweed and molasses and she's happy and loving life.

Likes
10
Share


@StonedFarm
Follow
09/21/24 - Purple Punch 👊 & Green Crack 💚
Both these girls got the lollipop 🍭. All the winners stayed 🏆 😂. They got a bump up in the PPM, and we also increased the TPS Signal for the 3gallon dunk to now 3ml. 100% Bloom juice now. Runoffs are in the 6.3-6 4. So they thriving.
09/24/24 - Purple Punch 👊 & Green Crack 💚
Both these girls are drinking heavy, and already starting to see frost on the PP. We have them a top feed of just pH 7.2 water, to hit the 6.4 runoff.


Likes
10
Share


@Big_Dennis_Budz
Follow
Tweaking the feed every watering, increasing the big bud and dropping the voodoo slowly
Likes
9
Share


@Colo420
Follow
Atrasados con el seguimiento debido a las vacaciones pero aquí regresamos!!
Proximamente 6 comienzan su flora en exterior y 2 en interior


Likes
Comments
Share


@Gardens_of_Of
Follow
She is also experiencing a general yellowing all over. I contacted Advanced Nutrients support and they consulted me to increase the feeding. Let’s see how it goes.
On the other hand, she keeps growing buds. Looks like stunned a little. That’s why I am waiting another 2 days for lollipoping.


Likes
6
Share


@Mr_nugs_lover_David
Follow
It was such a nice experience for me with this strain, first time ever growing her, she had a little bit of long internodes and thought she wasn't gonna be very productive, however the nuggets are so so hard and compact and the quality is just brutal, doesn't even look like she's s been outdoor grown, I love this strain for the rare strong smell like very sweet and floral with that strange diesel notes mix the sweet tones, I would love be growing her my whole life, I definitely will keep growing this lady FOR SURE!. thank you so much and hope you guys enjoy! 💎🙏🔝💚
