
Likes
Comments
Share


@Dictator
Follow
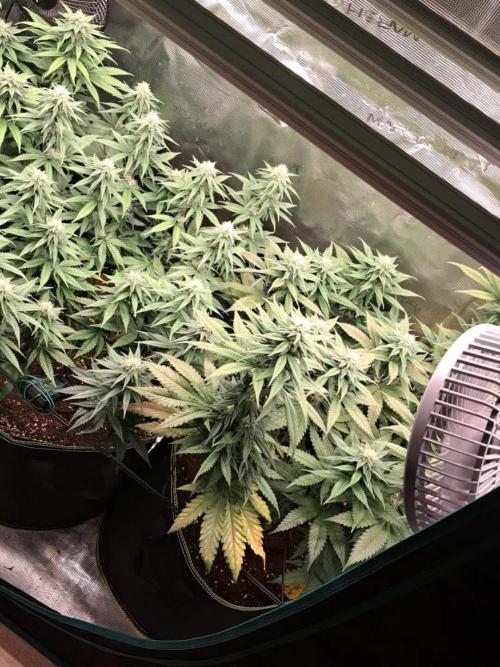
I did this beautiful girl a strong defoliation and let's see together what kind of girl she will be in the end, in 10 days I completely filled the 120/120 tent with the plant and then I will switch the light cycle to 12/12 🌞🌋💚

Likes
8
Share


@BigDaddyK
Follow
Looks healthy , roots everywhere I will transplant this week into the 19l pots
Change reservoir Fridays

Likes
16
Share


@AestheticGenetix
Follow
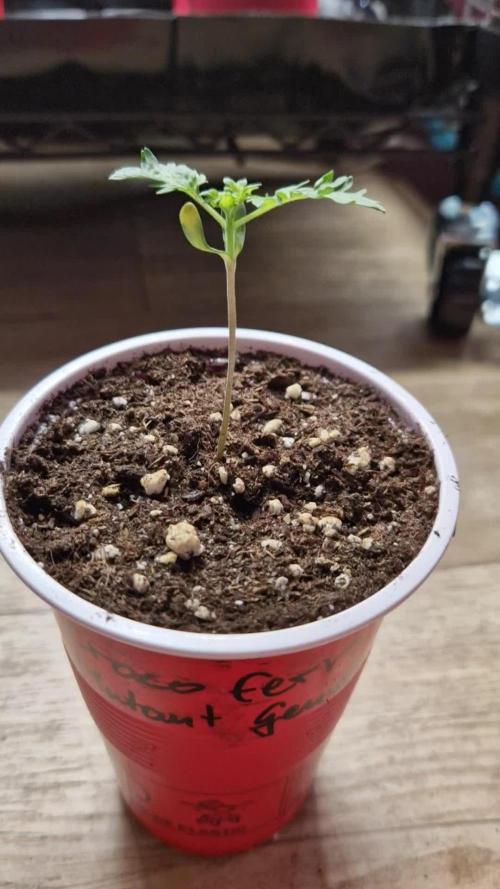
6/4/25 really slow growing. Will more than likely need to abort soon and try with a new seed
Processing
Likes
3
Share


@Mr_nugs_lover_David
Follow
She looks very good and healthy, hope she was gonna get a little bigger, same thing with her sister, however I like the aroma she's starting to produce both of them, let's see how they perform. Peace guys ✌️💚🌱❤️

Likes
1
Share

@Grow4ever
Follow
Die Pineapple Express hat so einen süßen Geruch.
Wirklich tolle Genetik.

Likes
10
Share

@TrickzGrowz
Follow
Servus Moin!
Die Mentha de Croco wurde letzte Woche noch von ihren Schwestern getrennt und einzeln eingetopft. Sie hat sich vom ganzen super erholt und bildet sogar schon neue Blätter aus. Sehr Interessant anzusehen.


Likes
17
Share


@FlavoursUk
Follow
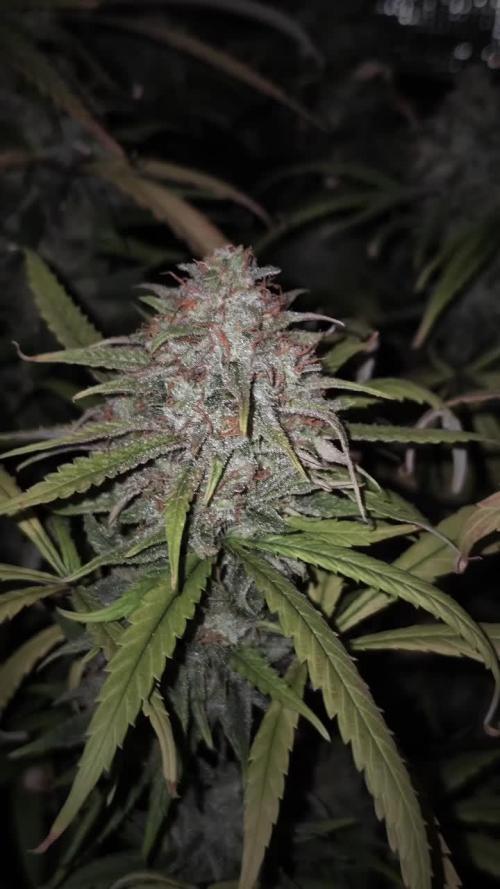
Day 58 - As you can see, buds are looking full but still looking like they want to go a bit longer, checking the trichomes frequently and seeing a lot of cloudy.. think i saw the first few ambers too. Any how, we shall keep going. Flush time soon.
Day 62 - Looking good, smelling better.. really fruity and sweet. Seems ripe too. Feeds lowered and a little flush. Buds are rock hard, very dense and sticky. Looking forward to harvesting. She will be ready by day 63, but I'll see weather or not ill let her go longer. Stay tuned.
Day 64 - trichomes ready, little flush and shes ready for the chop. Beautiful smelling strain and easy to grow. Very hard dense gassy and sweet buds. Once dry and cure, will be back with a little update.


Likes
2
Share


@GroloCup
Follow
Week 2 underway and she's developing accordingly. Everything is in the soil so we continue to just let her sip from the reservoir thru the wicks. I'm still misting the top of the soil to make sure she's getting enough to drink.


Processing
Likes
10
Share


@Barcelona_Farmers710
Follow
Esta semana transplantamos nuestras plantas en tiestos de 7 litros de tela y un par de ellas en 11 L de maceta de tela. Utilizamos Azos y Mykos siempre para esa etapa con las recomendaciones de la fábrica, este cultivo Probaremos el delta 9 un compuesto de algas marinas. Espero que os guste Farmers!🍁

Likes
Comments
Share


@n1mbu5
Follow
OK guys I've shut them down to 4hrs light a day for 2 days now. They have really filled out those buds and are looking extra sugary.
I have been watering with 140ppm water at 6.2-7 pH with flawless finish for 6 days now.
I have just given them probably the last watering will leave them for another 3-5 days on 4hr schedule before turning lights off for 2 days and then harvesting.
Next diary will be the harvest!! I hope nothing goes tits up from here😂

Likes
4
Share

@GoldenWeedGrower
Follow
📅 07/04/26
🗓️ D036 (V5 / D1)
🌡️ 1.2
💨 1000
💧 30L (New Setup)
🥗 4 ml for mains , 2 ml for additives
⚗️ 1.2
🔬 6.2 (pH- added)
🛠️ Transplant
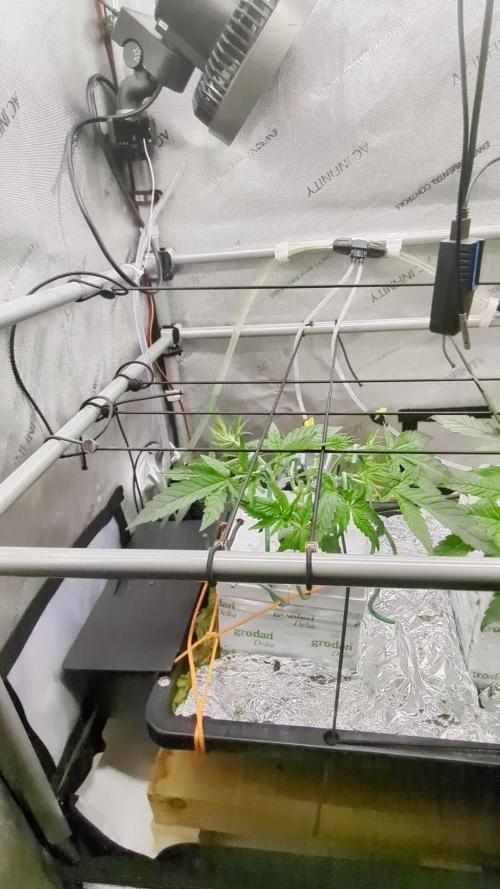
📋 New home, more space and a new setup with Aqualoop custom made DWC System
📅 08/04/26
🗓️ D037 (V5 / D2)
🌡️ 1.2
💨 1000
💧 -
🥗 -
⚗️ 1.2
🔬 6.0 (pH- added)
🛠️ Added Scrog Net and finished setup
📋 First day in the new home. Made a nice video of Aqualoop DWC System
📅 09/04/26
🗓️ D038 (V5 / D3)
🌡️ 1.2
💨 1200
💧 -
🥗 -
⚗️ 1.2
🔬 6.0 (pH- added)
🛠️ Defolation made. Flipped today to 12-12
📋 Flowering stage is coming
📅 10/04/26
🗓️ D039 (V5 / D4)
🌡️ 1.2
💨 1200
💧 -
🥗 -
⚗️ 1.4
🔬 6.0 (pH- added)
🛠️ Started LST
📋 -
📅 11/04/26
🗓️ D040 (V5 / D5)
🌡️ 1.1
💨 1300
💧 -
🥗 -
⚗️ 1.2
🔬 6.0 (pH- added)
🛠️ Fixed a problem with filters
📋 -
📅 12/04/26
🗓️ D041 (V5 / D6)
🌡️ 1.0
💨 1300
💧 -
🥗 -
⚗️ 1.2
🔬 6.0
🛠️ -
📋 A couple of clones rooted. Lemon Cherry Gelato is the first and Bruce Banner the second. I need to choose the mother based on rooting and mother performance. We will see...
📅 13/04/26
🗓️ D042 (V5 / D7)
🌡️ 1.0
💨 1300
💧 -
🥗 -
⚗️ 1.1
🔬 6.0
🛠️ Clones of Lemon and BB transplanted each one in a new rockwool cube
📋 -
==============================================================
Legend:
📅 DATE
🗓️ DAY (StageWeek / Day)
🌡️ VPD
💨 CO2
💧 WATER ADDED
🥗 FOOD ADDED
⚗️ EC
🔬PH (adjustements)
🛠️ ACTIONS
📋 NOTES
📅🗓️🌡️💨💧🥗⚗️🔬🛠️📋
Likes
27
Share


@Lplategrows420
Follow
Chopped today will updates weights and everything else after a week of hanging will trim and weigh then glad to make it to the end looking forward to the next grow. Super happy with this way more then I was expecting from this grow
Likes
3
Share


@Mr_Anonym
Follow
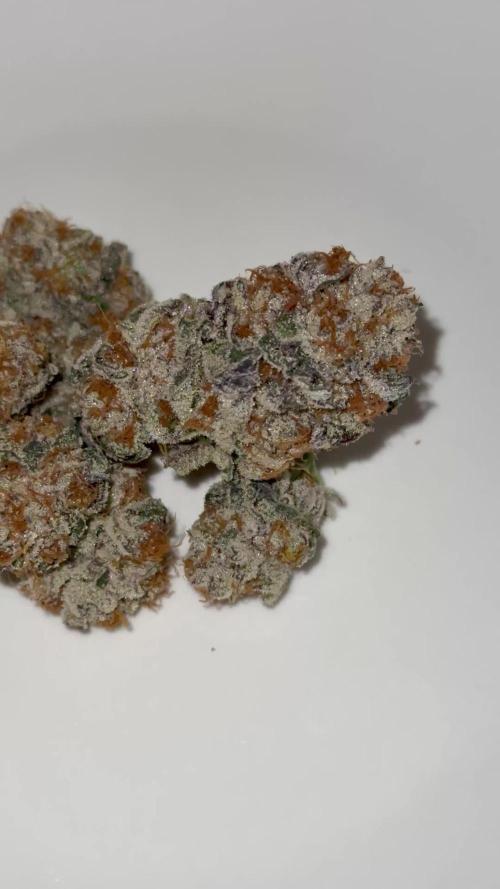
War ca 115g trocken. Riecht und schmeckt kush mäßig. Für automatics würde ich sagen ganz gut abgeliefert
Likes
71
Share


@ClubRiot
Follow
Royal Gorilla
Week 16
11L Pot
LED: SP250 (245W) for Flow. Stage
Canna COCO
Mineral Nutrients:
👇
Flawless Finish: 2 ml/L
Processing
Likes
10
Share


@Geewiz
Follow
Hey guys! Thanks for stopping in to check out my babies! This is week 2 of flower (days 8-14).
This week things really seemed to take off! 🔥 Plants were happy all week long and seemed to grow almost an 1” per day if not more.
Buds are developing nicely, no smell yet but nice to see them stackin’. I cut out anything under the trellis that would end up being popcorn buds so the plants could focus on the main colas. Hoping I’ll just have to pull a few leaves here and there from now on.
The New Floraflex drip system has been nice! 💯 It has made watering easier and more automated. Water distribution isn’t perfect but I’m sure they aren’t 100% level either.
Plants should stop stretching after this next week and should start putting on some size! Stoked to see what these girls can do in week 3!
Day by day break down:
Day 8
Cut out some lower growth/ leaves blocking bud sites
Day 9
Fed all 6 plants. PH: 6.11, PPM: 1136
Day 10
Plants look great. Let them do their thing.
Day 12
Fed al 6 plants. PH: 6.05, PPM: 1264
Day 14
sitting at 29” tall right now. Not so stressed on height being be issue. Thinking they might be around 35-40” tall at the max.
Stay tuned for next weeks post to see how much these ladies have thickened up!

Likes
2
Share


@birdmountain
Follow
Die Candyland ist wahrliche eine wüchsige Sativa mit mittlerweile 52 cm Höhe, obwohl sie bereits einmalig getopped wurde. Ihre Internodienabstände sind allerdings auch sehr groß. Da wird mehrmaliges Topping und vielleicht auch HST angesagt sein. Freue mich darauf sie nächste Woche nach den Eisheiligen in den endgültigen Topf verpflanzen zu können.

Processing
Likes
16
Share


@fvckinginfamous
Follow
First day of third week, its been 15 days since they got fresh air for the first time!
Its been quite amazing to see them grow pretty fast, since this is all new for me im pretty amazed!
Plant two, being the one in the middle, has much larger leafs than the others, but i guess thats because its directly under the LED, i wanna start LSD training but tbh i have no idea what to do with so smal space * and i have zero practice with this!
Plant two is also showing some yellowing signs on the tip of new leafs which i have to figure out why! asking some help in forums aswell now and see what i can change, i havent introduce them to bloom nutrients yet and that also might be it, will see what to do very soon! Might need to also increase biogrow levels on that one, since shes taking more light than the other two and growing faster, was wondering if switching places between them would help
for now im watering them daily each with 0.5L per day, with a 1ml/l of BioGrow, no idea if i should increase it or not, but ill learn
Likes
10
Share

@GREENPHOENIX6262
Follow
01/06 - Week 5 of flower - Increased nute feed to daily micro-dosing and increased Silica feed - temps running 72 (F) 65% humidity - Using light brown sugar as carbohydrate.
01/08 - Flowering coming along nicely - Light brown sugar for carbohydrate subs seems to be working effectively - micro dosing has continued with one morning feed before lights out and another 2hrs after lights on. Feeding solution temps are approximately 35 (F) - Drop in water feed temps has increased trichome production.
01/11 - Closing out week 5 of flower strong - light brown sugar feeds continue - amber color setting nicely in all the colas - Approx 3 to 4 weeks before cut-down😎😎😎😎🙌🙌🙌
