


Likes
Comments
Share


@Roberts
Follow
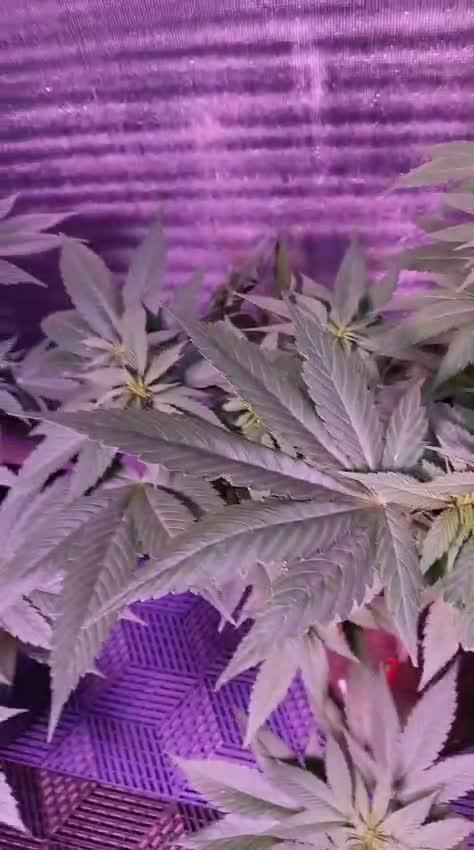
Northern lights has been doing good. She has started growing up from the hst last week. She has been progressing more into flowering, and is looking good. Thank you Divine Seeds, and Spider Farmer. 🤜🏻🤛🏻🌱🌱🌱
Thank you grow diaries community for the 👇likes👇, follows, comments, and subscriptions on my YouTube channel👇.
❄️🌱🍻 Happy Growing 🌱🌱🌱
https://youtube.com/channel/UCAhN7yRzWLpcaRHhMIQ7X4g

Likes
8
Share


@Borberad
Follow
Woche 3
Das Pflanzchen wächst gut und der Easycube ist gut durchgewurzelt. Diese Woche wird in den 3 Liter Stofftopf gewechselt. Dabei darf ein bisschen Pilzwürze natürlich nicht fehlen.

Likes
16
Share


@Naujas
Follow
the girl started to lighten, although I kept giving her 1100 ppm 2 times a row. ph 6.3 I think it's the pot's fault, it's too small! the roots want to run to collect the waste water. but basically the flowers look very nice:) and the smell after opening the tent is just wow, I already feel that it will be really good:) good luck to everyone:).

Likes
9
Share


@bigolebuds
Follow
Week 4: We are officially one month into our grow! things have been going pretty smooth so far and that’s exciting!! Yesterday we picked up our Gaia Green 4-4-4, repotted one watermelon zkittles into 5gal, and we we watered both Sunday and yesterday (oops). With that and the topping done, we plan to give them the week to recover and then start LST and feeding. You’ll notice a large number of plants were moved outside… those were all auto seeds that we got for free from Seedsman and Perry’s Magic Beans (Northern Lights, Critical + 2.0, M+M, and High C) shout out to them!! In a week or so the clones will be moved out and we will have our final 4 in the tent.

Likes
1
Share


@Cannerd
Follow
I'll be updating the comment with the daily log shortly, but figured I'd get the photos and weekly overview up.
I started off this week with a topping at about the 4th node, leaving the larger fan leaves on for now. I then left then alone for a bit while I waited for the new branches at the nodes to grow out, rotating as needed. By the end of the week, they had all bushed back up with new foliage and growth.
I also included photos pf the flowering mother plant to keep up with that sneak peak. She still wasn't showing signs of flowering, so I gave her an extra 24 hours of darkness to hopefully kick start the process. As I went to go shut unplug the light source, I noticed that there was a smaller light leak from one of the vent ports, so I also made sure to close that up. At the end of the week when she started to show signs of flowering, I defoliated her to help with light penetration, as she's got massive fan leaves. You'll see in the photos that I took that opportunity to decarb the trim as well. I'm sure there's little to no THC-A, but whatever other compounds are present should make for a nice addition to some butter later on down the road. I just won't factor it in when approximating the potency of the final product.
Processing
Likes
81
Share


@LockDownGrow
Follow
Well this little girl is forming very much like kush buds would , very dense and thick bud with very few white pistel hairs ,
A very attractive bud too watch form ,
she is packing on bud like there is no tomorrow as you can see from the pics and drinking the pot dry every 3 days of 8 pints ,
the colour from this plant is truly a sight indeed and the smell she is giving off is like a mouthful of blackberry jelly and icecream back when you was a kid ,
i am very excited about this one and cannot wait too try her ,

Likes
14
Share


@Canna96
Follow
This week went well for the Durban Nights. Not much to report, she hit day 14 today and is working on her 3rd node, I will transplant her in 48 hours, then hopefully top her in about a week or less. I will wait for her to grow at least 7 nodes so I am sure her roots are solid before the topping, but she will absolutely explode after transplanted into coco coir so that shouldnt be a problem. I will also complete the first two sets of toppings at the 3rd node, so that should shave a little time off as well as I previously completed the 2nd and 3rd toppings at the 5th and 3rd node to further spread out the plant.
Super excited for this strain as it is a cross of Durban Thai and Jack Herer which are two of my favorite Sative Strains. I hope everyone has a safe weekend.
Thanks for stopping by, Stay Safe and Blaze On!!! 💪
Website: https://medicgrow.com/
https://growdiaries.com/grower/medicgrowled

Likes
6
Share


@Hoodoo
Follow
Here are the comments. Continuing on with the sexy ultra awesome General Hydroponics EXPERT LEVEL NUTRIENTS which are making the trichomes and the smell go insane! Can I prove it's the new nutrient? Not at all because this isn't a rigorously conducted scientific experiment but anecdotally, it's making a difference. I have two new white widows that are growing using the expert schedule and they are the healthiest plants I have ever grown. Too bad I didn't start this autoflower with the full nutrients from the beginning.
I've never had a prettier plant though, good genetics from Sweet Seeds.

Likes
6
Share


@Izlti_ocelopilli
Follow
I’m using KIS organic a soil with fermented inputs and water soluble calcium, I’m using a KNF bloom and FPJ for nitrogen, and aloe for vitamins, and humic and amino acids. NO chemical fertilizers
Likes
11
Share


@GrowerGaz
Follow
The three small ones are in on day 14 , the bigger one is 5/7 days ahead. I gave them all a top dressing with a couple of grams each if bio grow from Greenhouse feed. Liking the @spiderfarmled , does not get to hot and seems brighter. I moved the light down to 40 cm , above the tallest plant.


Likes
6
Share


@Smokwiri
Follow
All looks good, smell is good,
flushing with ec 1.4
I could have harvested last week already, but i like to let it stay a little longer
harvest wont be impressive, but it's an trained autoflower, on normal potting soil, and lights very low.
quality looks very nice, smell too, I hope it tastes the same too.
Likes
283
Share


@love_2_grow
Follow
FD57 - We're at the start of the ninth week of flower. Everything is just coasting along this late in flower, and there isn't much to do except check trichomes. I'm seeing less clear and more cloudy and amber, and I estimate that chop day is one, mayyyyyybe two weeks away.
The RH is the tent has dropped somewhat to mid-high 50s. It is still higher than what I prefer at the end of flower but should hopefully be ok. I turned up the circulation fan to increase air movement and make it more difficult for botrytis to take root.
D63 - End of the ninth week of flower and I'm debating whether to chop tomorrow or wait another week until I get home from a trip. Decisions, decisions...

Likes
11
Share

@World_Breeders
Follow
Pink Truffle #1 — Week 2 Flowering
Pink Truffle #1 enters the second week of flowering displaying a vigorous yet controlled stretch, maintaining the compact and well-balanced structure already observed during vegetative growth. Unlike more elongated phenotypes, this plant continues to develop with tighter internodal spacing while steadily increasing the number of active flowering sites throughout the canopy.
The training performed during vegetation has resulted in excellent branch distribution, allowing light to reach both the upper canopy and secondary flowering sites. Multiple tops are developing simultaneously, creating a uniform structure with strong production potential across the entire plant rather than concentrating growth in a few dominant branches.
Flower initiation is now clearly established, with abundant pistil formation visible on all primary and secondary tops. The canopy remains dense but organized, showing an ideal balance between vegetative vigor and floral development. Branches are sturdy and well-positioned, supporting the formation of numerous future colas while maintaining excellent overall symmetry.
One of the most notable characteristics of Pink Truffle #1 at this stage is its efficient use of space. The plant combines strong lateral expansion with moderate vertical growth, creating a productive canopy that maximizes light interception without excessive stretching.
As flowering progresses, Pink Truffle #1 is showing all the traits of a highly promising producer, with excellent structure, uniform flower development, and the potential to generate a canopy filled with dense, evenly developed tops in the weeks ahead. 🌱🔥🍬
Seed: World Breeders
Grower: Piperoots
Likes
Comments
Share


@naughtydog420
Follow
This was my first attempt at growing autos she triggered a little to early being the reason she is so squatty but I'm sure she's still going to be just as good as a plant twice her size I most definitely learned a lot about the auto flower that I didn't know before so I made adjustments on my second auto flower that I'm growing she is about 40 inches in height and filling out nicely i'm going to let the plant pictured go another week or so to make sure she's completely done I will post pictures and video of the harvest
Processing
Likes
Comments
Share


@Heathi
Follow
Flipped to flower to see what she can do because so many clones took! I'm so super new that it's still so exciting every time I figure something out.
Definite pistils at day 3 of flower


Likes
6
Share


@AcidBurn_40
Follow
10.02.24 BT 20
Moin moin ,
Buddy's musste eben feststellen das mein kompletter Report weg ist 😡.
Den Mädels geht es gut 👍🏻
Sie Strecken sich und es kommt immer mehr zum Vorschein 🙂
Heute gab es wieder lecker Nährstoffe Hesi Blüh Complex 5ml auf 1L Wasser.
Das Gießen ist ganz leicht für mich 1 Tag Ph neutrales Wasser, darauf den Tag garnichts und dann wieder Nährstoffe.
Phosphor + gebe ich ab den 40 BT mit anfangs 0,2ml auf 1L bis zum Spülen dann höchsten 1ml auf 1L habe auf die Jahre gelernt damit vorsichtig zu hantieren und gut spülen 😉Sie kommen mit Hesi Blüh Complex aus.
Jetzt schaue ich erst mal das ich meine Berichte wieder neu schreibe ist ja leider alles weg.
Mögen all eure Lady's Gesund und brächtig Wachsen und euch mit schmackhaften Stuff versorgen 😉
Likes
1
Share

@Cannerd
Follow
How ya doing mates?? Awesome week last week - all photos and logs have been added so be sure to check it out! This week is going great so far! I've switched to an early vegetative state nutrient system. As you'll see in the daily logs early this week, this bumps up the micro and grow nutes, and keeps the bloom at 0.6ml/gal. A quick note about last week - I'm unable to update the measurements, but please note that those nutrient amounts are measured in ml/gal, NOT ml/l.
Anyhow, this week I'm just waiting to get my order of diatomaceous earth so that I can make up another batch of soil. I'm still debating between topping this week before repotting or letting them take root in the new pots first. Decisions decisions lol. I think at the very least I'll clean up some of the lower growth to make sure the energy is being spent at the right places. I've been switching back and forth between just LST and mainlining in the past - but I think I really like the ease and cleanliness of mainlining. The draw back is the recovery time they take in the process haha.
UPDATE:
The D.E. has come in, and I repotted the girls this week. I mixed in about 1.5-2 cups D.E. for the whole pot, as well as some Bat Guano and Kelp Meal for micro and macro nutrients to use on dry cycles.
I've also included some photos of the mother plant to give an idea of what's to come! I've just started to flower it, which is the first time for this strain - so I'm pumped!
Day 15:
M.C. 01-21 After reviewing the last set of photos from last week, I figured I'd play it safe and dimmed the light back down to 25% strength. The mother plant is almost ready for flower, and I'm down some tents so she'll be taking this one over shortly. These photos were taken shortly after the lights went off, and they look quite happy! You can see some of the side branch developement in today's photo for MC-01. The pots are fairly dry now, and I've decided to move to the next stage in the nutrient regime. This kicks up the Micro and Grow nutes, while maintaining the Bloom amounts.
M.C. 02-21 A nice top photo for MC-02, you can really see the lighter green in this photo. Not to worry though, as these will darken back to a vibrant green as long as I give her what she needs shortly! The pots are fairly dry now, and I've decided to move to the next stage in the nutrient regime. This kicks up the Micro and Grow nutes, while maintaining the Bloom amounts.
M.C. 03-21 Look at that little leaf poking out from the 2nd node! Some slight yellowing you can see too, but again, not to worry. The new mix should rectify that. I've decided to move to the next stage in the nutrient regime. This kicks up the Micro and Grow nutes, while maintaining the Bloom amounts.
Day 16:
M.C. 01-21 Today is the day - for the mother! I've cleared out some space and moved plants around. So back out to the grow room these girls go! MC-01 seems much better today with the reduction in light. The 5th node is almost flattened out and the 6th coming through still. Most notably though, you can really see the work she's put into the side branches! The branches at nodes 2 and 3 are starting to produce more leaves - great sign! The new growth at the top is also a nice dark green. Added 500ml water to the tray.
M.C. 02-21 MC-02 seems to have liked the adjustment of light as well. She's got nice dark green growth at the top, and the little branches at the 2nd node seem to have a full leaf! Added 500ml water to the tray.
M.C. 03-21 The photo from today is cool, because you can see how close MC-01 & 03 are, even though there's almost a full node difference. MC-03 is stretch out a bit to compete with her sister for the light haha. She's also put some more effort into the side branches that you can see. Added 500 ml water to the tray.
Day 17:
M.C. 01-21 I figured a video would be the best way to illustrate the changes today! They've been back in the grow room under the Veg dedicated light for a day now and seem to be loving it! MC-01 has its' 5th node out, splitting the 6th node, and I can JUST see the 7th node coming in. I don't think they'll get too much more height, as you can see that the side branches are starting to stretch now! She's definitely going to be well tangled in the roots by the end of the week when I hope to repot her.
M.C. 02-21 MC-02 is doing great despite the difference in height! You'll notice the side branches stretching out at nodes 2 & 3. The pots are also still fairly wet at their center, so I'll hold off on water most likely. At least this clone will have time to root more while we wait for the supplies!
M.C. 03-21 MC-03 also has great side branching! If you take a look at the group photo from today, you'll see that both MC-01 & 03 are practically the same height, but MC-03 snuck in there by the stretch haha.
Day 18:
M.C. 01-21 My order of D.E. came in last night, perfect timing! As you can see, her roots have fully reached the bottom, and have started to migrate upwards with the water that's absorbed. The soil was a little dry for my liking, which made things a little difficult/dusty but still no mishaps! Watered around the root-zone before covering with more soil to keep the gnats down.
M.C. 02-21 Not quite as much lateral root growth as MC-01, but still plenty enough for a repotting! Her soil was a little dry as well. Ideally I should have given them a light misting from the top of the soil and let is drip down to keep the dusty bits together haha.
M.C. 03-21 Nice and thick root growth, no issues with repotting, and strong stalk. The extra spacing in the nodes may prove to be helpful during the training phase.
Day 19:
M.C. 01-21 Some nice top shots today as they slowly get acclimated to their new homes. Once I see them push out a new node, I'll probably top them. This is to make sure that they're taking to the new pot without causing any extra stress before they can take it. Today I watered them with an early veg nutrient. I like to stay cautious with nutrient boosts since they're in soil - not to mention the added nutrients from the repotting.
M.C. 02-21 Top shots for the girls today. Not much change, but also no immediate signs of shock either, so I'll take it.
M.C. 03-21 You can't really see it in this angled shot, but the small branch at the second node is coming along nicely! I think the girls are happy that they each have their own tray not haha.
Day 20:
M.C. 01-21 Definitely noticing some slow changes to the top nodes when comparing the pictures from the previous day. The leaves are slowly starting to separate, and I'm not noticing too much yellowing yet which is good. Watered with 500ml water to keep water migrating upwards to meet the roots.
M.C. 02-21 Not noticing much change in this girl today, but that's okay. She's most likely focusing on the root developement instead which I can't complain about! Watered from the bottom.
M.C. 03-21 Maybe seeing some separation in the top leaves, however more notably are the small branches at the 2nd node that you can see better here. Still a bit of stretching with them as they get longer. I might even keep them on for clones later on. Watered from the bottom.
Day 21:
M.C. 01-21 Looks like she gained some distance last night, as the top node is now above the fan leaves, unlike 2 days ago. I'm really getting eager to top them, as I don't want them to waste too much time and energy growing tissue that I'll just end up cutting off. I'll be bumping the nutrients up starting next week to keep the progress going, moving to a mid-veg stage shortly. I'm going to let things dry up tonight for a fresh boost of water tomorrow to give it a dry cycle as the pot is still a bit heavy.
M.C. 02-21 MC-02 really worked hard last night it seems, as she almost completely flatted out her top leaves! I think she's ready for a topping, but I'll let her benefit from the headstart and let the other two catch up and root before. dry cycle for her tonight as well.
M.C. 03-21 MC-03 was busy last night too and is now slowly flattening out the top node as well! Maybe tonight they'll have enough progress to go topless afterall haha. Dry cycle in prep for watering tomorrow.
Likes
2
Share


@LoganatorDude
Follow
I absolutely love to watch them grow! Especially that moment they hit their first growth spurt.
I started with RO water that is remineralized for drinking purposes. The ppm is only 18! My tap is 156! So considering they don’t need much water, I’ve been stealing some of our drinking water. The RO water starts at pH of 7. After I add the nutrients, ppm of 249 @ pH of 5.8 while soil is still sweet @ pH of 7
I think my days are off as a new week begins on the last day of the previous week. I am going to leave that for consistency.
04/21 - Noticing some possible nutrient issues with the Fruity Pebbles for several days now. Going to see what she needs. Up front I’m thinking maybe just a super small amount of Amino Acids with a little Epsom Salt. Maybe she is struggling to access the nitrates from the neem cake. IF it’s a issues with nitrogen. We will see. Maybe she would benefit from some extra calcium?… Any ideas are greatly appreciated.
Day 22 and I am noticing how these girls have been burning up a lot of potassium lately, dealing with the wind and sun 💨 ☀️, getting pushed around all day.
I plant to top dress with some Kelp Meal pretty soon.
Day 24 -> 4/22/22- a quote from the weather on today’s red flag warning and dust storm warning.
“ HAZARD...Less than a quarter mile visibility with damaging wind in excess of 60 mph. SOURCE...Satellite imagery. IMPACT...Dangerous life-threatening travel.”
I’m keeping the girls inside today.
Day 26, I was planning to check the runoff on some of these girls, especially the fruity pebbles, however I messed that up as I also top dressed WAY too much of the seaweed bliss. So I flushed with plain RO water at pH of 7 until there was only slight coloration in the runoff. I didn’t check the runoff as a lot has changed with all that flushing. So next watering/feeding I will make sure I check the runoff on multiple plants.
So the seaweed bliss with its 17 on potassium, seems to be the most likely culprit for why there is a bronze-ish color on the inside of the new growth. Hopefully a foliar feed of Epsom salts can correct the problem. Inside tent, lights on LOW. Noticing similar pattern in all of them to a degree, most noticeable in the fruity pebbles.


Likes
62
Share

@Roberts
Follow
I am dropping a Do-si-Dos auto from Zamnesia seeds. I lightly scuffed both ends, and dropped it in a glass of water.in 24 to 48 hours when it starts a tap root. I will then drop it in rockwool, and dome till sprout. 🤞🏻 for a great grow. Thank you Medic Grow, and Zamnesia seeds. 🤜🏻🤛🏻🌱🌱🌱
Thank you grow diaries community for the 👇likes👇, follows, comments, and subscriptions on my YouTube channel👇.
❄️🌱🍻 Happy Growing 🌱🌱🌱
https://youtube.com/channel/UCAhN7yRzWLpcaRHhMIQ7X4g


