


Likes
Comments
Share


@Jardineiro_Br
Follow
Uma planta estava muito travada e pela minha experiência não vale a pena o custo da manutenção dessas plantinhas é chato mas preciso do espaço e do tempo para cultivar plantas que deem resultado.
Coloquei um gancho leve em cada planta hoje para ver se aumenta a área verde.

Likes
13
Share

@Organic_G
Follow
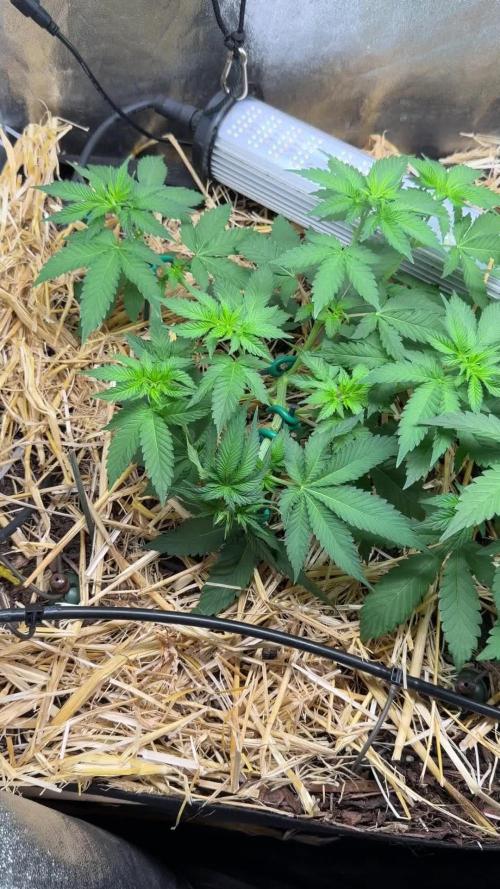
Die Ladys wurden gestern etwas beschnitten, habe untere treibe entfernt und neue treibe die nicht wachsen sollen. Ansonsten fühlen die Ladys sich extrem wohl wie man an der Bio Masse sehen kann. Gehen nun über in die Blüte, zumindest gibt es erste Vorblüteerscheinungen.

Likes
82
Share


@UnorthadoxDude
Follow
Hello growmies! Welcome to week four of An Epsilon Adventure!
The girls are already transitioning into flower, I will get some photos of that later in the week.
Massive thanks to both Shogun and Royal Queen Seeds for sponsoring this grow.
Daily Updates:
###
Week 4 Day 1 11:00 16/7
Removed some lower growth.
###
Week 4 Day 2 23:00 17/7
Tallest plants were showing signs of heat stress so I have raised the light about 30cm more. Unfortunately this now means the lower plants aren't getting as much light as they could, so I have put the cycle back to 20h (I may even increase it).
###
Week 4 Day 3 14:00 18/7
Photographed.
###
Week 4 Day 3 19:00 18/7
Fertigated 2l.
Okay these girls are now starting to concern me a little on the basis that they are supposed to grow to "50-70cm". At just over 3 weeks old the shortest of these girls is 53cm, the tallest (plant 3) is now 76cm tall. The worrying thing is they do not at all look like they are slowing down and as they are just pre-flowering now, the flowering stretch hasn't even started.
So I need some genuine advice here now:
Do I keep the faith and hope that they don't exceed the space I have?
Do I top or super crop them now?
These ladies are beastly, at the end of the week I am going to take some individual videos and more photos to really try and capture how magnificently well these girls are doing. I think I may be in the process of growing the biggest Epsilon F1's so far? Exciting to find out!
###
Week 4 Day 4 21:00 19/7
James has assured me they wont go much more than 85 so I am not going to mess with them. They are due a defoliation at the end of this week though.
Measured each plant as follows:
Plant 1: 81cm
Plant 2: 75cm
Plant 3: 80cm
Plant 4: 67cm
Plant 5: 59cm
Plant 6: 58cm
Might photograph later or leave until tomorrow.
###
Week 4 Day 5 10:00 20/7
Photographed and measured.
Plant 1: 85cm
Plant 2: 79cm
Plant 3: 81cm
Plant 4: 71cm
Plant 5: 63cm
Plant 6: 63cm
So they've all grown about 4cm in about 13 hours, except plant 3 - which seems to have slowed down a lot. The top of plant 3 is also the most advanced looking in terms of pistils. I forgot to take close ups of the preflowers I will do that tomorrow.
I have had to raise the light again today and it is now much further away than the younger plants than I would like. So I am thinking about adding a 300w LED into my 4x4.
I have another 3 inches I can raise the light on the hangers, after that I can removed the adjustable handers and tie it to the top of the tent... that'll gain me another 4 or 5 inches. If I need to go higher my only option would be to set them up without the tent which is not an option right now. Hopefully they all just stop getting taller now and focus on flowering... but my gut tells me there's more growth to come.
Watch this space!
###
Week 4 Day 6 15:00 21/7
Measured. Average 10cm growth 29 hours. 😳😳😲
Plant 1: 96cm
Plant 2: 89cm
Plant 3: 88cm
Plant 4: 81cm
Plant 5: 73cm
Plant 6: 72cm
###
Week 4 Day 6 23:00 21/7
Defoliated. Only photographed plants 1 and 2 individually as I was short on time. Some lovely pics though!
###
Week 4 Day 7 15:00 22/7
Fertigated. 2l Will photograph and measure later when they've had 24h since training.
###
Week 4 Day 7 23:00 22/7
Photographed and measured:
Plant 1: 102cm
Plant 2: 93cm
Plant 3: 89cm
Plant 4: 85cm
Plant 5: 76cm
Plant 6: 75cm
Well here we are at the end of week 4 and I am quite shocked by the growth of these girls. This strain averages 50-70cm in height. We have six plants here and every one of them is taller than the average... but would you just look at plant 1? She is a giant! 102cm!! Where will she stop?
Next week will see the full transition to flower and we will start to see the bud sites developing. I have no idea at this point what the heights will look like at the end of next week. This is sort of new territory really, they weren't meant to get this big!
---
Thanks for reading growmies! 👊
==========
Tent: 120cm x 120cm x 180cm
Light: 600w HID Elite Dual Spectrum HPS + Angel Wing Reflector
Air: 5" duct fan system with carbon filter ~300 m3/hour + RAM 9" floor fan + 4" intake fan
Pots: Air Pruner Fabric Pots 30l - UGro XL Coco + horticultural grade perlite (~20%)
Seeds supplied by Royal Queen Seeds https://www.royalqueenseeds.com
Nutrients supplied by Shogun Fertilisers https://www.shogunfertilisers.com/en
==========

Likes
5
Share


@BripGrows
Follow
Excited to finally have the baby cut down and now letting her dry out! Wet trimmed some pieces but then leaving rest to do dry. I am excited to share future grows00

Likes
3
Share


@CanarianGrow92
Follow
Started week 1 and we placed these girls in a 7 liter pot, they are now growing with 1x Marshydro TS1000 but im adding another TS1000 in 2 weeks when they start flowering
Likes
4
Share

@Nargileus
Follow
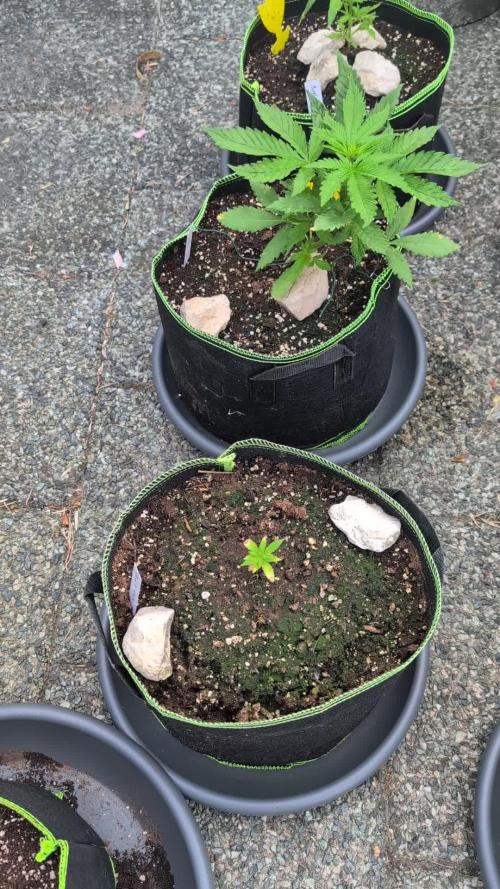
Teilweise war es sehr regnerisch aber den Pflanzen hat es nicht geschadet, die kleine von der ich gedacht habe das sie stirbt fängt langsam an zu wachsen. Normaler weise würde man die beiden kleinen Krüppel ja gegen neue austauschen, aber ich möchte sehen was daraus wird.
Processing
Likes
15
Share


@Dico29
Follow
They are starting to shoot some pistils. I added some random store fertilizer that is 1-4-7 and put it in the 3 gallon. I poured it in a water bottle and just eye balled it pretty slow and not for long. It seems to help

Likes
4
Share


@Biglegs_Cupboard
Follow
Week 2: Moving the Twins Outside
After a slow start, I decided to move the twins outside and plant them together in a 5-gallon pot. Space is limited, and with how slowly they’ve been growing, they’re not getting their own pots this time.
I’ve had slow starters before, and they don’t usually yield much, so I’m keeping my expectations low. Since these two have been particularly slow, they’re sharing a single outdoor pot. The medium I used is a mix of 50% coco, 30% soil, and 20% perlite—this should provide good drainage and aeration.
I used Great White from Plant Revolution during the transplant. The taproots on both seedlings were barely visible, which made me nervous—especially with autos, since they can be sensitive to transplanting. But it had to be done.
Now, they’re settling into their new outdoor setup, and I’ll be watching closely to see how they respond.
Current Setup:
Medium: 50% coco, 30% soil, 20% perlite (now in a 5-gallon outdoor pot)
Transplant: Used Great White when transplanting
Taproots: Barely visible on both seedlings
Lights: Moved outdoors
Nutrients: Biobizz Fish Mix for now; Big Plant Science later if needed
Likes
142
Share


@MadeInGermany
Follow
Hey everyone 🤗.
This week was harvested properly 😍.
All of them are harvested, except for the two Tropicanna Banana (they will be on tomorrow).
All finished crop images follow little by little as soon as they have dried enough and have got their actual bud structure 😃.
I wish you much fun with the diary, stay healthy Ges and let it grow 🌱


Likes
9
Share


@Susquihanna
Follow
I used my Max-see magnifier to take some close up pictures of Miss Dosidos trichomes. She is getting closer and closer to a harvest.
It rained a little this week so I only fed her a couple of times. I am currently feeding her @AdvanceNutrients Jungle Juice.
I have not had to defoliate this grow. I just didn't need to open up any space for sunlight, so I left them all in contact.
All in all, it was a good week. Miss Dosidos is dancing and concentrating on her bud growth.
As always, Let's chat it up! See ya next week.
Processing
Likes
54
Share


@rhodes68
Follow
3/18 Week 12 Day 33/Flower
Have a Norto virus in the house so being brief
All looks good no changes at this time waiting on buds to say when
Tricones 80% Milky 20% clear with no amber so at least a week to go before flush
3/19 Pics
Lot happened overnight, looking like end of week for flush.
Will continue PK for one more day as time for the last push here now as upped nuets about 200ppm.
PK ends Friday, nuets will drop back 200ppm at the same time.
Flush begins 3/24 Tuesday... 08:05 PDT ... 😏
3/21 Day 36/Flower
Ended PK dropped CT to below 900ppm
On track for flush mid-week which will be real close to Fast Buds estimate of 45 days.
3/22 D 37/F
Pics
Just waiting for the ripening and flush day next week.
Trics pretty much all white now, still no amber but that will come during flush.
Will be dropping nuets to half Monday on last feeding.
3/23 D38/F
Last feeding at half strength but tossed in a dose of Recharge just to see if it matters. doubt it would but it needed using as it hitting its effective date.
Flush begins tomorrow morning
3/24 D39/F
Flushed each using 10 gallons PHed tap water and 5ml/gal flushing agent.
Pics and vid
3/25 D40/F
Runoff @235ppm about 80 ppm over the water ppm so looks like the pot is empty and we can cease the FloraKleen those roots are stripped and I am no rush on this flush.

Likes
2
Share

@Terpofthetown1
Follow
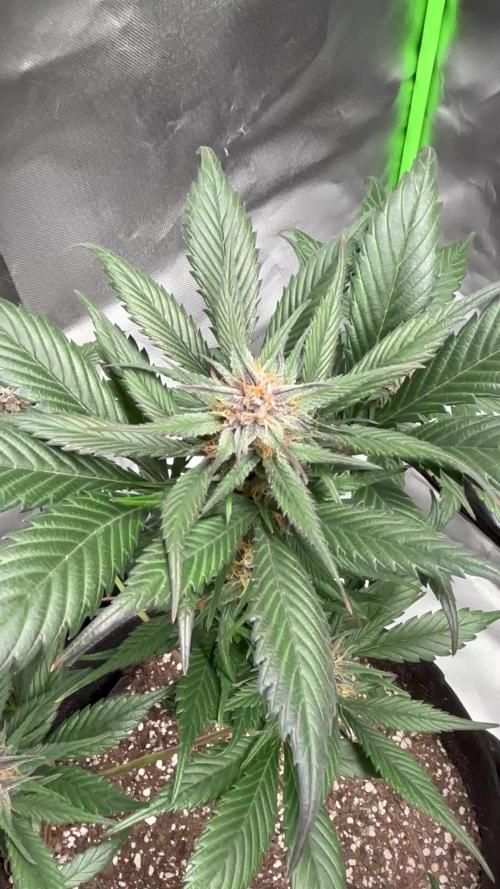
She’s starting to smell sooo creamy these terps are insane, showing amazing colours, including still a strong green to the leaf with some purple
I’m going to use a proper camera soon to check trics and so show you lot proper photos because my cracked phone doesn’t do it justice😍😍
MY FIRST ORGANIC
Likes
36
Share


@nonick123
Follow
Día 66 (05/08) Cerrado por vacaciones
Día 67 (06/08) Mi amigo viene a casa a hacer un riego con 1 Litro de H2O pH 6,5
Día 68 (07/08) Cerrado por vacaciones
Día 69 (08/08) Vuelta de vacaciones! A ver como están después de 5 días sin verlas... 😱
Riego con 1 litro. OnionOG con 1.5 L
Añado 3 cm de sustrato nuevo porque se ha compactado y se ven las raíces! 😢
Día 70 (09/08) Riego 500 ml H2O pH 6,55
Eliminación de algunas ramas bajas
Día 71 (10/08) OnionOG vuelvo a hacer topping a todas las ramas principales! 💥
Riego 500 ml H2O pH 6,55
Sesión de fotos semanal!
Día 72 (11/08) Riego con 1 Litro de Té Vegetativo de Lurpe Solutions. Preparación: 24 horas con bomba de aire (oxigenación) con ingredientes:
Green Sunrise 8 ml/L + Insect Frass 16 ml/L + Hummus Lombriz 8 ml/L + Melaza 1 ml/L + Kelp Hidrolizado 0,25 g/L
Aplicación foliar Kelp hidrolizado de Lurpe Solutions a 0,25 ml/l
💦Nutrients by Lurpe Solutions - www.lurpenaturalsolutions.com
🌱Substrate PRO-MIX HP BACILLUS + MYCORRHIZAE - www.pthorticulture.com/en/products/pro-mix-hp-biostimulant-plus-mycorrhizae

Likes
46
Share


@Smoking_Joe_Frazier
Follow
Vegetation Week 14: Royal Growth & Pre-Flower Whispers
Update: 17.06.2025| Day 102
Hey Growmies,
Week 14 is pure satisfaction. The ladies radiate health, pests are history, and every sunrise brings visible progress. Here’s the serene update:
Growth Report
- Explosive daily growth: New shoots cascade like a "royal dress" – layered, lush, and dense.
- Uniform deep green foliage – zero deficiencies, zero stress signs.
- First calyxes spotted at nodes! Pre-flower transition seems imminent (expect that legendary sativa stretch from Durban soon).
Pest & Recovery Update
- Aphids/ants: Fully eradicated. No sightings all week.
- Foliage untouched – pristine leaves from crown to soil line.
Care Routine
- Bokashi juice (1:100) twice weekly – plants absorb it effortlessly.
- Deep watering only when soil dries 5cm down (encouraging root depth).
- Mulch renewed – retains moisture through 28°C days.
Environmental Notes
- Weather: Stable 28-30°C days / 14-16°C nights.
Light: 16+ hours daily – still solidly in veg territory.
Next Steps
- Monitor calyx development daily – pre-flower stretch could begin any day.
- Keep airflow maximized through the dense canopy.
Week 14 Takeaway
Perfection in patience. After early battles, the garden now runs itself. These Dutch Passion phenos are sculpting themselves into regal, resilient queens.
As always take care of your girls and thanks for checking in. CU next time
– Smoking_Joe_Frazier

Likes
5
Share

@Skipi007
Follow
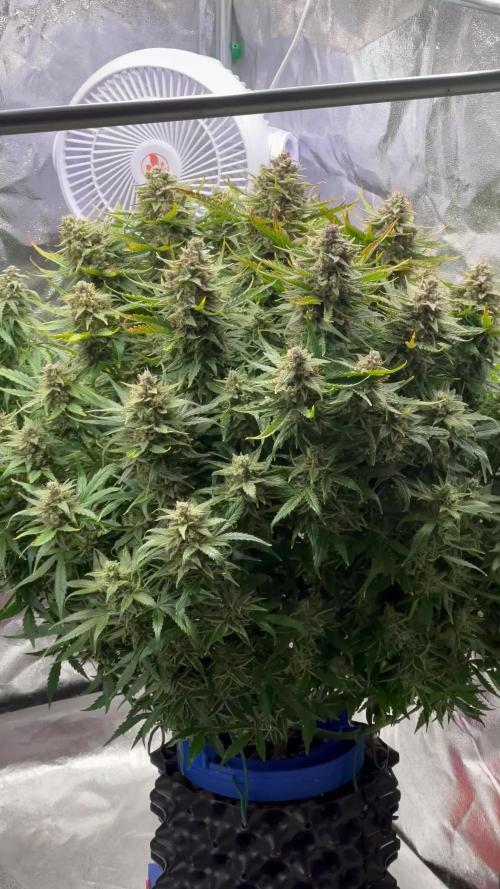
Hi, here is another week and the flowers are gaining volume nicely, for flower no. 2 I am not sure if I should feed for another week or if I should start the 14-day flush, flower no. 1 is about two weeks behind so I will fertilize everything this week, another week or two just Dragon force and then flush. Would you start flushing flower 2 already? I don't want to create another question. The trichomes are milky so far, no amber yet but the buds are overall with a brown tint so I think they will start to turn amber soon.
Processing
Likes
25
Share


@Cannibalgardens
Follow
Ok team I'm going crazy with these beans anymore I'm onto growing six seperate strains from 6 breeders .. They are all sponsored from the companies to run , the #alienaphrodesieac is a 80/20 indica heavy new strain from a contest on Instagram .. There are strains that all carry heavy indica traits and have been what I wanted to grow for the last little bit .. They are going to replace the last run that is in flower right now .. Trying this perpetual grow thing .. The ladies are all happy and healthy after a few more weeks they will get the transplant onto their final homes .. Thanks again to all the sponsors who have given me the chance to grow their strain ...cheers follow me on instagram @cannibalgardens.


Likes
44
Share


@Kanndera
Follow
Приветствую тебя в моем дневнике!
Это мой первый гроурепорт и первое выращивание. И я буду очень рад, если проходящий мимо гораздо более опытный товарищ, даст свой совет, рекомендацию или просто комментарий. Ведь тогда мои шансы на успех вырастут. Спасибо заранее.
Исходные данные:
Придумал чем занять себя на самоизоляции, тем более что давно хотел за это взяться и выращивать самому, но нужен был толчок к этому. Быстренько набросал схемы, почитал форумы и приступил к делу.
Собрал свой гроубокс, размеры: 200 см высота, ширина 100 см, глубина 70 см.
Прекрасно понимаю, что мои условия не идеальны, но я исходил из того, чтобы собрать это самостоятельно и в короткие сроки, плюс я живу в небольшом городе и некоторые вещи нужно заказывать с доставкой.
Гроубокс стоит на неотапливаемой лоджии. Вентиляция идет прямо на улицу. Пока на улице прохладно внутри стоит инфракрасный обогреватель с терморегулятором от теплого пола. Вдув воздуха в бокс пока пассивный. На выдув стоит вентилятор Вентс 125 с регулировкой оборотов.
Электронный таймер для лампы, первую неделю стоит режим освещения в 24 часа. Есть гигрометр и увлажнитель на 4 литра.
Лампа собрана из 3-х LED прожекторов 6400К, плюс 6 фитоламп и 4 бытовые LED лампы. 4 уровня освещения включаются сверху.
Вентилятор направлен на обогреватель, чтобы равномерно распределять тепло.
Горшок Airpot на 15 литров. Грунт: 65 земля + 20 кокоса +15 перлита. Вода из под крана 7.1 pH, 138 ppm. У отстоенной воды 37 ppm.
Семечка заложена в горшок 3 апреля.
4 апреля сделал пролив горшка водой 1 литра: Отстоенная вода + Восток ЭМ-1 (1мл) + Фитоспорин (0,5 мл)+ Эпин Экстра (0,1 мл).
6 апреля посадил в горшок рядом семечку Авто АК47 (от Семяныча).
8 апреля был пролив водой с Восток ЭМ-1 (1мл).
11 апреля сделал свой CalMag на основе: сульфата магния и нитрата кальция.
Пролил раствором с CalMag 2 мл + 1,5 мл янтарной кислоты + 0,1 мл циркона.
Думаю буду теперь постоянно проливать с водой, под корень и по листу с CalMag 2 мл.
Информация не вся, позже еще добавлю, если будут вопросы по условиям выращивания.
Likes
85
Share


@Grey_Wolf
Follow
Happy New Everyone 😀 🙏🙏
I have now got all of my Photoperiod Girls under a Greenhouse. Its only an elcheapo from Ebay but I reinforced it with a heap of good old Gaffer tape and Zipties.
I also ran guide ropes to the ground at the corners for Protection against heavy winds so hopefully it'll stay put.
The Wifi Plant just keeps growing and growing and will soon need some type of branch support and I'm thinking of using some of those plant yo yo's.
The white residue you can see on the leaves is Diatomaceous earth. I mixed some into the worm/mollasses tea just before I sprayed my plants with it.
It acts as a bug deterrent and can't hurt the plant in any way. I also mix some into the worm tea that I feed straight to the soil as Diatomaceous Earth is a fantastic source of Silica which we all know is extremely beneficial to your Plants Health.
As Far as my super soil is concerned , so far I have not needed to feed the plants any fertilisers as the soil is providing everything the plant needs.
All ive been adding is biodynamic food for the soil itself to keep everything under the surface happy and well nourished.
Once flowering begins next month I will need to add an organic Booster to the soil that will replace any depleted resources.
Because I only feed water throughout the grow there is no need for any final flush I can simply Harvest when it's ready and dry/cure etc.
Thankyou for reading this weeks update 2nd January 2020 👍


Likes
7
Share


@HowieMcHowie
Follow
Aus dem Gewächshaus habe ich die 2 Auto Orange ausgenommen und auf den Balkon gestellt. So haben die restlichen Pflanzen mehr Platz und ich kann besser an sie ran. An den heißen Tagen sind es über 40 Grad bei 25% Luftfeuchtigkeit. Oft gieße ich 2x täglich.
Likes
16
Share

@DogDoctorOfficial
Follow
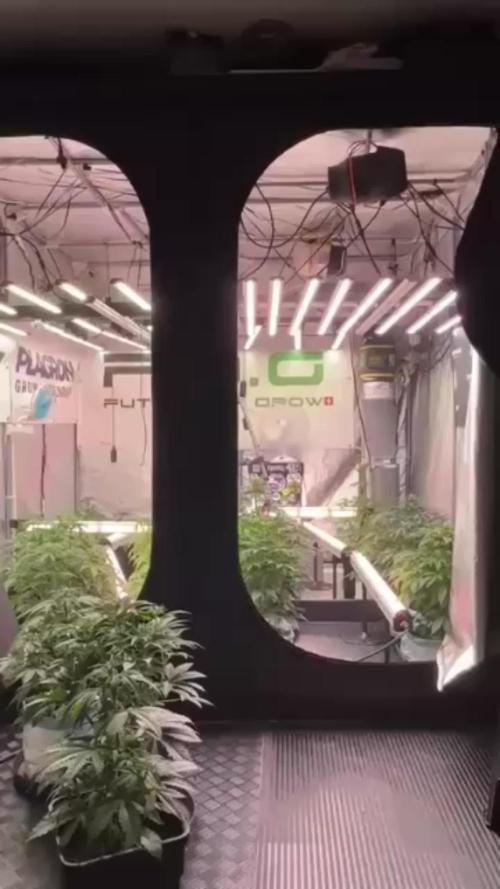
🌱 Week 7 From Seed | 12/12 From Germination
Transition Phase — Early Flower (Week 1)
📌 Quick Context (For New Readers)
These plants have been grown 12/12 from seed from day one.
Because of this light schedule, development timelines do not match traditional veg/flower calendars.
Although we are technically at Week 7 from seed, the plants are now entering what we consider Early Flower (Week 1).
Pre-flower signs are present but still subtle, which is completely normal for this method, especially with training involved.
Think of this as:
Week 7 from seed ≈ Week 5 in overall physiological development
⸻
🌿 Overall Plant Status
All plants are healthy, vigorous, and responding extremely well to training.
• Strong lateral growth
• Very bushy structure
• Tight internodes
• No major deficiencies or stress responses
The genetics are clearly expressing well under this method and environment.
⸻
🧠 Training Update & Learning Moment
This week involved low-stress training using plastic clamps and this was my first time.
• Most plants responded beautifully
• However, one branch was left clamped slightly too long, resulting in a partial break
Recovery Action • White tape was applied immediately
• The branch is stable
• Early pre-flower signs are still visible on that plant
👉 Based on experience and current visuals, full recovery is expected.
For comparison:
• Another plant is trained using metal clamps, shown in the last photo
• This plant is more delayed and not yet showing flower signs
This contrast clearly shows how training intensity and timing can influence flowering onset under 12/12 from seed.
⸻
🌡️ Room Conditions
Despite very cold temperatures outside, the room has been stabilized well:
• Temperature: 27.5°C
• Relative Humidity: 65.4%
• CO₂: ~909 ppm
Humidity is slightly higher than ideal for flower, but plants are thriving and showing no negative responses.
⸻
💧 Root Zone & Nutrition
Adjustments were made this week to prepare the plants for flowering demand.
• EC: Increased to 2.4
• Water Temperature: ~21°C (70°F)
• pH: Raised to 6.5
🔬 Why the pH Change?
This was a deliberate, science-based decision, not guesswork.
As plants transition into flower, a slightly higher pH:
• Improves availability of Calcium, Magnesium, and Phosphorus
• Supports early flower initiation
• Helps the plant shift metabolic focus
From here:
• pH will be cycled between 6.0 → 6.5
• Always kept above 6.0
• Adjusted based on plant feedback
Until now, pH ranged around 5.8–6.0, which favored vegetative uptake.
This marks the nutritional transition into flower physiology.
⸻
💡 Lighting Update
• PPFD Range: ~600–800 µmol/m²/s
• Taller plants receive closer to 800–850
• Smaller plants around 600–700
• Top Lights: 100%
• Under-Canopy Lighting: ~40–45% and increasing gradually
The goal is to let plants adapt to photons coming from all directions, promoting:
• Stronger lower growth
• Better canopy balance
• Reduced larf later in flower
⸻
🔮 What to Expect Next
Next 1–2 weeks:
• Clear flower initiation on most plants
• Stretch phase beginning
• Increased nutrient demand
• Continued canopy management (tucking & bending only)
What NOT to expect yet:
• No heavy defoliation
• No aggressive stress training
• No rushing the transition
The harder training plant will be given more time — no forcing.
⸻
🙏 Final Words
Thanks to everyone following along — newcomers, supporters, critics, and sponsors alike.
This run is about learning, transparency, and showing what 12/12 from seed really looks like when done patiently and intentionally.
More updates soon 🌱
As always — observations welcome.
Community Note
Due to YouTube community guidelines, our educational channel was taken down.
While we firmly believe the content was purely educational, we respect YouTube’s decision and are actively exploring alternative platforms to continue sharing this work.
📡 Please stay tuned.
🙏 Thank you for your patience and continued support.
FOR DISCOUNT CODES AND MORE JUST FOLLOW THE LINK https://website.beacons.ai/dogdoctorofficial
📲 Don’t forget to Subscribe and follow me on Instagram and YouTube @DogDoctorOfficial for exclusive content, real-time updates, and behind-the-scenes magic. We’ve got so much more coming, including transplanting and all the amazing techniques that go along with it. You won’t want to miss it.
GrowDiaries Journal: https://growdiaries.com/grower/dogdoctorofficial
Instagram: https://www.instagram.com/dogdoctorofficial/
YouTube: https://www.youtube.com/@dogdoctorofficial Deleted by Youtube
Vimeo : https://vimeo.com/dogdoctorofficial Under construction stay tuned ⸻
Explore the Gear that Powers My Grow
If you’re curious about the tech I’m using, check out these links:
🔆 Lighting & Environmental Control
• Future of Grow — Advanced LED lighting technology
https://www.futureofgrow.com/
DISCOUNT CODE: DOG20
• Lumiflora — Under-canopy LED lighting
https://lumiflorade.com/
• TrollMaster — Environmental controllers and automation gear (past collaboration)
⸻
Genetics
• Zamnesia Seeds — Genetics used in this project
https://www.zamnesia.com/
⸻
🌱 Soil, Substrates, Boosters & Root Support
• Plagron — Substrates, bio mixes, and supportive products
https://plagron.com/en/
⸻
🎒 Storage, Curing & Preservation
• Grove Bags — Curing and storage solutions
https://grovebags.com/
⸻
📸 Photography Equipment & Tools
(Not sponsors, but part of my creative toolkit)
• Sony A6700
• Sony full-frame macro lens + few more
• Stacking photography workflow - learning
• iPhone (for behind-the-scenes shots)
We’ve got much more coming as we move through the grow cycles. Trust me, you won’t want to miss the next steps, let’s push the boundaries of indoor horticulture together!
As always, this is shared for educational purposes, aiming to spread understanding and appreciation for this plant. Let’s celebrate it responsibly and continue to learn and grow together.
With true love comes happiness. Always believe in yourself, and always do things expecting nothing and with an open heart. Be a giver, and the universe will give back in ways you could never imagine.
💚 Growers love to all 💚
📸 P.S. – The Eye Behind the Lens
All photos in this diary (for now — except for the ones showing the camera, which I took with an iPhone) are taken with a Sony A6700 paired with a Sony full-frame macro lens and a few more.
Photography is part of the story — it’s how we share the fine textures, the glow, and the quiet details that words can’t always capture.
I’ve also started experimenting with photo stacking — a technique where multiple images, each taken at a slightly different focus point, are layered together to create one perfectly sharp image from front to back.
It’s not digital enhancement or AI; it’s pure photography — a way to reveal the plant’s beauty in microscopic depth, from trichome to petal.
You’ll even see a few shots of "ghost me" capturing the shots — camera, lens, setup — because every grow deserves not just to be cultivated, but documented like art.
FOR DISCOUNT CODES AND MORE JUST FOLLOW THE LINK https://website.beacons.ai/dogdoctorofficial
NEW DISCORD - Official Server Invite Link : https://discord.gg/ksjAkA5T74
