Likes
Comments
Share
@Dmars
Follow
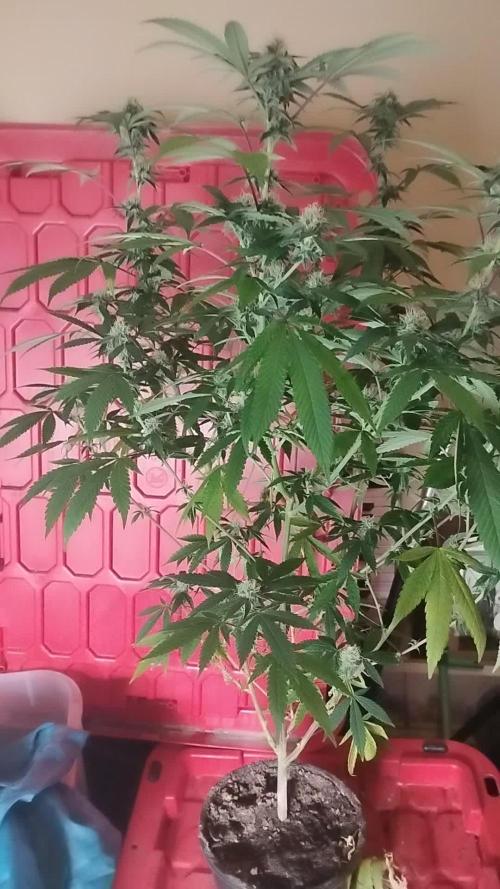
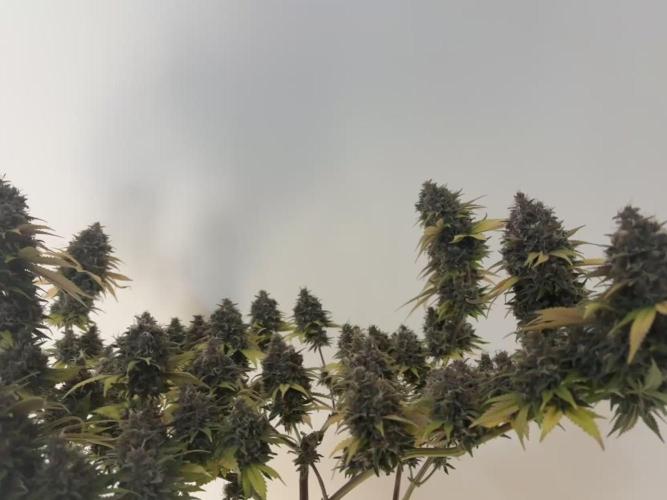
10/20 Day 86. Not really sure when to chop right now. I was hoping for a nice fade with some reds and purples but maybe it just won’t happen. Everything looks and smells great though. 10/24 Day 90. Finally getting some more leaf fade to go along with the trichs getting more cloudy. There’s still some clear trichomes in the mix so I’ll keep going a few more days, but at least I’m finally getting some signs she’s close.

Likes
13
Share
@Chubbs
Follow
Excited to start these ladies. This strain has the temps that make you want to keep going back for more. The flowers come out super dense and covered in trichs. Let's see if they come out as good if not better then the last time I've grown it. Got 10/10 to sprout so where already off to a great start. All In all Happy Growing
Likes
110
Share
ACTUALIZACIONES A DIARIO!! Miles de gracias al equipo de Royal Queen Seeds y a @James por proponerme esta aventura tan trepidante y poder conocer de cerca las nuevas F1 y sobre todo a la gran Titan F1. Espero que lo disfruteis y os sirva como referencia. ¿Qué piensas cuando lees la palabra “Titán”? Hay quienes la asocian con los hijos de Urano de la mitología griega. Otros saben que Titán es la luna más grande de Saturno. ¿Y entre los cultivadores de hierba? Estas personas reconocen a la Titan F1 como una variedad de marihuana con una genética de vanguardia. Se trata de uno de los primeros híbridos F1 autoflorecientes, y es una variedad pionera que ofrece productividad, resistencia y algo completamente nuevo. La Titan F1 deleitará tu olfato durante la fase de floración y más allá. Esta variedad autofloreciente ofrece un potente perfil de terpenos compuesto principalmente por mirceno, farneseno, ocimeno, pineno, bisabolol y limoneno. Gracias a MarsHydro 😊🙏 por darme la mejor luz que hay en el mercado. La marca numero uno en focos 💡, carpas de cultivo ⛺️, extractores 🌬️ y demás aparatos que necesitas para tu cultivo. Para esta aventura arrancaremos con 💡Mars Hydro TS 1000 Full Spectrum LED Grow Light 150W Regulable y 1 semilla autofloreciente a un ciclo de 20/4. Verdaderos 150w con este TS1000, la mejor luz de cultivo LED para principiantes. Ofrece una luz adecuada para 2-4 plantas 🌱. Su precio razonable, la marcada mejora del rendimiento y el control variable de la producción la hacen amigable para los nuevos cultivadores. Todo un tesoro para cualquier cultivador que este comenzando. Usaremos para esta aventura una carpa de 60x60x90, MarsHydro una carpa para los más exigentes.Con una solapa de cremallera mejorada, dobles cremalleras de metal con forro,reflectante diamante tipo Mylar, postes de metal para una estructura mas solida, no se puede pedir nada mas. Garantizando una respuesta en solo 24 horas tanto si has usado antes la marca como si no. 🌻🚀 Consigue tus semillas aqui: https://www.royalqueenseeds.es/semillas-de-marihuana-hibridas-f1/624-titan-f1.html 💡 MarsHydro TS1000: https://www.amazon.com/gp/product/B07PLY1WKK ⛺️ 60 x 60 x 90 MarsHydro: https://www.amazon.com/dp/B081PN2QDN/ Cuarta semana de floracion, las planta ha terminado de estirar, las ramas laterales han estirando junto con la cola central y se muestran los futuros cogollos, es una planta muy compacta y he tenido que quitar alguna hoja baja para evitar la aparicion de algun hongo. Se muestra el principio de una gran cola principal. Es la genetica que mejor ha respondido, por no decir la mejor. Felicidades Royal Queen Seeds y MarsHydro 😁 📅 Dia 42: Riego con nutrientes, EC 1200, come todos los nutrientes que se le aplican. 📅 Dia 43: Riego con nutrientes, EC 1050 📅 Dia 44: Riego con nutrientes, EC 1050, ya se ven cogollines totalmente cargados de resina, el olor es cítrico y afrutado, se te hace la boca agua. 📅 Dia 45: Riego con nutrientes EC 1050 📅 Dia 46: Riego con nutrientes EC 1050 📅 Dia 47: Riego con nutrientes EC 1150 📅 Dia 48:
Likes
22
Share
@xHSxMonki
Follow
3/6/2020 day 81(day 2) Plants have been given a healthy dose of calmag. Also have been given nutrients. They arnt ready to be harvested yet. But should be soon in the next 11 days. I think 92 days is a lot for an auto 6/6/2020 such a dumbass. I didnt feed any nutrients. I fed my plants fucking myco! I was mixing myco into my reservoir. My myco can and my nutrient can both look the same. I accidentally replaced the wrong lid and fed myco to my plants for so long. Ffs. What other ways can I fuck up my grow?
Likes
6
Share
I noticed that this plant starts to smell sweet, flowery, and fruity especially at lower temperatures. When temps rise, the aroma shifts to spicy and gassy. I’ve never seen this happen with any other strain. I’ll definitely try to keep the temps lower from now on — hopefully, that awesome sweet smell carries over into the smoke. Everything else looks healthy and happy. The buds are getting heavy and starting to fall over a bit. The way I BDSM’d this poor girl, the branches are a bit too flimsy to hold them up.
Likes
2
Share
Started using overdrive this week let's see how it goes
Likes
6
Share
Pues la catastrofe pasó. Usé una bomba de descarga (un spray de esos que apretad y tira todo) que en teoria es compatible con las plantas dentro.... Se lío, ya se ve en las fotos y video que muuuuuchas hojas han reaccionado, fitotoxicidad y capúm. En fin, el cultivo lo voy a terminar, se salva mucha cosecha, en principio, pero eso.
Likes
14
Share
So, Week 4 is done and the Sweet Seeds Gorilla Girl XL Autos are slowly coming along. It has been even colder in Canada this past week and temperatures in the tent have been hovering around the 70 degree mark. The humidity has come up a bit to around 30% and this is an improvement but the combination of too cold + humidity too low = small, struggling but surviving plants. It’s disappointing but this is consistently my toughest grow cycle of the year. Other than that, I increased the water to 4 litres per watering which is still being done every 4th day- so that’s 0.7 of a litre per plant per day. Although I was planning on topping all four of these plants following my previous Sweet Seeds grow experience, these ladies are just not up for it- too small, too slow and surviving not thriving. I will look forward to that with my next and final Sweet Seeds grow so stay tuned for that in future. Mom’s Tip for Week #4- Cleanliness is next to Godliness!… I wholeheartedly feel that a clean and organized tent/grow room is essential for a successful grow. I often see other growers leaving dead foliage to pile up in the bottom of their tents, watering with no drip trays or not cleaning their space in between grow cycles. They are often plagued with unwanted visitors, fungal infections and a nasty build up of crud in the most precious place- your happy garden! Here are my top tips for keeping your tent/grow room clean, organized and consistently productive. Always remove dead or defoliated foliage from the bottom of your tent and take it all the way out of the immediate growing area/room. Biodegrading foliage provides the perfect environment for unwanted insects/pests to hide in and feed on- potentially creating an infestation that could devastate your crop and contaminate future grows. I place all green materials including my post harvest plants into the compost pile where it breaks down creating beautiful, natural fertilizer for future grows! Always use drip trays when watering or clean up excess dirty water that seeps through your pots/containers- potentially creating ideal conditions for various fungi and molds that can affect your plants, equipment and perhaps even you. I use inexpensive, plastic drip trays to catch any run off instead of relying on the waterproof bottom that is sold with my tent. I have personally witnessed the mold that can grow on and between these waterproof bottoms and the actual bottom of your tent as well as moisture so severe that it rotted through the stitching/seams of an otherwise perfect tent. Always clean your tent/grow room in between each and every grow cycle as well as throughout the grow as needed- potentially avoiding cross contamination from the previous grow and maintaining a high daily standard. Aside from insects and pests, fungi and molds- pollen from a previous grow gone wrong can wreak havoc on future grows if not dealt with correctly. I thoroughly vacuum my entire tent and wipe it down with a hot water/bleach solution applied with a spray bottle and a clean cloth. I also use a cordless Black and Decker hand vac conveniently mounted on a wall near the tent for daily maintenance and clean ups as needed. Keeping your tent, immediate grow space and supplies organized will also make things easier. I keep everything up and off the floors and if possible stored in rubbermaid type containers. This allows for quick and easy sweeping/vacuuming, wiping/dusting and the deep cleans required in between grows. All of the above mentioned tips will help increase the odds in your favour for a successful grow/harvest but they will also increase the longevity of your equipment too. Growing Cannabis at home can be quite a hefty initial investment so if a little light cleaning can make my core components (tent, lights, intake/exhaust fans, etc.) last longer, work better and equal more bang for my buck- it’s a no brainer!
Likes
10
Share
We enter the second full week of flower. I went and got some nutes to start adding in sparingly to the watering sessions. Mild mix from Foxfarms of their Tiger Bloom formula. I didn't catch that the large plant's leaves were curling pretty tellingly so I didn't realize I was about to overload the nutes for that plant when I should have been flushing for a week. I had supercropped this large plant as it was 6" taller than the others but it bounced back so quickly. Five colas snapped and turned 90 degrees, bounced back in a day or two. It did allow the others to catch up a bit. I find that the one potential male I removed was 100 a male as it now had well developed pollen sacs. I had this plant outside alonside the other two potential herm/males. I put the two questionable ones on the roof and chopped the male down.
Likes
20
Share
Gracias al equipo de MSNL y XpertNutrients sin ellos esto no sería posible. 💐🍁 Forbidden Fruit Auto: Forbidden Fruit Autoflower, llamada así por sus deliciosos sabores, es un cruce entre Cherry Pie, Tangie y Siberian Ruderalis. Esta variedad ofrece efectos estimulantes y relajantes con un sabor afrutado, cítrico y a pino. Ideal para quienes buscan un dulce escape. 🚀🌻 Consigue aqui tus semillas: 💡TS-3000 + TS-1000: se usaran dos de las lámparas de la serie TS de Marshydro, para cubrir todas las necesidades de las plantas durante el ciclo de cultivo, uso las dos lámparas en floracion para llegar a toda la carpa de 1.50 x 1.50 x 1.80. https://marshydro.eu/products/mars-hydro-ts-3000-led-grow-light/ 🏠 : Marshydro 1.50 x 1.50 x 1.80, carpa 100% estanca con ventanas laterales para llegar a todos los lugares durante el grow https://marshydro.eu/products/diy-150x150x200cm-grow-tent-kit 🌬️💨 Marshydro 6inch + filtro carbon para evitar olores indeseables. https://marshydro.eu/products/ifresh-smart-6inch-filter-kits/ 💻 Trolmaster Tent-X TCS-1 como controlador de luz, optimiza tu cultivo con la última tecnología del mercado, desde donde puedes controlar todos los parametros. https://www.trolmaster.com/Products/Details/TCS-1 📆 Semana 3: Ha sido una buena semana, ella ha dado un gran cambio en su lugar definitivo 😎. Se le ha aplicado un tratamiento insecticida con agua + tierra de diatomeas ( 1 cucharadita por litro de agua), también se le aplica un tratamiento fungicida con una infusión de cola de caballo para evitar futuro moho. A partir de ahora se aplica riego por goteo, 1/3 de la dosis recomendada por el fabricante ya que al estar en exterior y en buena tierra, ya tiene bastante comida.
Processing
Likes
6
Share
@Smokwiri
Follow
pictures are taken last day of the 7th week since getting the seed if i didn't use lst, it would be 27+30 cm high (measured the horizontal main stem) i added molasses this time, for taste, instead of other booster besides the pk solution also i threw in some chicken fertilizer pellets in to add some organic power to the soil i like the taste of mineral, but my heart is with bio, so i use both somehow the flower is looking like it's wanting to finsh already. very nice experiment, instead of 18-20 or 24 hours of light for autoflower, i dd 12/12 from seed, guessing that the 7 proposed flowering time would be for the 18 minimum hours of light. I think it will be ready within that time, let's wait for that moment, whatever comes out is nice, her bud is starting to make me stare already...
Likes
6
Share
Planted 2 weeks after my other Plant and it already the Same size as all them growing like a champ. I know I need more soil.
Likes
17
Share
@Chucky324
Follow
Hello. This is the end of week 5 and the beginning of week 6 of flowering. Man what a marathon. Did a big harvest last week and didn't want to stop till it was done... So I didn't report last week. Since I was finished the harvest... I vacuumed in here, and brought the 3 plants from the northside of this greenhouse, and put them in here. This plant is growing well and looking good. It's got a few thrips marks on some of the lower leaves. Still thinking about harvesting around Sept 1 or so, unless there's a problem with pests or mold. OK. Keep Growing Straight. Chuck.
Likes
40
Share
Info: Unfortunately, I had to find out that my account is used for fake pages in social media. I am only active here on growdiaries. I am not on facebook instagram twitter etc All accounts except this one are fake. Harvest day 71 since the time change to 12/12 hrs. Hey guys :-) Finally the time has come . The lady was harvested. After the trichomes have been checked (70% milky 30% amber) as always, it was left in complete darkness for 48 hours before it was neatly trimmed by hand. After trimming, she was put back in the drying tent on nets. There they are allowed to dry for the next 8-12 days at 62% humidity before they are put into the jar to ferment with 62% boveda packs. After about 4-6 weeks in the jar I will swap the 62% boveda pack for a 58% boveda pack where it can be ready for another 4-6 weeks to enjoy :-). As always, the remains of the leaves are used to make Ice o Lator and oil. Of course, as always, there is a final update during the fermentation process. Until then, I wish you all a lot of fun with this update. Stay healthy 🙏🏻 and let it grow 👍. You can buy this Nutrients at : https://greenbuzzliquids.com/en/shop/ With the discount code: Made_in_Germany you get a discount of 15% on all products from an order value of 100 euros. You can buy this Strain at : www.Zamnesia.com Type: Runtz ☝️🏼 Genetics: Zkittlez x Gelato 👍 Vega lamp: 2 x Todogrow Led Quantum Board 100 W 💡 Bloom Lamp : 2 x Todogrow Led Cxb 3590 COB 3500 K 205 W Soil : Canna Coco Professional + ☝️🏼 Nutrients : Green Buzz Liquids : Organic Grow Liquid Organic Bloom Liquid Organic more PK More Roots Fast Buds Humic Acid Plus Growzyme Big Fruits Clean Fruits Cal / Mag Organic Ph - Pulver ☝️🏼🌱 Water: Osmosis water mixed with normal water (24 hours stale that the chlorine evaporates) to 0.2 EC. Add Cal / Mag to 0.4 Ec Ph with Organic Ph - to 5.8 - 6.4
Likes
9
Share
She's developing very nice on her second week, she's not developing as good as her sisters but she's definitely coming along. Let's see how she performs. 💎💚👨‍🌾
Likes
20
Share
I’ll be most definitely harvesting these next week! I will continue with water from now until they are ripe and ready! They are absolutely smelling of some nuttiness and dank fuel ⛽️ like stardawg smells too! The buds are starting to swell too so thinking next 7 days I’ll be ready! Next upload will be harvest hope you like buddies! I’ll be hang drying this time! As I’ll have space and a tent to do it in as before I didn’t and used the brown bag method! But I can maintain between 14c - 18c with a humidity of 42 percent! So I’ll hang dry this time! Any suggestions?? Let me know! I’ll be putting 2 fans on them for air circulation and a air vent only sucking out as it will draw air in on its own and keep the humidity lower in the tent while drying!
Likes
20
Share
Unfortunately I have to change the dwc sysyem. Why, Emerald Harvest ph fluctuation are to rysky. Plant cut at the 2 node. Main lining at the 4 nodes. Ready this week to cut and accive 8 nodes. Aming to over 60. Wish me luck 🎲
Likes
23
Share
@GrowSmith
Follow
Last week on nutes now Doubled in size as per dragon force