
Likes
Comments
Share


@BruWeed
Follow
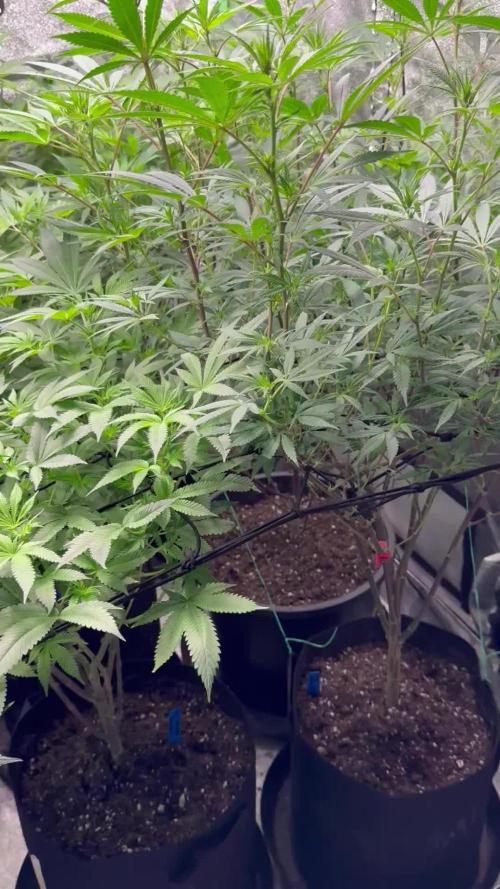
18/10 - comienza su quinta semana en etapa de floracion. Su evolución fue muy rapida, apenas entro en flora cambio totalmente la planta. Los cocos están perfectos, super resinosos con olor muy fuerte.
El banco de semillas recomienda que este en flora de 8 a 9 semanas. Seguramente la deje hasta la semana 8. Esta bastante avanzada. No tuve problemas en ninguna etapa. Sin dudas es una genetica que volvera a cultivar. Cabe aclarar que esta planta genera mucha resina por que es ideal para extracciones.
Podes seguirme en instagram como @bruweed_arg


Likes
31
Share


@Reaper
Follow
week 2 flowering.
no calmag issues so far the one i transplated in the 20L pot looks much better than the one left in 12L. the pot with 20L was filled at the bottom and around the edges of the old soil with 3 month fertilized soil. flowers already showing on both plants
they were both vegged for 5 weeks
august 20th: day 14 flower
see last video of this week

Likes
19
Share


@Schneidersitz
Follow
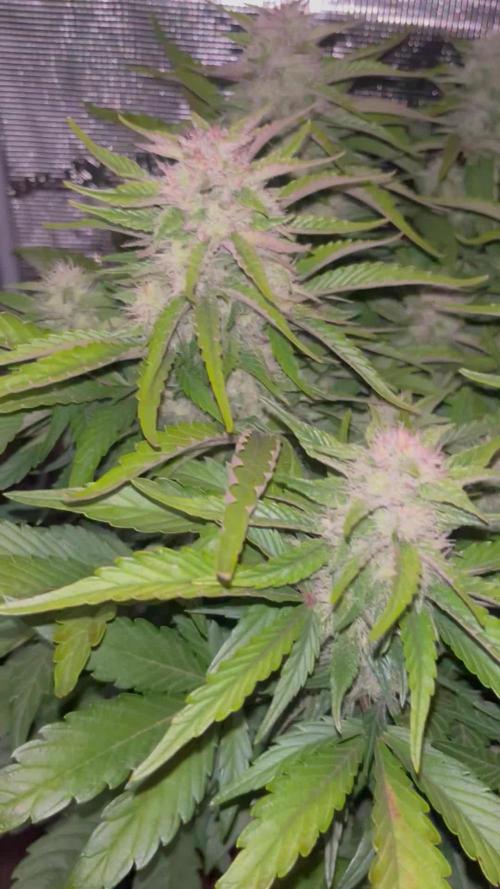
Wie in den anderen Tagebüchern schon gesagt, fehlte mir zwischendrin leider die Zeit schöne Fotos zu machen. Aber kurz vor Ende musste ich mir die Zeit nehmen diese schöne Dame zu fotografieren. Sie hat sich extra schick gemacht.
Die Blüten sehen wunderschön aus und duften nach herrlichem fruchtigen Kuchen.
Ein paar Tage darf sie noch stehen und ausreifen. Die Trichome wechseln gerade zu Bernstein.

Likes
95
Share


@DogDoctorOfficial
Follow
Week 4 day 26F and they are starting to look the way i like , the canopy is full enough and the girls are pumping nice airs to what looks like is gona bi great bud, but I don’t like to speak before things happen hehehe for now the Tropicanas still looking way better than the chocolates ones, but in the end the final product will have the final saying 😁 they are drinking 4,5 L water every day, divided in 3 times, 1st after 2H ligth, 2nd is 2H after and the last after 2H were they reach run out and dry from there until next day. I do the ocasional one day in between to dry out the roots and induce some low stress to help tricomes production, in the end thats going to b the most important factor in my final decision.
I lower my lights to level up my ppfd levels, i will bring them up to 1000ppfd along next week or so since they are enjoying the amounts so far 😁💚👌
PPFD - 750 Umol/m2
DLI - 32.2 mol/m2d
VPD - 1.30 kPa
Little battle between Topicanna Poisen from @sweetseeds vs Chocolate Skunk from @00Seeds (just for fun)
TP = Tropicana Poison
CS = Chocolate Skunk
Light Lumatek Zeus 465W compact pro at 100%
All i grow is medecine for myself, nothing to sell, dont even ask !!!
Stay safe and do it with love for the love ❤️ 🙏
💚Growers Love to you all 💚


Processing
Likes
43
Share


@GrowerGaz
Follow
Saturday 18th day 18 of 12/12
The jacks toe jam was looking a little hungry so, i gave it a pint of Bac PK booster and bloom stimulator. For the rest I will use biotabs pk compost tea and molasses, when the time is right. More tying down for the rest and some defoliation. I also added some nematodes on the 12th as I have a couple of little gnats buzzing about. Apart from that, I have just been carrying out daily checks for any buglife and any signs of male parts.


Likes
15
Share


@DeepRootGrows
Follow
She’s doin amazing. She’s always happy and is taking the skrog very well. She’s by far my favorite plant I have goin.

Likes
35
Share


@Rap_a_cap
Follow
Hey Growmies, some of you had asked to me if I prepare concentrates.......Yes I do!
I don't like modern rosin extraction but instead very rarely I like to smoke some oil.
The following is the recipe of cannabis oil made by ancient Mustapha's process.
It needs:
pharmaceutical grade ethyl alcohol (96.5% by vol.) or 95% for liquors
Weed
A jar with rounded bottom
A lot of time
This oil is 5 months aged, from 20 grams of weed I've obtained 3.5 grams of product.
Trim previously dried weed (20 grams) and put into a 500 ml jar. Cover with 200 ml of alcohol and leave it partially covered with cap. Let alcohol to evaporate on itself and shake the mixture 2 times a day. The most of the solution will evaporate within 10-15 days. When the solution is evaporated by 2/3 it needs to be filtered between 90 and 120 microns. Now is the time to finish and decarboxylate the solution by heating the jar by bain-marie until the green cream sticks to glass. The jar needs to be refrigerated before you remove the cream with a spatula to transfer it into a smaller jar. Store it in a dark place and open twice in a week for few seconds.
You'll obtain a petroleum green/dark amber cream (the green tone will turn into dark brown by time). If the job is well done the surface will crystallize and will shine like a mirror.
This cream is insanely sticky.
Smoke one drop a time. The collapse is around the corner.
Tips:
Best results, in terms of flavour/aroma, with single strain
Let alcohol to evaporate very slowly, take away some macerated weed (after at least 48 hours infusion) and add new weed/hash pieces little by little. Act as if it were a piggy bank.
The final product is a very strong shit, really narcotic.
Likes
21
Share


@MadeInGermany
Follow
Info:
Unfortunately, I had to find out that my account is used for fake pages in social media.
I am only active here on growdiaries.
I am not on facebook instagram twitter etc All accounts except this one are fake.
Have fun with the update.
Flowering day 40
since time change
to 12/12.
Hey everyone 😊.
It gets more beautiful from week to week 😍.
The buds are getting thicker and thicker and already smell very good :-).
The time has come when she no longer puts her strength into growth but into the flowers :-).
It was poured 3 times this week with 1.2 l each time.
When watering, there was 1 g of GHSC enhancer per liter of water as every 2 weeks 👍.
Of course, as always, the tent was cleaned every day and the humidifier refilled.
The complete filter system was also checked again.
I filled the tank with fresh osmosis water for the coming week.
I wish you all a nice week.
Stay healthy and let it grow 🙏🏻👍
You can buy this Strain at
https://www.amsterdamgenetics.com/product/kosher-tangie-kush/
Type:
Kosher Tangie Kush
☝️🏼
Genetics:
Kosher Kush
X
Tangie
👍
Vega lamp:
2 x Todogrow Led
Quantum Board 100 W
💡
Bloom Lamp :
2 x Todogrow Led
Cxb 3590 COB 3500 K 205W
💡💡☝️🏼
Soil :
Canna Coco Professional +
☝️🏼
Fertilizer:
Green House Powder Feeding
☝️🏼🌱
Water:
Osmosis water mixed with normal water (24 hours stale that the chlorine evaporates) to 0.2 EC. Add Cal / Mag to 0.4 Ec Ph with Organic Ph - to 5.5 - 5.8 .


Likes
11
Share


@Socal6pak
Follow
I LIKE TO PLANT DIRECTLY IN SOIL. LESS I HANDLE THE BEANS THE BETTER. KEEP IT SIMPLE. SHOULD HAVE STARTED EARLIER THIS MONTH. BUT THE NIGHTS WERE STILL GETTING BELOW 60S, SO I WAS WAITING. THESE SHOULD BE DONE 8-10 WEEKS ANYWAY. SO BY EARLY AUG SHOULD BE DONE, WHICH IS STILL FULL SUN. 1/2 LST, 1/2 NO TRAINING. I'VE GROWN PLENTY OUTDOORS AND AUTOS ARE THE EASIEST. IF YOU LIVE IN SOCAL GET A PACK OF FASTBUDS AND START GROWING YOUR OWN OUTDOORS. HARVEST THE SUN. JUST NEED A 3-5 GAL POT, ORGANIC SOIL AND WATER. NOTHING FANCY.
Likes
15
Share


@Satax
Follow
Geeting big!!
Try to defo under the back plants but very difficult to acess there…

Likes
5
Share


@Mrg7667
Follow
Final week! I am starting the flush process at week 8 so going to do quarter nuts for 2days then half then 1/3 and then finish with 2-3 days water
Tricombs where about 75% milk rest where clear maybe a few random turning amber
She really must have put on weigh this last week because she is sagging hard now!

Likes
151
Share


@BioBuds
Follow
These XtraKush are also finally starting to grow. It took them a while but they doubled in a week. Still a little bit pale compared to the other two strains.
With a new top layer of first worm castings and then neutral organic cocopeat to combat the gnat problem and we seem to have fixed most problems.
Temps are going down at night, I'm trying to fix this by keeping it warmer in the attic where the grow is.
In the coming week, I'm going to train/manifold them, they are getting a bit big.
Check out the great discounts on mars-hydro.com
Contact @MarsHydroLED for special offers!


Likes
42
Share


@Canna96
Follow
This little lady is turning out to be a piglet just like her sister. She is drinking so much I though I had a leak in my auto drainage system because I came after a few days out of town and the 32 gallon reservoir was almost empty but so was my drain bucket outside the tent. I opened the tent expecting it to be soaking wet on the floor but there was not a drop of water, so I had to up her watering to 5 gallons per day to even get a quart of runoff. I also had to remove the mini dehumidifier and replace it with a full size dehumidifier to keep the tent under 50% RH. I also have a full size dehumidifier running outside the tent and it is keeping the RH at around 40% outside the grow tent. She is starting to smell very nice and grapey, not overpowering yet when you open the tent, but I feel like in a few weeks she will definitiely be there. I hope everyone had a great Christmas and has a wonderful new years. Be safe and Blaze On!
