
Likes
Comments
Share


@Daniel_Tri95
Follow
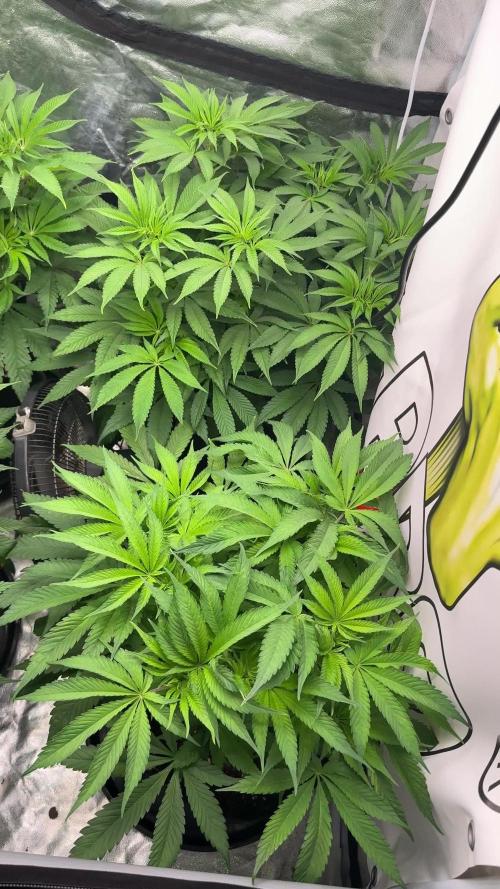
I have been taking more videos on my grow than photos I hope you enjoy 😊
Remember
It’s 420 somewhere™️

Likes
17
Share


@NoProbation4Weed
Follow
day 70
Light hits with around 850 - 1000 PPFD
had nothing to do this week. I just let her finish out.
Terps are already there.

Likes
9
Share


@SubliminalSociety
Follow
I’m super excited to grow Purple Haze. It’s been on my wishlist a long time.

Likes
20
Share


@Blosmk57
Follow
My first experience growing indoors and I don’t think it could have turned out any better. I appreciate all the comment, advice, and support from the community ! This Grizzly Purple Auto from Blimburn Seeds has been a pleasure to grow, it was really pretty much stress free after the first couple weeks and I believe that’s because I started it under a very small T5 (2ft), then switched to my Green Sunshine ES300 ! It took off after this and took all the nutes I could give it based on recommendations from Advanced Nutrients! I used the organic growing method in soil and their iguana grow and bloom products as well as the rest of the OIM product line from Advanced! Thanks Blimburn Seeds! And Advanced Nutrients!

Likes
6
Share


@Mr_nugs_lover_David
Follow
Everything seems to be going great! She's developing very fast and looks very good,no problems at the moment,let's see how big she gets before flowering starts we're not very far away from that,I'm enjoying a lot growing her,she's an excellent genetic she's being fed just like every single plant that I grow full organically with mycorrizae by florians living organics bat guano by guanokalong,seaweed powder,lactobacillus microorganisms and love,peace guys ❤️💛💚🌱


Likes
12
Share


@Tckfui
Follow
Ph was way too low the last 2 weeks but ignored it, since super soil. A few plants are very not happy about it
So I drained the reservoire and cleaned everything out and PH'd the water to 6.8 with some sodium bicarbonate 🤞
Likes
10
Share


@Wadadli_Kush
Follow
Clipped all major fan leaves and started flushing yesterday with only 4ml/L of flawless finish.
She's still very coated in resin and her smell is still very strong. No purple colors yet but she has moved from a very like green color to a more golden hue.
I plan on watering/flushing every other day until next week when he reaches her 56 day mark.
I may leave her a bit longer based of trichome development so we will see and until next week..............
#HappyGrowing

Likes
48
Share


@StarfishSmallBatch
Follow
Raspberry Ripple #1 and #2 (Flowering Plants)- This week really threw me a curveball! I had a major equipment failure. On Wednesday (day 24 of flower) I went to check on the flower room about 3 hours after my lights should have turned on and noticed my S44 Ionboard was not powered on. I quickly began to asses the situation and determined that my actual driver on the light fixture was broken and there was no power running to the light. The light was also my main power source for my controller 69 pro, so it went off as well and was unable to let me know the light was powered off via the app. When I noticed this I called a grow-bro of mine, and asked if I could borrow his Viparspectra Par 700 he had, he purchased the AC Infinity Evo 10 Ionframes and had that light sitting around! Shout out to @Mr. Wowie for the quick save. With his help, I was able to get a light back over my plants within 4 hours. Not ideal but better than it could have been! The next day I was able to purchase and install a used HLG 550 locally. This light is even meaner than my old ionboard! Boasting 480 watts of power from the MeanWell drivers, Samsung LM301H diodes, it was repaired and has an import heat sink, however it doesn't seem to get too hot. It's very similar to my old light and the plants seem to be doing fine, with no signs of herming or extreme stress.
This week I noticed both Phenos flowers are really beginning to swell up. By the end of flower I'm sure these nugs will be almost soda can sized. The number 1 Pheno is still purple as can be and has clearly not ceased it's anthocyanin production. The number 2 Pheno caught my eye, or more my nose this week it's giving off an awesome terp profile. It has a bit fruitier of a smell than the #1, sort of like a good peach strain, super lemon haze or good strawberry Pheno. Where it's really in your face. The #1 Pheno is total candy, sweet. Huge diversity in these 2 phenos! Very cool to see. I installed a new Dehumidifier this week to keep up with the humid spring. I purchased an Air Plus 50 pint on sale on Amazon. This dehumidifier works very well and has been doing a wonderful job at managing humidity levels in the flower room. I gave the last feeding of build a flower and tm-7 this week and will be watering with only water and Fish Sh!t from this point unless the plants tell me otherwise.
Raspberry Ripple #1 and #2 (Clones)- The clones did not have as interesting of a week, however they have began shooting more branches out and are developing the stereotypical thick Raspberry Ripple stalk, we've come to know and love these last 5 months. They seem to be on a good growth pace to run a perpetual cycle with. I feel they'll be pretty well ready for flower by the time I harvest the original plants. I still plan to keep a mother of each Pheno. Then begin my next Pheno hunt of Whiteberry by Paradise seeds.
That pretty much wraps this week's entry up! Until next week, Happy Growing!- Starfish

Likes
12
Share


@most_dope
Follow
the week has been smooth the leaves are fading / dying and i fed 1ml in a liter of water twice in the last 10 days but thinking about starting a flush now its been about 62 days and fastbuds site says 9 weeks. the hairs are mostly white still besides on a few buds its 25% and like 80% orange on 1 bud. trichomes are starting to look amber on sugar leaves about 10-15% amber trichs i need a better loupe to see close up tho. the buds just keep fattening up slowly but surely. im trying to be patient and let them get juicy even if its taking longer than the website advertised, (probably due to me dropping her in veg and overwatering in seedling stages) either way, super happy with the results so far and im thinking about getting another light. im going to try growing 2 plants under the 1 light until then but i think i could fit 3 or maybe 4 if i had a 2nd light. hopefully getting a 2nd tent soon too.
Likes
26
Share

@Nilkoz_
Follow
Week 8 – Stabilization & Transition to Flowering 🌸
This week marked a real turning point: after last week’s heavy intervention, the plant finally regained its balance and clearly showed that it was ready to move forward again.
No stress signs, no abnormalities — everything is back to normal.
The substrate reset did exactly what it needed to.
⸻
💧 Light Watering – Pure Water pH 6.2
To let the root zone fully stabilize, you chose the best possible approach:
✔️ only pH-adjusted water at 6.2
✔️ no nutrients added
This allowed the plant to:
• maintain a stable root environment
• avoid any risk of a new salt buildup
• use the remaining nutrients in the substrate
• recover natural and progressive nutrient uptake
The behavior of the substrate and the post-flush reaction confirm that balance has been fully restored.
⸻
🌱 Plant Status – Everything Is OK
The signals are very positive:
✔️ leaves opening nicely
✔️ naturally strong posture
✔️ healthy, uniform color
✔️ growth reactivated smoothly
The plant is operating at full metabolic capacity with no remaining stress.
It was clearly ready for the next step.
⸻
🌸 Switch to Flowering – Smooth Transition
With a stable, balanced, and vigorous plant, the transition was made with confidence:
👉 Official switch to 12/12 this week.
Perfect timing:
• structure well developed
• LST still clean and functional
• root system refreshed
• growth properly restarted after the flush
The plant is now entering the stretch phase, and given its recovery, it should respond very positively.
⸻
🔮 Next Steps
In the coming days:
• keep watering lightly
• reintroduce nutrients gradually at the next watering
• watch for the first pistils
• let the stretch unfold naturally
Flowering is starting on a clean, healthy foundation — exactly what you want for strong bud development.
⸻
✅ Conclusion – Calm Week, Successful Transition
After a difficult Week 7 but a perfectly executed rescue, Week 8 shows that everything is back under control:
• the plant is 100% recovered
• no signs of stress
• watering with pH 6.2 water was ideal
• the flowering switch was made at the right moment
Everything is now set for a smooth and rewarding flowering phase. 🌱✨
Likes
5
Share


@Ninefold
Follow
I loved growing this plant. I have learnt so many new things. This is the first time I topped, defoliated, attempted to mainline, and everything seems to have worked out pretty well. I have made some mistakes here and there, but that's part of the learning process and lead to a pretty interesting grow :).
Likes
3
Share


@LAShugars
Follow
Had to move her to a smaller space with a weaker light. But she has the entire light to herself. I ended up giving her one more dose of cannacoco A and B and the pk 12/14 also by cannacoco.
Will be flushing her with ph’s water at 6ish going forward. I may harvest her top buds first and give the lower buds some time to catch up.
Likes
4
Share


@Staffedition
Follow
Привет друзья.✋
Наше знакомство продолжается с новым фотоцветущим растением от Smail_Seeds сорт TROPICANNA POISONZKITTLEZ XXL Regular F1 reg.
Сегодня растению 66 дней.
Перевёл на 12/12 1.10.2023
Перешло в активную фазу цветения
Растение очень хорошо развивается, ни каких сбоев в генетике не наблюдается😀
Сорт выводим сами.
Смотри мой профиль, у нас всегда есть что то интересное.
Не забудь поставить лайк❤️, если понравилась как прошла неделя
И читайте наш TELEGRAM: https://t.me/smail_seeds
#Smail_Seeds 😀
Likes
57
Share


@DogDoctorOfficial
Follow
Man how great is my Medusa F1 from Royal Queen Seeds, She is really taking off in the second week of flowering. I mean, have you seen the fruit formation on this girl? She's going to be a real beast! And I can't forget to give a big shoutout to Royal Queen Seeds for sponsoring my journey - their seeds are top-notch and I'm grateful for their support.
By the way, have you heard of the "Medusa's Gaze" cocktail? Yeah, it's named after the infamous head of snakes and apparently it's quite potent. But enough about drinks, let's talk about the plant!
During this stage, it's important to make sure my Medusa is getting all the nutrients, light, and water she needs to keep growing strong. I'm keeping a close eye on her progress and making adjustments as necessary to ensure she stays healthy and happy, for this i trust no one but Aptus Holland and the magic only they know how to do <3 <3 <3
Overall, growing Medusa F1 is turning out to be an amazing experience, and I can't wait to see how she does in the coming weeks.
As always thank you all for stopping by and for supporting me on this journey, i am super passion about growing and fell blessed to have you all with me on this new journey <3 <3 <3
Genetics - RQS MEDUSA F1
Ligth - LUMATEK ZEUS 465 COMPACT PRO
Food - APTUS HOLLAND
All info and full product details can be find in can find @
https://www.royalqueenseeds.com
https://aptus-holland.com/
https://autopot.co.uk/
https://lumatek-lighting.com/
With true love comes happiness <3<3<3 Always believe in your self and always do things expecting nothing and with an open heart , be a giver and the universe will give back to you in ways you could not even imagine so <3<3<3
<3 <3 <3 Growers love to you all <3 <3 <3
Medusa F1
Medusa is a true F1 hybrid created from pure, inbred cannabis lines. She boasts uniform grow traits, mouthwatering aromas and flavours, and plenty of potency. If you're looking to bring stable, elongated plants into your room, tent, or garden, look no further. Mouthwatering Aromas, High Potency, and Mid-Size Plants
Though she won't turn you to stone like the mythical goddess after which she's named, Medusa F1 is bound to get you plenty stoned in her own special way. Combining genetics from inbred lines deriving from Sugar Magnolia, a thick and sweet indica, and American Beauty, a fast, fruity hybrid loved for its well-balanced, positive high, the result is an autoflowering F1 variety that produces fresh flavours, a unique cannabinoid profile, and large yields.
A very aromatic cultivar with a vibrant concentration of terpenes bearing notes of fresh mint alongside an upfront peppery kick, backed up by hints of fresh fruit, berries, and tangy fuel. Her thick, frosty flowers consistently produce high levels of THC and CBG, as well as high concentrations of myrcene, ocimene, farnesene, and caryophyllene. As a result, Medusa F1 has strong effects that relax and stone the body from head to toe (brought on by particularly high concentrations of myrcene and farnesene) while motivating the mind with an uplifting, creative, and motivating kick (thanks to high concentrations of ocimene).
Medusa F1 seeds produce elongated autoflowering plants with long, strong branches and well-spaced internodes. Plants regularly grow up to 80–85cm tall and boast a fast flowering time of just 42–45 days (72 days from germination to harvest). Thanks to her genetics, Medusa F1 produces plenty of thick flowers with big, swollen calyxes that make for very easy trimming. Medusa F1 is very stable, handling stress and unfavourable growing conditions with ease, though she is somewhat susceptible to Botrytis, so make sure to keep tabs on the humidity in your grow room/garden
Likes
29
Share


@Naujas
Follow
super!!! girl, mature :) I didn't increase the light intensity this week :) it's 32° in the suitcase during the day, which is a lot, but she's coping well with it, this week I'll move the suitcase to a cooler room and hope to lower the temperature to at least 30° :) good luck to everyone.
Likes
18
Share


@GYOweed
Follow
Trainwreck and Brucey now in flower room 5 gals going 15/9.
Need to feed the TW or color is ok for sativa?
The greenpoint OBS was fimmed and recovering. Same for the strawberry sorbet going way better.


Likes
22
Share


@knnabisgrower
Follow
En el transcurso de la 7ma semana hicimos una defoliación general, trasplantes a 16 lts cargando el sustrato con nutrientes de asimilación lenta, enfocados en la etapa de flora, sacamos 2 clones de la parte baja a cada planta y ajustamos el p.H a 6.2. Dejaremos un par de días que se adapten al nuevo espacio y mandamos a florar.


Likes
24
Share


@SkunkyDog
Follow
Hallo zusammen 🤙.
So das war es für sie.
Wir sehen uns in 3 Wochen mit dem Erntebericht wieder.
Bis dann
Rabattcode für den BIOTABS-Webshop https://biotabs.nl/en/shop/ GDBT420, damit erhalten Sie 15 Prozent
