The Grow Awards 2026 🏆 


Likes
11
Share
@StickyFingah420
Follow
Ya se acerca la cosecha! Última semana de vida y ya comienza la cuenta regresiva.
Los tricomas están lechosos en su mayoría y ámbar en menor medida, para mi este es el punto perfecto de corte.

Likes
22
Share
@HighlyEduc8ed
Follow
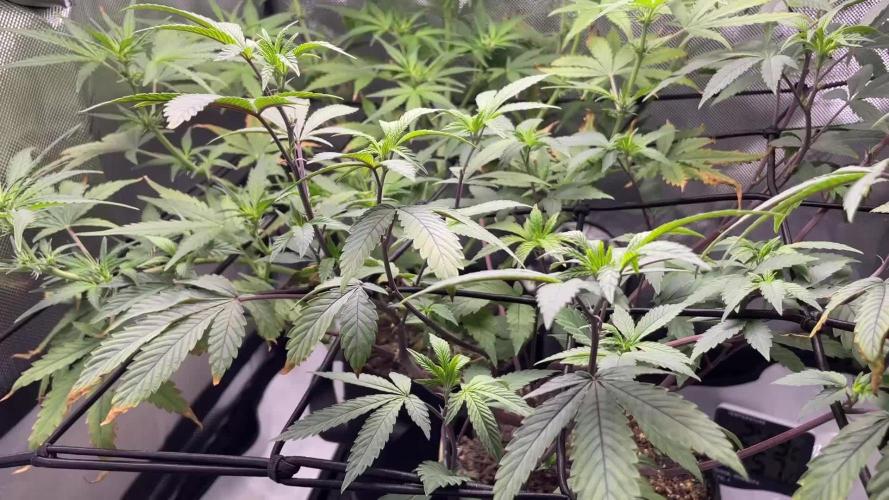
Week 3 of flower
So we had a power outtage due to a storm that came through. Lost power from 10a-6p which is most of my day cycle. So there is that.
The plants looks really well. Noticed a bit of spotting so I added some cal/mag with my last watering. Buds are hella frosty you can definitely see the Banana Butter cups coming through.
Thanks for stopping by please leave a like and tips and advice are always appreciated.
Likes
26
Share
@pifflestikkz
Follow
Day 51
20/08/24 Tuesday
Feed today using de-chlorinated tap water pH 6. With Plagron PK13-14 and power buds.
Noticing the stretch stop, and now packing out there bud sites 💪💚
ACOP , Melonade Runtz have Xmas tree structure where as orange bud is pure tall sativa structure... The Overdose is a compact indica looking dwarf but the bud sites are packing out a punch 👊🤣
Day 54
23/08/24 Friday
Watering only today using de-chlorinated tap water pH 6,
I'm watering in 350ml no run off. 400ml I'm seeing tiny run off.
Day 56
25/08/24 Sunday
Water today using de-chlorinated tap water pH 6. Added bud candy and rhino skin 1ml per litre


Likes
37
Share
@Roberts
Follow
My tiny potter is doing pretty good. It is a hard grow with the plant this size. The window for ph error is very small since it dries the potter out in a few hours. It is very root bound, and drainage is very slow. I been feeding 2 to 3 times a day if I get the chance. I got a little nute burn when I increased nutrition a little too early. The twin tops might of gotten too close to the light as it stretched. Regardless it's looking pretty good for a tiny potter. She is bulking now, still under the Mars Hydro FC4800 light. nothing much else to report. Thank you Mars Hydro. 🤜🏻🤛🏻🌱🌱🌱
Thank you grow diaries community for the 👇likes👇, follows, comments, and subscriptions on my YouTube channel👇. ❄️🌱🍻
Happy Growing 🌱🌱🌱
https://youtube.com/channel/UCAhN7yRzWLpcaRHhMIQ7X4g
Likes
16
Share


Processing
Likes
28
Share
@Salgeezi
Follow
August 31 - Day 35
Getting there. Everything is basically the same besides the topping I did on August 29th (Day 33). The girls were on their 7th node going on 8 and I topped 3 down to 5 nodes and 1 to 6. Lost at least 5 days to a week in growth on that. But I didn't feel like they were growing enough daily to top them sooner
Temp - 78
Humidity - 63
Wattage - 110
EC - 600

Likes
18
Share
@Luca90
Follow
Today 23/07/22 We are two days into week 5, never talked about nutrient or water’ problems I had some leaves with few yellow marks but very small one beside that I always saw my plants green and happy, here you can see the scrog I set up yesterday not sure if this will work better but I think will help the branches grow further from the others increasing the light they riceve! I made it myself I will order one for the next grown when I will get my grow box! The watermelon is already flowering but the northern light no so today I started feeding the plants with different preparations.. I kept on giving the grow booster with a bit of bloom booster and viceversa for the watermelon! If you have any tips anything you think I’m doing wrong or you see it’s not ok let me know I don’t grow in a box I grow between the curtains and my window so the environment wasn’t always the perfect one


Likes
2
Share
@smokeycropping
Follow
7 SEMANA (4 FLORACIÓN)
- SIGUEN SALUDABLES
- LAS 2 GORILLA GLUE SE ESPIGARON YA QUE TIENEN 2 SEMANAS ATRASADAS NO LAS ELEVE Y YA ES TARDE
- TODO VA EN ORDEN MUY SATISFECHO
Likes
14
Share
@ernest_twwg
Follow
January 27th:
Not much to say.
They're about done and smelling delicious.
The dry room is set up and ready.
I'm excited to harvest it, after all the nonsense this cycle went through.

Likes
Comments
Share
@Dankmark420
Follow
Now it just a waiting game..😍
Girls are looking better and better for each goddamn day only thing I’m kinda meh about is they haven’t showed colour yet.. but we hope it will come in the next couple weeks
O.m.g is getting FROOSTY🤯


Likes
8
Share
@CannabisCultivate
Follow
We have unfortunately lost the Black Opium in this line up but the other three are doing well. We have some albinism throughout the White Widow and she looks lovely to say the least, Kabul is well on her way and doing great along with the Purple Opium. Hopefully we have a great week and these girls keep in their groove!
Likes
3
Share
@CannaBiNook
Follow
Day 35. Last week top dressed with a cup each of Craft Blend & Build a flower.
The stretch continues. Lights also switched to 12/ 12 to initiate flower on the Gush Mints clone
Likes
24
Share
@m0use
Follow
***Sponsored Grow*** = Medic || https://medicgrow.com || Grow = ***Sponsored Grow***
First ever ETS Grow, all thanks to @emeraldtriangleseeds/ @emerald_triangle_seeds
I asked them for some sample seeds and they responded in kind, they let me pick out a few strains, this was one of the ones I picked.
I also received from them their Leviathan CBG, Royal Purple Kush CBD and Morningstar. curious to see how their Leviathan CBG is vs Seedstockers CBG Zerodue. This black berry og CBD is my main pick from them. 3:1 reported cbd to thc ratio. plus a big fan of berries :D
As of now I've scarified the seed, soaked in water for 20hr then moved to paper towel till a 1mm or less tap root was showing then planted in the medium.
This grow has a lot of new things happening. its my first attempt at indoor growing using dry crystal fertilizers, the brand of nutrients I'm using is Lotus. It was also a gift from another user @SanderanderS as shipping to them would have been astronomical for the stuff they wanted. I have noticed some weird things like boated packaging, off gassing and weird consistency with the nutrient line up so far and been in contact with the reps online about it, They said everything is normal and not to worry.
Another new thing with this grow is how it will be grown under the new LED's by Medic Grow. They will be under two of their MINI-SUN 2 240W LED grow lights using their V1 Spectrum, Its good from seed to harvest. You can find more information about this in the foot note.
Just going to wait for another week till It pops up and will update as follows. Watered in with PH of 6.2 and a EC of 0.6 or 340ppm 500 scale.
This is part of a 5 part diary in conjunction with medic grow led lights, in the beginning it was to be 6 plants but one of the selected strains died out and its replacement/backup seeds also failed. Sorry to say Humboldt Seeds Raspberry Diesel was a big flop all 3 seed did not meet my expectations, really wanted to try that one it looked nice. Can add that to the failed 4 seeds of Seedsman Cookies Chill :(
***Sponsored Grow***
Official Website:
https://medicgrow.com/
+
https://www.emeraldtriangleseeds.co.uk/
Facebook:
https://www.facebook.com/medicgrowled
+
https://www.facebook.com/OriginalETS/
Twitter:
https://twitter.com/medicgrow
+
https://twitter.com/emeraldseeds
Instagram:
https://www.instagram.com/medicgrow420/
+
https://www.instagram.com/emeraldtriangleseeds/
YouTube:
https://www.youtube.com/channel/UCNmiY4F9z94u-8eGj7R1CSQ
Growdiaries:
https://growdiaries.com/grower/medicgrowled
https://growdiaries.com/grow-lights/medic-grow
+
https://growdiaries.com/grower/emeraldtriangleseeds
https://growdiaries.com/seedbank/emerald-triangle-seeds

Likes
18
Share
@Kloud9gardenz
Follow
Plant fuckin enormous especially if you look back at how it started. Node spacing is pretty wide and it's not a leafy plant BC the fan leaves are literally there on each bud site, light penetration clearly isn't an issue just gotta feed this amazon and pray at this point. She also smells like lemons

Likes
60
Share
@Cannibalgardens
Follow
She has been amazing to grow super smell, good amount of crystals and very sticky.The humdity has been killing me i had to move her outside , this barely helped and had to cover her outside for light cycle. Ive decided to start the flush process now with flora-kleen and to harvest in the near future. Truly have loved this plant ,my first grow and it feels great to be ready to harvest and enjoy my labour oh and enter a contest too..cheers brothers and sisters

Likes
101
Share
@Ferenc
Follow
Day 80, 2nd of December 2020:
Hi there! Ladies are cool everything is alright. In one week buds strated doubeling and the developement is dope haha.
The 2 Zamnesia ladies are pretty Gelato is so nice bushy and the smell is great as well.
Kalini Asia will be a green pheno I think and she my be hermied a bit on me.... I am still waiting to see I see some strange develepement lets say.
Sweet Seeds girls are dope unfortunately Red Mandarine and Tropicanns poison don't show any sign of colouting yet but it is okay even if they green phenos.... It may happen in the end of the flowering cycle let's see.
Basically that's all I wanted to share.
Oh yes... this one:
All good the lamp is now on 11 hours and off 13 hours. Every week 15 minutes was taken off and after 4 weeks here we go. Strated 12/12 and now 13/11 wanted try to imitate the nature as the light days are getting shorter.
Fertilization has changed no more epsom salt from this week and I will stop giving nitrogen as well from next week.
Great job Sweet Seeds and Zamnesia! Nice genetics :) Lovely plants!


Likes
11
Share
@NoProbation4Weed
Follow
- Day 63 of Flower Light reduction to 50%
- Day 65 of Flower Last time Watering
- Day 67 of Flower Lights out for 3 days
- day 70 of Flower Harvest
Trichomes are about 10% amber and 80% cloudy with 10% clear
Temperatures for drying gonna be 19°C and RH around 55%.
She is looking beautiful and her Smell is so intensive you cannot unsmell it. Its Loud!
Has Some Sweet doughy, Stanky, Cheesy and Garlic notes to it.
I cant wait for the smoke.
Has Some Fruity (Plum or Tangie like), Soapy and Floral Notes to it.
I cant wait for the smoke.
Likes
3
Share
@SelfCultivationGrower
Follow
My long vegging. Pheno of Fat Banana Auto is finally ready for harvest. Top Buds got nice purple leaf tips. Smell and bud structure is 10/10. I did wet trimming because of high humidity levels.