
Likes
Comments
Share


@Cornfed
Follow
Welcome to week 3 of veg. They’ve been growing about 1” per day lately. I’m planning to SCROG these three girls with a portable scrog screen. Supplies arrive today and I’m anxious to test this. (Note that my portable scrog screen didn’t work, so I’m using a 2x4 stretch screen).
So far the self watering feeders are working well. The reservoir ph does tend to climb, so I make regular adjustments by adding RO water to the nutrient mix and using ph down. The PPM of the nutrients is climbing too, so adding RO dilutes that. As an example, it had climbed from 925 ppm to 1080 ppm overnight. I diluted it back down to 880 ppm.
Saturday: installed scrog net
Sunday: checked reservoir ph (6.4) and ppm (970). Added ph down. Adjusted scrog net. Discoloration in leaves appears to be worsening. Waiting for a new dehumidifier to arrive. With all of the humidity that the fiber pots put off, I’m going to need a dehumidifier in flower.
Monday: ran pipes for humidifier, heater and dehumidifier through a different tent outlet. I’m ready to start dehumidifying at flower flip. Removed humidifier since I won’t need it until after the harvest (I dry in my tent ideally). Topped off reservoir water with a heavy emphasis on CalMag. Reservoirs are at a ph of 6.0 and 750ppm. Lowered ppm due to start of burnt leaf tips on one plant.
Wednesday. Lowered ph in reservoir from 6.4 to 6.1 with ph down and diluted nutrients. Lowered ppm from 780 to 700. Removed growth below the SCROG net. Adjusted lighting to a DLI of 35 which proved too intense for the plants, so I backed it down to 30 DLI.
Thursday: wrapped up the week by giving them a foliar spray after lights went out. Feeding 5ml/g or CalMag and 30ml/g of Seaweed Extract. Topped off reservoirs using 6ml/g of micro, 9ml/g of Bloom, Seaweed and 2ml CalMag.

Likes
5
Share


@Enki_Weed
Follow
Diese schwarze Woche wird noch beschrieben .... in der Bericht der 11 Woch

Likes
3
Share


Likes
12
Share


@CheeRz
Follow
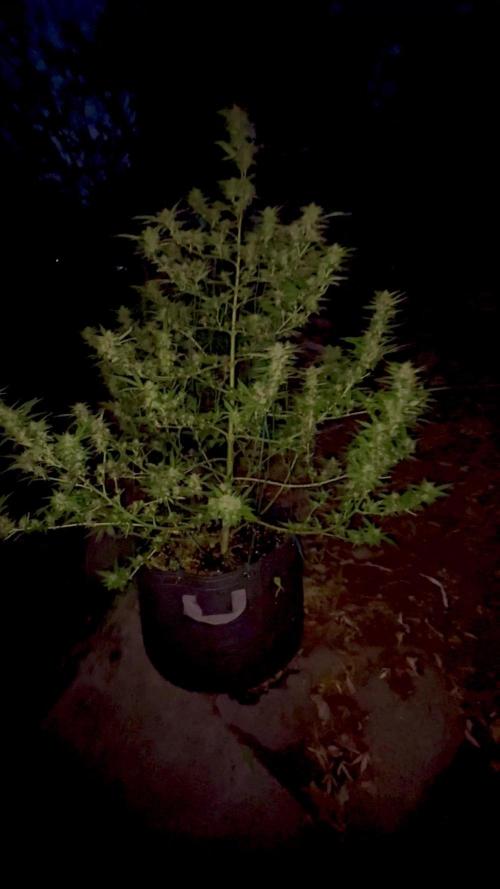
Time flies and we r hittin' week 8 💚💚💚.The development is quite good for the fact that the ladies had such problems in the vegi. Some day this week I'll also scrog the ladies.


Likes
12
Share


@leafy_greenz
Follow
Note: Moisture and Temp readings are done in the mornings.
Lights are on an 18/6 schedule on most days. Unless stated otherwise.
📏: AK1: 22 in (55.88 cm), AK2: 26 in (66.04 cm), North: 17 in (43.18 cm)
Quick Notes: At the beginning of the week I was tending to the AKs deficiencies, all plants received a lot of extra nutrients this week. I think it was related to being underfed or underwater. Midway through the week, they started to recover and grow taller. North is on the verge of flowering. I also lollipopped all plants to try and clear the lower region so it's easy to water and so the plants can focus growth on the important parts. Overall the AKs have been drinking up a storm (watering almost every day at this point), I'm trying to keep an eye out for overfeeding. I'm feeding every watering for now until I see issues pop up, then I'll slow down. Next week may be the week I start flower (guessing since these are autos).
Day 42 (Jul 8) - Plants look the same as yesterday pretty much, AK1 & AK2 are doing less of the 'preparation droop'. The major yellow leaves are starting to crust off and it seems like the mid/upper leaves are not getting paler / translucent. Watering with a lot of Nutrients this morning.
💧: Tap: x pH (Forgot to measure tap)
Adjusted with Concentrated Lemon Juice
AK1: 1 liter (5.7 pH, 2.5 ml FloraMicro, 2 ml FloraGro, 1ml FloraBloom, 1.5 ml CalMag)
AK2: 1 liter (6.1 pH, 2.5 ml FloraMicro, 2 ml FloraGro, 1ml FloraBloom, 1.5 ml CalMag)
North: 1 liter (5.6 pH, 2 ml FloraMicro, 2 ml FloraGro, 1 ml FloraBloom, 1.5 ml CalMag)
💦: 41% (36-58) - 🌡️: 28C (25-34)
Day 43 - Lights out overnight, starting 7 hrs from 130am.
Lights on, AL1 & AK2 perky, surprised AK2 is perky. The yellowing seems to have slowed on both plants. AK2 developed salty spots on random leaves. *AK2 grew 4 inches in 2 days.
💦: 52% (36-65) - 🌡️: 28C (23-31)
Day 44 - Lights 24 hours. Watering in the morning, pots are light and the soil is pretty dry. Giving a little less Nitrogen / Micro and more Bloom to North since she's clearly showing some white pistols (and it doesn't seem to be suffering from the same things as the AK's).
💧: Tap: 8.15 pH
Adjusted with pH Down
AK1: 1.5 liter (6.1 pH, 2.5 ml FloraMicro, 2 ml FloraGro, 1.5 ml FloraBloom, 1.5 ml CalMag, 1.5 ml Voodoo Juice)
AK2: 1.5 liter (5.8 pH, 2 ml FloraMicro, 2 ml FloraGro, 1.5 ml FloraBloom, 1.5 ml CalMag, 1.5 ml Voodoo Juice)
North: 1.5 liter (6 pH, 1.5 ml FloraMicro, 2 ml FloraGro, 2 ml FloraBloom, 1.5 ml CalMag, 1.5 ml Voodoo Juice)
💦: 41% (35-65) - 🌡️: 31C (23-31)
Day 45 - Soil pretty dry, a little damp ¾ inch below surface. Got 3-in-1 pH / Light / Moisture reader in mail, pH is reading pretty alkaline soil (need to investigate, not sure if accurate).
💧: Tap: 7.10 pH
Adjusted with pH Down
AK1: 1.5 liter (7? pH [forgot to record the exact amount], 2 ml FloraMicro, 2 ml FloraGro, 1.5 ml FloraBloom, 1.5 ml CalMag)
AK2: 1.5 liter (6.15 pH, 2 ml FloraMicro, 2 ml FloraGro, 1.5 ml FloraBloom, 1.5 ml CalMag)
North: 1.5 liter (6.15 pH, 1.5 ml FloraMicro, 2 ml FloraGro, 2 ml FloraBloom, 2 ml CalMag)
💦: x% (34-37) - 🌡️: xC (28-30)
Day 46 - Lights off overnight (9 hrs), with exhaust fan on so watered pots don't humidity tent. Plants look relatively fine, North's bud sites are developing (think I see 2 new sites). Placed Oscillating fan in tent for more circulation, average temps decreased overall.
💦: 62% (34-34) - 🌡️: 24C (23-31)
Day 47 - Lights off overnight (~9 hrs). Spent some time Lolipopping the plants, then watered. *North soil wasn't completely dry yet.
💧: Tap: 7.30 pH
Adjusted with pH Down
AK1: 1.5 liter (5.9 pH, 2 ml FloraMicro, 2 ml FloraGro, 1.5 ml FloraBloom, 2 ml CalMag, 1.5 ml Voodoo Juice) 875 PPM
AK2: 1.5 liter (5.75 pH, 2 ml FloraMicro, 2 ml FloraGro, 1.5 ml FloraBloom, 2 ml CalMag, 1.5 ml Voodoo Juice) 1050 PPM
North: 1.5 liter (6? pH, 1 ml FloraMicro, 2 ml FloraGro, 2 ml FloraBloom, 2 ml CalMag, 2 ml Voodoo Juice)
💦: 54% (40-64) - 🌡️: 27C (23-29)
Day 48 (Jul 14) - Lights dimmed overnight. Not watering North since the soil is still moister than the AKs. AK soils are not completely dry. All plants are beginning to flower, especially North so I'm lowering FloraMicro for now to see the response and upping FloraBloom.
💧: Tap: 7.60 pH
Not adjusted
AK1: 1 liter (6.2 pH, 1.5 ml FloraMicro, 2 ml FloraGro, 2 ml FloraBloom, 2 ml CalMag, 1.5 ml Voodoo Juice) ~1200 PPM
AK2: 1 liter (6.2 pH, 1.5 ml FloraMicro, 2 ml FloraGro, 2 ml FloraBloom, 2 ml CalMag, 1.5 ml Voodoo Juice)
💦: 72% (41-74) - 🌡️: 25C (24-30)


Likes
1
Share


@KannaGrowing
Follow
Estamos en la semana de transición del periodo vegetativo al periodo de floración.
Nuestras plantas ya tienen un tamaño correcto para poder pasar de 18h de luz a 12h... De esta forma iniciamos dicho periodo.
Hemos conectado tres equipos led LazerLite Pro 720w ajustados al 50% de su potencia.
Repartimos bien todas las plantas para que reciban luz de forma homogénea.
Regamos, esta vez solo con agua, para no tener exceso de fertilización, ya que nuestro sustrato es muy rico en nutrientes.
Likes
3
Share

@Organic473
Follow
I did a major defoliation and she took it perfectly…Her smell is slightly increasing as matures.
Likes
4
Share


@DragonDominance
Follow
The plant grow so fast you could almost see it happening. It was resistant to drought and handled anything I threw it's way. I highly recommend this strain. The best grow techniques are main-lining or topping, from my experience.
Likes
77
Share


@Basementganja
Follow
I love the sativa shaped nug-towers! When my plants grow big, I like to grow them until the very end of their cycle! That's why the extended flower period.
Video of Measurement of yield: T=Tops(92grams), M=Mids(59.1 grams), L=Lowers(58.6grams)
Total: 209.7 grams (1-2 grams worth, was taste-tested prior to scaling.)
Likes
17
Share


@HighZenBerg
Follow
Flowers developed nicely and the first leafs are covered in trichomes already. I hope this progress will keep up for the next 30 days.
Nutrients as scheduled by BioBizz. I added Alga-Mic and CalMag to get rid of the CalMag issue. So far, the spots on the leaves don’t become worse.
Day 54: did some light defoliation to remove the yellow/burned leaves. Somehow, the deficit won’t go away. I think that my PH-Level is too high. But I can’t really test the drain water without a test kit. Maybe I will buy one
Keep in touch!
Cheers,
HighZenBerg


Likes
76
Share


@Canna96
Follow
The buds are very tight, but they didn't grow large colas so that means wasted time trimming cannabis, which I am not a huge fan of. I will not be growing this strain again, as I believe there are far better breeders and strains out there. I will continue to seek out the best breeders and strains until I am satisfied. I believe this Auto will yield in the 16-22 Ounce range dry, so I am not super disappointed, but I know I can do much better than this. After 6 days of drying, it took me around 7 hours to trim this auto, and she ended up yielding 16.72 Ounces. So she was definitely on the lower end of the spectrum from what I estimated on chop day, but still in the range. The buds are very tight, and smell like like cheese. I am only running one mature auto at a time now, so next up will be the Acid Dough from Ripper Seeds. I hope everyone has a great rest of your weekend, stay safe and Blaze On!!
Likes
145
Share


@Kynareth
Follow
Day 81 update - as you can see at microscope pictures the buds are near to be ready for the harvest. I will stop watering for the next 24 hours the 2 biggest plants to be harvested at the weekend on days 82-84.
The other one i will wait a bit more to madurating proccess.

Likes
49
Share


@masterofsmeagol
Follow
7/11 Got half in of rain last night. Glad I didn't water. Ph of rain water is very acidic. Added supports to the blueberry cheese in the 50. I just used string and went diagonal and attached to the cage. Wrote a ton but it disappeared. Anyway looking at previous diaries I was wrong about senescence. It wad the life cycle of those earwigs that did that to my plants (see other diaries). This soil mix is amazing. These plants gave only gotten like two small feeds of big bloom. I showed my commercial buddy and I'll keep it between us what was said but it made me feel really good. I'm considering either expanding the cage in one direction with some lumber I already have or moving a couple outside tge cage. That way I have more room. He said he's seen plants structurally similar reach huge heights (14f) so I'm just trying to avoid future problems. I at least need to get the trellis on. I hope poor that's food enough. Did a real nice video this morning but nothing wanted to upload and it just uploaded the same one twice. I'll try again and hopfully it will go up. If not I'll put it up tomorrow.
7/12 Dad has surgery this morning. I did a quick video and took some pictures. I need to do some rearranging with the plants and cut a pallet to fit in the back. Then I can put a vertical trellis up. Haven't decided if I'll add on to the cage, remove a couple plants or just rearrange things but I'm leaning towards the later. They will need water again and I'm wondering if I should start nutrients but everything looks so good. By this time on past diaries I'd be losing all my leaves bu now. MI think it wad part ear wigs and part to many nutes. This soil mix is taking these plants through veg. I'll probably do a feeding soon but it will be organic and it will he small like a big bloom or ancient amber. Im leaning towards not using growbig this year as my plants seem to be doing great without it. We'll see. I'll keep this updated.
UPDATE: Went back over and gave plants a full watering. Some were slightly drooping. I was going to add nutes but decided against it as I didn't see any deficiency. So far NO Earwigs! I comed through the plants and I did find a jpn beetle which I happily killed. I mixed up 8 gallons of water and gave it to the 11 plants so it wasn't quite a gallon a plant. I need to rearrange the plants so I have room to move around. I also need to cut another pallet and use the spaces I'm not. Trellis needs to go up.
7/13 I think I've got the watering amount down. Now just to find how often which will depend on weather. I've watered very little this year. They loved that gallon. I was going to use big bloom and kelp me/you but looking at my garden I decided not too. My buddy asked what i was addingvthings for and to wait fir what i added to do what I wanted it to do. I see no nutrient deficiencies so why add anything? I think this soil mixture will get me all tgexway through veg. I dont plan on using much in fliwer either. Definitely good genetics. I really need to cut that palley and move the 1 10gallon to the far back coener. It will open thibgs up so much better. The garden looked so beautiful this morning. Getting very aromatic. I started untangling trellis netting but had to leave. I'll update what I do. Happy growing folks
UPDATE: Went back over as I had a slight intuition that I needed to check the garden. I found and killed at least 7 jpn beetles. That's what's been making holes. They tried to escape and bounced off a tarp but I got it. I went through the interiors and found two pillars. If these beetles are gonna be around I'm ordering a net. I'm also close to positive I'm going to extend my cage in the back a few feet. Things are getting unmanageable in here. My buddy said I'll be having problems soon if I don't do something. I'll document what I decide to do.
7/14 Found ONE jpn beetle in the garden this morning. I can manage those well enough. The birds help too. I check my garden multiple times a day so I manually remove many pests. However I've noticed some thrip damage on a leaf and a leafhopper damage on "A" leaf so there are "some" pests around but not enough to spray shit. A couple wasps were doing there job while I was there. Supposed to get thunder storms after three and tonight. Supposed to get over a half inch of rain tonight. I lifted the bags and decided to hold off and let mother nature take care of it as the bags weren't totally dry. Only problem I really have is space. I AM moving that 10gallon (that's the same size as some 20's) in the back. There's 27in not being used and a few feet the other way. My buddy cautioned me that I'm going to have problems since my plants are so crowded. I agree with him. I spoke with me father and we have most materials to extend my cage four feet in the back. I think that's my plan. I'll extend the structure before the stretch then I can put up the supports. We'll see how this goes.
UPDATE: Went back over to check the girls as I had a feeling I ought to. When I got there I saw that a couple of the blueberry cheese were pretty light (liftng the smart pot) but the others seemed to be fine. ONE 10th planet was light like that and the purple punch in the 10 gallon was as well. Each plant thar needed it got at least a half gallon of water. I'm waiting to see if we get the thunderstorms and the half inch of rain. I watered the MASSIVE blueberry cheese in the 50 but I only gave it 1 pitcher which is like 1/4 gallon or so. Don't know why I even gave it that. Looked fine but the soil WAS pretty dry. Next year I'm giving myself way more room. I was running trying to chase these jpn beetles. This time I have the dawn and water and a measuring cup to knock them in. This ain't my first rodeo. I did notice some bright yellow streaks on a leaf edge and I'm hoping it's not septoria. I doubt it but I have an anxiety disorder and I worry. I hope I can get the cage extended sooner rather than later. It's getting hard to move in there and more importantly I can't take any more plant pathogen problems. I'm considering starting a plant doctor regimen just to be safe.
7/15 Got a bunch of rain last night. No jpn beetles in the garden and not really much damage. I did notice this (I think it's leaf hoppers) that leave those dots close together on a leaf so it appears I've got a variety of pests. I'm considering how to approach this. I mean the damage is very minimal but I don't want it to get out of hand. Another thing I need to look out for is leaf septoria or any other fungal pathogens. I believe that has been part of my problems in the past. I think that's what caused my earlier grows to drop all their leaves so quick. I think I'm being overly cautious but its very crowded in there. With my father just getting out of surgery the girls will need to wait a little bit before before I can extend the cage. I could still cut the pallet and move the 1 10gallon and that would give more room. I rearranged a LITTLE BIT so they have a little more room but I've really got to get this cage extended.
UPDATE: IT Rained so hard I had to pull the car over. We hydroplanned the whole way home. After working ob my house I went to see what the damage would be like. NOT A SINGLE BREAK THAT I COULD SEE. I took a video but since the wifi here sucks I'll have to upload it tomorrow. Walking around in the cage even if I cant get it extended I think I'll be OK. It obviously will open me up to lots more issues but at the very least I can reorganize before I build on. The 10 gal purple punch would fit perfectly in the back and I have a pallet I can cut to fit it in place. Putting that one back and pulling the others forward will be much better than what I've got going on now. I'm also thinking about running an extension cord and putting fans under the canopy or at an angle to keep the wind moving. Just thinking outloud. However after that storm the girls looked as happy as I've ever seen them. All happy praying to the sun, thankful for the much needed rain. Mother nature does a pretty good job with out me messing with it. I've noticed a couple interior lowest leaves turn yellow and die like a nitrogen deficiency but everything else is fine. Also noticed a leaf that looked like a p deficiency but again, it was the VERY bottom leaf on ONE plant. Again the rest of everything looks fantastic. I'll keep an eye out for anymore nutrient deficiencies and if anyone that reads this sees some please let me know. I should've taken stills since they looked so good but I got it on video.
7/16 It POURED last night and throughout the day. TORRENTIAL rain. The branch breaking sheet rain that us outdoor growers learned to fear. My plants aren't trellised currently. I know what I need to do now. I have a pallet to put in the back corner and I'm moving the purple punch in the 10 there. And pulling others forward where there's more room. Then when I extend it (it's gotta be done this week) everything g will be in their proper place and I can just throw on a vertical trellis. I also noticed more (leafhopper) damage on a leaf. Different leaf of the same plant so I'm considering spraying something. I have a number of products but I was trying not to use them. Luckily I have these diaries so I can look back and see certain plants reactions to certain nutes or fungacide/insecticide/nutes and the doses used. I haven't been using much but if my plants will remain cramped I'm going to start the plant doctor. I'm seeing more pillar damage too but BT is super narrow so I'm thinking when I fo spray for pests I might use cap jack and be done with it. Then I can apply the BT in flower if it's necessary. I took a video but I have to wait until tomorrow to upload. I took a quick snapshot though.
7/17 Despite the torrential rain I don't have any breaks. I'm noticing more pest damage though. Another leaf on the same plant had those closely shaped round circles. I forget what pest it is but it's there. Caterpillars are there I'm sure so I may do a preclcentative spray. Just unsure what I'm going to use. I lost a COUPLE very bottom interior leaves that look like they just got used up. After this rain I think think the plants might benefit from a feeding. Probably next water after they dry out. I REALLY need that cage extended. I expressed that today and it should be done this week. I'm looking for pallets today. I have the little one that I can put in the back which will allow me to move the 10 gallon and move the other forward. That will help some but I need more room. I'll update as I go.
UPDATE: GOT A SMALL PALLET AND IT FIT PERFECT IN THE BACK ROW. I MOVED THE PURPLE PUNCH IN THE 10 GALLON ONTO IT. I SHIFTED A BUNCHVIF THINGS AROUND. I ROTATED ON BLUEBERRY CHEESE 180 DEGREES SO IT WOULD FIR BETTER. CROP ROTATION IS GOOD ANYWAY. I TOOK VIDEOS AND YOU CAN NOW SEE THE ROWS MUCH BETTER. 2 WITH 3 and 1 WITH 4. IT'S SIGNIFICANTLY BETTER THAN IT WAS. I CAN GET AROUND ALL SIDES OF EVERY PLANT NOW. GRANTED THE LARGE 50 IN THE BACK IS GOING TO HAVE SOME TROUBLE BUT ILL JUST STAKE IT TO THE CAGE. IT WILL GROW TOWARDS THE SUN ANYWAY. IM SUPRISED I DIDN'T LOSE A BUNCH OF LEAVES AFTER THIS RAIN. MOVING THINGS AROUND AND LOOKING ON THE INTERIOR OF PLANTS I FOUND A COUPLE LEAVES THAT HAD BEEN USED UP. I REMOVED A COUPKE LEAVES THAT HAD DONE THEIR JOB. I'LL UPDATE AS I GO ALONG.

Likes
4
Share


@Ieiogrow94
Follow
Eccoci qui...
Per problemi di lavoro ho tardato un pò la pubblicazione delle foto, la piccola è molto vigora ed emana un forte odore.. Già si può vedere la resina che si inizia a formare sulle cime in alto...
Sono estremamente soddisfatto della sua crescita finora e sono sicuro che mi riserva sorprese, odore veramente intenso.
Grazie a tutti per il supporto, NON VEDO L'ORA DI RACCOGLIERLA 🔥🌲❤️


Likes
92
Share


@DogDoctorOfficial
Follow
🌸 Week 4 Flower Report: Growth, Challenges & Big Changes! 🌸
Hey, Grow Diaries Fam! ✨
We’re here at Week 4 of Flower, and what a week it’s been—packed with challenges, adjustments, and exciting progress! Before diving into the details, let’s start with a note on my flowering timeline. While this is Week 4, I don’t start counting flower days the moment I flip to 12/12. Instead, I wait for the plants to show true signs of bloom. It’s a small but significant distinction that keeps things accurate and aligned with the plants’ development. 🌱
Defoliation: Timing is Everything!
Defoliation is a critical part of the flowering stage, and I typically wait until Day 21. However, this week, I tackled it earlier on Day 17 because:
1️⃣ The room was simply too full.
2️⃣ And most importantly—the Papaya Zoap had other plans!
She’s a fighter—determined, defiant, and constantly reaching for the moon. Despite intense training like super cropping, she’s still pushing upward, nearly outpacing the LED lights. Challenges like this remind us of a simple truth: gardening mirrors life. It’s about resilience, adaptation, and unwavering determination. 💪
This week, I added a second SCROG layer. While this net will support the flowering colas, it’s also there to strategically manage the Papaya Zoap. Why? Because experience has taught me that if she grows out of the LED’s range, she won’t finish properly—and that could disrupt the balance for every other plant in the tent. It’s all about teamwork, even in the garden. 🌟
Defoliation was intense, removing nearly all the leaves with stems to clear space and boost airflow. The tent now looks dramatically different! For the full before-and-after transformation, be sure to check out my YouTube channel—trust me, you’ll want to see this process up close! 🎥✨
Switching to Aptus Holland Minerals
A major milestone this week: I’ve transitioned entirely to Aptus Holland Minerals. 🌊 From now on, it’s just minerals—no more organic inputs. This marks the start of a new chapter, and I’m incredibly curious to see how the plants react to these changes. Here’s the current nutrient mix:
• System Clean: 0.5 ml/L
• Regulator: 0.15 ml/L
• RO Water Conditioner: 0.8 ml/L
• All-in-One Liquid: 2.1 ml/L
I’m keeping the pH at 6.1 and TDS at 556 ppm, and so far, the plants are thriving. This week also included a thorough system clean, ensuring everything runs smoothly as we enter the final flowering stages. 🌿
Bud Development: Pure Magic!
The bud formation across all the genetics is nothing short of incredible. Every plant is thriving, and the canopy is lush, vibrant, and full of potential. I’ve raised the PPFD to 750 for this stage, with temps steady at 25°C and RH at 63%—keeping the VPD dialed in at 1.11. The TrolMaster ecosystem, paired with the AutoPots, makes managing these precise conditions seamless. With more time to focus on the plants, I can give them the daily care they deserve. 💚
Shoutouts & Gratitude
A huge thank you to my sponsors and supporters: TrolMaster, Aptus Holland, Pro-Mix, Cannakan, and the amazing seed banks. Your incredible products and technology make this journey possible. 🌟
To the Grow Diaries community and all my followers—thank you for your energy, love, and even the challenges from the haters. It all fuels this incredible process, and I apprecilove every bit of it.
Special shoutout to Brother Daggadna—check him out on Instagram and show some love! 💚
The plants are heading into the next phase of bloom, and I can’t wait to share how this story unfolds. 🌸✨
As always, stay tuned, stay positive, and let’s keep growing strong together! 🙌
Growers’ love to all 💚
#TrolMaster #AptusHolland #GrowLife #CannabisCommunity #FlowerWeek4 #NeverGiveUp #GrowWithLove #IndoorHorticulture #Defoliation #PPFD #ControlledEnvironment #SCROGNet #DogDoctorOfficial
Discount Codes so you can save big on your next check out 💚💚💚
Kannabia - DOGDOCTOR 30% off
SeedsmanSeeds - DOGDOCTOR 10% off
CannaKan- DOGDOCTOR 15% off
terpyz.eu - DOCTOR 15% off
The Neutralizer - PORKIT5-DOG 15% off
As always thank you all for stopping by, for the love and for it all , this journey of mine wold just not be the same without you guys, the love and support is very much appreciated and i fell honored and so joyful with you all in my life 🙏
With true love comes happiness 💚🙏 Always believe in your self and always do things expecting nothing and with an open heart , be a giver and the universe will give back to you in ways you could not even imagine so 💚
Friendly reminder all you see here is pure research and for educational purposes only
Growers Love to you all 💚💚💚
P.S. – A Deep Dive into the ICL-300: Revolutionizing Under-Canopy Lighting
The ICL-300 isn’t just another LED—it’s a game-changer for under-canopy lighting. Unlike traditional LED systems that project light in a single direction, the ICL-300’s 300-degree design ensures even light distribution beneath the canopy. 🌟 This unique feature means that no part of your plant is left in shadow, creating a balanced environment for lower buds to thrive.
Key Tech Specs & Benefits:
• 300-Degree Light Distribution: This design fills the under-canopy space with optimal light, enhancing photosynthesis where it often gets neglected. 🌱
• Full Spectrum Output: Tailored to meet the specific needs of plants at every stage, ensuring quality growth from base to apex.
• Energy Efficiency: Advanced LED technology delivers maximum output with minimal energy usage, keeping costs down and sustainability up. 💡
• Durability & Heat Management: Built with high-quality materials, the ICL-300 stays cool and reliable, even in intense growing environments.
Why It Matters:
Under-canopy lighting is a game-changer for growers aiming to maximize yield and quality. Typically, lower buds receive less light, resulting in larfy or underdeveloped flowers. The ICL-300 changes that dynamic entirely by turning shadows into opportunity. 🌟 With light evenly dispersed across the entire plant, you’re not just growing; you’re sculpting a masterpiece.
For me, the ICL-300 is more than a tool—it’s a partner in innovation. It ensures that every plant in my grow room has equal opportunity to shine, from the top colas to the smallest buds at the base. When paired with a carefully managed ecosystem, like the one powered by TrolMaster, the potential for consistent, top-quality harvests reaches new heights.
This isn’t just about adding light—it’s about adding value, efficiency, and balance to the grow process. I’m beyond excited to see how the ICL-300 transforms the game in my tent, and I can’t wait to share the results with you all! 💚


