
Likes
Comments
Share


@ButterfliesLittleFarm
Follow
Hello Diary,
Cherry Pie has completed the second week of flowering.
The flowers are forming nicely, the areas around the flowers are a lighter green color, so it looks like it has Christmas lights on it.
Cherry Pie has started to stagnate in growth, this week only 9 cm, now the plant will direct most of its energy into the flowers.
The leaves are a healthy green color and so far they do not show me any signs that the plant is missing anything.
Watering was every three days, I continued to add CalMg and Bio-Bloom Fertilizer.
The conditions in the grow box are now much better.
The temperature is around 28 degrees and the humidity is below 50%.
Overall I am very happy with the growth and progress so far.
Here is a quick overview of the week.
24/08/2024 - Day 31.
Watering.
I prepared 9 liters of water. I added CalMg 1 ml/lit, Bio-Bloom Fertiliser 1.5 ml/lit and then lowered the p.H. to 6.0.
With this amount I watered all three plants evenly.
27/08/2024 - Day 34.
Watering.
I repeated the same procedure as three days earlier.
28/08/2024 - Day 35.
End of the second week of flowering, or the fifth week from the beginning of vegetation.
Photographing and measuring the height of the plants.
Cherry Pie - Day 35. - 69 cm
That's all from me for this week, see you soon.

Likes
37
Share


@Gardener_of_Goodness
Follow
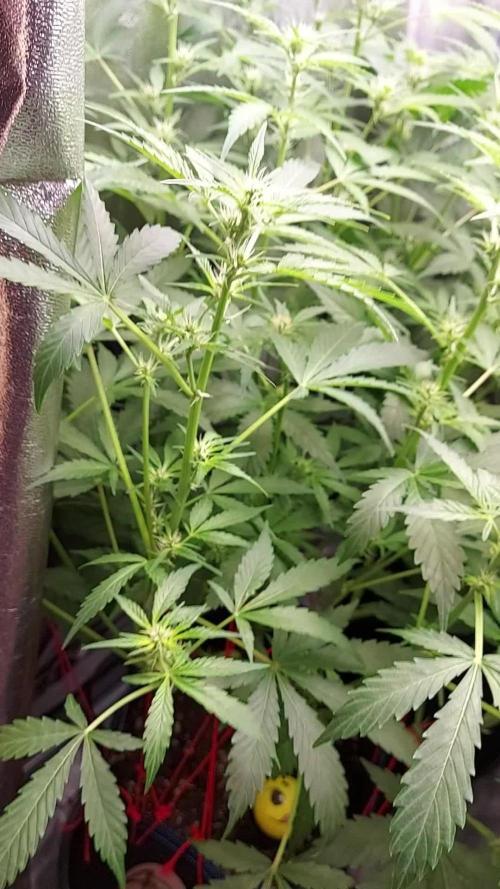
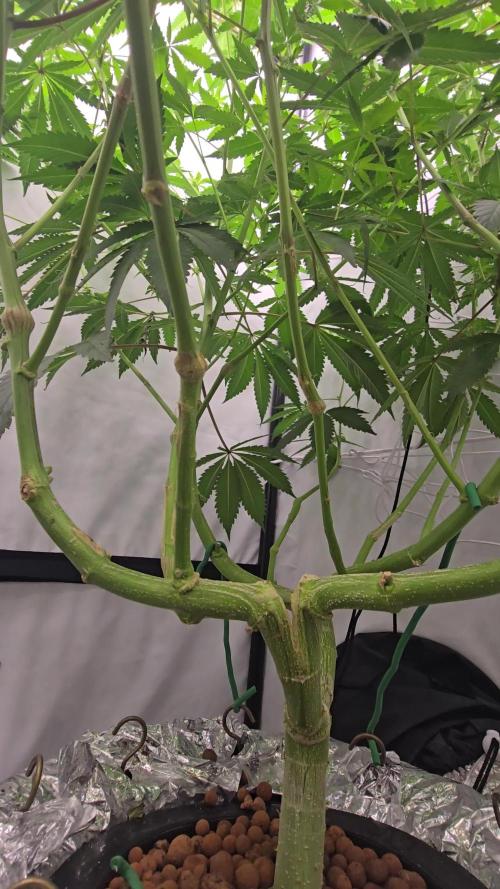
Here’s where I’m upto guys, I’m really now not sure what to do next,
The canopy is pretty even, there some strong branches and a healthy amount of bud sites. Can anyone advise...? Please :)


Likes
35
Share


@MadeInGermany
Follow
Unfortunately, I had to find out that my account is being used for fake social media sites.
I am only active on growdiaries here.
I'm not on Facebook Instagram Twitter etc.
All accounts except this one are fake.
Have fun with the update.
Hey everyone 😀.
The plant develops as it should 😍.
It grows very well and very beautifully. She also coped with the topping very well, so I will top it a few more times before it finally goes to the flower tent 😃.
Until then, I wish eucb a lot of fun until the next update.
Stay healthy and let it grow 🙏🏻
You can buy this Strain at :
https://www.zamnesia.com/de/3271-zamnesia-seeds-blue-dream-feminisiert.html
Type:
Blue Dream
☝️🏼
Genetics:
Blueberry x Haze
20% Indica / 80% Sativa
👍
Vega lamp:
2 x Todogrow Led
Quantum Board 100 W
💡
Bloom Lamp :
2 x Todogrow Led
Cxb 3590 COB 3500 K 205W
💡💡☝️🏼
Soil :
Canna Coco Professional +
☝️🏼
Fertilizer:
Green House Powder Feeding
☝️🏼🌱
Water:
Osmosis water mixed with normal water (24 hours stale that the chlorine evaporates) to 0.2 EC. Add Cal / Mag to 0.4 Ec Ph with Organic Ph - to 5.5 - 5.8 .

Likes
2
Share


@WinnieThePooh
Follow
Well, I think we're almost done here 😄
The buds looks amazing and they smell so good!!! In the next two weeks I'll give her just water so she can flush well and the buds could mature a little bit more.
What do you guys think?? It's important to me to read your opinions and advices so don't bem shine 😋
Keep on grow!!
Likes
129
Share


@Regenwurm
Follow
Die 13 Blütewoche ist erfolgreich abgeschlossen!
Tage der Wachstumsphase = 32 Tage.
Tage der Blütephase = 91 Tage
Wachstum h in Blütewoche 9= 0 cm
Blütenbildung: sehr Hoch
Die Blütenkelche sind am Ende der Produktion und verfärben sich.
Die Trichome sind bei beiden ladies im gesamten trüb. Heißt, der Harvest Day nähert sich. Ich denke 1 Woche 👌
In dieser Woche den Ladies einige Blätter abgenommen das in der Endphase das Licht die buds erreicht.
Der Wasserbedarf der Pflanze ist gleichbleibend moderat.
Diese Woche 2 Tage von 7 gegossen (2* gespült mit 10 l)
Mutation 1= strähnige Blüten (wie bei der Dr. Greenspoon öfter mal vorkommt)
Mutation 2 = Gigantismus (doppelt so viele DNA Ketten wie regulär)
Mutation 3 = Sekundäre Blüten an Blättern
2 mal in dieser Woche mit Purolyt Mischung 1:25 besprüht
Lichtstärke: 87 %
Lichtabstand: 36 cm
Std Tag/Nacht: 12/12
Temperatur Tag: ca. 23,5 Grad
RLF Tag: 40-45%
Temperatur Nacht: 20-21 grad
RLF Nacht: ca. 45 %
VPD Wert: ca. 1.2
PH Wert Wasser/Düngelösung: 6,4
EC Wert: 0,3
Ventilator Oszillation: Stufe 3
Befeuchter: aus
Entfeuchter: mit Steuerung an
Zusätzlicher Entfeuchter: 1 Stk außerhalb vom Zelt im Raum
Bewässerung: 2* bewässert mit Dünger mit den o.g. Mengen
Purolyt Besprühung: 2 mal
Controlling: Grow Control
Dünger: Greenbuzz Nutrients
Licht: Pro Emit Vollspektrum
Abluft: EC Carbon Active 750 m3 gesteuert/PrimaKlima 480m3
https://greenbuzznutrients.com/de/
Danke an Greenbuzz
Ihr bekommt 25 % Rabatt bei der Nutzung des Codes auf der GB Homepage
https://greenbuzzliquids.com/de/shop/
Code: GD42025
(Mindestbestellwert 75€)
Likes
33
Share


@Ju_Bps
Follow
Hello my friends growers,
Week was good,
Buds look stoped to grow up, so i'll start pk 13-14 next week,
I've start to give tera flores and sugar royal this week.
Plant look healthy and buds look nice with lot of pollen, it will be probably a sticky weed :).
Have a good week mate growers, see you next week 😘


Likes
13
Share


@StickyFingah420
Follow
Coseché hace un poco más de 2 semanas y he ido probando inevitablemente, y es bastante bueno lo que se aprecia. Poco a poco los brotes van impregnandose de un agradable olor a crema dulce, el humo es bastante edificante y golpea fuerte, no raspa en la garganta que es lo que agradezco.
Espero poder dejarlas en frasco lo más posible y así poder probar su sabor final y bien curado.
Gracias a quienes han visto y compartido comentarios, estaré subiendo las actualizaciones 👌🏽
Likes
26
Share

@squalino
Follow
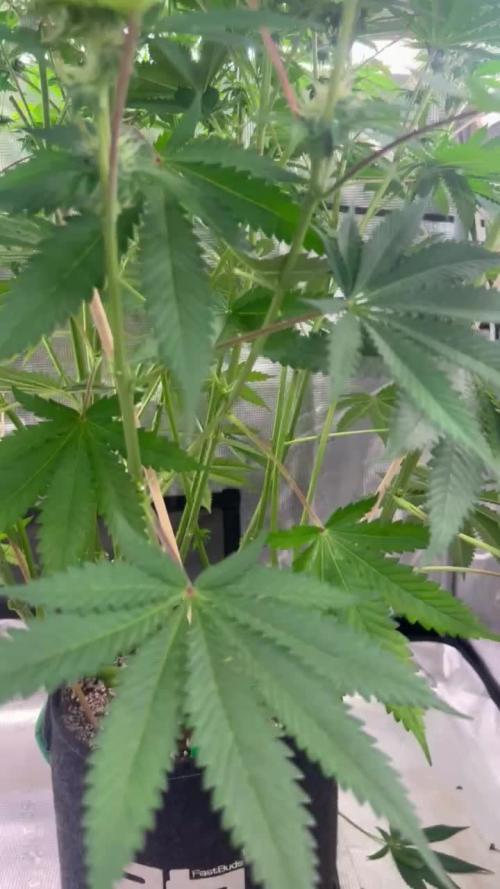
🌿 Journal de Culture : Mac 1 Autoflower – Semaine 5
On continue sur notre lancée. Cette semaine, la Mac 1 a littéralement explosé, montrant que le stretch est maintenant en plein régime. Je la laisse s'exprimer pleinement.
Un Grand Merci
Un grand merci à @Mia_BIOTABS et @Mrs_Larimar pour leurs conseils qui portent leurs fruits, ainsi qu'à tous ceux qui suivent cette aventure de près. Votre soutien fait plaisir !
Paramètres de Culture & État de la Plante
Taille :
Elle a pris un sacré volume et culmine désormais à 68 cm (+28cm)
Lumière :
la plante prend tellement de vigueur qu'elle se rapproche de la lampe , elle est maintenant à 55 cm de la canopée.
Climat :
Toujours avec 24°C le jour / 21°C la nuit
50% d'humidité.
Arrosage :
Le système Autopot fait tout le travail. La plante reçoit uniquement de l'eau claire avec un pH stable à 6,3.
Maintenance & Observations
C'est la semaine du "laisser-faire". Je n'ai touché à rien depuis 7 jours :
Zéro stress : Pas de défoliation, pas de nouveau palissage. Je la laisse se stabiliser après les manipulations de la semaine dernière.
Nutrition :
Elle vit sur ses réserves et sur ce que les Biotabs libèrent dans le sol. Aucun signe de carence, la couleur est uniforme et éclatante.
Analyse de la structure
Le stretch est impressionnant. La plante s'est bien élancée tout en gardant une structure robuste. Comme on peut le voir sur les photos, la canopée commence à se couvrir de pistils blancs de plus en plus denses, marquant l'entrée franche en floraison.
Les branches secondaires que j'avais écartées avec la ficelle ont bien profité de la lumière et rattrapent joliment la tige principale, créant une belle surface d'exposition. On commence à deviner la future formation des pompons.
L 'espacement entre les nœuds est idéal :
assez d'espace pour que l'air circule, mais assez serré pour promettre des têtes bien compactes. Elle a une allure de "sapin" parfaitement contrôlée.
Merci à tous de suivre ce journal ! La plante est en pleine forme, sereine, et commence à préparer ses fleurs sérieusement.
On se retrouve la semaine prochaine pour voir l'évolution des premiers trichomes !

Likes
25
Share


@Ganjeiro420
Follow
Olá, Sejam todos bem vindos a mais uma semana dessa maravilhosa semente Banana Purple punch com grow caseiro feito de sapateira.
Comecei essa semana fazendo a primeira rega com nutrientes, coloquei 1ml/L de cada fertilizante(Grow,Micro) e reguei com 1 Litro de água.
Estou achando que está começando a amarelar um pouco as folhas, vou colocar um Calimagic na próxima rega e ver se melhora.
Se alguém tiver uma dosagem legal dos nutrientes pra me passar nessa fase eu agradeceria.
Um ótimo início de semana pra todos 🙏
Likes
10
Share


@ScottShelby
Follow
I watered my girl in day 10 with merely 250 ppm and 5.8 pH. Hope it wont cause any nutrient burn !
Update: watering every 1-2 day with 300ppm and 5.8pH.

Processing
Likes
38
Share


@GardenSchool
Follow
February 2, 2021 (Week 4, Day 29): The plants grew enough overnight to top at the third node. This is the second and last time I'll be topping these plants - this is the Nebula method of manifolding. I also took off the second node of each growth stem as well as the original fan leaves. I've pressed them in my plant press to save the memories of my experience with my first grow. I also redid the LST on every plant. The new growth sites I've pinned to the fan leaves. I really enjoy doing LST, it's quite therapeutic to figure out just how to support the plant without harming it. I think I am getting great lateral growth so far. The main growth stems are swelling a lot at the bases. Medium is still wet from yesterday - lightly tilled about a half inch of top soil. I've turned down the humidity another 5% this week. I'll keep it there most likely until I start the flowering cycle. Averaging 60% rH and 78℉. Plants are happy, and I am happy. 😸
February 3, 2021 (Week 4, Day 30): Plants are looking good this morning. The nitrogen toxicity in Unknown 2 is beginning to subside. Now Unknown 1 seems to be having a nitrogen toxicity as well - slight leaf curling at the ends with a very lush and dark green color. I am assuming this soil is still very hot. As I've lowered the humidity I suspect more nutrients are being sucked in through the roots instead of transpiration through the leaves. I think the plants are going to take a little bit to get used to the hot soil, but I bet once they do they'll be as happy as ever. Medium is still slightly moist this morning, no watering. I tilled a half inch of top soil again to keep everything aerated. Most likely will water tomorrow or the next day. My LST seems to be holding nicely. I tied down Unknown 2's first growth tips as the fan leaves have finally straightened out after the topping yesterday. New growth tips are emerging nicely from the third node of each lateral stem. Averaging 60% rH and 77℉. Nothing else to report for today.
February 4, 2021 (Week 4, Day 31) : Growth looks good overnight. I think this second topping is confusing the plants a bit. Lots of bulking of the stems, but not much lateral growth. I have a feeling they'll take off over the next few days. They're still growing really well. I posted a grow question last night having to do with little white bead-like structures growing on the surfaces of the leaves on every plant. I was concerned it may be a mold or fungus starting to grow. I did a bunch of research and it seems to be early trichome development called "sessile glands". I still have the question open and I am trying to get confirmation. Really hoping if they're trichomes that's a good sign that these plants are going to be frosty. I uploaded some pictures to show the development. Over night they started to grow everywhere on the leaves - hopefully they really are just trichomes and I am being over-vigilant. Better safe than sorry. I watered the plants today without nutrients; 3 liters per plant pH'd to 5.8. Runoff sitting at ~6.5 pH now which is much better. I'll continue to run 5.8 pH solution until I see the pH of the soil come down to at least 6.2-6.3. Tomorrow I'll most likely have to defoliate a bit and tie down the second sets of growth stems, as they're beginning to stretch and grow vertically. Averaging 60% rH and 76℉. Happy growing all! 😸
February 5, 2021 (Week 4, Day 32): The plants are exploding with growth now. I defoliated the fan leaves from the first node on every plant and tied down the growth stem for lateral growth. These plants are meaty as hell. The stems are thickening really quickly and I am getting tons of foliage and stem growth. The third nodes are starting to come around. I think I figured out the "mold" issue I thought was starting. They're definitely trichomes, not mold. I touched the leaves that were sparkling and my fingertips got sticky, oily, and reeked of weed - so that's great news. The smell in my grow room is getting stronger every day. While defoliating this morning I found my first pre-flowers on Gelato 1! It looks like all the plants are female, but Gelato 1 threw some pretty pistils at me to get my attention. Seems like the plants are reaching maturity. Depending on growth over the next few weeks it may be time to switch to flower soon! I am aiming for about 16" in veg before switching. Seeing these pre-flowers made me so anxious for flowering. Unknown 1 and Unknown 2 are doing great as well - all the signs of the nitrogen toxicity have subsided. Unknown 2 has more trichomes on the leaves than any of the other plants, and its foliage is a beautiful deep green. They are either different phenotypes or different strains entirely as the two of them are growing and looking quite different. Unknown 1 is much lankier so I suspect a different strain. Unknown 2 is especially squat and I suspect it's 100% indica or close to it. Medium is still wet. Averaging 60% rH and 77℉. No other news today.
February 6, 2021 (Week 4, Day 33): Last 24 hours I have seen at least an inch of lateral growth per growth stem on each plant. These girls are absolutely loving life from the looks of it, they're growing incredibly fast. I redid a bunch of LST today. Had to move every tie up one node. Medium is still moist. Lightly tilled half inch of top soil. Gelato 1 is shooting out more pre-flowers. Thanks to my wife we have new friends that have joined us in the smart pots. 😸 Averaging 60% rH and 75℉. Happy weekend everyone!
February 7, 2021 (Week 4, Day 34): These girls are chugging right along. Tons of great lateral growth every 24 hours at this point. Having to adjust LST pretty much every morning to accommodate for the crazy growth. Gelato 1 is a freak of nature - the fan leaves are gigantic. Defoliated again today; took the fan leaves from the third node of each plant. Will be defoliating the first node of the secondary growth stems tomorrow most likely. Medium is slightly moist. Tilled the soil again. Will be watering tomorrow morning most likely. There's still a little dropping at the ends of the leaves so I will hold off on nutrients until all nitrogen toxicity has subsided. Averaging 60% rH and 77℉. Nothing else for today.
February 8, 2021 (Week 4, Day 35): Watered today with 3 liters of 5.8 pH filtered water per plant (no nutrients) - runoff around ~6.7-6.8 pH. Will most likely resume nutrients upon next feeding depending on how the plants look. Defoliated entire first node from center four growth stems and tied down third nodes. Readjusted outside LST. The plants are almost to the outside of the pot which is when I'll switch to vertical growth. Unknown 1 is very close to being let loose, it's also pre-flowering now. Gelato 1 is now covered in pre-flowers - it's definitely a happy plant. Unknown 2 is still the runt of the group but also appears to be almost 100% indica by how stout it is. It's showing sex but no pistils yet. All three plants seem to responding well to mainlining and the stress isn't making them skip a beat. Stems are getting huge. I downloaded an app on my phone to check how well my lights are doing and, if the readings are accurate, I am very impressed with these lights. I've read cannabis can handle around ~65 DLI, so I am right where I need to be. Averaging 60% rH and 78℉.
That ends week 4 of veg. Time is flying. Hoping to switch to flower in two weeks for a total of six weeks in veg. Getting super stoked to switch over! Happy growing everyone! 👽

Likes
139
Share

@Schnabeldino
Follow
📅 Week 10 | 🗓️ Day 64–70
Day 70 – Papayton 🏀 (2nd week flower)
🔸Papayton is growing vigorously in week 10 and is slightly ahead of Lemon Cherry Runtz in terms of size. The canopy is wider and the spearheads are slightly higher – exactly where the flower clusters are now really taking off. The pictures show densely packed calyxes with long, creamy white stigmas; the sugar leaves are already nicely pollinated and the buds are starting to stack up. So far, everything looks great.
🔸The SANlight remains at 90% and ~30 cm distance (approx. 900 PPFD at the canopy). The leaves appear relaxed, without claws or lightening – so no indication of light stress. I keep the climate rather moderate, with good air circulation through the foliage so that the fresh resin heads remain dry. It's a bit cold at the moment, so I can't quite reach the VPD, but I'm not going to put a heater in, hehe.
🔸I watered as planned with BIO PK from BioTabs – carefully following the manufacturer's instructions. Otherwise, only water. The goal: to push flower formation without compromising leaf health.Depending on how it develops, next time I will either just water it or give it a top dressing with Slizium Flash.
📈 Current Conditions
🌡️🔆 = 24°C
🌡️🌜 = 17°C
💨 Humidity = 69%
🔦 PPFD = 900 µmol (12/12)
🛠️ Setup (unchanged)
💡 2 x SANlight Evo 4-120 @90%
⛺ 120 x120 x 180 Spiderfarmer
🍯 Pots: 18 liter fabric pots
🌱 Soil: Bio-Bizz light mix
💊 Nutrients: BIO Tabs
🌱 “Easy, organic, only-water method. Save 15% with GDBT420. biotabs.nl/en/shop/”


Likes
4
Share


@Elpatron152
Follow
Hello everyone I put 3 other plant with the older one, since i dont know what happening, this time im not going to make the same mistake, for the older i clean the soil and let it dry to start new dose nutriments.
Thanks everyone

Likes
5
Share

@Stork
Follow
Day 77 Mon
Refresh water and nuts
PH 5.8
EC 1.0
DLI 12h
PPFD
Water 28c
Day 78 Tue
Add Bloom B
PH 4.7 - 5.8
EC 1.0 - 1.2
DLI 12h
PPFD
Water 20
Day 77 Mon
Refresh water and nuts
PH 5.8
EC 1.0
DLI 12h
PPFD
Water 28c
Day 78 Tue
Add Bloom B
PH 4.7 - 5.8
EC 1.0 - 1.2
DLI 12h
PPFD
Water 20
Day 79 Wed
Add water
PH 5.8 - 5.9
EC 1.3 - 0.9
DLI 12h
PPFD
Water 20
Day 80 Thu
PH 6.0
EC 1.0
DLI 12h
PPFD
Water 20
Day 81 Fri
Refresh water and add nuts
PH 5.9
EC 0.7
DLI 12h
PPFD
Water 25
Day 82 Sat
PH 6.1 - 5.8
EC 0.8 - 0.9
DLI 12h
PPFD
Water 23c
Day 83 Sun
PH 5.7
EC 0.9
DLI 12h
PPFD
Water 23c


Likes
1
Share

Likes
3
Share


@mck47
Follow
Gave her some water with magenesium and aloe vera powder.
I ordered FHM Fulvic & Humid Acid + Trace Minerals. Will use it the next week as topdress.