


Likes
41
Share


@Tubington9
Follow
Week 10 Day 1 Stardawg is continuing through flower nicely and I will be adding the final nutrient to her mix with Bud Boom by Future Harvest to really help her bulk up in her final couple weeks.
Week 10 Day 2 Added trichome photos with the loupe that arrived today.

Likes
41
Share


@Haoss
Follow
I gave this beautiful girl a topping, defoliation and a trim, she is feeling great
Likes
2
Share

@420DeepGrow
Follow
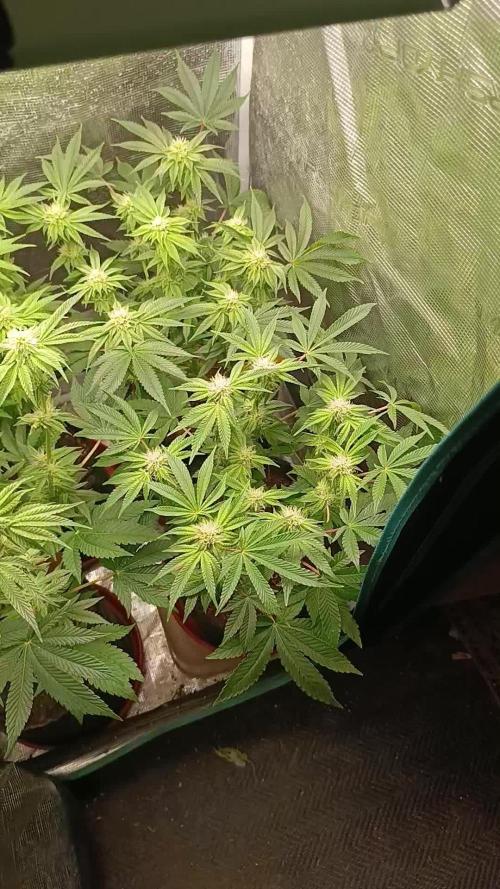
📆 Semana 4
El stretch ha terminado y el cultivo entra en inicio de bulking, con la energía centrada en la formación de flores. Los cogollos empiezan a agruparse y el stacking se hace visible.
La estructura está bien definida y la canopia se mantiene uniforme, favoreciendo la luz y la aireación. La resina ya es notable, incluso en hojas de abanico, y el perfil aromático empieza a activarse.
Seguimos creciendo fuerte 💪!


Likes
11
Share


@PinkFloydLover
Follow
Flushing the bigger girl since day 140. Harvested the smaller girl on day 141, but will show you the results after I harvest the other one. I had a little of it, but I had cut some branches to smoke some weed previously!

Likes
6
Share

@cdxxbuds
Follow
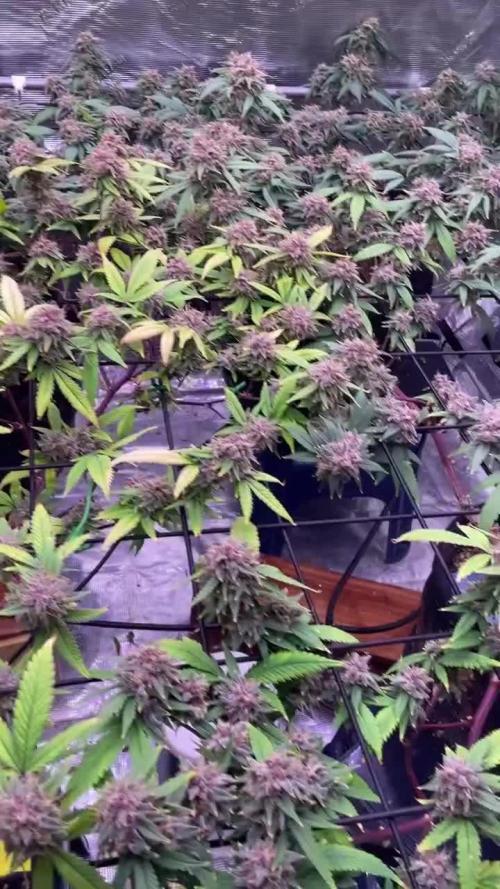
Week7 done. Harvest will be soon in a day or two.
1st two plants will come down and after a few days the other two will also come down. The Buds are rock hard. Trichomes and the aroma is just sweet and pungent. All buds purpled up nicely.
Cheers yall.

Likes
3
Share


@JackJolla
Follow
Diesel: The plant has slowed a bit after topping but now growth seems stable.
Wedding Cake: Still the lil one of the three, growth is now more stable after topping.
Sunset Sherbet: It was the one with the least expectation of the three, but after FIMIing, growth continued without a hitch and is now almost as tall as the other two.


Likes
28
Share


@JiggleBudz
Follow
Day 71 - Let the new week begin! Removed some fan leaves from the center of the plant today to create more air flow.
Day 72 - Good run off today of 13%. Starting to notice the buds fattening up. CalMag decreased to 0.6ml/L.
Day 73 - She looks really beautiful today. All the colas are starting to take shape.
Day 74 - All the colas are taking shape now. Humidity in my area is high again putting the tent around 58%.
Day 75 - Defoliated some of the inner fan leaves today, whilst doing so I touched some of the buds and they are smelling amazing! Fruity/Mimosa smell is already there and super sticky!
Day 76 - She's taking up less water these days. My area humidity has gone up really high but still managing around 55% in the tent. I'll be monitoring her to see how she responds to the defoliation over the last couple of days.
Day 77 - Getting really smelly now!🍊 That's the end of week 10! Pretty crazy to think! We'll be entering Week 6 of flowering tomorrow. The flowers look great and they are swelling out by the day.

Likes
2
Share


@Saintvicious
Follow
Flower stretch and bud sites are setting. Lots of tops from the lst. Fingers crossed.


Likes
20
Share


@Gardengobblin
Follow
Mes crayon à ph était defect j'ai donc eu quelque petit problème mais j'ai remédier en achetant un nouvelle appareille .
Ph réajuster donc tout est revenue à la normale .
Les tête gonflé encore.
Le smoothie va commander son rinçage au prochaine arrosage pour 2 semaine complète.
Les 3 autre son capables de prendre au moins une as 2 autre semaine avant le rinçage. Merci de me suivre 💪🏼


Likes
Comments
Share


@CentralCoastGenetic
Follow
A week later we could see some progress all 6 have sprouted and looking nice . Hitting them with some nutrients next week ..🤙🏽
Likes
14
Share


@Chi_K24
Follow
hey guys,
Into week12 and plants are recovering nicely from the fungus gnat issue from week 10-11.
Its time to add another round of organic amendments, this time in a 70/30 ratio 9f 284 to 444. Increasing the P since we are now clearly into flpwer and the ladies will love it! I also found that the amendments needs a few waterings before it really gets in to the system. Have to plan ahead for that to ensure your plants are not starving for npk.
Added d.e. again and another pack of yellow fly traps up.
As for watering, each plant gets 9L ea every 2-4 days since temps are going crazy jn the gta. Few days at 35+ deg c to 14 lows.
As always, have a good one and see you on the next update!

Likes
17
Share


@mcjordan
Follow
Week 9 started, nothing much has changed from week 8, just looking at buds and trying to notice the changes in size and just checking in. Plants look well, mostly buds, some lower leaves arent that healthy but probably due to light. Still adding flower nutriens, because I think harvest could be one or two weeks away, could flush later. Not sure if I should add even more water? Cant really tell from plants. Hoping this week buds will get bigger in size, currently they seem pretty small still.
Week 9 ended, plant 1 has nice big bugs, some brown-ish flowers, sad that it outgrew space, some top buds were burnt by light, plant no 2 which was under secondary light also have nice big buds (this light has more red color i think), also this plant outgrew its space and had burnt top buds from light, but it looks almost ready, lots of brown flowers, also it has leaves with marks and issues, so already started to flush it, plant no 3 has nice frosty buds, but they are smaller in size, either lightning setup didnt reach it or maybe it was because of all the stress it recieved in vegetation weeks. Defoliated plants, which I think now is kind of mistake, should remove only the big fan leaves, no the small ones, perhaps thats why plant no 3 has smaller buds, because it recieved lots of defolation lately. Changed up lightning setup and moved plants around for better light conditions.
Plant no 1 or no 2 could actually be ready for harvest or in few days, im not really sure, Im waiting on all plants for harvest, because will use grow space for drying and curing. Also I've shoulde started flushing somewhere this week, now Im going to start flushing only at end of week which could be too late.
Likes
8
Share


@Adkguerrilla44
Follow
All in all this was an amazing strain to grow and looks and smells insanely delicious 😋 i cannot wait for her to cure up so i can get a proper session in!!!
Likes
144
Share


@roro_204
Follow
They grow fast at this Age . Transferred them to 3gal pots this week
I miss how the grow room used to be so clean lol before the huge hose was installed :p
Likes
107
Share


@TheFoxFarmer
Follow
Week 10 Flower
After 4 whole weeks of flush this girl has finally met the scissors ✂️
It took her quite some time to fade out, but after cutting down the most faded half of the plant that was closest to the light on Day 65, and then the rest on Day 70 it was long enough.
I'm very impressed with how fat and chunky this girl has become. I wasn't expecting quite this size from first look at her thinner stems and branchy structure earlier in flower, but her buds have swelled up nonetheless and she's stacked well.
I always cut my girls down around half an hour (or a bit more) before the lights are due to turn on. This prevents her from starting any chlorophyll production in order to maintain the best flavour and burn. Only a few fans were taken off before being left to hang dry as she's absolutely covered in trichomes! Don't throw away your sugar trim (leaves with trichomes) as this can later be used for dry sift, which can then be pressed for some dank rosin. Harvest update coming soon!
Thanks for following and happy growing! 🐺

