


Likes
63
Share


@Chubbs
Follow
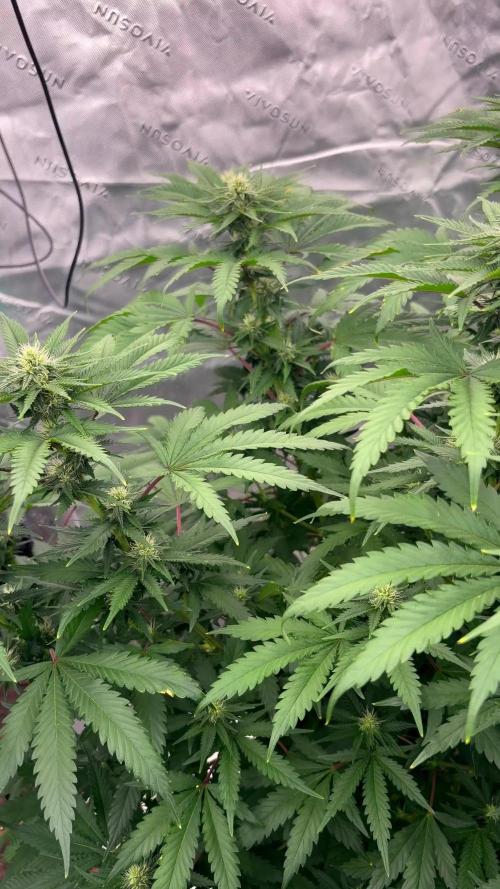
420Fastbuds
StrawberryGorillaAuto
Week 5
What up grow fam. Hopefully everyone had a great 420. These 3 beautiful ladies are growing amazing. Started there transition into flower this past week. So where starting to get some great growth and all in all the plants look super healthy. Happy Growing


Likes
36
Share


@valiotoro
Follow
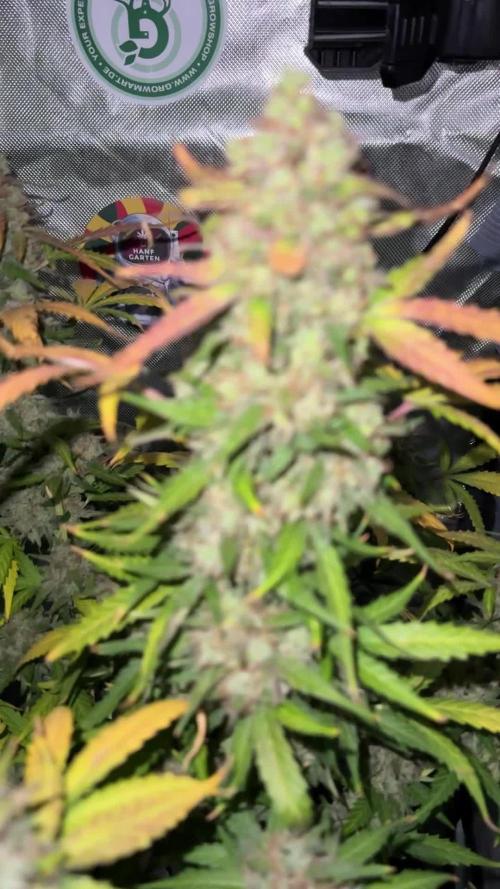
Super frosty & rock hard buds💥
Delicious terps🤤
Perfect buds leaf ratio
Likes
2
Share


@Stork
Follow
Day 1 Mon
PH 5.8
EC 0.6
PPM 270
DLI 19h
PPFD
Water 22
Day 2 Tue
PH 5.7
EC 0.6
PPM 270
DLI 19h
PPFD
Water 22
Day 5 Fri
PH 5.8
EC 0.6
PPM 280
DLI 19h
PPFD
Water 22

Likes
42
Share


@Ganjagrandaddy
Follow
Day 7 flowering: Well growmies, what a week this has been. These ladies have bought their A game to the party it seems. I have spent the week constantly moving stakes and re seating restrained branches. They are all responding really well to the different methods used to exploit their growth in the l.e.d . The topped girls are vigorously pushing the 4th nodes as mains and ate spreading out nicely to their pots edges. The #1Amnesia has really burst into life and is a huge cabbage of a girl. Leaves are nice and thick with a rubbery strength thanks to the silicon additions i think. Lots of huge fan leaves to power those thickening stems holding the numerous growing tips. I think she will be a very productive girl come harvest time Her Fim has given her a monster looking main head along with some really big secondary branches fighting through the thicket. An amazing looking lady already. #2 is also looking very nice too with her main shape now being "bush" instead of rectangular. Again lots of staking
and leaf tucking will get the best from this productive girl. #3 is similar to #1 bit not as big looking in scale. She is pushing the plant next to her already so will need to be really held firm with some wire and brute force!.
The 2 Girl scout cookies are a lot smaller looking in general but as a different hybrid mix , I am not surprised. They have both been opened right up with strong pegging and a week of constant training. The stems on them both will no doubt hold some nice sized fruits as they stewtchbinto space and with so many bud sites exposed to the lights , it should help boost the final yields. The 4th nodes on the #2 have set so perfectly to keep this training ongoing this way. Now the smaller sites can themselves see the light direct , they should also avoid just being popcorn buds and attempt to be the big boss.
I am more than happy with their growth this week and commend Zamnesia for the genetics. Beauties in the making now.
Until next time growmies, be lucky

Processing
Likes
2
Share


@BigHorn
Follow
After trimming plant from bottom up like a lollipop. Buds have grown bigger, resin is coming in and so are the Crystal's. Plant seems to be loving the Nutrients and conditions. No burn, keeping feeding at 1 liter every other day with 1 teaspoon of Nutrients seems to be doing very well. Got a few more Weeks of budding we will see how it goes.
Likes
7
Share


Likes
2
Share

@IslandTerps
Follow
Strains: Zamnesia – Strawberry Cough | Kalini Asia | Permanent Marker
Grow Type: Indoor
Plants: 3
Pot Size: 16 Gallon & 13 Gallon
Medium: Coco Coir & Perlite
Nutrient Line: Athena
Week 3 Flower Update
We’re into week 3 now and everything is running smooth. Stretch is pretty much wrapping up and they’ve settled into flower nicely. The buds are starting to bulk up and form properly, and you can see things coming together across all three plants.
I’m still going through and cleaning up fan leaves here and there, mainly the ones blocking light from hitting the bud sites. Just keeping everything open so the lower sites can get some light and develop properly.
No issues to report they’re feeding well, looking healthy, and just doing their thing. This is the stage where it starts getting exciting watching them stack up.
Feeding
Volume: 6L
pH: 6.0
PPM: 1000–1100 ppm
Frequency: As needed
Indoor Climate Conditions (Flowering)
🌡️ Temperature: 26°C day / 18°C night
💧 Humidity: 45–50%
📈 VPD: ~1.3–1.5 kPa
Now the real stacking begins 🔥🌿
Likes
14
Share

@MadeInGermany
Follow
Hey guys :-)
The lady has developed very nicely this week 👍.
They were planted in their 8 liter pot where they can now really take root again.
Depending on what time is left in the vegi phase, you might be trained :-) .
Otherwise everything was cleaned and checked.
Have fun and stay healthy 💚🙏🏻
👇🏼👇🏼👇🏼👇🏼👇🏼👇🏼👇🏼👇🏼👇🏼👇🏼👇🏼👇🏼
You can buy this Nutrients at :
https://greenbuzzliquids.com/en/shop/
With the discount code: Made_in_Germany you get a discount of 15% on all products from an order value of 100 euros.
👇🏼👇🏼👇🏼👇🏼👇🏼👇🏼👇🏼👇🏼👇🏼👇🏼👇🏼👇🏼
You can buy this strain at :
Clearwater Seeds
Water 💧 💧💧
Osmosis water mixed with normal water (24 hours stale that the chlorine evaporates) to 0.2 EC. Add Cal / Mag to 0.4 Ec Ph with Organic Ph - to 5.8 - 6.5
MadeInGermany
Likes
55
Share


@pifflestikkz
Follow
Day 158
07/10/24 Monday
Feed today using de-chlorinated tap water and calmag, pH to 6.2.
Picture and video update 📸
Day 160
09/10/24 Wednesday
So she has started to seed again in only 3 places I can see on different tops I have one bean.
So flush STARTS NOW,
Using 10L of De-chlorinated tap water pH 6 with flawless finish
Day 162
11/10/24 Friday
De-chlorinated tap water pH 6 only today again pH 6.
Day 163
12/10/24 Saturday
Another Flush today, using 10L de-chlorinated tap water pH 6 with flawless finish.
Day 164
13/10/24 Sunday (End of week)
She is starting to generate a tangy pineapple 🍍 😋.
Picture update 📸💚
Likes
51
Share


@Chumpkilla
Follow
12/30/23 - Day 54 - Hello All! I started this week a day early. I wanted to update everyone on something I have been thinking about a lot. Curing. I feel if there was a hole in my growing skills it would be curing. Last grow there was more than I had anticipated. I was not set up for curing 1 lb. I threw in an audible at the last minute. It worked out but I know I can improve with some trial and error and hands-on experience. So after reading a ton, and going off of some of my prior builds for drying, I came up with this design.
I have a controller that will turn the air on and will run when the contents inside the box hit whatever RH% I want to set it at. I think the first week I will set it for 78%RH, then every couple of days go down a % until I hit 62%.
The thought is that if the bucket gets above the set RH% then the air will kick on and distribute air across the buds until the RH% is back down to where you want it. It will force the humidity out. I won't need to worry about burping. It will happen on its own.... in theory.
Ill update tomorrow with some pictures after the water change.
12/31/23 - Day 55 - Everything is looking good. The water change completed this morning while I was in the shower. Its adding nutes now and will do so over the next hour or so. She is starting to get stinky. I had to add the extra carbon filter to the room. I've got some pics up top of that.
Happy New Year! Next time I post it will be in 2024! Have a great night and be safe! Dont drink and drive, your life and anyone else involved in an accident is too important! C' YA!
1/4/24 - Day 58 - I have been thinking of trimming her for a while.... I got a comment on the bushy-ness and I got self-conscious and gave her a trim. Lol I have been going bath and forth for a while and that gave me the push to give her a little trim.
She looks great and is growing really quickly. Ill update with more pics as it goes along.
Likes
1
Share


Likes
5
Share


@mobbly
Follow
"Hi, I received my pH meter this week, so from week 6 onwards, I'm aiming for a pH value of 6.0 - 6.5. This week, I noticed that the plant in the small pot received too much fertilizer. The other two 7.5-liter fabric pots also received double the recommended amount according to the feeding schedule, but they don't show any signs of over-fertilization."

Likes
7
Share


@Laplantadelpie
Follow
•1g de enhancer x litro de agua aplicación en el riego
• se apliga plaguicida en el riego
Likes
12
Share


@Prilyfe13
Follow
March 7, 2023
Skywalker OG Day 45
Height: 34.5"
DLI: 45 (below top)
Wedding Glue Day 38
Height: 9.5"
DLI: 25
Going into week 6, I expect to see massive bud production from Skywalker OG. She looks great and has a ton of bud sites and is stacking beautifully. She has also started her Bloom nutrients. I use Fox Farm Tiger Bloom.
Wedding Glue should be stretching this week as well. She will certainly fill out even more and I'll definitely have to defoliate one more time. Everything looks great on her. Beautiful lush green and great form. Definitely will be super bushy.
Then there is that clone I made from Skywalker OG. It rooted and seems super healthy. I planted her in a 1/4 gallon nursery bag with the 50/50 Fox Farm mix. So she is planted and living in the tent now. I'm going to die if I get a nice cola out of this. 🤣🤣🤣🤣🤣.
Grow System Environment:
Temp: 72.6°
RH: 55.3%
VPD: 1.19 kPa
March 8, 2023
Not much going on today. Skywalker OG has some great internodal spacing. Looking great!
Wedding Glue got a few more leaf snips. Opened the canopy right up again.
Clone... Nope! She gone! I was mistaken. No rooting. Oh well.
Grow System Environment:
Temp: 71.9°
RH: 55.1%
VPD: 1.17 kPa
March 9, 2023
Lots of filling in last night from Skywalker OG. I had to take a few leaves off that were directly covering bud sites. Nothing crazy though. Her buds are really well formed and growing rapidly.
Wedding Glue hasn't stretched yet, but she is definitely looking about ready to. She is getting wider and I can only hope that she will shoot up during her stretch. She will be massive.
Grow System Environment:
Temp: 72.7°
RH: 54.6%
VPD: 1.22 kPa
March 10, 2023
Skywalker OG is stacking! The smell is still weak, but it smells great! Her buds are filling in quite nicely. I snipped 4 leaves that were becoming a problem for lower bud sites.
Wedding Glue is looking great! Still slow growing, but robust. Branches are becoming nice and strong. She will definitely be able to hold a good amount of bud on them. She still has a bunch of huge fan leaves, but they seem to be helping her with developing a natural level canopy. She is starting to get a distinct smell from her branches and stems. Nothing super strong but a nice smell either way.
Grow System Environment: kinda messy today.
Temp: 71.8°
RH: 55.9%
VPD: 1.14 kPa
March 11, 2023
Unfortunately I have run out of FishShit so I dropped it down to 1 ml per gallon for the rest of the week. Hopefully I can get more ASAP. Wedding Glue had a bump in her nutrient uptake from 1 ml to 2 ml for the week.
Speaking of uptake, they have both gotten really thirsty in the past day. Both reservoirs were bone dry this morning. I have to keep a closer eye on the water levels. Finally, Wedding Glue is growing upward. Or at least starting to. Her branches are all reaching up now and most have broken through the canopy. I'll do another light defoliation when she really gets into the stretch. Just the biggest fan leaves. Maybe 10 total? Skywalker OG looks great! Trichomes are starting to develop all over the smaller fan leaves. Pistils are massive and stacking is getting impressive already. Most branches have some pretty good internodal spacing, especially through the top 8 inches or so, maybe 10? Either way, I hope to see some big and long colas for this lady. She also hasn't stopped growing either.
Grow System Environment:
Temp: 70.9°
RH: 56.2%
VPD: 1.10 kPa
March 12, 2023
Skywalker OG looks great! She's building those buds so nicely and she is starting to get a beautiful pungent scent. So far just gassy.
Wedding Glue is getting bigger and bigger. I believe she just started pre-flower today. Hopefully the stretch will be here soon.
Grow System Environment: Snowing Outside
Temp: 71.4°
RH: 54.4%
VPD: 1.17 kPa
March 13, 2023
Final day of week 6. Wedding Glue will get a defoliation at some point in the following week. She still hasn't started stretching, but she looks like she is getting ready to.
Skywalker OG looks great as ever. She is definitely too close to the light at the top, but the rest of the canopy is comfortable at a DLI of 45. The top is around 68. Much too high.
She looks great! Pistils are getting bigger and more abundant. Even on the lower bud sites, the pistils are huge and numerous. Great end to the week.
Grow System Environment:
Temp: 72.4°
RH: 54.8%
VPD: 1.20

Likes
5
Share


@LOKO_Grower
Follow
LST again & again. My Gagarin Auto gives powerfull branches on both sides. Seems like it wants to start flowering. That's pretty early)


Processing
Likes
19
Share


@Oldmanbud__50
Follow
So iam into my 2nd week flower. Iv had a few problems but got over them. They are all but 1 about 55". But have a beast in the corner she's 4and half foot tall and looking amazing. On wards n upwards.
Likes
1
Share

@ReallySavoy
Follow
Final dry weight report (details later):
Final chop was on day 88.
First harvest was 184g of top-shelf from 5 colas. Then another 5 colas brought it up to 300g of top-shelf on sticks — all from the tent.
On the second-to-last harvest I took the rest, which added up to another ~300g including leaves.
Flushed with Terra Aquatica FlashClean (before that I was running Overdrive + honey with the base bloom nutrients).
In total: 3 days on water + FlashClean, followed by a step-by-step harvest and another 6 days just on water.
Likes
5
Share


@killerjoint
Follow
10-8-2024 TOP DRESSING AND WORM TEA.....
NOTHING MORE
10-9-2024 22ND DAYS INTO FLOWERING
SMELLS CRAZY ON THESE STRAIN
GETTING SOME SNOW ON TOP
LET'S GO
10-11-2024 DO NOT HAVE ANY PEST BUT JUST IN CASE
NATURESGOODGUYS HOOK ME UP WITH LADYBUGS
JUST GOT HANGING PATCH ABOUT /WITH SHIPPING
10-14-24 NOTHING TO DO...JUST WATER (PH6.6)AND WATCHING THE PLANTS.......
COPY CAT GENETIX STRAINS ARE CRAZY!!!!!!!!

