
Likes
Comments
Share


@UnitedStrainsGermany
Follow
Bisschen Stress hat nur noch tropical poison XL denke Block weshalb die nächsten 8tage nur Ph Wasser. Alle sind im selben Zeitraum aber ganz andere Stadien.


Likes
11
Share

@Organic473
Follow
She needs a serious defoliation. I am closely monitoring the full moon coming as we are in the dry season, they rainfall may be lower hopefully. Everything else is good with her for now.


Likes
28
Share


@Cronos
Follow
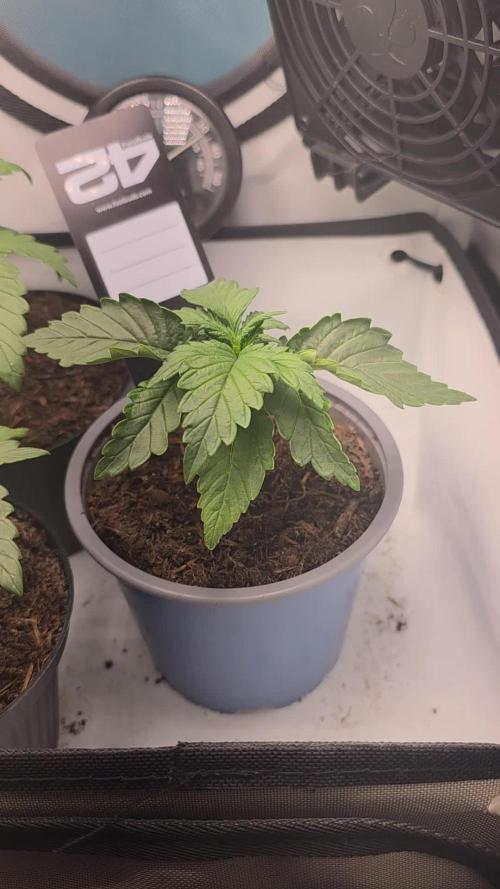
Hello everyone, I am new here.
This is the second time I grow and first time in living soil, previous was organic.
Learned some experience from a super guru at seedsmans.
# Planted:
05 Jan. 2022
Germination in Root Riot plug.
# Transplanted:
Day 4
Pot:
12 gallons smart pot
Living soil kit (thehighchameleon.com):
- Worm compost
- Mealworm guano
- Biochar
- Bat guano
- Zeolite
- Volcanic basalt
- Endomychorize Glomus Intraradices
- Bacillus Amyloliquefaciens
Bacteria/insects (biogrowi.fr):
- Phytoseiulus and California predatory mites
- Nématodes (Stenema, b-green, Mier-run)
Worms:
Eisenia Foetida, Hortensis and Andreï.
Companions plants (RQS):
- Cerastium
- Marigold
- Alfalfa
- Red Clover
- White Clover
- Chervil
- Peppermint
- Lavender
- Coriander
- Chamomile
- Yarrow
- Lemon Balm
- Sweet Basil
- Borage
# Day 9:
Made Avocado tech:
- Pumpkins and leeks from Bokashi bin
- Almend nuts
Feed pot with 4 liters of AACT:
- 5 liters water
- 5 ml molasse of sugar can
- 125 grams vermicompost
- 12.5 grams nettle
- 12.5 grams horsetail
- 5 grams growing guano
- 5 grams fish hydrolyzate
- 5 grams epson salt
The day after I gave AACT, the leaves started praying so I switched light and VPD settings to veg.

Likes
100
Share


@Roberts
Follow
Hash plant smells great. I did have root issues during grow. It did help solve the issue for future grows. Still had can nice plant. Smells great. Will try to upload a video here and will be available on my YouTube channel. The Viparspectra P4000 light worked great. The New Level Hydro buckets are very nice. Plus PEV has some great strains from ones I have tried so far. Thank you everyone
It won't upload my video. It is on my YouTube channel though. I tried.
Thank you grow diaries community for the 👇likes👇, follows, comments, and subscriptions on my YouTube channel👇. ❄️🌱🍻 Happy Growing 🌱🌱🌱
https://youtube.com/channel/UCAhN7yRzWLpcaRHhMIQ7X4g
Www.newlevelhydro.com
Www.hygrozyme.com.

Processing
Likes
15
Share


@greenflipcali89
Follow
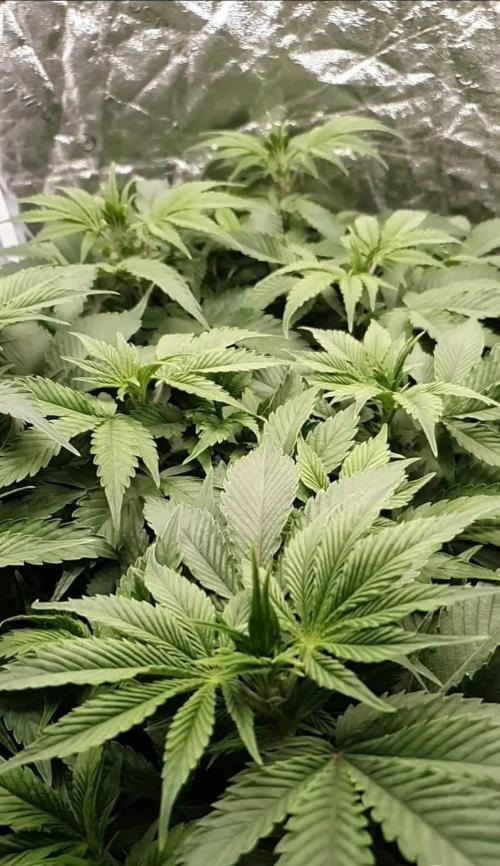
Finished week 2 of flower. I have been inspecting every single leaf for PM and have found a few spots, but quickly spot treated with solution. I have learned that PM is a SYSTEMIC disease and the spots on leaves are a symptom of an already infected plant. So the best thing I can do is keep the symptoms in check by spot spraying and its working! Only a few burned leaves as a result, but nothing like my first grow where it was widespread!
Defoliated to thin out a bit and allow for better airflow. Light LST to a few of the taller stems to maintain an even canopy. Overall, I am happy with the way my 2nd indoor grow is progressing.


Likes
16
Share


@Tipton
Follow
Day 45 in flower... Trichomes are about 80% milk and no amber... The paint and big Z are 7-9 weekers and orange cake is 9-10... Def few weeks on the orange cake... But getting close to how I like it on the other two... The smells are outta this world... Orange cake smells like orange cake... Very orange like it's nuts... Never smelt anything like it tbh... The paint is a different pheno than previous ones because there's usually a chemical skunk smell but this is a fruity pebble smell with layers of earth smell and a sticky presence that doesn't go away for a long time lol... The big Z is another sweet smelling but more along the smell of a mouth full of Skittles and that dirt earth smell aftertones... They're awesome and I'm really excited!
Day 46
They fattened up over night! Coming to n end... I did find little clusters of amber trichomes on the paint and I can't find many clear on the big Z... So it's right where I want it!

Likes
5
Share


@Foxbud420
Follow
Had major issues with the mildew lost London Mint Cake, Cookies Kush, Bruce Banner and Cheetos…
The last standing planta has no problems with the mildew.
Malasana Cookies and Gary Payton are finished and now they are drying.
I will give an Update when all is dry and smokeable.


Likes
33
Share


@pHilosophy420
Follow
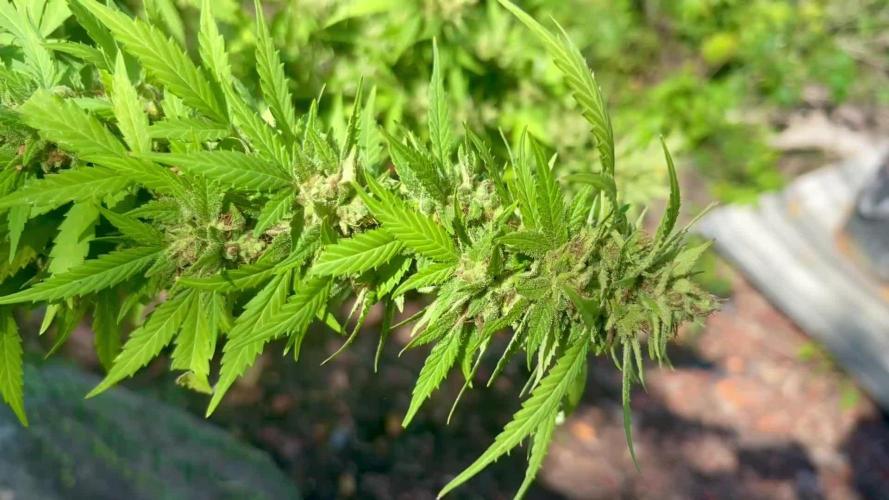
This strain smell is best. It's sweety orange smell and the buds looks nice and frosty
Likes
15
Share


@AK1210
Follow
New flowering continues to develop on this lady, she seems to be swelling up day by day.
Yellowing of the fan leaves has started which usually means it's time to flush, I need to check the trichomes to see how amber they appear before I do just in case the flavour or yield could be effected.
Likes
3
Share


@Bear_Grows_Green
Follow
01/01 happy new year start of a new week here. Top dressed with craft blend, pushin p, and ocean blend, and 2/1 mix of buildaflower and castings .and watered in rootwise goodies just 3 gallons also raised vpd to 1.2 and ppfd to 550-600 depending on the spot.
01/02 remembered to shift the hours down to 16/8 definitely gave em to much light for to long looked pissed before lights out. Also have been adjusting light height and power to get the ppfd I want and temp. Think I got it dialed in now. Just keep tucking for now
01/05 For some reason wat I logged the last few days is now gone from here... yesterday I watered in 17 gallons total 3.5 of that in the middle with supplemental stuff. I should have kept it at 14 gallons cus in slightly over saturated in the bottom but it should be fine. Continue to tuck in the trellis every morning filling the canopy out with tops.
Likes
54
Share


@rhodes68
Follow
2/26 Week 9 /3 flower
Still looking for their nuet levels.
Reducing CT Bloom by 25% just learning the DTW system and how these strains act. Still white tips, run off at 650 ppm so not sure whats the deal yet.
Upping PK to 5ml/gal
Lights doing well, should have done this long ago
2/27
The very first signs of a mag def began so keeping the feed at 4ml/gal and wait to see what develops.
Basically the same thing that happened when I did this in veg.
Till I hear back from Fast Buds or someone has a suggestion just going to sit on it and keep em healthy.
PK to 5ml/gal
Switching to HPS light in the HID tomorrow as the stretch seems to have ended.
Update:
Fast Buds got back so quickly, thanks.
Going to let the white tips go and watch other factors for feeding. The tips were always my marker for nitrogen so will watch color and curl from here on.
Going up to 5ml/gal on the bloom nuets at the morning feeding. Use that as a base line from here on
Thanks @HighRoller909 You are on the same wavelength as Fast Buds 👍
2/28
Looking well
All nuets at 5ml/gal
In PPM 750 - Out PPM 800 - Not surprising given the increase
HPS installed - light defoliation of canopy
Smells and buds -
Buds will be greenish primarily with a predominate berry/fruity smell you only get during defoliation at this point.
Yall want to start a pool on what these may be? 😏
Change of view:
Looking back if I had to be honest I would flip week 7 from flower to veg. I really dont think it took till maybe the last day or two of the week.
Slightly important as we are looking closely at finishing time on these strains. Going to keep a day count of flower from here and this will be ...
2/28 Day 10 of flower
2/29 Day 11 Adjusted nuets slightly increased to 800ppm by increasing CocoTek and decreasing slightly the PK.
Increased runoff to 25% for a mini-flush
3/2 Day 13 Flower
Flipped week 7 to veg, just reflects reality a bit better.
Leaving things as is for now, pics when I can
I smell Creme-Cookies , odor hit
3/3 Day 14 of flower
Ending week , nothing visual has really changed so no pics till later.
The feeding schedule seems to be doing everything I could want but will continue to up it slightly tomorrow.
Eliminating the silicon, done what its going to do as the stretch has ended completely and plenty in the pot.
Putting them under the MH until it slowed down worked.
Light defol today just getting leaves off buds.
Defoliating all the unproductive branches (loofy buds nothing firm) tomorrow to get that energy where it needs to go.
Ok so its some kind of cookies but sweeter than I am used to so sticking with Cookies and Cream for my guess on FF7
FF5 is still puzzling, sweet fuel is all I can peg.
And another week in the books 😜


Likes
3
Share

@Gram_Solo
Follow
Took away some more big fan leaves and tucked a few, exposed some more bud sites 👀👀🙌
I've still been weighing down the stems best I can, slowly bending them into shape but trying not to snap any 🤞
I'm thinking of doing 1 more week in veg and then flipping them to the dark side! Lol
We got the shape we need now
Time for 1 last light defoilation at the end of the week and then do a PH water Flush before flowering.
Can't wait to see these pop!
🌴👽🌴

Likes
8
Share


@4F1M6
Follow
Really packing it on now! Buds are really gaining character. Nice round structre and the trichomes are piling on giving her a nice shine. She stayed squat compared to the rest of the tent. I might jack her up on something to get her higher up into the canopy.
Really loving these genetics. So imma make another diary of a clone from this plant. Be able to take better media of it aswell. So it'll be bomb.
I reduced the nitrogen dose again. I also stopped giving them vigorous. Its a pure bloom mix now as this lady is booming with flowers. Until next update. Happy growing and stay lit fam.

Likes
226
Share


@HighTV
Follow
This grow was full of great smells, tastes, and beautiful looking buds with a harvest time of only 10 weeks. Yeah, I would have liked the buds to have came out more dense in some locations, however with such a short life cycle and exotic visuals this strain offers its a good compromise. I was surprised this strain did so well while in hydroponics given its sensitivity to nutrients, but I think the fast earlier growth DWC offers allowed it to sustain. I'm looking forward to doing this strain again with a better nitrogen scheduling and using Great White Mycorrhizae from the start to see how dense we can get these buds. These are the type of buds you can't find in a dispensary anywhere and if your lucky enough to you will be paying top dollar to walk out with them.
If you enjoyed this diary and grow please follow me here on GrowDiaries and check this grown out on youtube
😘
https://youtu.be/iI4p-lStgGA000000
Likes
13
Share


@Lfuego22
Follow
Day 18 veg from clone
Water temp 69.6
Ph 5.9
Ppm 724
Ec 1.6
Room temp 66.8
Light temp 74.4
Humid in room 48
Over light 42
Day 19. Full flush.
PT 1
Start ppm of RO (filtered/nestle) 146
Ph 7+
Final ppm 880
Ph 5.9/6.0
Temp 70°
Room humidity 50%
Light 45%
Light heat 73.0
Room heat 68/70 depending on if heater on or off
Processing
Likes
7
Share


@Chronnoisseur
Follow
Well she seemed to slow down and now her roommates have over taken her. But fingers crossed she still put out some nice buds
The cheese candy is starting to become more smelly this week stay tuned....
Likes
20
Share


@Mr_nugs_lover_David
Follow
She's grown perfectly with mainlining and lst methods. Very big bush this pheno #1 has been thw most productive and still had 2 branches that broke off because of tje weight so pretty happy with this one, this plant is not only quantity but quality too, very sweet and tropical fragrance coming from this buds
