




Likes
3
Share


Likes
4
Share


@Nookandplant42o
Follow
An immediate feeling of high something relaxing in the eyes, the body becomes active for activities or work. Brings Up Old Thoughts Reflection Watching movies is a great thing to stay focused and better save something sweet to eat. Undoubtedly, the high comes with hunger, something good even for those who have a lack of appetite. Strong sweet and citrus aroma, mild flavor bringing a light guava sweetness. 🤗

Likes
11
Share


@Buddyhighs
Follow
Another week donnnnnnne 💪🏽!
Soo yeah the stretch has finished and the buds are stacking I fucked up a little at the start of the week, i set the lights to full power. She’s at 300watts. I turn the timer down to 11hours. But I didn’t realise it turned the timer off by mistake 😬 she ran 24 hours a day for two days 😫. I hope she don’t get pissy with me but so far so good. A part from that there noting to report on. No nutes this week just water.
Until next week let’s get it 💪🏽!

Likes
50
Share


@AsNoriu
Follow
Day 72 since seed touched soil. All is okeish in garden. Joe way behind all, will be huge pain at the end ...
Mars TSL2000 is now on very healthy distance. Works fine.
Temps are in good range. Humidity spikes to 70 on watering day, but is in 60-65 during others.
Happy Growing !!!

Likes
35
Share


@Master_weeda
Follow
Bonjour à tous les padawans et les maîtres jedis
Pour cette semaine je prévoit de pratiquer comme technique spéciale le LST et juste un arrosage.
Pour cela comme à mon habitude j'attend le cinquième noeud ou que je juge la plante robuste.
Je profite que cette semaine qui va être relativement calme pour faire un LST appliqué et vous faire un rappel de ce qui est pour moi la meilleure technique pour arroser une autofloraison et la façon dont je pratique le LST.
En suivant ces quelques simples conseils vous obtiendrez un résultat optimal tout au long de votre culture :
Le cannabis est une plante qui n’aime pas recevoir un léger arrosage en continu. Il est impératif de l’arroser en grosse quantité, puis d’attendre que la terre soit bien sèche avant d’arroser à nouveau!
Pour calculer la quantité d’eau nécessaire à chaque plante, suivez cette règle :
Le volume d’eau à donner lors de chaque arrosage doit représenter au moins environ un quart du volume du pot !!
Exemples :
pour un pot d’1L, donnez 0,25L d’eau à chaque arrosage pour un pot de 4L, donnez 1L d’eau à chaque arrosage pour un pot de 12L, donnez 3L d’eau à chaque arrosage pour un pot de 30L, donnez 7,5L d’eau à chaque arrosage !etc…
Pour donner un tel volume d’eau, il est souvent nécessaire d’arroser en deux (voir trois) fois, lentement et uniformément sur toute la surface. Disposez de bonnes coupelles sous les pots, celles ci se rempliront d’eau qui remontera dans le pot par capillarité en moins d’une journée. Il est également très important d’utiliser un bon terreau de qualité, avec une bonne capacité de rétention d’eau mais qui assure également un bon drainage (celui ci doit contenir de la perlite, et/ou de la coco, etc..)
Il vous faut alors maintenant attendre quelques jours en sous-pesant régulièrement les pot avec vos bras. Quand ils seront redevenus très légers, vous pourrez arroser à nouveau !!
En effet, comme l’eau pèse beaucoup plus lourd que la terre, un pot gorgé d’eau pèse plusieurs fois le poids d’un pot d’une plante prête à être arrosée. Avec un peu d’entraînement, vous apprendrez donc très rapidement à sous-peser vos pots pour savoir quand une plante a soif.
C’est une technique à la fois très facile et très efficace, et qui peut être appliquée à toutes les plantes en pots !
En arrosant de cette façon, en général vous devrez arroser vos plantes tous les 3 à 6 jours.
Pour cette semaine 3 au jour 17 ma plante fais 12 centimètres et son cinquième noeud apparaît je décide donc de pratiquer un LST sur ma plante.
Pour ce j'utilise du fil de fer galvanisé que je plante directement dans le substrat en faisant attention de ne pas endommagé les racines car n'oublions pas que ce qui pousse dessus pousse aussi dessous.
Jour 17 je pulvérise du une solution composé d'une cuillère à café de savon noir mou dilué dans un litre d'eau en prévention d'éventuels nuisibles.
Je corrige mon LST suivant la pousse de ma plante ...
Pour ma par c'est la manière dont je procède. Comme promis petit rapel de:
Quand commencer à appliquer la technique LST
De nombreux cultivateurs commencent la manipulation dés que les plantes possèdent entre 3 et 6 nœuds ou une paire de feuilles. Durant cette première étape de la croissance, le tronc encore flexible est pliable sans risque qu’il ne se casse, même si au fur et à mesure du développement de la plante il sera de plus en plus difficile de le plier. Nous pouvons continuer à guider la croissance des branches durant toute la culture, même durant la floraison, ce qui pour cette étape représente un grand avantage face à la taille, qui n’est pas du tout recommandé une fois que la formation des têtes commence, cela stressera en effet la plante, ce qui aura pour effet de retarder la récolte.
Comment appliquer la technique de guidage LST
Si nous sommes prudents, la flexibilité naturelle des fibres du cannabis permet de plier leur tronc et branches avec une relative facilitée, même durant la floraison des plantes.
En utilisant une corde fine, nous pouvons accrocher la pointe de la plante à la base du pot par exemple ou à un tuteur que nous aurons planté dans le substrat. Nous plierons le tronc avec précaution et nous le fixerons avec la corde, à partir de là, nous pouvons augmenter progressivement la tension de la corde, chaque jour un peu plus, jusqu’à obtenir la position souhaitée. Soyez attentif à la réaction de la plante, essayez de ne pas appliquer trop de pression sur la corde et rappelez-vous que la flexibilité des branches peut varier d’une plante à l’autre.
Pour obtenir de meilleurs résultats, il suffit de suivre quelques règles simples. Pour commencer, nous devons choisir une corde fine mais pas trop pour ne pas blesser les troncs au fur et à mesure qu’ils grandissent et qu’ils deviennent plus gros.
Nous pouvons utiliser des crochets en plastique souple ou de n’importe quelle autre matière flexible pour éviter d’endommager les plantes. Spécialement en intérieur, utiliser des cordons en plastique de couleur (voir les diaries de @Silky) est très pratique pour voir facilement les accroches et faciliter le travail au milieu du réseau formés par les cordes, les tuteurs, les mailles ou les supports que nous aurons dans la culture. Bien entendu, en culture extérieure et surtout en guerilla nous ferons juste le contraire et nous utiliserons des matériaux de couleur qui n’attirent pas l’attention pour que notre jardin reste discret.
Pour stresser les plantes au minimum, la mieux est de réaliser ces manipulations le soir ou juste après que les lampes en intérieur s’éteignent, ce qui leur permettra de se remettre durant la nuit. Normalement, le jour suivant nous pourrons observer comme les pointes des branches que nous avons pliées se dressent de nouveau vers le haut à la recherche d’une source de lumière.
Que la force soit avec vous

Likes
57
Share


@HighDran
Follow
Es la más grande en rendimiento y apesta casi toda la casa y sale un poco den olor a la calle🙌🏻 Ya solo espero a que seque para actualizar
Likes
1
Share

@Organic_G
Follow
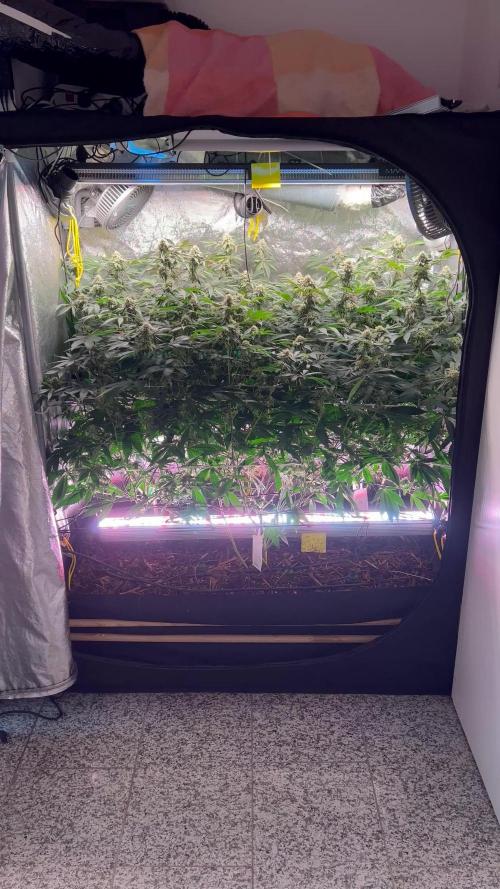
Einfach wunderbar, noch ne Woche würde ich den Tops geben, dann kommen die wahrscheinlich noch ab, werde wieder stufenweise ernten… oh Mann kein Bock auf Trimm Jail… Aber wieder ordentliche Beute für 3 Pflanzen

Likes
2
Share

@hassehujasse
Follow
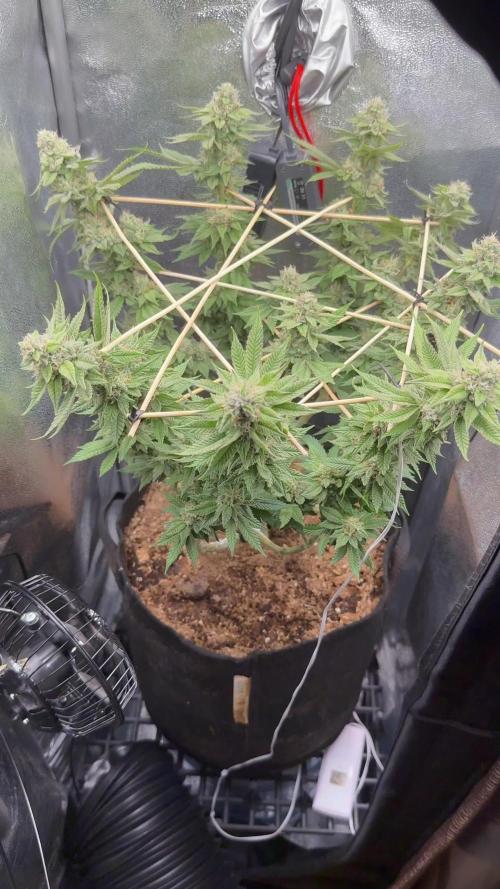
Se fui a dormir con LST bien hechoNo Os perdeis que sandra de esta mujercita !!!
Transformation de la chica a la mujer. Disfruta lo conmigo
Strong begining of the week, looking forward to give her all my love
Likes
99
Share


@Natrona
Follow
Week Harvest
My journey of Runtz Automatic and her entrance in the Eternity Grow Cup 2025 began on January 7 when she popped her head above the soil. Runtz was an easy carefree plant to grow with no incidents of pests or disease. A few defoliations were all that was necessary to keep her in check. I kept her under a light schedule of 18/6 to maximize her light exposure. After topping her she grew only 24 inches tall. This small plant structure is suitable for growers with limited space.
She was harvested on March 20, day 74 from germination. As part of the flushing process, I topped the pot with ice, then watered with ph 6.5-6.7 water for 3 days. Then I put Runtz Auto in the dark for 2 days still in her pot. March 20, she got the chop, Wet weight 314g and is hanging dry in a darkened room. As she dries, candy, sweet, fruity smells escape the room.
Temps are 71-72and 43-48% humidity. I am sure she is as tasty as she smells and will not disappoint in effects.
My sincere thanks to Patricia @Zamnesia for her support and encouragement throughout this grow. Big thanks and sincere appreciation to Plagron and Zamnesia for hosting this fun and exciting contest.
Everyone entering the contest started with the same strain in either a feminized auto or photoperiod seed. Zamnesia generously provided 5 seeds to everyone and Plagron provided the Green Sensation flowering additive. During this contest I enjoyed visiting many contestants’ diaries and seeing beautiful gardens. Many, like me, are limited in space or number of plants they can grow but all are displaying fine specimens. Some Runtz phenotypes are very sativa dominant, with long thin leaf fingers, while others lean more indica. What will be most interesting will be the smoke reports on effects. My theory is that the more sativa leaning in structure, the more active, energetic and euphoric that plant will be and the indica leaning specimens will be more relaxing and uplifting.
Your likes and comments are appreciated. Thanks for stopping by.
Growers love 💚🌿
💫Natrona💫

Likes
9
Share

@HoneyBlunt42
Follow
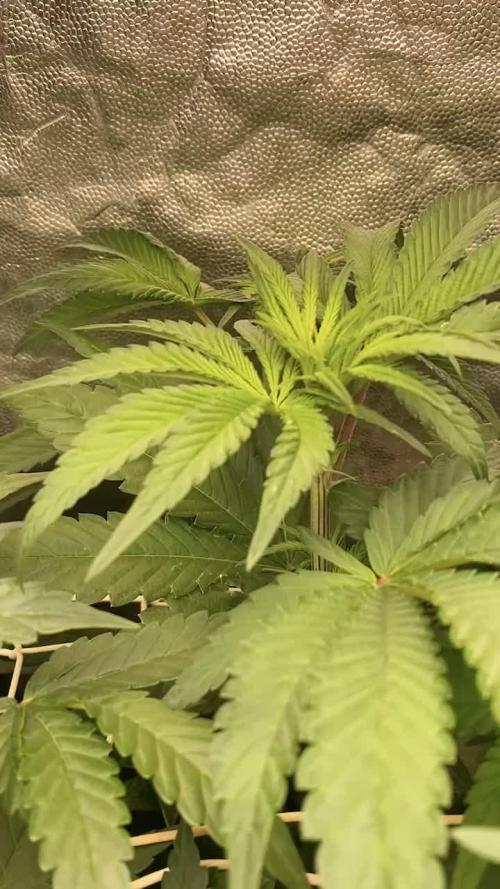
By the end of the 7th week (2 weeks from 12/12), the mamba is doing great and has grown 60 cm. Two main colas are above the net, and the others are still catching up.
A day or two ago, it gave a little red color to the upper burdocks.
They are the size of a palm or more narrow. I fertilized with coco coir – I mixed two capfuls (20 g) of Powder Feeding Bio Bloom into the top layer per 7-liter pot. I water with water + CalMag + pH down.
The mamba takes up part of the box, so I only photographed healthy branches.


Likes
28
Share


@DreamIT
Follow
Sponsored by:
🌲DUTCH PASSION SEEDS🌲-💡VIPARSPECTRA💡-💐GREEN BUZZ NUTRIENTS💐-🛠️WEDRYER🛠️
25/7 Despite the very high temperatures and the death of some seeds, I resume germination starting from the ongoing contest, by Dutch passion seeds, which I thank for the sponsorship. So off with the sowing!
28/7 it has appeared in the night and is already ready to become huge😁
2/8 I will combine the two weeks of germination into one. As you can see in the video it is going well, tomorrow I put it in the 0.5 jar. yeah
3/8 I have to postpone the transfer
7/8 decanting carried out in soil biobizz light mix. no nutrients for now🤘
8/8 update with photos
__________________________________________
Personal advertising (contains affiliate links)
__________________________________________
🦄 Dutch Passion was the second European cannabis seed company, founded in Amsterdam in 1987. Their mission is to provide the recreational and medical home grower with the highest quality cannabis seeds available. Anonymous shipments !! ( no affiliate link)
✅https://bit.ly/DutchPassionSeeds
__________________________________________
Did you know that Green Buzz Nutrients fertilizers are 100% vegan? A complete line of products ready to give the best to each of your plants! Visit the site and see my journals to see how they work 🦄
🤯 And with the code "dreamit" you will immediately receive a 15% discount on your purchases
✅https: //bit.ly/GreenBuzzLiquidsPro
__________________________________________
👀 Are you looking for a good lamp to start with? 👀
🌞Viparspectra has something more than the others, take a look at their site.
⏩ Use "GDVIP" for an extra discount or "DREAMIT3" for an extra 5 %% discount
👀 Search for it on Amazon
✅Amazon USA: https://amzn.to/30xSTVq
✅Amazon Canada: https://amzn.to/38udUVe
✅Viparspectra UE: bit.ly/ViparspectraUE
✅Viparspectra USA: bit.ly/ViparspectraUS
__________________________________________
🌈 Tired of blowing on your weed hoping it dries quickly? Check out the Wedryer website! You will find a well-made accessory that will help your weed dry in just 8-10 days without the annoying risk of finding mold or other annoyances! (no affiliate links)
✅https: //bit.ly/Wedryer_
__________________________________________
📷🥇Follow the best photos on Instagram 🥇📷
https://www.instagram.com/dreamit420/
Backup
https://www.instagram.com/dreamit4200/
🔻🔻Leave a comment with your opinion if you pass by here🔻🔻
🤟🦄💚 Thank you and good growth 💚🦄🤟




Likes
25
Share


@RakonGrow
Follow
+
Day 43 :
Pantine + Pantinchen each 2.0L
Pantine 50% 50% vega and flores
Pantinchen 100% last vega pahse
Day 44:
Day 45:
Pantine 2.0L (80% Flores + 20% Vega)
Day 46:
Pantinchen 2.0L (100% Vega) its slow , really slow in progress.
Day 47:
Pantine 2.0L (100% Flores) PH 5.9 (Canna PH+)
Pantinchen hurry up in progress , nice about 4-5cm over night !!! Finally I can remove a height box again . There are only 3x5cm to her sister that I didn't disturb with topping on day 4. Nutrien up to 80% of her sister. It is a weak little plant, my bad :/ .
Day 48:
Pantinchen 2.0L (close to night) (100% Vega) .
Day 49:
Pantine 2.0L (100% Flores) PH 6.1 (Canna PH+)
+
Likes
3
Share

@SkullRipper
Follow
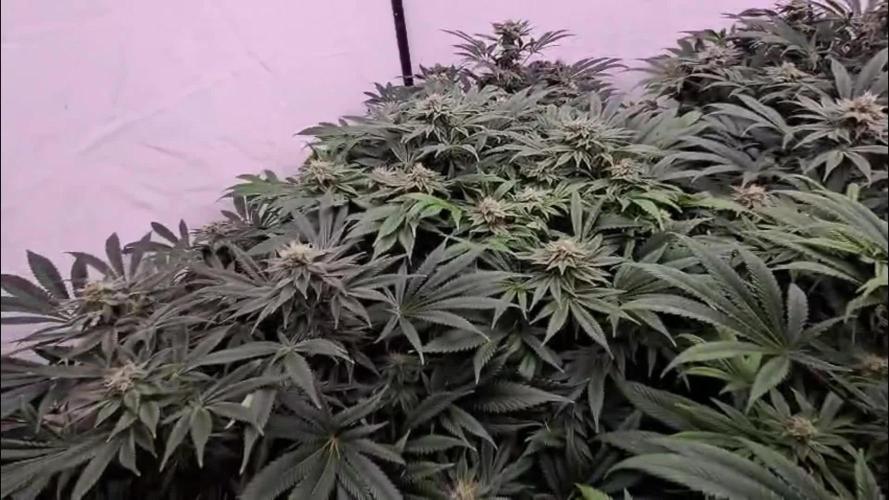
Day 40 of week 6 flowering,
Overall very pleased with the quality so far
Plants seem happy and producing a lot of crystal's
Hopefully the next 3 weeks will see a nice amount of bud swelling
Ttfn Skully

Likes
88
Share


@Roberts
Follow
Gorilla Jealousy F1 is doing good. She is finally going to her own spot in a few days. She will be switched to flowering, and get a solution change at that time. All the pest were eliminated in the grow room. She was on the other side of the room from where it started. I never seen signs on her, but had to treat to be sure nothing could hide in the room. She had some defoliation done today. She is looking ready to go. Thank you Seedsman, and Spider Farmer. 🤜🏻🤛🏻🌱🌱🌱
Thank you grow diaries community for the 👇likes👇, follows, comments, and subscriptions on my YouTube channel👇.
❄️🌱🍻 https://www.seedsman.com/?a_aid=Mrsour420.
This is my affiliate link to seedsman.
Thank you Happy Growing 🌱🌱🌱
https://youtube.com/channel/UCAhN7yRzWLpcaRHhMIQ7X4g

Likes
38
Share

@Natrona
Follow
Divine Seeds Auto Candy Outside Grow
W4V4 June 29-July 5
Auto Candy is getting water only. She is 6.5 inches tall and so far doesn’t mind the heat and humidity, Fingers crossed she will be strong and take the heat like a champ.
As aways, thank you all for stopping by, for the likes and most of al growers’ love and support.
Stay green, growers love 💚🌿
💫Natrona💫


Likes
36
Share


@MadeInGermany
Follow
Hey everyone 😀.
On flowering day 59 both came into the darkroom and on flowering day 61 both were harvested :-).
Both were very easy to trim 👍.
Both of them already smell very tasty but more on the last update because this is only the short intermediate update :-).
The trimmed buds were laid out on nets so that they can now dry at 62% humidity for 8-14 days before fermenting with 62% boveda packs in the jars :-).
I wish you a lot with the interim update of the harvest and we'll see you at the end 👍😃.
Stay healthy and let it grow 😀
You can buy this Strain at :
https://sweetseeds.es/de/sweet-skunk-f1-fast-version/
Type:
Sweet Skunk F1 Fast Version
☝️🏼
Genetics:
Sweet Skunk Auto (SWS34)
X
Early Skunk
👍
Vega lamp:
2 x Todogrow Led
Quantum Board 100 W
💡
Bloom Lamp :
2 x Todogrow Led
Cxb 3590 COB 3500 K 205W
💡💡☝️🏼
Soil :
Canna Coco Professional +
☝️🏼
Fertilizer:
Green House Powder Feeding
☝️🏼🌱
Water:
Osmosis water mixed with normal water (24 hours stale that the chlorine evaporates) to 0.2 EC. Add Cal / Mag to 0.4 Ec Ph with Organic Ph - to 5.5 - 5.8 .
