


Likes
Comments
Share


@Bread_n_Buds
Follow
And here we are at the end of this magnificent journey on the spaceship Black Orchid Automatic, a phenomenal strain from Zamnesia, it is the last beauty harvested more or less at the same time as the others but shown separately for the amount of important photos that I am taking.
Please take a look at the macros (micro) and let me know what you think.
This week I'm talking about the harvest of the third and last lady, the purple one, very purple to be clear.
She grew a lot, she matured quite quickly and produced a lot of resin. The flowers are quite hard and of a wonderfully wonderful color.
The smell is very particular probably from the purple / cookies / cake area but the strong point of this beauty are the trichomes. The girl offers a park of trichomes of a disarming beauty, the more I shot the more I wanted to shoot, I was left speechless for real. We have purple stuff in the stem, purple noba in the gland, totally purple stuff in the stem with amber gland, glands in various shades of purple. Wonder for real. There is still something transparent but it had to come venia, like animals feel earthquakes I start to feel the mold in advance, or maybe I'm paranoid, anyway we are mostly cloudy, something amber and a thousand shades of purple and something even transparent.
For me it's fine like this baby. Harvest time, in the drying room.
I strongly recommend you to try this strain both in the feminized version and this one in the photoperiod version, if this plant doesn't convince you wait to see the next two that I will publish in the next two weeks but they have already been harvested.
The taste is still CALI in sense of purple part of cookies family. We feel like we're teleporting to Los Angeles with Snoop making a blunt, incredible California flavor, to be clear in a coffee shop in Amsterdam you would pay 25 to 30 euros per gram.
Everything has always been grown with Plagron Pro Mix soil which I found exceptional, I was used to using Light Mix but I had probably underestimated the power and cleanliness of going 100% organic. It has an absorption coefficient that I find very pleasant, it dries with less aggressiveness than the light mix so you will not have that phenomenon that when the plant is too dry the water goes down. With this soil it is more difficult as it is more difficult to have midges. In my MODEST opinion pre-fertilized are fertile ground for ground midges with this soil I have had ZERO GNATS, before ever.
Information and personalized cards on the Plagron website
---- at the link --- https://plagron.com/en
The plant has eaten the 100% Organic feeding of Plagron: Alga Grow and Alga Bloom as basic nutrients, the rooting Power Roots, the amino acids of Sugar Royal, the Enzymes of Pure Zym that eat the dead parts in the soil, Power Buds that always gives us immense satisfaction with rapidity of start of flowering and composition of the buds, the legendary Green Sensation that now needs no introduction, a name a guarantee. Also the foliar Vita Race used for the first time with success.
The fertilizer kits that you can find on the Zamnesia website are perfect for this purpose, there is everything. Choose them based on their mineral/organic composition and the soil you have chosen.
at the link --- https://www.zamnesia.io/it/11457-plagron-easy-pack-natural.html
The growbox is the DS120w by Secret Jardin as well as the DF16 ventilation system and all the fans
at the link --- https://www.secretjardin.com
The light was supplied in the past by Viparspectra and it went crazy but it came back to me to produce very well too...
at the link --- https://www.viparspectra.com
A fantastic selection of seeds, a headshop and a selection of exceptional accessories on the world of cannabis, many other things about mushrooms, health, well-being and all the beautiful things that nature offers only on the Zamnesia website
at the link --- www.zamnesia.com
Instagram ----
@zam.nesia - @zamnesiawebshop - @zamnesia_usa - @bread_n_buds

Likes
22
Share


@RDWCGrowing
Follow
12/25/2023-Germination Day 1
Merry X-mas 2023 I decided to start a run of SolFIre Gardens Hoodz Candyz S1. I am going to do a cup filled with RO water a touch of Hydrogen peroxide and let it sit for 24-48 hours until I see tap root then I am going to put it into a rapid rooter.. Tap root Down and put it about 1/4 of the say down the Rapid rooter.
I made some modifications to my basket on this run.. I have taken a few Pods that I use for my cloning machine and decided that I am going to try and use them as sure plants, so that I can take my water right up to the bottom of the basket this time and see if these can make my planting more consistent.
12/26/2023-Germination Day 2
Tap root achieved Planting Commencing
12/27/2023-Germination Day 3
Misted the dome lightly misted the rapid rooter and added a little water to the bottom of the pan to encourage root growth to the pan.
12/28/2023-Germination Day 4
Ground Hogs day
12/29/2023- Germination Day 5
She is up, she has broken surface, I misted the root riot, and around the bottom of the tray to try and entice root growth down rapidly.
12/31/2023- Germination Day 6
Ground Hogs Day
1/1/2024-Germination Day 7
HAPPY NEW YEARS!!.. I did it I planned it out so my planting day would fall on New Years and it worked.. Yay!!!
1/2/2024- Germination Day 8
Since the roots are not to the water yet, I am pouring one cup of water lightly on the hydroton around the lady to try and encourage root growth down to the water..
1/3/2024- Germination Day 9
Ground Hogs day, will continue until roots hit the water.
1/4/2024- Germination Day 10
Ground Hogs day, will continue until roots hit the water. I will just continue to top feed until roots are in the water.. Shouldn't be more than a few more days.
1/5/2024- Germination Day 11
Ground Hogs day, will continue until roots hit the water. I am going to change the water Sunday and kick off Week 1, I will just continue to top feed until roots are in the water.. Shouldn't be more than a few more days.
1/6/2024- Germination Day 12
Ground Hogs day, will continue until roots hit the water. I will just continue to top feed until roots are in the water.. Shouldn't be more than a few more days.
1/6/2024- Germination Day 13
Ground Hogs day, will continue until roots hit the water.
1/7/2024- Germination Day 14
Ground Hogs day, will continue until roots hit the water.


Likes
21
Share


@Trickybis82
Follow
OK hi growmies,
I'm in to final flush week with purple lemonade. She looks and smells amazing so 7days until we cut her down :()
Also wedding cheesecake coming along beautifully. Her aroma is amazing and creamy with the hint of cheese and I j8st cannot wait... i have a couple more weeks for her and Grape gushers...
Next week i will have pics and videos or crop from purple lemonade 💜
Still will have curing process and final taste to show and describe.
Shout out to these auto seed companies
@420FASTBUDS @TASTEBUDZ


Likes
168
Share


@Still_Smoq
Follow
📆 Week 1, 6-12 May 2024
6 May - 3rd sprout appeared. Waiting for main root to appear before transferring.
8 May - Main root appeared on the 1st sprout, transferred to its permanent home (see pictures).
9-12 May - Observed and watched the seedling grow.
📑 Transferred seedling into permanent Deep Water Culture, 2 gallon system. I’ve always had the best response when the main tap root appears prior to this process, it helps to ensure success. This plant seems to be getting off to a slower start, but steady.
All seeds germinated, sprouted and became seedlings. I’ll be finding homes for the other 2 as my grows are limited by space and number. Another reason I like to only germinate a single seed at a time and primarily why it needs be viable. “One good seed is all you need”.
🍶 8 May initial nutrient solution started
🍽️ 8 May initial feeding schedule started
💧 Using reverse osmosis water with EC/TDS at 0
🐉 Nutrient solution EC 1.0 at 72 degrees F
🔆 Light power at 50%, DLI 12-15 canopy coverage at 18hrs
😤 Using PYPABL, Air Pump, 400GPH
That is it for this week. Thanks for the look, read and stopping by.

Likes
6
Share


@Blumentopf
Follow
Nun ist es offiziell. Meine Pflanzen blühen. Obwohl beide so unterschiedlich sind, die ist 50 und die andere 40cm groß, haben beide gleichzeitig angefangen zu blühen.
Beim nächsten mal gießen kommt dann der erste Dünger dazu. Plagron alga bloom. Ich nehme wie manche Leute empfehlen nur die Hälfte, da es sich um automatics handelt.
Am Samstag habe ich nun das erste Mal gedüngt. 5ml auf 1l Wasser Pragron alga bloom.
Sonntag habe ich mein Pflanzen gemessen. 70 und 48cm. Meisterlich
Ich werde eine Woche nicht bei meinen Pflanzen sein können. Sie werden von Dritten gepflegt werden. Also Wasser und Dünger geben. Denke zweimal Wasser wird reichen. Dann nächste Woche wieder mehr.

Likes
19
Share


@BB_US
Follow
These ladies are beautiful starting to show signs of their pistols and all of them so it will be flowering very soon by the next 2 weeks or so. Cutting back the big fan leaves for more light and airflow as she reaches more to the sky 💚🌱🌿

Likes
24
Share


@Elmobud
Follow
Really happy with the yeild on this strain with getting 545g of 4 beautiful plants Happy Growing 😁😁😁

Likes
35
Share


@SooSan
Follow
90x60x140 (Mars Hydro)
FC-E4800 (Mars Hydro)
Easy2go Aquavalve5 (Autopot)
Living Soil (Demetearth)
Bruce Banner (PEV Seed)
Gorilla GG4 (Ganja Farmer)
Cream Caramel (Sweet Seed)
Gorilla Gelato (Ganja Farmer)
Blueberry (00 Seed)
Kalini Asia (Zamnezia)
Biscotti Mintz (Barney's Farm)
Blackberry Cake (Sensi Seed)
Amsterdam Amnesia (Dutch Passion)
Gelato Cookie (Ganja Farmer)
Purple OG Punch (Ganja Farmer)
Sweet ZZ (RQS)
Rainbow Road (Paradise Seed)
Substrat ~50L:
30L Super Light Mix Biotechnologie
18L coco
2L perlite
1,7kg lombricompost
350g guano de chauve-souris
350g Zéolithe
350g Basalte
170g guano vers de farine
170g biochar
0,7g Endomychorise glomus intraradices
0,7g Bacillus Amyloliquefaciens
Paillage de luzerne alfalfa
Arrosage avec 2ml/L de mélasse de canne 1x par semaine
Pulvérisation avec 1% d’huile de neem


Likes
92
Share


@Regenwurm
Follow
Die dritte Woche unter sehr guten Bedingungen ist abgeschlossen und die Ladies sind wohl auf und geben Gas.
Der Vorsprung der Pflanze rechts auf den Bildern baut sich aus, dies scheint der Pheno zu sein der sich stark stretcht. Ich werde ihn die nächsten Wochen täglich mit Superscropping stressen um eine einheitliche Höhe zu bekommen.
Die Luftfeuchtigkeit war diese Woche heftig hoch, so das ich diese außerhalb vom Zelt mit einem großen Entfeuchter auf rd 55-60 % regulieren musste um im Zelt optimale Bedingungen zu erreichen.
In dieser Woche wurden beide Ladies getoppt zusätzlich alle weiteren Trainingsmethoden die ich nutze parallel angewendet. (Topping, LST, Entlaubung, Supercropping)
Durch das umtopfen stehen erstmal genug Nährstoffe zur Verfügung. Ich steigere langsam. Pflanzen haben eine gute gesunde Farbe
Tage der Keimung = 4 Tage.
Tage in Wachstum = 21 Tage
Wachstum h = 8 cm
1 mal in dieser Woche mit Purolyt Mischung 1:25 besprüht
Lichtstärke: 55 %
PPFD: ca. 500 umol
Lichtabstand: 35 cm
Std Tag/Nacht: 18/12
Temperatur Tag: ca. 26,5 Grad
RLF Tag: 65%
Temperatur Nacht: 22-23 Grad
RLF Nacht: ca. 65 %
VPD Wert: ca. 0,8-0,9
PH Wert Wasser/Düngelösung: 6,3
EC Wert: nicht gemessen
Ventilator Oszillation: Stufe 1
Befeuchter: an
Entfeuchter: aus
Zusätzlicher Entfeuchter: 1 Stk. außerhalb vom Zelt im Raum
Bewässerung: 2* bewässert mit Dünger mit den o.g. Mengen, 1 mal pures Wasser
Purolyt Besprühung: 1 mal
Besprühung Fast Plants Spray: 1 mal
Controlling: Grow Control
Dünger: Greenbuzz Nutrients
Licht: Pro Emit Vollspektrum
Abluft: EC Carbon Active 750 m3
Danke an Greenbuzz
https://greenbuzznutrients.com/de/
Ihr bekommt 25 % Rabatt bei der Nutzung des Codes auf der GB Homepage
https://greenbuzzliquids.com/de/shop/
Code: GD42025
(Mindestbestellwert 75€)
Likes
5
Share


@Johnny_0G
Follow
Well she made it another week and tbh I think I'll go about two more days with her in dim light. She got another coating of terps a few days ago and she looks ready🧐😍😍😍
Likes
Comments
Share

@SolitudeCorners
Follow
📓 Cultivation Diary: The 12/12 Flip & Transition Week
📅 June 5, 2026 (Veg Day 17)
Irrigation/Reservoir: Prepared a full 100L reservoir refresh.
Nutrients: Kept the feeding aggressive with a double dose of vegetative nutrition (x2 Nutrient formula) to ensure the root zones and plant tissues are fully stocked with elements before the transition.
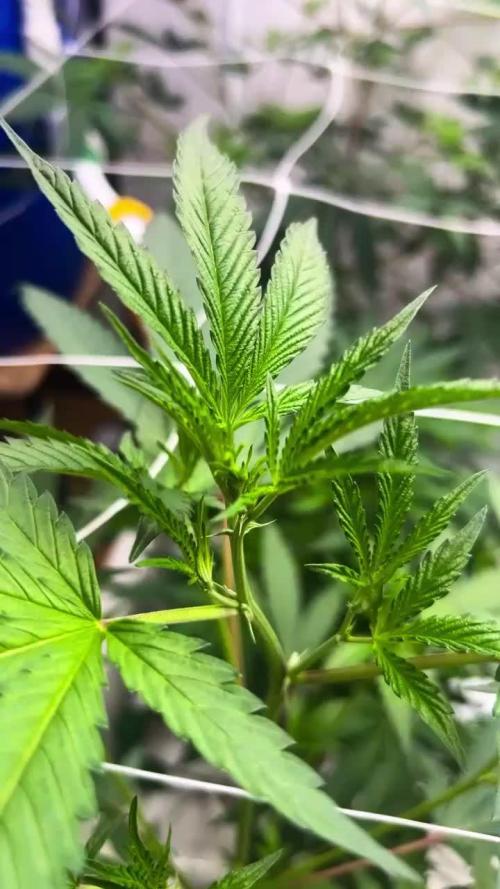
Canopy Observation:the canopy is thick, uniform, and fully occupying the table space. The trellis net is officially filled out, and the lower branches are strong and rigid.
📅 June 6, 2026 (Day 1 of Flower / Bloom Week 1)
The Flip: Officially switched the timers to a 12/12 photoperiod (Lights ON at 6:00 PM / Lights OFF at 6:00 AM).
Schedule: First irrigation shot triggers exactly 1 hour after lights on (7:00 PM), followed by a shot every 1.5 hours.
Volume: Configured the drip stakes to run for 1 minute per shot, delivering 5 shots total per day. This provides roughly 450ml per plant per day, creating excellent target dry-backs overnight to force vigorous root searching.
📅 June 11, 2026 (Day 6 of Flower / Bloom Week 1)
Irrigation/Reservoir: Bumped reservoir capacity up to 110–120L to keep up with increased transpiration as the plants begin their post-flip stretch.
Nutrient Recipe (TargetingpH 6.0 EC 2.5
Water: 110–120L
Athena Cleanse: 120ml
Silica: 220ml (Essential for stem strength during the stretch)
CalMag: 10ml
Athena Bloom: 600ml (Adjusting base to target 1.2–1.3 EC from Bloom component)
Athena Core: 400ml
Irrigation Adjustments: Increased the shot duration slightly to 1 minute and 15 seconds to match the accelerating growth pace.
The early flowering stretch has officially begun. The tops are noticeably pushing past the trellis net layers, and the node spacing remains tight and stacked. Leaf color is an excellent dark green with healthy, bright yellow-green shoots driving upward at the growth tips. No signs of stress or stalling from the schedule shift.



Likes
38
Share


Processing
Likes
4
Share


@grown29
Follow
The smell has really picked up! The buds don't seem to be getting any longer/more connected, but they are def getting denser... I'm guessing another couple weeks before harvest.
Likes
9
Share


@McGrowin
Follow
Starting to do extremely light lollipopping only for leaves blocking budsites or budsites that will not get enough light
Day 35: #2 is starting to smell of limonene. #1 and #3 are like 3-5 days behind #2 in terms of flowering. #3 is very slow and the runt of the bunch.
Hoping for 3-5 more weeks of flowering before I cut them down. Will likely cut #2 a few days before the others.

Likes
92
Share


@DogDoctorOfficial
Follow
🌸 Week 3 Flower – Growing Strong, Tall, and Vibrant! 🌱
Hey Grow Fam! It’s already Week 3 in flower, and I’m thrilled to bring you this update because these plants are doing phenomenally well! Some are stretching up so tall that I might have to get creative in the coming weeks! Fruit production is well underway, and it’s absolutely amazing to watch the canopy fill out as these girls reach their potential.
Aptus Holland Pack Unboxing & New Additions
This week kicked off with a big arrival: the Aptus Holland nutrient pack! 🙌 I couldn’t wait to share the unboxing with you all; there’s a video up where I go through all the goodies, so check it out if you haven’t yet! Between the photos and videos, you’ll be able to see just how well these nutrients are already feeding these green beauties. Having a blast sharing more content lately—I’m in the zone with editing and creating, so get ready for even more shares!
🌡️ Environmental Control and Fine-Tuning the Reservoir pH
Temps this week have been holding around 27.2°C with RH at 65.2% and CO2 at 800 ppm, creating a VPD of 1.26 for ideal flower development. The lighting intensity is at 833 PPFD, and the solution in the reservoir is fine-tuned to a pH of 6.22, EC of 475, with a temp of 21.8°C.
Let’s talk pH in the reservoir: it’s a dynamic process, and I’m constantly adjusting it to keep everything at the right level. The pH tends to rise throughout the week, and each day, I work it back down, fine-tuning it to keep those plants happy and balanced. Managing pH is truly a hands-on job, and it’s worth every moment. I love staying on top of it for optimal nutrient uptake—it’s all about consistent effort and keeping that perfect range dialed in.
Leaf Maintenance & Selective Defoliation
These leaves are HUGE and gorgeous, creating a lush canopy that’s nearly too perfect! I’ve been taking a few leaves here and there, focusing on leaves that may be blocking light from reaching lower parts of the plant. Selective defoliation at this stage is key because it opens up airflow and allows light to penetrate deep, boosting energy distribution across the whole plant.
Big, healthy leaves mean we’re getting excellent photosynthesis, but a gentle, strategic defoliation can guide that energy toward those developing buds. Leaf removal is all about balance, giving the plant space to breathe and thrive while still maximizing growth in flower!
🌐 TrolMaster + App – Real-Time Precision
Huge shoutout to the TrolMaster system and the app—keeping everything in sync and at peak performance is honestly effortless with this ecosystem. The app provides a full overview of each environmental parameter, allowing me to make real-time adjustments as needed and track trends over time. The precision here is unbeatable, giving me complete control over temps, humidity, CO2, and VPD, ensuring my girls are in a controlled paradise 24/7.
What I love most is how the app records everything automatically, so I always know exactly where things stand without having to keep separate records. If you haven’t tried TrolMaster yet, it’s a total game-changer for any grow setup!
💥 Shoutouts & Gratitude
Massive shoutout to TrolMaster and Aptus Holland for powering this grow with tech and nutrition that’s second to none. And, of course, gratitude to Pro-Mix for the superb growing medium and to the seed banks behind the genetics. We’re running strong thanks to each of you.
And to the whole community—thank you, everyone, from new friends to seasoned followers, lovers to haters. Your energy, whatever form it comes in, is all part of this journey, and I’m so grateful for it all. Special shoutout this week to my brother Daggadna—head over to IG and give him a follow! And if you’re loving the journey, remember to like, comment, and subscribe—it really helps the channel grow and reach others who may also dig this content!
Discount Codes so you can save big on your next check out 💚💚💚
Kannabia - DOGDOCTOR 30% off
SeedsmanSeeds - DOGDOCTOR 10% off
CannaKan- DOGDOCTOR 15% off
terpyz.eu - DOCTOR 15% off
The Neutralizer - PORKIT5-DOG 15% off
As always thank you all for stopping by, for the love and for it all , this journey of mine wold just not be the same without you guys, the love and support is very much appreciated and i fell honored and so joyful with you all in my life 🙏
With true love comes happiness 💚🙏 Always believe in your self and always do things expecting nothing and with an open heart , be a giver and the universe will give back to you in ways you could not even imagine so 💚
Friendly reminder all you see here is pure research and for educational purposes only
Growers Love to you all 💚💚💚


Likes
71
Share


@Schnabeldino
Follow
_____📅 Week 5 | 📅 Day 29 - 35 | 27.05 - 02.06 ______
27.05.25 | Day 29 🌞💧
🔸The ladies moved into the big tent on the 29th day after I had cleaned it and hung up my new lights.
🔸Poison Envy is developing superbly, all branches are equally developed and grow evenly. She is doing wonderfully with the LST, she is growing the fastes and most beautiful of all 4 ladies, I like it very much, can go on like this.
🔸I only work with hooks and occasionally with clips, but I've often broken branches with them so I prefer to use hooks hehe :D
01.06 | Day 34 💧
🔸 1500 ml
🌡️🔆= 23-24°
🌡️🌜= 18-19°
💨 Hum. = 65%
🔦 PPFD = 500 umol 18/6
🔦⌚DLI = ~ 32
_________________________________________________________________________________________
Equipment to use:
💡 Light: 2 x Sanlight Evo 4- 120 on 50%
⛺ 120 x120 x 180
🍯 Pots: 18 liter pot
🌱 Soil: Bio-Bizz light mix
💊 Nutrients: Advanced Nutrients
💧 Water: Tap Water 0,5 EC


Likes
34
Share


@MrJoint
Follow
✌️🎃 Thank you for checking my cultivation.
✨ Great development in this week.
🌿 Starting LST in #1