
Likes
Comments
Share


@PatriciaGant
Follow
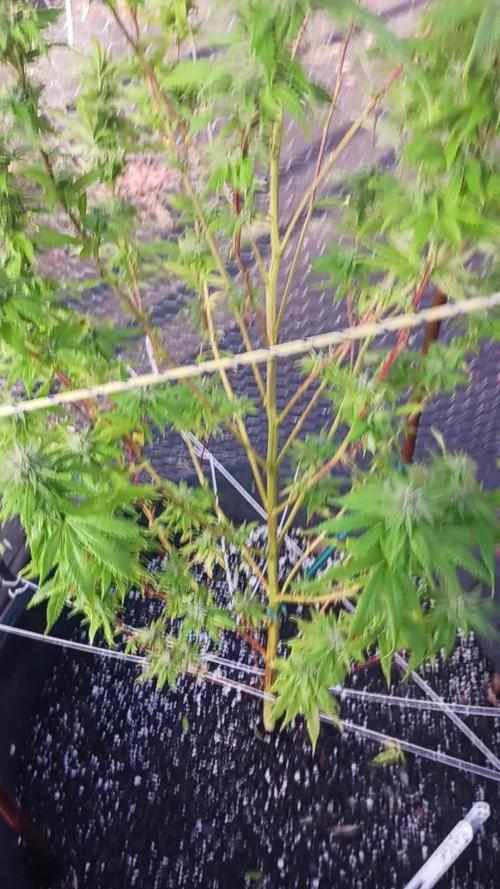
and next week of this lady. nothing special i just let her grow. all nutrients are in ger section if not other mentioned all by maufactures instrucktions.

Likes
8
Share


@LoudLemon
Follow
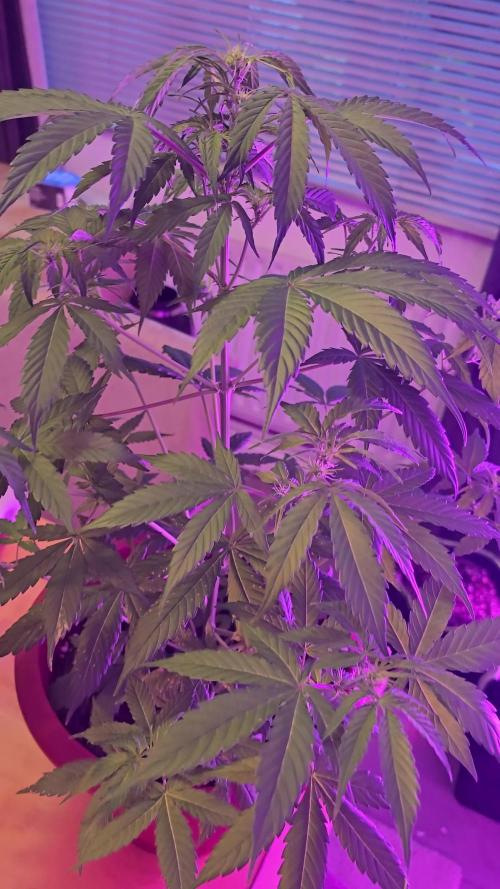
Wish I had left her at least another couple days however all of a sudden their became a sudden need to harvest asap unfortunately, never the less she was well into her finishing stage and and has been an amazing journey with her from start to end!

Likes
17
Share

@masterofsmeagol
Follow
9/20 Man I've been busy. I'm sick too. Looking back at my diaries I get sick this time of year every year it seems. Once I get the important stuff done I'll put some pictures of finished product up. Sunny today and windy as hell. All the plants left seem to be doing good and look like they'll finish. The pink kush might not finish how I WANT but it's stinky and has lots of milky trichs. I'm playing with fire with this mk ultra. It's fucking done. It could get a LITTLE more amber and maybe come together a bit more but I don't know if it's smart to risk it. Frost warning in effect tonight. I'll probably check the forecast and harvest tomorrow. We're having some good weather just cold nights. Then it turns to like a 30% chance of rain for 4 or 5 days. I'll yank it before that. This actually turned out tp be a pretty good year. Haven't tested everything (especially shit in the ground) but what I have sampled I'm incredible happy with.
9/21 IT was a balmy 36° on my way to the garden. My windshield had frost on it. Surprisingly the TIGHT nugs of the pink kush and this phenome of 10th planet didn't seem to mind it. Both strains are still increasing in size, smell and trich development. Not just changing but adding more. Trichs on trichs. Very in hospital environment. It will be interesting to see what happens with these girls. We will be getting some rain. I mean we've had SOME but I mean real rain. If thays the case I'll put these in the garage for a little bit. Honestly I thought these would be goners. I've gotta get to work trimming bucking and manicuring flower. Doing a garden like this sure is an awful lot of work. But the reward is worth every penny. WATERED EVERYTHING LEFT A HALG GALLON APIECE. PROBABLY SHOULDVE GAVE A GALLON BUT THEY WERE STILL A LITTLE HEAVY.
9/22 It rained last night and we got another frost. HAD to cut a main branch of the tenth planet as it had stem rot. Lots more cold weather coming. If I could get it done and I wasnt sick and have all this other material to process I would probably pull then. It's getting really cold. We're going to be getting rain. I'll check the weather and hopfully I can just put the movable ones in the garage. Either way things will work out. Pictures that will be coming will be of the finished product!
9/23 Had a super busy day. Had to but a branch off the pink kush due to stem rot. If I had time I would've taken it. It rained today but I think the plants will be alright. I've been working non stop. I may not have the quantity I'm used too but the quality is AMAZING. I can't wait to do the smoke points and put up finished flower. The other 10th planet seems to be doing really well. I expected nothing off that. I'll keep it updated but it's hard with everything going on.
9/24 Had more emergencies. Raining and cold. Finding stem rot a boytritus but not much. We are getting an inch of rain tomorrow and rain the next day. I wasn't going to watch my shit rot as it was hard as hell and all milky so I quickly waited for a break in the rain and harvested two pink kushes. Still have one pink kush in the 50 and the 10th planet. I cut a cola off 10th planet just in case. This should've been done yesterday but it is what it is. Even with ALL the damage this had been a pretty good year. I can't believe the quality of....well....everything lol. A couple take the cake but I'll wait to do that. I gotta get back to work.
9/25 Heavy rains today and tomorrow. After seeing the damage on the 10th planet and the stripped branches and dying leaves I took out the loupe and checked the trichs. It was a rare break in rain and the plant was luckily dry. After seeing the pistols change on many buds to pure red and seeing lots of cloudy trichomes abd swollen buds I was able to harvest it. I have one pink kush left that sea7s like a willow. I probably should've taken that by looking at it but the trichs had some clear on it. Lots of damage this year on all plants but the first special kush. The quality is amazing though. I havent got to try every strain but I am incredibly impressed with what I have so far. I stopped smoking dabs (for now) in favor of switching my different strains up. I hope that every gardener is able to instil there energy in the plant and gets the same feeling that I do because it's wonderful. I will do an independent review of each strain, and keep updated on last pink kush.
9/26 Boy that was a lot of rain. Pulled ONE molded bud off that pink kush. Probably should've left the other 10th planet but I was losing so much to damage that I wanted to cut my losses. Trichs were milky but could've gone longer. My stash this year is potent. I'll have some time soon and I'll do the reports on the others.


Likes
33
Share


@Chubbs
Follow
Fastbuds Week 4
Gorilla Cookies Auto
The 2 of these are growing amazing. One definitely bigger than the other but I believe the little one will catch up before to long. Been giving them straight water up to this point so About week 4 of Veg I like to give them a good molasses tea. It just gives them a nice boost into veg to flower transition from ny experience. Until next week Happy Growing


Likes
7
Share


@Paul_on
Follow
I don't know what to make of her bud structure, because the one on Anesia Seeds look totally different, they should look like bunches of mini roses covered in smooth silver crystal, very good looking buds too ,but mine look totally different, do yall think I got the right strain (Black Frozen Cherries 🍒, any have pics of theirs in late flower ? , ps the terps are quality.
Likes
36
Share


@JeyGanesha
Follow
Ultime settimane.siamo arrivati al finale anche con queste quasi...bella e sicuramente anche buona😜🤤😂 profilo terpenico forte intenso .un profumo delizioso...quando proverò questa strawberry 🍓 banana 🍌 vi racconterò com'è di sapore e potenza...le cime sono dure dure come una pietra


Likes
2
Share


@Mac_and_Cheesy
Follow
Shes having her last flush today on her day 75.
Its a late journal im totally new here and at growing too since i started this new passion on late december 2019 so 6 months ago or already 2 harvest ago lol.
Just to let everyone know that this is my first time ever growing automatics too and wont be the last cause ill go again in auto mode next run. 1st run was fem seeds from crop king too the blue cookie.
No lst or defoliation on this run cause im too new to this and i tried in my first run and i made so many mistakes lol. Not this time oh no :D
I gave myself a chance to learn about my plants and how to feed well this time.

Likes
6
Share


@GERGrowDesigns
Follow
Welcome to Flower Week 2-3 of Divine Seeds Auto Fractal
I'm excited to share my grow journey with you all as part of the Divine Seeds Autoflowering Competition 2025. It's going to be an incredible ride, full of learning, growing, and connecting with fellow growers from all around the world!
For this competition, I’ve chosen the Feminized Automatic strain: Auto Fractal
Here’s what I’m working with:
• 🌱 Tent: 120x60x80
• 🧑🌾 Breeder Company: Divine Seeds
• 💧 Humidity Range: 50
• ⏳ Flowering Time: 60 Days
• Strain Info: 23%THC
• 🌡️ Temperature: 26
• 🍵 Pot Size: 0.5l
• Nutrient Brand: Narcos
• ⚡ Lights : 200W x 2
A huge thank you to Divine Seeds for allowing me to be a part of this amazing competition and Sponsoring the Strains. Big thanks for supporting the grower community worldwide! Your genetics and passion speak for themselves!
I would truly appreciate every bit of feedback, help, questions, or discussions – and of course, your likes and interactions mean the world to me as I try to stand out in this exciting competition!
Let’s grow together – and don’t forget to stop by again to see the latest updates!
Happy growing!
Stay lifted and stay curious!
Peace & Buds!

Likes
41
Share


@Reyden
Follow
Le luci sono state impostate a 12/12 già da una settimana quasi e per motivi di lavoro 🎚️🎛️🔊 ho dovuto lasciare 3 giorni le piante senza guardarle…non pensavo che avrebbero asciugato così, i vasi in tessuto fanno passare così tanta aria che non avevo calcolato questo..insomma sono tornato ed erano tutte flosce, tempo di bere ancora e qualche ora sono tornare belle splendenti come prima! Le piante non sono state praticamente toccate 😄🙌💥✨
Likes
3
Share


@gottagrowsometime
Follow
Week 5, days 35-38
Ztrawberry 1 pheno & Damn Sour 2 phenos
Both strains are on a very different path. Ztrawberry has been in a bigger pot since the start and after been put in an 11L pot. Wow, she has thrived. She's gotten so big. I've actually decided to flip her. Her nodes are grown and she is fully ready to flip and the process of waiting will be short. I gave her the last grow feed a few days ago. Already still having grow mix as she was moved into a solo pot of grow/light/pebbles 40-40-20 from plagron. She's pushing so hard. There is a few ph issues and a few other stuff. No nutrient defs so nothing that would stop her moving to the next phase. Ztrawberry has been put in 12/12.
More pics coming soon from week 4
Damn Sour
Both phenos have been stuck in a 2L pot and was only transplanted into each 2L pot. Been giving master root and Enzymes + silica for stress. They've only been put in 2L pots a few days ago. 1 was very stressful as I practically had to pull her up with as much of the roots as possible. They are the sane age as Ztrawberry but they had no space. I will uppot them to 9L pots in a few weeks once the root zone has recovered. I really should have left them and uppoted to a bigger pot. But been so long in that pot. They wouldn't have reached out which is what's happened to my 2 lemon photos I kept too long in a 20L hydro pot. Was really as waste of time by the looks of it.
More pics coming soon
Have had to PH to 6.7 and I used - on the silica feed which have been all on since they were transplanted. Ztrawberry 2 weeks ago & Damn Sours 2 dags ago..
Discount codes from sponsors for you
20% off Xpert Nutrients/KANNABIA with code:ggst
20% Zamnesias entire catalogue with code; ZAMMIGROW2024

Likes
15
Share


@Roberts
Follow
She grew well for the little time I spent with her. She grew fast as upping my room temps a few degrees sped the process up. She has a good smell and I will be back to update on a smoke report in a few months once it is dried, cured, and trimmed. Thank you, Medic Grow, and ILGM. 🤜🏻🤛🏻🌱🌱🌱
Thank you grow diaries community for the 👇likes👇, follows, comments, and subscriptions on my YouTube channel👇.
❄️🌱🍻 Happy Growing 🌱🌱🌱
https://youtube.com/channel/UCAhN7yRzWLpcaRHhMIQ7X4g.

Likes
5
Share


@yamyam
Follow
Huge thing
26/01/2025 - defol
27/01/2025 - flushed Coco to lower the strength feed from 1.3 to 0.9 EC

Likes
6
Share

@Pilotpanthro
Follow
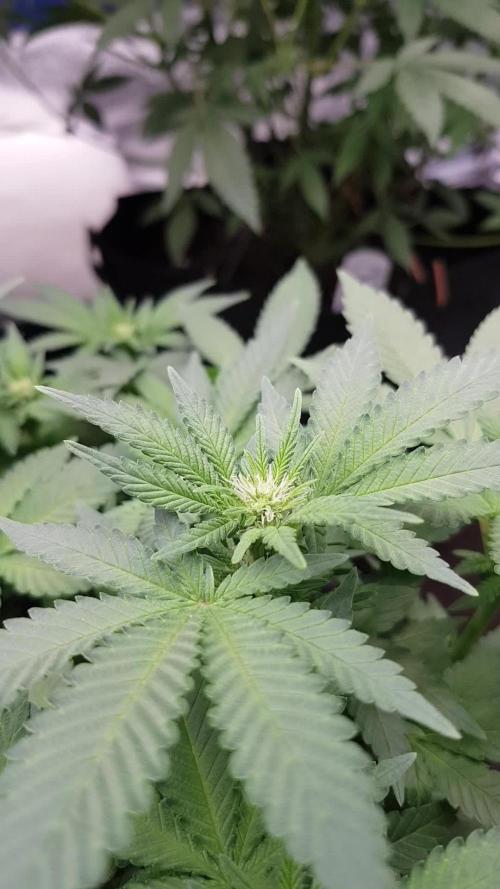
What a fantastic grow, this has now overtaken another plant thst was started 2 weeks before this F1, the growth on this plant is phenomenal !! Buds look like they have started to form nicely, as this is an auto i have taken to try and tuck levlaves in to open more light to buds below as I do not want to defoliate being an auto. Still amazed at the speed of this strain and already looking forward to next week's update for you all. 🌱
Likes
25
Share


@Ultraviolet
Follow
ANTHOCYANIN production is primarily controlled by the Cryptochrome (CR1) Photoreceptor ( !! UV and Blue Spectrums are primary drivers in the production of the pigment that replaces chlorophyll, isn't that awesome!
1. Diverse photoreceptors in plants
Many civilizations, including the sun god of ancient Egypt, thought that the blessings of sunlight were the source of life. In fact, the survival of all life, including humans, is supported by the photosynthesis of plants that capture solar energy. Plants that perform photosynthesis have no means of transportation except for some algae. Therefore, it is necessary to monitor various changes in the external environment and respond appropriately to the place to survive. Among various environmental information, light is especially important information for plants that perform photosynthesis.
In the process of evolution, plants acquired phytochrome, which mainly receives light in the red light region, and multiple blue light receptors, including his hytropin and phototropin, in order to sense the light environment. .. In addition to these, an ultraviolet light receptor named UVR8 was recently discovered. The latest image of the molecular structure and function of these various plant photoreceptors (Fig. 1), focusing on phytochrome and phototropin.
Figure 1
Ultraviolet-visible absorption spectra of phytochrome, cryptochrome, phototropin, and UVR8. The dashed line represents each bioactive absorption spectrum.
2. Phytochrome; red-far red photoreversible molecular switch
What is phytochrome?
Phytochrome is a photochromic photoreceptor, and has two absorption types, a red light absorption type Pr (absorption maximum wavelength of about 665 nm) and a far-red light absorption type Pfr (730 nm). Reversible light conversion between the two by red light and far-red light, respectively(Fig. 1A, solid line and broken line). In general, Pfr is the active form that causes a physiological response. With some exceptions, phytochrome can be said to function as a photoreversible molecular switch. The background of the discovery is as follows. There are some types of plants that require light for germination (light seed germination). From that study, it was found that germination was induced by red light, the effect was inhibited by subsequent far-red light irradiation, and this could be repeated, and the existence of photoreceptors that reversibly photoconvert was predicted. In 1959, its existence was confirmed by the absorption spectrum measurement of the yellow sprout tissue, and it was named phytochrome. Why does the plant have a sensor to distinguish between such red light and far-red light? There is no big difference between the red and far-red light regions in the open-field spectrum of sunlight, but the proportion of red light is greatly reduced due to the absorption of chloroplasts in the shade of plants. Similar changes in light quality occur in the evening sunlight. Plants perceive this difference in light quality as the ratio of Pr and Pfr, recognize the light environment, and respond to it.
Subsequent studies have revealed that it is responsible for various photomorphogenic reactions such as photoperiodic flowering induction, shade repellent, and deyellowing (greening). Furthermore, with the introduction of the model plant Arabidopsis thaliana (At) and the development of molecular biological analysis methods, research has progressed dramatically, and his five types of phytochromes (phyA-E) are present in Arabidopsis thaliana. all right. With the progress of the genome project, Fi’s tochrome-like photoreceptors were found in cyanobacteria, a photosynthetic prokaryotes other than plants. Furthermore, in non-photosynthetic bacteria, a homologue molecule called bacteriophytochrome photoreceptor (BphP) was found in Pseudomonas aeruginosa (Pa) and radiation-resistant bacteria (Deinococcus radiodurans, Dr).
Domain structure of phytochrome molecule
Phytochrome molecule can be roughly divided into N-terminal side and C-terminal side region. PAS (Per / Arndt / Sim: blue), GAF (cGMP phosphodiesterase / adenylyl cyclase / FhlA: green), PHY (phyto-chrome: purple) 3 in the N-terminal region of plant phytochrome (Fig. 2A) There are two domains and an N-terminal extension region (NTE: dark blue), and phytochromobilin (PΦB), which is one of the ring-opening tetrapyrroles, is thioether-bonded to the system stored in GAF as a chromophore. ing. PAS is a domain involved in the interaction between signal transduction-related proteins, and PHY is a phytochrome-specific domain. There are two PASs and her histidine kinase-related (HKR) domain (red) in the C-terminal region, but the histidine essential for kinase activity is not conserved.
3. Phototropin; photosynthetic efficiency optimized blue light receptor
What is phototropin?
Charles Darwin, who is famous for his theory of evolution, wrote in his book “The power of move-ment in plants” published in 1882 that plants bend toward blue light. Approximately 100 years later, the protein nph1 (nonphoto-tropic hypocotyl 1) encoded by one of the causative genes of Arabidopsis mutants causing phototropic abnormalities was identified as a blue photoreceptor. Later, another isotype npl1 was found and renamed phototropin 1 (phot1) and 2 (phot2), respectively. In addition to phototropism, phototropin is damaged by chloroplast photolocalization (chloroplasts move through the epidermal cells of the leaves and gather on the cell surface under appropriate light intensity for photosynthesis. As a photoreceptor for reactions such as escaping to the side of cells under dangerous strong light) and stomata (reactions that open stomata to optimize the uptake of carbon dioxide, which is the rate-determining process of photosynthetic reactions). It became clear that it worked. In this way, phototropin can be said to be a blue light receptor responsible for optimizing photosynthetic efficiency.
Domain structure and LOV photoreaction of phototropin molecule
Phototropin molecule has two photoreceptive domains (LOV1 and LOV2) called LOV (Light-Oxygen-Voltage sensing) on the N-terminal side, and serine / on the C-terminal side. It is a protein kinase that forms threonine kinase (STK) (Fig. 4Aa) and whose activity is regulated by light. LOV is one molecule as a chromophore, he binds FMN (flavin mononucleotide) non-covalently. The LOV forms an α/βfold, and the FMN is located on a β-sheet consisting of five antiparallel β-strands (Fig. 4B). The FMN in the ground state LOV shows the absorption spectrum of a typical oxidized flavin protein with a triplet oscillation structure and an absorption maximum wavelength of 450 nm, and is called D450 (Fig. 1C and Fig. 4E). After being excited to the singlet excited state by blue light, the FMN shifts to the triplet excited state (L660t *) due to intersystem crossing, and then the C4 (Fig. 4C) of the isoaroxazine ring of the FMN is conserved in the vicinity. It forms a transient accretionary prism with the tain (red part in Fig. 4B Eα) (S390I). When this cysteine is replaced with alanine (C / A substitution), the addition reaction does not occur. The effect of adduct formation propagates to the protein moiety, causing kinase activation (S390II). After that, the formed cysteine-flavin adduct spontaneously dissociates and returns to the original D450 (Fig. 4E, dark regression reaction).
Phototropin kinase activity control mechanism by LOV2
Why does phototropin have two LOVs? Atphot1 was found as a protein that is rapidly autophosphorylated when irradiated with blue light.
The effect of the above C / A substitution on this self-phosphorylation reaction and phototropism was investigated, and LOV2 is the main photomolecular switch in both self-phosphorylation and phototropism. It turns out that it functions as. After that, from experiments using artificial substrates, STK has a constitutive activity, LOV2 functions as an inhibitory domain of this activity, and the inhibition is eliminated by photoreaction, while LOV1 is kinase light. It was shown to modify the photosensitivity of the activation reaction. In addition to this, LOV1 was found to act as a dimerization site from the crystal structure and his SAXS. What kind of molecular mechanism does LOV2 use to photoregulate kinase activity? The following two modules play important roles in this intramolecular signal transduction.
Figure 4
(A) Domain structure of LOV photoreceptors. a: Phototropin b: Neochrome c: FKF1 family protein d: Aureochrome (B) Crystal structure of auto barley phot1 LOV2. (C) Structure of FMN isoaroxazine ring. (D) Schematic diagram of the functional domain and module of Arabidopsis thaliana phot1. L, A’α, and Jα represent linker, A’α helix, and Jα helix, respectively. (E) LOV photoreaction. (F) Molecular structure model (mesh) of the LOV2-STK sample (black line) containing A’α of phot2 obtained based on SAXS under dark (top) and under bright (bottom). The yellow, red, and green space-filled models represent the crystal structures of LOV2-Jα, protein kinase A N-lobe, and C-robe, respectively, and black represents FMN. See the text for details.
1) Jα. LOV2 C of oat phot1-to α immediately after the terminus
Rix (Jα) is present (Fig. 4D), which interacts with the β-sheet (Fig. 4B) that forms the FMN-bound scaffold of LOV2 in the dark, but unfolds and dissociates from the β-sheet with photoreaction. It was shown by NMR that it does. According to the crystal structure of LOV2-Jα, this Jα is located on the back surface of the β sheet and mainly has a hydrophobic interaction. The formation of S390II causes twisting of the isoaroxazine ring and protonation of N5 (Fig. 4C).
As a result, the glutamine side chain present on his Iβ strand (Fig. 4B) in the β-sheet rotates to form a hydrogen bond with this protonated N5. Jα interacts with this his Iβ strand, and these changes are thought to cause the unfold-ing of Jα and dissociation from the β-sheet described above. Experiments such as amino acid substitution of Iβ strands revealed that kinases exhibit constitutive activity when this interaction is eliminated, and that Jα plays an important role in photoactivation of kinases.
2) A’α / Aβ gap.
Recently, several results have been reported showing the involvement of amino acids near the A’α helix (Fig. 4D) located upstream of the N-terminal of LOV2 in kinase photoactivation. Therefore, he investigated the role of this A’α and its neighboring amino acids in kinase photoactivation, photoreaction, and Jα structural change for Atphot1. The LOV2-STK polypeptide (Fig. 4D, underlined in black) was used as a photocontrollable kinase for kinase activity analysis. As a result, it was found that the photoactivation of the kinase was abolished when amino acid substitution was introduced into the A’α / Aβ gap between A’α and Aβ of the LOV2 core. Interestingly, he had no effect on the structural changes in Jα examined on the peptide map due to the photoreaction of LOV2 or trypsin degradation. Therefore, the A’α / Aβ gap is considered to play an important role in intramolecular signal transduction after Jα.
Structural changes detected by SAXS
Structural changes of Jα have been detected by various biophysical methods other than NMR, but structural information on samples including up to STK is reported only by his results to his SAXS. Not. The SAXS measurement of the Atphot2 LOV2-STK polypeptide showed that the radius of inertia increased from 32.4 Å to 34.8 Å, and the molecular model (Fig. 4F) obtained by the ab initio modeling software GASBOR is that of LOV2 and STK. It was shown that the N lobes and C lobes lined up in tandem, and the relative position of LOV2 with respect to STK shifted by about 13 Å under light irradiation. The difference in the molecular model between the two is considered to reflect the structural changes that occur in the Jα and A’α / Aβ gaps mentioned above.
Two phototropins with different photosensitivity
In the phototropic reaction of Arabidopsis Arabidopsis, Arabidopsis responds to a very wide range of light intensities from 10–4 to 102 μmol photon / sec / m2. At that time, phot1 functions as an optical sensor in a wide range from low light to strong light, while phot2 reacts with light stronger than 1 μmol photon / sec / m2. What is the origin of these differences? As is well known, animal photoreceptors have a high photosensitivity due to the abundance of rhodopsin and the presence of biochemical amplification mechanisms. The exact abundance of phot1 and phot2 in vivo is unknown, but interesting results have been obtained in terms of amplification.
The light intensity dependence of the photoactivation of the LOV2-STK polypeptide used in the above kinase analysis was investigated.
It was found that phot1 was about 10 times more photosensitive than phot2. On the other hand, when the photochemical reactions of both were examined, it was found that the rate of the dark return reaction of phot1 was about 10 times slower than that of phot2. This result indicates that the longer the lifetime of S390II, which is in the kinase-activated state, the higher the photosensitivity of kinase activation. This correlation was further confirmed by extending the lifespan of her S390II with amino acid substitutions. This alone cannot explain the widespread differences in photosensitivity between phot1 and phot2, but it may explain some of them. Furthermore, it is necessary to investigate in detail protein modifications such as phosphorylation and the effects of phot interacting factors on photosensitivity.
Other LOV photoreceptors Among fern plants and green algae, phytochrome ɾphotosensory module (PSM) on the N-terminal side and chimera photoreceptor with full-length phototropin on the C-terminal side, neochrome (Fig. There are types with 4Ab). It has been reported that some neochromes play a role in chloroplast photolocalization as a red light receiver. It is considered that fern plants have such a chimera photoreceptor in order to survive in a habitat such as undergrowth in a jungle where only red light reaches.
In addition to this, plants have only one LOV domain, and three proteins involved in the degradation of photomorphogenesis-related proteins, FKF1 (Flavin-binding, Kelch repeat, F-box 1, ZTL (ZEITLUPE)), LKP2 ( There are LOV Kelch Protein2) (Fig. 4Ac) and aureochrome (Fig. 4Ad), which has a bZip domain on the N-terminal side of LOV and functions as a gene transcription factor.
4. Cryptochrome and UVR8
Cryptochrome is one of the blue photoreceptors and forms a superfamily with the DNA photoreceptor photolyase. It has FAD (flavin adenine dinucle-otide) as a chromophore and tetrahydrofolic acid, which is a condensing pigment. The ground state of FAD is considered to be the oxidized type, and the radical type (broken line in Fig. 1B) generated by blue light irradiation is considered to be the signaling state. The radical type also absorbs in the green to orange light region, and may widen the wavelength region of the plant morphogenesis reaction spectrum. Cryptochrome uses blue light to control physiological functions similar to phytochrome.
It was identified as a photoreceptor from one of the causative genes of UVR8 Arabidopsis thaliana, and the chromophore is absorbed in the UVB region by a Trp triad consisting of three tryptophans (Fig. 1D). It is involved in the biosynthesis of flavonoids and anthocyanins that function as UV scavengers in plants.
Conclusion
It is thought that plants have acquired various photoreceptors necessary for their survival during a long evolutionary process. The photoreceptors that cover the existing far-red light to UVB mentioned here are considered to be some of them. More and more diverse photoreceptor genes are conserved in cyanobacteria and marine plankton. By examining these, it is thought that the understanding of plant photoreceptors will be further deepened.


Likes
32
Share


@Sejnik
Follow
3 dny po posledním tréninku (53 dní od vyklíčení) jsem změnil světelný cyklus na 12/12. Nastavil jsem SCROG síť do finální výšky a nyní zbývá jen čekat až holky vyrostou 🤩 snad se mi podaří vytvořit rovnoměrný baldachýn.
Blumat zavlažování funguje skvěle a rostliny jsou s ním velmi spokojené.
V substrátu se mi rozmnožili springtails. Beru to jako dobrou zprávu poukazující na dostatek organického materiálu kterým se živí. Ale i tak budu jejich počty hlídat a redukovat postřikem substrátu pomocí nimbového oleje (1 polévková lžíce na 1 litr vody + 3 kapky mycího prostředku na nádobí) vždy když mi přijdou jejich počty moc vysoké.
Likes
4
Share

@ChitownCannaChica
Follow
She’s been beat the f up! The heat, rain you name it ran her through the ringer and I still will get 4 dense terpy buds
Likes
11
Share

@GERGrowDesigns
Follow
Welcome to Flower Week 2 of SuperStrains OreoZ
I'm excited to share my grow journey with you from my
SuperStrains Project . It's going to be an incredible ride, full of learning, growing, and connecting with fellow growers from all around the world!
For this Project , I’ve chosen the Feminized Photo Strain OreoZ:
Here’s what I’m working with:
• 🌱 Tent: 120x60x80
• 🧑🌾 Breeder Company: SuperStrains
• 💧 Humidity Range: 60
• ⏳ Flowering Time: 8-9 Weeks
• Strain Info: 22%THC
• 🌡️ Temperature: 26
• 🍵 Pot Size: 20
• Nutrient Brand: Hy-Pro
• ⚡ Lights : 600W x 2
A huge thank you to SuperStrains for allowing me to try my Best with this amazing collection from Photo Strains they managed to Sponsore side by side with theyre Hy-Pro Nutriets . Big thanks for supporting the grower community worldwide! Your genetics and passion speak for themselves!
I would truly appreciate every bit of feedback, help, questions, or discussions – and of course, your likes and interactions mean the world to me as I try to stand out in this exciting competition!
Let’s grow together – and don’t forget to stop by again to see the latest updates!
Happy growing!
Stay lifted and stay curious!
Peace & Buds!