The Grow Awards 2026 🏆 


Likes
Comments
Share
@Ninjabuds
Follow
I started with three Blackberry Moon Rock seeds, and two of them sprouted – awesome! These girls are loving life, reaching for the sky as the tallest plants in my tent. They're already about six inches tall, and they're taking up all the nutrients very well without any nute burn.
Both blackberry moonrocks plants are very similar height although they have very different looks to them. The one of the 2 definitely going ti strech alot more than the other. One has internodes about 1 cm apart rn and the other is about 3/4 to 1 inch between nodes.
Happy late turkey day grow diaries world!!!! It's now day 24 from seed for all the seedlings I have going. The past few days the plants have really started to take off. There roots have really started to dig in. Every other water I am still giving 2ml per gal of fox farm grow big. I keep having to tell myself not to add any more nutes other than that. I don't want to fry my plants but I also want they to start jumping. I'm quite excited for the coming week, I think the next 7 days or so is when the plant really starts to transform and look more like a pot plant than just some random little green thing.
A few days ago I decided to move the plants from under my 55w cheep amazon light to under my spider farmer 100w newer version light with the good leds in it. The plants will hopefully be ready to up pot them here soon and get them in the large tent.
Sometimes when growing multiple different strains it can be really hard to balance giving to much or to little light. You don't want the faster growing plants to get to stretched out waiting on the slower plants to catch up
I spend Thanksgiving day morning transplanting the plants into 2gal pots. I am useing spme promix potting soil it's my 1st time tring this soil. It is actually doing really well the roots were all white and nice looking. I think next time I'm going to add some worm casting, kelp, granular mycos, and a little bit extra perlite. I just didn't have the money with christmas coming to splurge for all the extra stuff. I got rid of 2 plants 1 of the bubble og and 1 skunk apple runtz. There is only room for 10 pots in the 2x4 tent. I will peob only bring 8 of them to flower, always good to have back ups. Yesterday I also stuck the plants back under the 500w medicgrow mini sun 2 in my 2x4 tent. They did great under it the 2nd half the day I was happy they didn't get stressed. I had put them under that light a little early about 10 days ago or so. I am expecting in a week these plants will ge going crazy with growth

Likes
5
Share
@GrowDr
Follow
I Pruned all the lower herming sections and lowered the far red % as well.
Lots of trichomes, which is always awesome. Smell is amazing

Likes
21
Share
@DeepRootsGrowTrees
Follow
SATIVA DREAM by KANNABIA
This week she's doing
WEEK #14 Overall
Week#13 Veg
This week no issues to report she's growing well she should be getting ready to start flowering here soon!!
Stay Growing!!
Kannabia.com SATIVA DREAM

Likes
3
Share
@BearBuds
Follow
We have made it to the end of Week 6. Conditions in the tent have improved DRAMATICALLY. The heat wave has finally passed and the temperature has finally leveled out. Not only that, the super weird monsoon weather that we were having has also passed and now the humidity is not rising above 60%. This turn for the best is really showing and also fixing the pH problem I had also probably helped a lot. Going to push the PPM a little more this week, between 750-850 The color of the buds is really coming through now, especially in the pineapple express and zkittles. The melonsicle seems to be growing much more like a traditional sativa. I feel it's about a week behind schedule with the rest of the plants. It seems to be on a true 9 or 10 week tract at this point. I think the blue gelato is going to be a bust in terms of yield. It just got heavily over shadowed by the other three plants from the beginning. It has stayed quite small and I am not sure it will yield heavily. Hopefully the smoke is quality and I will be impressed enough with my first Barney's Farm experience to try again.


Likes
7
Share
@Cultivatorcarlos
Follow
still growing fast as fuck. i was falling more and more in love with her as time passed. she was showing signs of hunger so i gave her, her first feed of veg nutes on december 5th 2021. I mixed 1/2 tsp to each gallon. I used a bucket with 3 gallons of dechlorinated tap water.
Decmber 8th: same amount of veg to gallons of water with the same 1/2 tsp. phd to 6.4.
December 10th gave her a feed honestly dont know how much. id say about 10-20 cups worth of dechlorinated tap water with 1/2 tsp of veg nutes to 3 gallons.

Likes
30
Share
@WeWantItToGrow
Follow
This week was absolutely torturous had an accident in which one of my plants was damaged fortunately I do not believe that all is lost I will just have to hold her back on sending her into flour with the rest until she is completely healthy I have sent one into flower a bit early just to see if I could and seems to be working swimmingly

Likes
2
Share
@Gardens_of_Of
Follow
She seems to be overfed, showing yellowing here and there. Also other has some leaves have brown spots. I might have messed up the Ph because I did not adjust the Ph of nutrients mix. I assumed it was ph corrected. Now, I am adjusting the Ph and reducing feeding. Let’s hope that she recovers next week.

Likes
9
Share
@PhinolaGreen
Follow
Ich habe mich dazu entschieden sie heute schon zu legen. Sie sieht einfach Klasse aus, frostig, kompakt und Fett!
Update vom 23.01.2026:
Ich habe mit meinem gecurten Guava an einem privaten Community Winter-Cup teilgenommen und habe mich gegen 4 andere Sorten durchgesetzt, darunter Zkittlez Runtz, Permanent Marker, Tangerine Dream und CBD Crack 1:1 wuhuuu 🏆
Als Gewinn gab es einen 20€ Gutschein für einen Ortsansässigen Headshop 🤤 😄🤭🥇
Freue mich total 😌👌🏻

Likes
10
Share
@Losweed
Follow
2 plants have undergone too much stress due to excess fertilizers, but thanks to the help of expert friends maybe I can fix it !!! we hope well!!
Likes
3
Share
@GoodTimesOrganics
Follow
Die Ice Cream Haze performed mega und dass Aroma Profil ist unbeschreiblich.
Süß, ein wenig wie Zuckerwatte und Schockofrüchte mit einem leichten Zitronen Haze Aroma.
Ehrlich gesagt, kann ich es kaum erwarten, diese unfassbar Aromatische Sorte zu testen.
Sehr viele glitzernde Trichome und funkelnde Zuckerblätter.
Ein echter Hingucker.

Likes
22
Share
@burnout
Follow
Swelling and getting plump
Getting very stinky , wife upset her coworker could smell it on her jacket. I'm using a new AC Infinity refillable carbon filter, I don't think it's large enough for the room. Going to get another big Phresh filter, that seemed to work better.

Likes
1
Share
@Gratak
Follow
Leider habe ich von diesem Grow nur die Bilder Kurz vor der ernte aber ums mal kurz zusammen zu fassen:
Ich habe die komplette Plagron Dünger Linie benutzt und bin damit auch sehr gut gefahren.
SANlight:
Zur Anzucht auf 30%
Zum Start der Blüte 60%
Wochen Später auf 80%
Ab Woche 7 dann 100%
Der Grow verlief reibungslos wie immer bei 420 Fastbud, da ich aber viel geschäftlich unterwegs war konnte ich den Dünger nicht ganz auf die Bedürfnisse anpassen.
Ich denke beim nächsten Versuch kann ich das Ergebnis noch mehr optimieren, obwohl ich schon extrem zufrieden bin was Qualität und Quantität angeht.
Likes
7
Share
@PCGrows
Follow
This is more preflower week, bud sites emerged bud plant is hasn’t quite stretched yet. This’ll be the week she gets y’all or I know my pots are a little too big and she’s working to much on root growth those first weeks


Likes
4
Share
@GREENPHOENIX6262
Follow
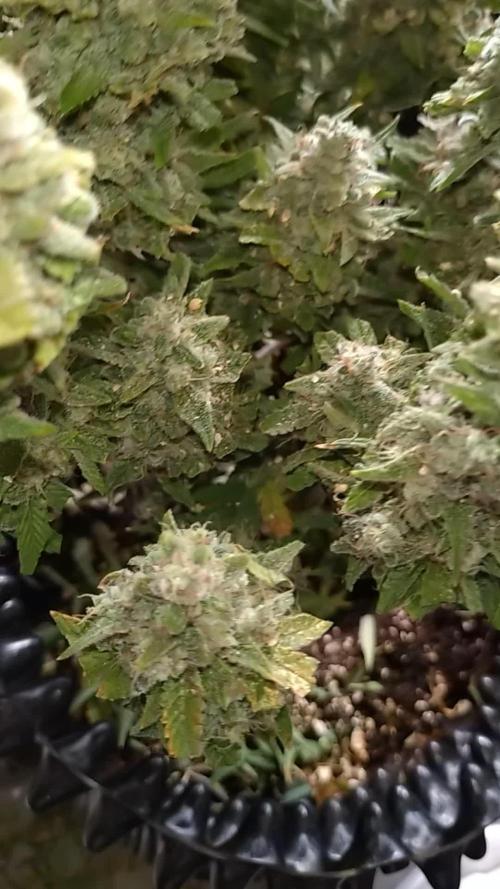
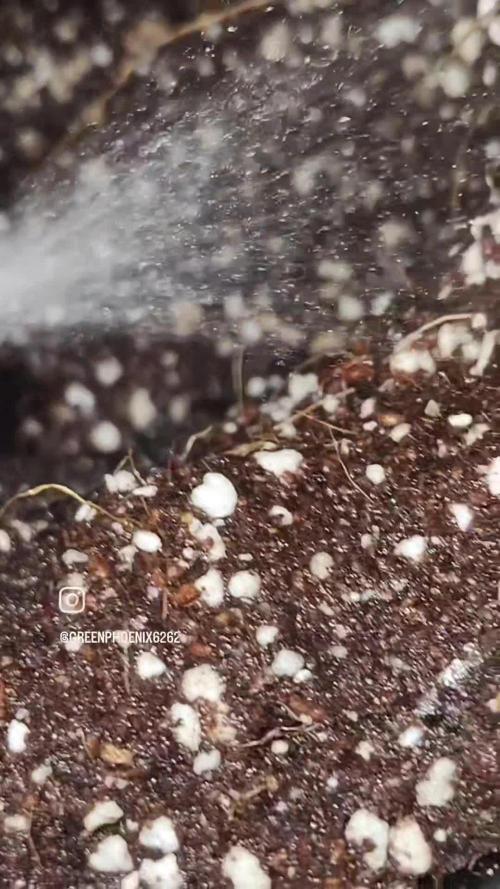
10/14 - Mother had to be discarded - PH burn - pulled 17 viable clones - all clones are alive and thriving - split between 2 tents (2x2 - 4x4) all clones will be moved into the 4x4 - All the clones have been topped.


Likes
45
Share
@HinduGod
Follow
THE SUN GOD HAS BEEN VERY VERY BAD!!!😡 ONLY 2 DAYS OF SUN DURING DIS WEEK LONG STRETCH. TOOK A COUPLE OF THE BIG FAN LEAVES OFF ON DAY 46. DID SOME LST ON A COUPLE OF LOWER BRANCHES ON DAY 48.
PLEASE COME AGAIN!!!!!!
Likes
10
Share
@SnoopyShaggy
Follow
What a week it was, experimented with my 2 AK47 hermie seeds and the happiness seeing a jungle in my 2x4 tent. They overtook the lights and pistils are coming out however no pistils are forming and the nice looking hairy structure was not visible instead the plant overstretched. I was informed to flip them lights in which i may attempt once harvested all of my 3 autoflowers. It is no doubt that this hermie can produce great flowers once i flip the switch, i have completely defo the plant to reveg it once Purple Punch, Outlaw Amnesia and strawberry cough is chop-chop.
Other 3 autoflowers are looking great.
Likes
9
Share
@TheGreenGroomer
Follow
Hey everyone,
I meant to post this update yesterday, but I was really busy. Anyway, here she is! She's doing great, although still a bit darker than I'd like, which might just be her genetics. Overall, I'm really happy with how things are going for my first grow.
There are definitely some things I could have done to improve this run. The top buds aren't as fat as I hoped, probably because there are so many tops and bud sites under the canopy that aren't getting enough PPFD. This seems to be causing the plant to direct quite a lot of energy to the lower buds, leaving the top colas not getting 100% of the energy they need.
But hey, we learn as we go, and this first run has taught me a lot. I'm aiming for at least 4 ounces, but honestly, she doesn't look like she's producing that much weight at the moment. Fingers crossed these buds juice up and double in size within these last two weeks!
Thanks for following along and for all the support! 🌱✨

Likes
42
Share
@Ganjagrandaddy
Follow
DAY 21: With the settling in period well passed and the beginning of establishing their bases in the pots , it was time to get busy on the planned Methods to train them with. I enjoy trying different methods when growing multiple plants from a strain and comparing their finishes. It can be handy to watch which way pulls the best from them.
#1 Amnesia Haze has been f.i.m.m.e.d and seems to have caught her in a good spot. Hopefully a multi-crown will form as the lowers catch up now.
Amnesia #2 still has her rectangular look but I decided to top her as the node lengths could be a sign of a more sativa grow pattern possibly. This should keep her managed along with her potentially shorter sisters. The growth tips will be encouraged outwards now to give them their own space as they form.
Amnesia #3 has so far only been cleaned out of her 1 and 2 nodes. She will be bent over once she is tall enough to safely do it to her. All looking happy and a nice cour still so hopefully flowering will be close now to use the stretch to shape them.
Girl Scout Cookies # 1 has been bent over after working her stem a little between my thumb and finger to soften the stem again. She has stood back up once already so I have now had to use a tent peg to keep the 5th node down ....
#2 G.s.c also had the same treatment but her stem snapped so I had to quickly reset her to let her fix the break. She is repairing it and again starting to feed the leaves on her 5th node. If she doesnt repair enough , I can top her too. They both have a good amount of growth on them so should be nice producers.
All of the girls are due to go j derby the sp3000 directly in a day or so as I am harvesting a few others . They will be in then best spot to hit flowering stretch then. Onwards and upwards growmies. Be happy.
UPDATE #
I have been busy keeping g them trained over the past few days and wanted to show their progress before the next weekly update. It can help to show how the plants respond to the initial pinches /bends etc... They are bushing out where they need to now and the fimmed girl is bang on the money for the hotspot I think. Enjoy the new pics.

Likes
8
Share
@Designer_grow_pt
Follow
Transplanted the seedlings to 17l pots, the ak-47 showed she was a male so I killed her
