
Likes
Comments
Share


@CannaBossBizz
Follow
The Moby Dick ist gettin bigger every day. Lovely plant.
Did top her and some LST so every branch's gettin enough light. Stay tuned for more 🤙🏽

Likes
9
Share


@Mr_nugs_lover_David
Follow
She's looking very healthy, beautiful color on the leafs, completely stunning after I got rid of the fungus gnats she's growing ultra fast, let's see what happens with this beautiful princess of mine! 😍👀💚

Likes
34
Share


@iLoveGoodWeed
Follow
Seed one receive finalpart at the end of week and will continue till end of next week and then flush time.
Seed two buds getting bigger but it's not yet ready for final part.


Likes
6
Share

@Mxrcel09
Follow
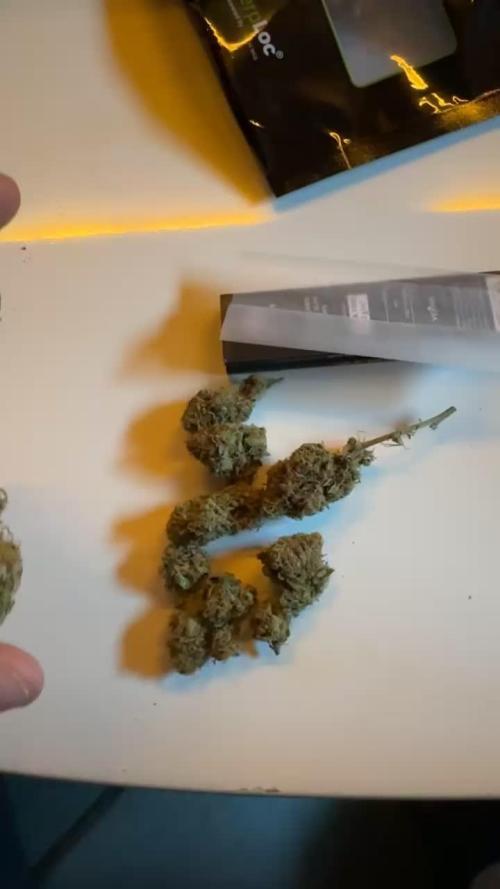
Had to Chop. Consistent RH of 65% the last few days. Dont want to risk the single plant to be moldy. In better environment I would have gave her another week to ripen. Smells very loud! Fruity, tropical smell with gassie Zoap. Very excited to smoke it. Will dry it in the tent. Currently at 62.3% RH + 22C (cant get it cooler).
Will Update after 2 weeks cure 🙏🏼
Dry weight: 98.5g / 1 plant

Likes
5
Share


@ThinkDankGenetics
Follow
Closing thoughts. Damn easy plant to grow responds well to training have fairly uniformed plants only on kept the purple trait but that's ok we can selection breed for that. I am happy I decided to go this route with the breeding the girl scout diesel really complemented the mother plant


Likes
10
Share


@asstonmartian
Follow
First week of flower! After the 48 hour dark period, the budsites turned bright green. This faded a bit over the next week to become green like the rest of the plants. I'm starting to see repro signs and looks like I've a few males so I'll be keeping a close eye on them! A few days later I decided to quarantine the males so I chucked them outside on my back porch to decide if i wanted to chop completely or maybe finish growing on my roof? My concern was that pollen would float fro mthe roof right into my windows, making its way into the tent and pollinating the ladies...
By the end of the week the largest plant was showing it would be overpowering the others, heightwise, so I decided to supercrop it, despite being in the beginning of stretch, now was the time to.
Water ph'd to roughly 6, no additional nutes added at this time.
Likes
11
Share


@Chubbs
Follow
420Fastbuds
FBT2304 Week 8
Week 8 update on these two beautiful girls. They both appear to be growing great even though they're different in size and structure. The flower sites are swelling up as nicely as one could expect. So will keep up the same routine of nutes every 3rd watering. All in all Happy Growing


Likes
76
Share

@Natrona
Follow
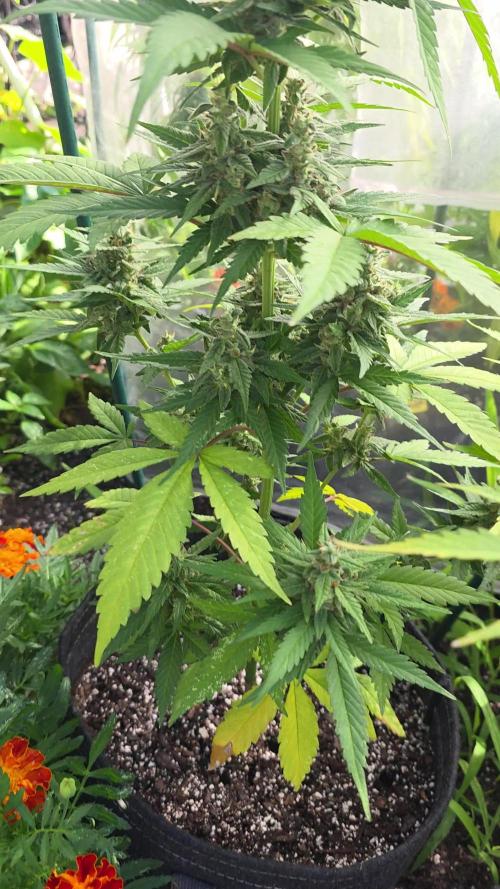
Whorled Phyllotaxy-Hawaiian Snow auto
Outside 2026- @GanjaFarmer
6/28-7/4 W8 F5
Hello Friends,
We have had several thunderstorms this week due to the heat. We are under a heat advisory with temperatures reaching 100 with a heat index to 110 later in the week.
I defoliated a few yellow fan leaves near the bottom. Since some fans are yellowing, I top dressed with azomite and rose and flower fertilizer and watered well.
Trichome formation is well underway but only a few pistils are turning brown. So far, no pests (using mesh bag) and no mold issues. Hawaiian Snow has reached her max height at 29 inches tall. Next week the weather looks the same. Hot and humid.
That’s all for this week.
Stay green, growers love 💚🌿
💫Natrona💫

Likes
51
Share


@Dunk_Junk
Follow
Wow what happened this week? Doubled her height!!! From 45cm to 88cm tall!!
She's gonna be a big girl I think!
Flowering underway now so the stretch should slow down next week 💪
Likes
6
Share

@Huntablunt
Follow
1 plant, the smallest and bushiest is just showing gender, so it's about 1 week behind the others.
1 plant is in between and showed gender about 3/4 days ago.
The rest is more or less in the same stage, about 1 week ahead. So what I am probably going to do is harvest the latest plant a bit early, to avoid cutting the others too late, since I must chop them all the same day, due to smell and drying possibilities.
Ec is now at 1.3 and everything looks OK. Just 2 plants seem to have a small problem with nutrition (due to ec change and the stage they are in) and/or moisture, since I watered them a bit too much the last days.
Their leaves partly have a green which looks a bit too light. But I will check and see wether they will stick to the nutrition, or if I should change again, but intuition says, they will adapt as they get into blooming.
I also removed more leaves and I think now I am done doing so, maybe just a bit here and there the next few days.
Now I obviously get more and more excited to see them budding....... If one would ask right now I would say....... The small and bushy pheno is not really worth growing indoors, but maybe it will teach me different.
Update day34
I am worried about the big plant, because she seems to have a deficiency.
Really crazy, thinking how much they get fed....... I bought algamic and cal/mag, hoping this will do good, because it's too long to go to just ignore it.
I used it yesterday and it will see. If this won't help I may have to think about giving her even more nutrients, which to me would be kind of crazy, since ec is at about 1.4.


Likes
45
Share


@masterofsmeagol
Follow
9/24 Busy as fuck and personal emergencies always hit during harvest season. I took a few tops from my favorite gmo just so I have some if the weather fucks me. I'll take more today probably. WATERED YESTERDAY. I'll post pictures of dry flowers and do the reports. Three are still standing. That huge gmo is going to extracts though.
9/25
9/26 We are getting a week of rain. After looking at my trichs I decided to pull the GMO's I had left. I was sick of cutting branches due to grey mold and I was starting to lose buds to botrytis. Trichs got to about 10% amber on most. Maybe more. I worked like a mule. I was going to leave my favorite gmo and the sherb pie. However, my wife had multiple medical emergencies that required hospitalization. I couldn't risk letting my girls turn to mush if she had to stay. I'm glad with my decision. Everyone now I see is asking about bud rot and pm cures. This happened at the same time last year. She was hospitalized during late late flower. I couldn't keep this updated and I took the plants ad quickly as I could and rough wet trimmed some of them. Some plants got hung whole. I have been in trim jail. I have finished two plants and that is working my balls off. The one in the fifty and the event horizon. I'll do the harvest reports and add pictures but with my wife how she is and the work load I'm going to have to wait. I also left buds to ripen right before the rain and got lots of nice amber flowers that I froze to make a temple ball. I have lots of content. I just need time and a place to do it. I have one lone survivor. The seedling in the ten that seems to be a sativa hybrid. She's a beast and I think can handle the rain due to the fluffy buds. If I see problems I could easily carry it inside. I'll be back with some pics and videos but for now breaks.
9/28 Busy as FUCK. SICK. Been in and out of the hospital with the wife. Looking back on diaries she's in the hospital when I'm harvesting the past few years. I got two strains curing right now. I got a shit ton drying and I'm in trim jail. I haven't taken picturesor been on here but ill be more active i just havent hadcthe time. I'll wait until shits dry and I can do my harvest reports. I'll look to see if I have any pictures I can upload My sativa hybrid survived the rain. All this rain has made its leaves turn yellow and start to drop. It needs food I think. I'll check the trichs but I know it's not ready. The buds are like soda bottles but they are loose. Like a string of calyxes. I don't flgrow sativas so I'll have to ask for some help. I'm trying to decide if I should feed it. It looks hungry. I'm going to have to scope it and then I'll feed if necessary. I'll take pictures and a video when I have the chance.
9/29 Rain stopped and the sun came out. I need to take some pictures and put them up here and do a harvest report. My little BIG Sativa hybrid in the ten got scoped today. It's weird it's starting to foxtail some. . I've had tons of emergencies but I've bern kicking asses and taking names. I've got one GMO (one pheno was much faster flowering than the others), one event horizon and the sherb pie all curing. I'm just waiting on the others to dry. I've got a couple gmos that are just going to extract. One is really nice though and I'm keeping it for smoke. That's trimmed too. I have been working on the other event horizon which will be done today because it's time for it to be cured. I am sick and sore as fuck but I know how important this is and it's mine and my wife's medicine for the year. Sherb pie was a let down quantity wise but I let it get eaten by ear wigs for too long. I've got to get back to it but when I get it done I'll take the pictures and do the reports reports but this breaks over. I've got a BUNCH of fresh frozen too that I'm planning on running bubble hash with and aging a temple ball.

Likes
46
Share


@RedBeardGreen
Follow
This is the final week for plant #2 ,#3, #4 ,#5, #11 , #12. The other six will be kept in veg until the first six harvest. I also collected clones of the plants listed above just in case I come across a really good pheno to keep as a mother plant. Today I switched the first 6 into a 12/12 cycle.

Likes
26
Share


@1Right_Angle
Follow
First pic is showing off some of the stretch that has occurred.
We start “Above the Stakes”this week.
-Sun 10th; it looks like the R plant is making a solid effort in its Stretch, which has just begun & is really happening. The L plant is flourishing and nearing the end of its own stretch. There is an image of the pair with 3’ showing on a tape measure as reference.
Jan 11 Good things are happening as the circle of branches starts fill in !
** as a side note, the Uv-B is going back on for 6hrs a cycle (3+3) after some more reading and the recent stretch action from the plant on the R. Nothing wrong with a weeks delay in nature between sisters & UV-B sounds like solid tech. Power is on again **
- Dinner-time after 4 days.
- Hole drilled in overhead corner-bracket, to help Centre the Light.
- Plants have been rotated a bit, LST (lashing-some-timber lol) re-positioned a bunch of branches/stakes, meshing the two plants together, in the middle. nuf snapshots. details as the week-ends.
-Nutrient ratios are Max’d as the volume will continue to climb for 2 more big feeds.
-rapid-start & cal/mg have already been dialed back a bit.
My watering volume per/24hr now shows my water use in metric. That # is based on the last 2 meals and I’m now looking at 5 days without nutes...
14th, Steady progress all the way round. Moving lights and supports as needed. Reach continues on the Right plant, while the Left continues to look amazing
-molasses in next feed (Sat), TDS to be updated
15th -the volume of water my plants have been receiving, has been larger each of the last 4 feedings. Extra time between feeds has been allotted and watering based on Pot weight/dryness is keeping the plants Full and Green.
-The next feed will be half the volume of the last one.
The goal tomorrow (day 5 since last feed) is to immediately satisfy the plants nutritional needs with a small meal (7 litres/2), but then it’s going to scream for more food. This time I will wait only 2 days and return to the larger volume and a 4-5 day cycle. That’s the plan.
Goal was to raise both the volume and demand for more nutrients. (Without creating a swamp) It’s been kind of patchwork getting the numbers-up, and this is the first pause in that steady climb. Both plants seem to be firing in all cylinders.
Sun Jan17
- adding Molasses to each feeding from Week 5 on in to harvest.
- 2 days since last half-feed.
Big feed tonight and 5 day gap next.
-Reached my Max H2o volume with solid Nutrition #’s. Plan is to hold levels for week 5/6 and then begin to taper nutes & volume slightly in 7/8 and hold till flush (11) & harvest (12/13)
** this grow is my best effort yet, if anybody sees or feels it’s getting “sideways”... I would love to hear about your opinion/concerns. **
The buds that are forming, actually have some substance to them. Tired of Indoor Popcorn. This grow is hapnin

Likes
43
Share


@Sabac
Follow
Última semana de mis plantitas
Hoy corto 12 de 16
Fue un cultivo sin problemas.
Y creo que viene buena producción
Recomiendo 100% los fertilizantes hesi buenísimos.
5 cultivos con ellos y 0 problemas.
El sustrato Biobizz light mix excelente
Las semillas de barneys farm uff pura crema. Eva seeds recomendables y las sweed seeds buenisimas semillas para seguir cultivando. Los Led yxo para ser de un perfil bajo qué no a toda la gente les gusta cumplen la. Función 480w de pura potencia en un espacio de 120x120 los recomiendo para gente que tenga un presupuesto bajo.
Ahora voy por unos sobre 600w aunque los reforzaría estos con unos led de 100w
.
Bueno feliz con los resultados.
Esta semana mostraré los resultados de las plantas cortadas.
Se vienen más cultivos
Salu2


Likes
12
Share


@most_dope
Follow
the week has been smooth the leaves are fading / dying and i fed 1ml in a liter of water twice in the last 10 days but thinking about starting a flush now its been about 62 days and fastbuds site says 9 weeks. the hairs are mostly white still besides on a few buds its 25% and like 80% orange on 1 bud. trichomes are starting to look amber on sugar leaves about 10-15% amber trichs i need a better loupe to see close up tho. the buds just keep fattening up slowly but surely. im trying to be patient and let them get juicy even if its taking longer than the website advertised, (probably due to me dropping her in veg and overwatering in seedling stages) either way, super happy with the results so far and im thinking about getting another light. im going to try growing 2 plants under the 1 light until then but i think i could fit 3 or maybe 4 if i had a 2nd light. hopefully getting a 2nd tent soon too.
Likes
43
Share


@The_Northern_Skunk
Follow
two of the ladies are on plain ph'd water for the next week or so and two are currently doing 48hours of darkness, then we'll get to chopping. 💚🤟
Likes
7
Share


@SzkolaZiola
Follow
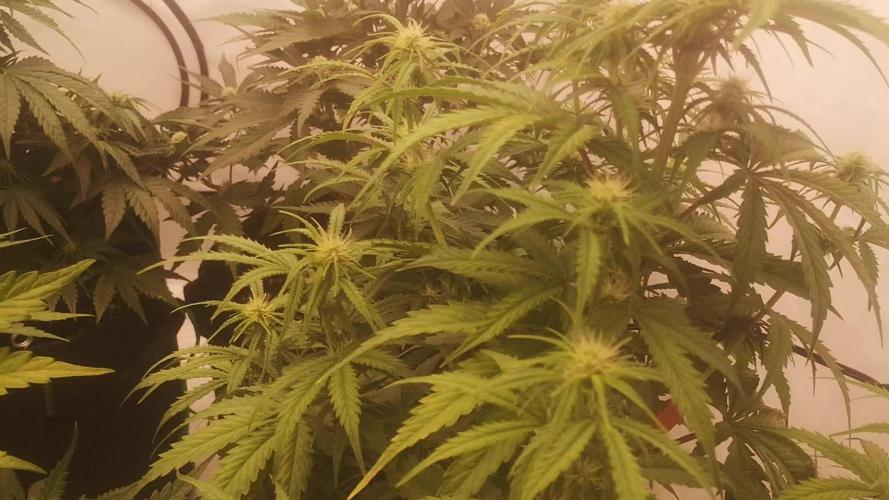
Fifth week completed. They are showing more and more deficiencies, so I starded feeding more.
I also got Bluelab soil pH meter - currently they are around 6.2 - not bad - week ago runoff was adound 5 so I was worried - but 2 waterings of pH 7.2 did the trick. They are back on track.
I hope they will eat fast enough to save more leaves till the end - I want to keep them 3 or 4 more weeks.
Buds are bulking nicely - they get fatter by the day. And they smell amazing - even with my horrid temperatures - the heat wave is real - AC does not help much though without AC it would be like 40*C in the tent 😵
Till next week! Happy growing everyone! 💪