
Likes
Comments
Share


@D33jW
Follow
FLOWEEK: 8 - 57FLO
Light: 11/13
RH: max 55%
TEMP: 24C
PPFD: 750
RH maximum 55% target is 45%
Cold in night just 17C
Last week to harvest I will make some flush..


Processing
Likes
13
Share


@Gdot96
Follow
day 46, a couple of the plants are showing signs of a deficiency.. i think it might be calcium, but i have no calmag. so i've sprinkled some bonemeal on top of the soil and watered it so it washes through to the soil.. hopefully 😅 ill see how they react tomorrow.. some really nice bud growth going on.. every day i go in i notice swell.😎

Processing
Likes
6
Share


@Mr_nugs_lover_David
Follow
This wonderful plant is amazing man, I have fallen in love with this strain and the hard rocks nuggets she has produced, beutiful orange pistils, it's just pure fire. Very dense and compact nuggets guys, she's been 100% organic grown, she has been watered with pure water and beneficial bacteria all the way and also with guano liquid by guanokalong, the aromas are very complex is very gassy stinks like a skunk however it's got some piney in and kush aroma,definitely awesome man need to keep growing this strain many more times no doubt.


Likes
137
Share


@MrJones
Follow
🌱Slurricane #7 S1
@inhousegenetics_official
👨🌾🏽GD Grower: MrJones
🔹🔹🔹🔹🔹🔹GOALS🔹🔹🔹🔹🔹🔹
🌞Environment - 75/80℉ and 60% Humidity Good Old Mother Nature
💧 Feeding - The Green Sunshine Company - Earth Dust All-Natural Plant Nutrients
⚗️Soil - 35% ProMix MP / 25% Ocean Forest / 20% Tupur Royal Gold / 10% lobster Compost / 10% Additional Perlite
🍃Training / So this girl was 60 Inches and spread out under a 5x5 Trellis
🕷️ IPM - Will be using Green Cleaner" 1 OZ per Gallon, and CannControl from Mammoth alternating between products each month
🔹🔹🔹🔹🔹🔹🔹🔹🔹🔹🔹🔹🔹🔹🔹
📜 Rambling - Week 28, The bigger of the 2 plants is doing great, the smaller one is looking root bound, not a lot I can do for it at this stage, live and learn, next year all 50-gallon fabric pots.
🔹🔹🔹🔹🔹🔹🔹🔹🔹🔹🔹🔹🔹🔹🔹
▶️ Sunday - 08.15.21 / JJust watering daily with Dechlirnated H20 using the BOOGIE BLUE PLUS+ (High-Capacity Filter) to remove the Chlorine and Chloramine out of the water.
▶️ Monday - 08.16.21 / Just watering daily with Dechlirnated H20 using the BOOGIE BLUE PLUS+ (High-Capacity Filter) to remove the Chlorine and Chloramine out of the water.
▶️ Tuesday - 08.17.21 / Just watering daily with Dechlirnated H20 using the BOOGIE BLUE PLUS+ (High-Capacity Filter) to remove the Chlorine and Chloramine out of the water. IPM Treatment today.
▶️ Wednesday - 08.18.21/ Just watering daily with Dechlirnated H20 using the BOOGIE BLUE PLUS+ (High-Capacity Filter) to remove the Chlorine and Chloramine out of the water.
▶️ Thursday - 08.19.21 / Just watering daily with Dechlirnated H20 using the BOOGIE BLUE PLUS+ (High-Capacity Filter) to remove the Chlorine and Chloramine out of the water.
▶️ Friday - 08.20.21 / Just watering daily with Dechlirnated H20 using the BOOGIE BLUE PLUS+ (High-Capacity Filter) to remove the Chlorine and Chloramine out of the water.
▶️ Saturday - 08.21.21 / Just watering daily with Dechlirnated H20 using the BOOGIE BLUE PLUS+ (High-Capacity Filter) to remove the Chlorine and Chloramine out of the water.
🔹🔹🔹🔹🔹🔹🔹🔹🔹🔹🔹🔹🔹🔹🔹
Earth Dust - DESCRIPTION
🔹Earth Dust is our all-natural plant nutrient designed for indoor and outdoor flowering plant growers. You can grow easily by “just adding water” to your soil for the entire growth cycle. It creates a “living soil” so your plants thrive from seedling all the way through flower and harvest. Earth Dust represents an organic dry amendment method of gardening, it’s made of a natural powder of ingredients.
🔹Because you only need to water your soil with Earth Dust, you can concentrate on caring for your plants and getting a healthy crop “on autopilot”. Now you can grow without spending hours of your life mixing chemical nutrients, and you can do it naturally. What’s more, is you will enjoy the cleanest, most aromatic, and flavorful harvest you’ve ever experienced when a plant grows in a rich, organic web of living soil.
Product Highlights
🔹All-Natural Ingredients – Mostly plant-based – Safe around children and pets.
🔹Packaged in kraft paper bags that are recyclable and compostable.
🔹Easy to Use – Just mix the powder into the soil 3 separate times – then water only.
🔹Packed full of rich microbe food & contains billions of beneficial fungi and bacteria! Creates a resilient, living soil that defends against pests and diseases.
🔹Rich in trace minerals and nutrients for full plant expression. Sourced from rock dust, sea-farmed kelp, and land-grown crops.
🔹Soil Conditioners help balance pH and make nutrients more available in the soil. Achieved with ingredients like bat guano, worm castings, limestone, molasses, and humic acid.
🔹The correct balance of N-P-K nutrients for each stage of growth:
🔹Earth Dust Base (3-1-2) contains key nutrients for sustained vegetative growth. High nitrogen (N), Low Phosphorous (P), and Medium Potassium (K).
🔹Earth Dust Boost (2-3-6) contains accelerated-release nutrients for powerful flowering growth. Low nitrogen (N), Medium Phosphorous (P), and High
Potassium (K).
🔹Re-use soil harvest after harvest by simply adding more Earth Dust Base to begin again. Create your own living soil that gets better every time it’s used.
🔹Go organic, save time, and get predictable, healthy harvests.
🔹🔹🔹🔹🔹🔹🔹🔹🔹🔹🔹🔹🔹🔹🔹
Compost Tea for Vegetative Stage
Water 4 Gallons
3 Cups Composr (Your Favorite Worm)
4 TBL Molasses
4 TBL Seaweed Extract
4 TBL Fish Fertilizer
Use air Stone o the tea for 24/3 hours 70/75F, use at full strength for establishing plants and a half-strength for younger plants
Likes
4
Share


@HawksGrow
Follow
This one is definitely taking her time but its looking like the end product will be worth the wait, im getting an almost lemony aroma from the tent now.
Edit: 5 days on I've just started the flush since trichs are turning cloudy.


Likes
2
Share


@CannaIGrow
Follow
I did not top this girl, yet. Her top lowers started catching up to the top so I didn’t want to stop her yet lol. But all in all she’s looking healthy.
Likes
19
Share


@Mr_Juice
Follow
3x anesia seeds/frozen black cherry
1x sweets seeds/skywalker og runtz auto xl
I love Spanish seed banks ❤️
the plants in the back contain guanocalong, the plants in the front are fed with plagron

Processing
Likes
34
Share


@LockDownGrow
Follow
So this little lady has also shot up looking very plump and reaching for the sky , she is how ever slightly smaller than her other tester seeds sister the FBT7
But are looking full of vegour , thursty for there first nutrients next week once ive worked out the correct doses

Likes
2
Share


Likes
17
Share


@Gordy
Follow
Overall I'm very happy with this grow. There were a lot of small buds, and I realize with more skill as a grower I'll train my plants properly and defoliate the lower leaves and branches before they develop into buds. It took me about 5 hours to trim this entire plant down, and I feel a lot of that was because of all of the small buds. Hopefully the only real loss on these small buds is bag appeal. Really this is all for myself so I don't care if the buds are small... this round 😜
The smell in my apartment while harvesting was so nice. It smelled like super sweet citrus weed... beautiful.
I didn't get as much fade as I expected leading up to harvest. I've been too timid with watering and was afraid to give this plant a good flush. Hopefully since she was fully organic it should still taste fine.
I won't be growing a single plant in a 10 gallon bucket for a while, I feel this was just too big for an inexperienced grower. It made watering this thing difficult.
I'll post more updates once this fully dries and cures for a while.
Thanks for following my grow if you have. I had a blast growing this girl and I'll continue to grow this strain for a while.000

Likes
8
Share

@D4D3DHOMMIES
Follow
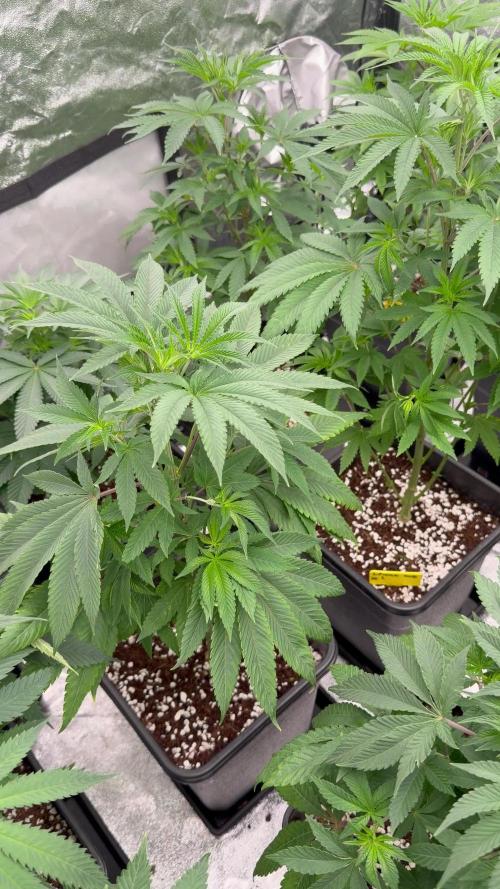
Entering week 7, preparing the plants for flowering. Some will probably need a little more time, so I might give them a bit more than a week of vegetative growth. And I'm also making my first clones! With great results!
Likes
43
Share


@Sabac
Follow
Semana 4 de flora están a full mis plantitas. Creciendo cada día más y más.
Sanitas.


Likes
6
Share

@lolluz_420
Follow
The girl has entered full flowering, with excellent potential for large yields. The odor in the tent is minimal. I'm very pleased with the structure of this strain.
A few days ago, I started fertilizing the girl with 1 ml of Bio Bloom and Top Max of Biobizz per liter of water. If the plant responds well, next week I'll increase the dose to 2 ml, also supplementing with 1 ml of Green Sensation.

Likes
13
Share

@EllysGrow
Follow
So glücklich über das purpeln der Banana Purple Punch RF3, da ich beim letzten grow und der Vorgängergenetik leider keine lila Genetik hatte. Ich liebe diese Farbe einfach! 😊
Likes
24
Share


@TerpTurtle
Follow
Strawberry Truffle - White Truffle x Red Pop & limited seed it came with Chem 91 x Red pop
Processing
Likes
58
Share


@DailyDabs
Follow
Bud sites are starting to look real nice now, I'm thinking the main stretching has already happened but I'm still expecting her to get a bit taller.
Likes
45
Share


@AsNoriu
Follow
Day 8 since seed touched soil. Great strain, started early and strong. Have big hopes from first look ;)
Girls got tent and air movement. 240w dimmed to 30%, distance approximately
40 cm .
HappyGrowing !!!

Likes
5
Share

Likes
6
Share


@sa2_gr
Follow
Hello guys,
I fixed my RH problems.
I now water them 1,5L every 2-3 days, the Shimos seems to still be thristy !
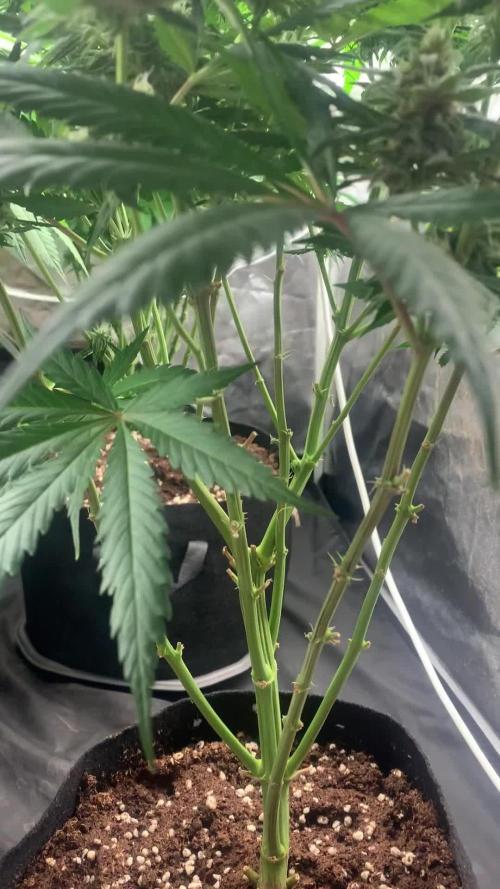
I did a light defoliation, then flipped into 12/12 after 32 days of vegetative stage.
This will be interesting 😍
Have a nice day, see ya next week !
