Likes
10
Share
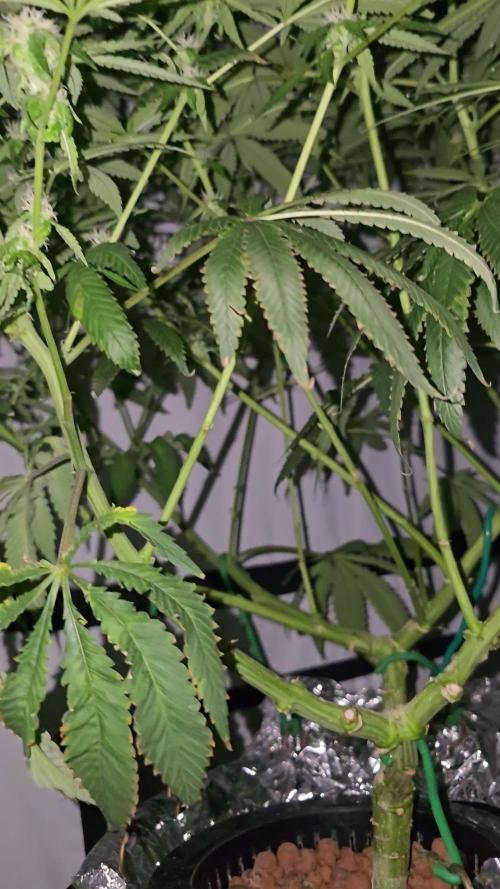
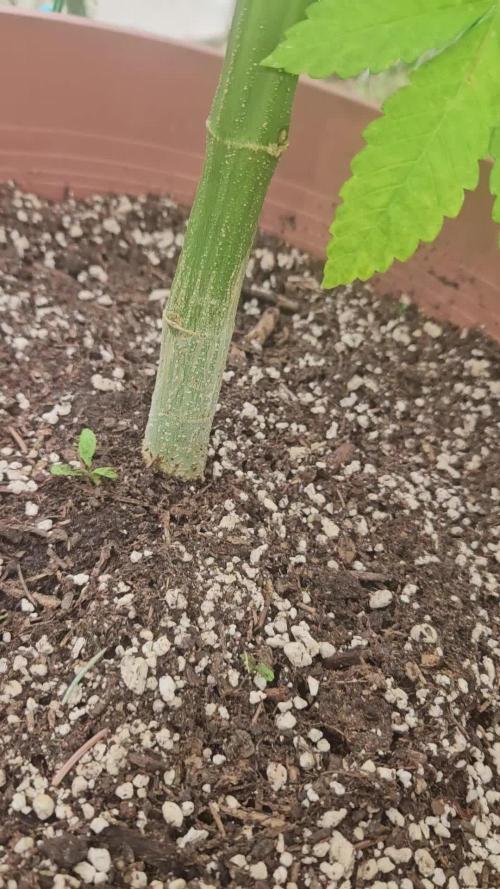
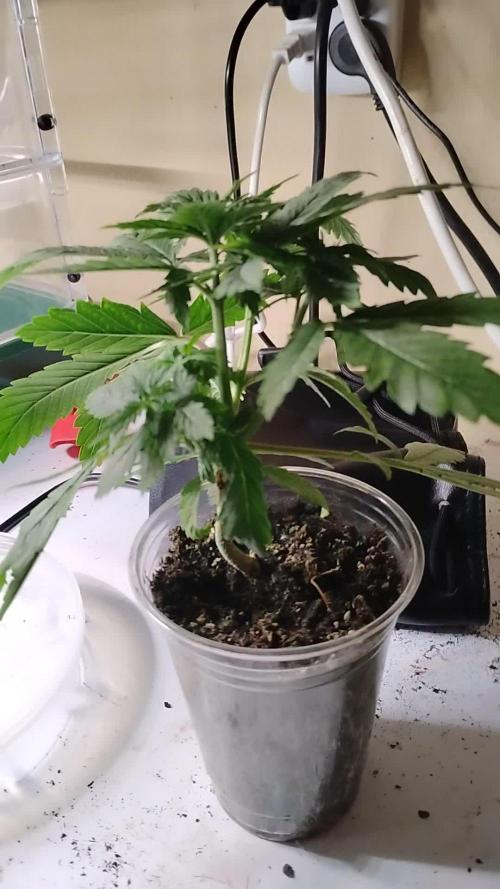
Beginning of third week, changed up my set up! Ready to see how these girls react to the Nutes also I have two slow growing plants(purple lemonade autoflower) & (seedsman autoflower lemon)
Likes
50
Share
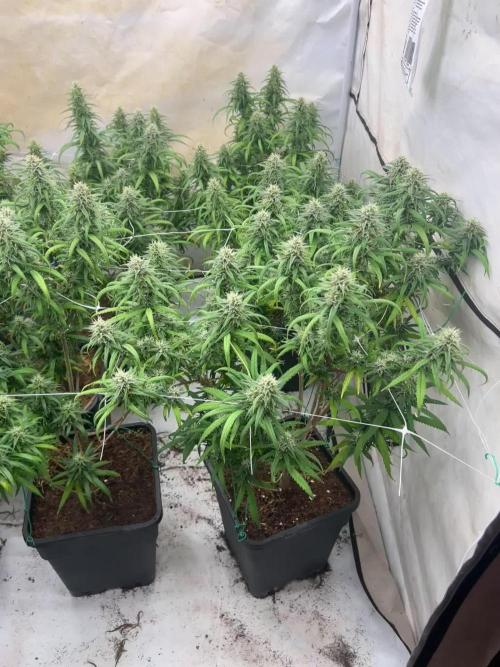
Normally I wanted to do a Mainlining// SCROG. But the Stalks of the Gorilla_ladies are so Sturdy and strong. No way for SCROG. So i just let them grow. They turned out resinous and very smelly.
Likes
6
Share
DrUnderground UPink Kush es una indica de potencia muy elevada, no necesita demasiada comida, es bastante agradecida,tiene la particularidad de sacar estigmas de color rosa, e inclusofucsia, el envés de las hojas adquiere tonalidades entre rojizas ypúrpuras, estos caracteres son mas visibles en cultivos al exterior.La cantidad de resina es brutal, típico en las mejores Kush El aroma es una combinación entre kush original y diesel muy característico en estas lineas con un trasfondo a sal de frutas, pero lo mejor de U-Pink Kush es su efecto, con poco puede ser una delas mejores fumadas jamás conocidas, con mucho... puede arruinarte el día.La densidad de los cogollos es alta, las hojas mas cercanas a estosquedan bañadas en resina.Esta preciosidad termina su periodo de floración entre 8 y 9semanas. El hachís que se hace de su extracción es una exquisitez dealtísima calidad de fama mundial, con ciertos tonos rojizos y ocresproduce un burbujeo de otra galaxia
Likes
14
Share
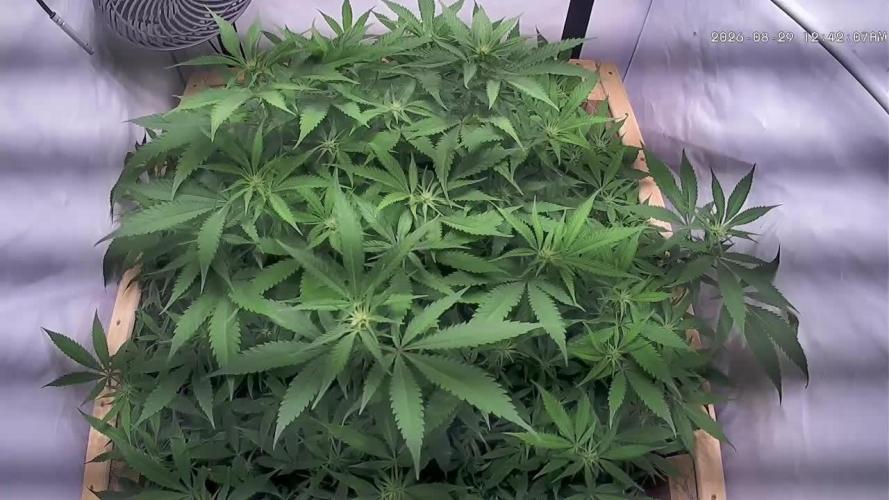
Another week closer.... These girls have been a pleasure to grow so far they love everything you can give them ...no deficiencies no problems.....earlier in the week a slight tip burn but after 2 days they adjusted and ask for more.....as they are eating up the nutrients I am replacing and upping it each time...pushing these girls and they are showing there love....17 days since I switched the light and they are filling in nicely. Until next week, smoke a fatty, help out you're fellow grower
Likes
14
Share
Growing how it is growing. Grows great outdoors. Still smells like coconut and strawberries. Haven't been adding anymore fertilizers just letting it grow naturally.
Likes
14
Share
GMO Cookies Served with Extra Curiosity ?🍪 Week 14 — Harvest Report | Fresh Frozen Experiment And here we are. Week 14. Harvest week. And honestly… the room looked absolutely unreal. Before we even touched the scissors, before a single branch was cut, before the freezer bags started filling up, there was already this feeling in the room that these girls had become something special. Massive structures. Heavy flowers. Long spears. Dense tops. Colors everywhere. Deep greens. Fading yellows. Lime tones. Hints of gold. Dark shadows between swollen calyxes. And then the smell… Oh man. The smell. This is one of those cultivars that genuinely makes the room feel less like a grow room and more like walking into a kitchen where someone is preparing something loud, greasy, savory, and unforgettable. The GMO side of these genetics speaks immediately and unapologetically. Garlic. Onion. Savory funk. That unmistakable “food terpene” profile that GMO became legendary for. But underneath all that aggression, there is still sweetness hiding in there too. Cookie dough warmth. Earthiness. Creamy backend notes. A weird balance between offensive and delicious that only certain genetics can truly achieve. And honestly? We loved it. But before diving fully into this week, let’s do what we always do and quickly recap the journey, because by now many people arrive only at the final reports and never see the earlier stages of the diary. So first of all: yes… once again we divided the harvest into multiple reports 😄 And honestly, we know it starts becoming a cliché at this point. But there is simply too much here: * too many photos, * too many details, * too many observations, * too many experiments, * too much resin, * and too much love for the plant itself to throw everything into one rushed update. This run deserved time. From seed until now, this GMO Cookies run was grown under a 12/12 from seed cycle using the F.O.G. LED setup, inside the Mammoth Elite tent environment, with careful environmental management throughout the run. The girls received multiple rounds of LST, selective defoliation, and continuous observation to maintain airflow and light penetration while still allowing the plants to express themselves naturally. And express themselves they absolutely did. These plants developed huge vascular systems and incredibly thick stems by the end of flower. Once harvest began and we started cutting branches down, the insides looked almost like miniature tree trunks. Thick water highways running through the center, dense supportive tissue everywhere, strong skeletal structures carrying massive tops from beginning to end. You could physically feel how much water and energy these plants had been moving daily. Some stems genuinely felt more like wood than plant tissue. And that strength translated directly into the flowers themselves: dense, heavy, greasy, stacked, and extremely aromatic. Now here comes the part that will probably make some people cry a little 😄 Because normally, growers harvest and dry most of their flower for smoking… while only freezing smaller amounts for hash washing later. We did the exact opposite here. Most of these girls went directly into the freezer. And yes… intentionally. Why? Because this plant was screaming hash potential from the beginning. The resin texture, the greasy leaf rub, the finger stickiness, the way trichomes smeared across gloves, the density of the heads, the aroma intensity… everything about this cultivar felt like it was asking to become fresh frozen. So after removing fan leaves and preparing the flowers carefully, we separated the majority of the buds specifically for freezing. Not whole plants. Not stems. Not unnecessary material. Just flowers. Pure bud material prepared for future washing. Final fresh frozen numbers landed around: 755.5 grams total including bags, which leaves us somewhere roughly around the 700–730g range of actual fresh frozen flower material once packaging weight is removed. And honestly… that is incredibly exciting. For anyone unfamiliar with fresh frozen: this means the flowers are frozen immediately after harvest instead of being dried first. The goal here is preservation. Fresh frozen material helps preserve volatile terpenes, delicate aromatic compounds, and resin characteristics that can partially disappear during traditional drying and curing. Later, this material can be processed into: * ice water hash, * bubble hash, * live hash, * live rosin, * or other solventless extractions. And despite some people debating whether water itself should technically count as a “solvent,” the reality is that this process remains one of the cleanest and most beautiful extraction methods in cannabis culture. Ice. Water. Movement. Separation through resin density. That’s it. And based on what we already felt from simply handling these plants? This could become something truly beautiful later on. Even during harvest, the resin behavior was already honestly ridiculous. The gloves became sticky almost immediately. Fingers started collecting greasy residue after only small amounts of handling. The scissors became coated quickly. And the texture of that resin… dark, oily, greasy, almost greasy-food-like in character, which feels incredibly fitting for a GMO cultivar. This is the type of resin that makes hash makers smile instantly. Now of course, we did not freeze absolutely everything. We intentionally kept select flowers aside for traditional drying and curing because we want to compare the expressions later: * cured flower terpene profile, * versus fresh frozen hash expression, * versus eventual solventless extraction results. That comparison itself is part of the experiment. And honestly, that is one of the beautiful things about growing: sometimes the harvest is not the end of the project. Sometimes harvest is simply the beginning of several new ones. The flowers we kept for drying are currently hanging under controlled conditions while the frozen material quietly waits for its transformation later on. And yes… there will absolutely be future reports about the washing process. About the ice water extraction. About the resin quality. About the yields. About the terpene preservation. About the final hash itself. But for now? This week belongs to the harvest. To the skeletons. To the colors. To the smells. To the giant branches hanging in silence. To the freezer bags packed full of greasy flowers. To the excitement of possibility. And honestly… to experimentation too. Because growing is not only about repeating safe formulas forever. Sometimes it is also about curiosity. Trying things. Learning. Observing. Comparing. Taking risks. Seeing what happens. And this entire harvest feels driven by exactly that spirit. We also brought these girls into the studio before harvest because honestly they deserved their final photoshoot. And wow. They looked incredible. Some shots leaned cinematic and dark. Others focused on vivid greens and flower structure. Some highlighted the towering spear-like colas. Others focused on greasy closeups and texture. And under the studio lights, the resin coverage became even more obvious. The flowers looked almost wet in certain angles. Sticky. Alive. Heavy. Exactly the kind of flower that instantly tells you: “This is not going to stay clean for long once trimming starts.” 😄 Which brings us to next week. Next week will likely focus on: * drying, * trimming, * resin collection, * finger hash, * scissor hash, * handling techniques, * curing preparation, * and possibly the beginning of the washing process if time allows. If not, the washing report will arrive later as its own chapter. And honestly? That feels right. Because this run deserves patience. Now before ending this report, as always: Thank you. To Zamnesia. To Plagron. To F.O.G. To the gear. To the platform. To the community. To the growers sharing knowledge every day. To the silent supporters. To the curious people discovering the diary for the first time. To the macro lovers. To the hash makers. To the flower lovers. To the skeptics 😄 To everyone spending even a few seconds here with us. This plant may already be harvested… but honestly? This story still feels far from over. 🌱 📲 Don’t forget to Subscribe and follow me on Instagram and YouTube @DogDoctorOfficial for exclusive content, real-time updates, and behind-the-scenes magic. GrowDiaries Journal: https://growdiaries.com/grower/dogdoctorofficial Instagram: https://www.instagram.com/dogdoctorofficial/ YouTube: https://www.youtube.com/@dogdoctorofficial Deleted by Youtube - https://www.youtube.com/@TheDogDoctorOfficial NEW Vimeo : https://vimeo.com/dogdoctorofficial Under construction stay tuned ⸻ Explore the Gear that Powers My Grow If you’re curious about the tech I’m using, check out these links: 🔆 Lighting & Environmental Control • Future of Grow — Advanced LED lighting technology https://www.futureofgrow.com/ DISCOUNT CODE: DOG20 • Lumiflora — Under-canopy LED lighting https://lumiflorade.com/ • TrollMaster — Environmental controllers and automation gear (past collaboration) ⸻ Genetics • Zamnesia Seeds — Genetics used in this project https://www.zamnesia.com/ ⸻ 🌱 Soil, Substrates, Boosters & Root Support • Plagron — Substrates, bio mixes, and supportive products https://plagron.com/en/ ⸻ 🎒 Storage, Curing & Preservation • Grove Bags — Curing and storage solutions https://grovebags.com/ ⸻ 📸 Photography Equipment & Tools (Not sponsors, but part of my creative toolkit) • Sony A6700 • Sony full-frame macro lens + few more • Stacking photography workflow - learning • iPhone (for behind-the-scenes shots) As always, this is shared for educational purposes, aiming to spread understanding and appreciation for this plant. Let’s celebrate it responsibly and continue to learn and grow together. With true love comes happiness. Always believe in yourself, and always do things expecting nothing and with an open heart. Be a giver, and the universe will give back in ways you could never imagine. 💚 Growers love to all 💚 📸 P.S. – The Eye Behind the Lens All photos in this diary (for now — except for the ones showing the camera, which I took with an iPhone) are taken with a Sony A6700 paired with a Sony full-frame macro lens and a few more. Photography is part of the story — it’s how we share the fine textures, the glow, and the quiet details that words can’t always capture. I’ve also started experimenting with photo stacking — a technique where multiple images, each taken at a slightly different focus point, are layered together to create one perfectly sharp image from front to back. It’s not digital enhancement or AI; it’s pure photography — a way to reveal the plant’s beauty in microscopic depth, from trichome to petal. You’ll even see a few shots of "ghost me" capturing the shots — camera, lens, setup — because every grow deserves not just to be cultivated, but documented like art. FOR DISCOUNT CODES AND MORE JUST FOLLOW THE LINK https://website.beacons.ai/dogdoctorofficial NEW DISCORD - Official Server Invite Link : https://discord.gg/ksjAkA5T74
Likes
32
Share
@Hawkbo
Follow
Sorry for the delay was in a wedding this weekend came home and been trimmin like a dog the past few days and didnt have time to do the update but I'll do another one before tuesday to get back on track. As of Friday sept 6 its day 46. In the video the plants from back left to right are .. Gelato-> Cream Cookies -> Gelato Middle row from left to right are Lemon A.K 1 -> 6 Shooter-> Lemon A.K Front is Tester 5 -> Lemon A.K -> Tester 26 5 is prob gunna be done first
Likes
10
Share
@CervantiS
Follow
Feb.9 Diy Growbox: 60*60*160 cm Light: 150w led Light Cycle: 12/12 Soil: CocoPerlite in diy Hydrobucket Extractor: 120mm PC vent Running 24/7 Dear Growdiary, Had to find out how to calibrate Ph meter, stupid manual didn't say how get next Ph setting. Found out on Youtube, Thanks to all tutorial uploaders 👍 Day62: Feeding 780ppm @ 6.14Ph 4L Drainwater 169ppm @ 6.50Ph Day65: Bucket seems to dry up fast Water 2L added
Likes
5
Share
@Ensign420
Follow
Greetings fellow growers 🖖 and welcome to my first grow ever. This adventure actually started several months ago when I decided to stop buying flower from dispensaries and just grow my own bud. How hard can it be!? This is actually my second seed of this strain. The first bean sadly died due to over watering (sorry girl, RIP). I was literally watering the cube to the point where water was dripping from the bottom, then heavily sprayed the humidity dome and tray with the vents completely closed. Everyday. Multiple times. I never let the dome or try dry out. So after about 8 days of not sprouting, there was a funky smell of rot. So that was that. Later I learned that rockwool retains a lot of water and can easily drown seeds. So a wet/dry cycle is best for rockwool germination. So even after hours of researching and digging through forums and tutorial videos, I was still under prepared for this journey. Did not consider how delicate the germination phase is. Oh well. Lesson learned. Reset and try again! I hope everyone is safe and stoned during this corona crisis. Just like everyone else in the world, I want this pandemic to be over with. But in the meantime, let's grow some weed! 🖖 [START OF WEEK 01] Day 01 - Monday - 08/03/20 - Total Days: 001 ----------------------------------- - [0830]: Light Schedule: 24Hrs/0 --- Soaked cube in 5.5 PH water for 10 min. Did not shake water out. --- NO NUTES! Only PH'd down to control the PH levels. --- Did not use the default hole (way too deep). --- Flipped cube upside down and made a shallow hole for the seed (less than 0.25" deep). --- Placed seed in and pinched hole close. No additional water added. --- Sprayed the tray and dome with straight water (5.5 PH). --- Vents are cracked opened a for ventilation (about 1/4 opened each). --- Distance between the light and tray was 53" --- AC was set to 80 °F --- Exhaust fan was set to 86 °F --- Room average temp was at 85 °F --- Dome humidity was at 85-99% when sprayed. --- Allowing to completely dry before respraying. - [2200]: Dome and tray were completely dry! Sprayed only tray and dome with more water. Day 02 - Tuesday - 08/04/20 - Total Days: 002 ----------------------------------- - [0845]: Sprayed dome and tray in the morning. Everything was dry. --- Hoping for the best! - [2130]: Everything was dry again, so sprayed dome and tray at night along with a light spray on the cube. Day 03 - Wednesday - 08/05/20 - Total Days: 003 ----------------------------------- - [0830]: Everything was dry again. Resprayed dome and tray. Slightly sprayed cube. - [2125]: Hooo damn!! She popped! Am little stub is visible! Resprayed dome and tray again. --- Still going 24/0 for lights. - [+0033]: Just checked up on her and I swear she grew a bit taller! Getting excited! Day 04 - Thursday - 08/06/20 - Total Days: 004 ----------------------------------- - [0845]: Wow! Went from a little stub to fully sprouted overnight! Everything was pretty dry again so resprayed dome and tray. - [2200]: Tap root is visible! Over 1" long too! Just resprayed dome and tray again. -- Going to prep for hydroton transplant tomorrow! Day 05 - Friday - 08/07/20 - Total Days: 005 ----------------------------------- - [0930]: She keeps growing! -- Added a bit of CalMag to the spray bottle (8 drops to 650ml of distilled water). Resprayed dome and tray. Water was at a 5.4 PH with 141 PPM. - [1045]: Prepped the bubble bucket with 4.5gal of water. Water is high enough to reach about 0.25" above the bottom of the net pot. --- Added 3 drops of Superthrive --- Added 3.5ml of CaliMagic --- Added 2ml Hydroguard --- Then PH'd down to 5.6 --- Solution Strengh: 120 PPM --- Water chiller is set to 20 °C - [1100]: Transplant time! --- Filled the net basket 1/3 with hydroton. When placed in the bucket, air bubbles are not visible, but are slightly below the surface (slight digging will reveal the water/bubbles below). --- Removed plastic on rockwool cube and placed in basket, then filled around and covered with hydroton. Making sure to block any light from passing through the net pot and into the nutrient solution. --- Covered with a half-bottle dome sprayed with the CalMag water from earlier. --- Hoping for the best! - [1300]: Raised Bucket 5" higher. Now light distance is 48" to top of bucket. - [1820]: Lowered tent exhaust temp to 76 °F --- Lowered AC to 75 °F --- Raised bucket even higher so light distance is 30" to top of bucket. - [2300]: Looking good! --- Sprayed dome and surrounding hydroton with more CalMag water. --- Attached timer to light! So new 18 Hrs On/6 Hrs Off light schedule. --- Lights On: [1600] (4pm) --- Lights Off: [+1000] (10am the next day) --- Decided to go with lights on during the evening/night and off during the later mornings/afternoon (the hottest part of the day) to see if temps can be controlled better. --- Please survive girl! Day 06 - Saturday - 08/08/20 - Total Days: 006 ----------------------------------- - [0800]: Everything was dry. Resprayed hydroton and dome. - [2000]: Here first night cycle seemed to go well! Get'n taller! --- Dry again. Removed the dome. --- PH went up to 6.5 so PH'd down to 5.7 --- Ran the top feed drip ring for a bout a minute to wet the hydroton and rockwool with the nutient solution. ---Too scared to leave the top feed on 24hrs (I don't want over water her and cause dampening-off). Will let dry before re-watering. - [2100]: After closer inspection, I think she's looking a bit yellow. --- Decided to add a bit of grow nutes to the bubbler solution. --- Added 2ml of Sensi Grow A --- Added 2ml of Sensi Grow B --- Solution strength after adding more nutes: 176 PPM --- PH went up to 6 --- I hope that the extra chelating properties of the 'PH Perfect' solution is enough of a buffer for proper nutrient uptake. Day 07 - Sunday - 08/09/20 - Total Days: 007 ----------------------------------- - [0800]: Water dropped a bit (mostly due to evaporation) so solution strength was at 190. --- Checked PH again. Was still at 6, so PH'd down to 5.4 --- Ran the top feed for a minute to wet the hydroton a bit. - [0915]: Since she's looking perky but still a bit yellow. So decided to up the nutrient concentration even more before lights out. --- Added 2ml more of Sensi Grow A --- Added 2ml more of Sensi Grow B --- Solution strength after adding more nutes: 199 PPM --- PH went up to 5.8 - [1700]: Checked nutrients. --- PH: 5.9 --- Solution strength: 202 PPM --- Added 4ml of Voodoo Juice --- Added 4ml of B-52 --- PH after adding more nutes: 5.9 --- Solution strength after adding more nutes: 238 PPM - [2130]: Decided to make a new foliar spray to address the continued yellowing. --- Started with 500ml of distilled water. --- Added 3 drops of CaliMagic --- Added 3 drops of Sensi Grow A --- Added 3 drops of Sensi Grow B --- Added 3 drops of B-52 --- Added 1 drop of Superthrive --- Solution strength: 164 PPM --- PH was at 5.9 and did not adjust. --- Gave her one spray. --- Also sprayed the surrounding hydroton. [END OF WEEK 01]
Likes
7
Share
@Lazuli
Follow
Final weeks, i think 2 more So next week (in 4 days after this update) i will flush her again and start ripen feed I flushed her yesterday and fed her again with a lower dose of the same nutes as i was starting to get calcium lockout due to the medium being too accidic
Processing
Likes
13
Share
@Dunk_Junk
Follow
5cm vertical growth this week. Flowers starting to plump up.
Likes
9
Share
Están formando sus preflores y se les ve buen color, no presentan carencias,el agua 💧 de tiego tiene un ph 6 .
Likes
57
Share
W12 - ESTHER 🌱is growing well. Days become longer with more hours of sunlight ☀️ Still can't spot any signs of flowering 🌻 in her 😥🤦‍♂️ I started to defoliate branches from unnecessary leaves. Regularly make some tea 🍵 from them with a dash of virgin olive oil. I need to admit makes me very mellow and tastes delish 😋
Likes
22
Share
Likes
11
Share
Chop chop for Do-si-Dos, another successful grow in the books. A great strain to grow and a pleasure to smoke. This strain will continue in my garden for many more grows.
Likes
Comments
Share