
Likes
Comments
Share


@Smokwiri
Follow
Welcome to my Sun of a Peach by Anesia Seeds diary
The topped one is doing better than the other, if you want to know why, i'm referring to the pictures to see for yourself.
I think it wont take long before the first defoliation will be done, waiting for the older leaves to turn a bit yellow.
This plant loves the organic menu, you can see it...


Likes
38
Share


@PrairieFrostGrow
Follow
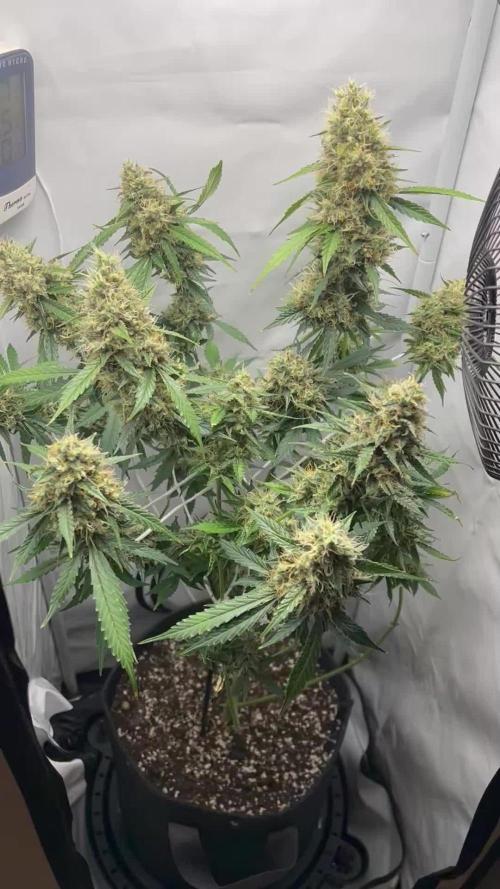
********* Week 11 - February 17 to 23, 2020 (**Days 71 to 77 from head coming out of medium**)
Well another week has come and gone and she is still going💪😃 This was week of not too much to report as well as it is basically just keeping her medium wet, light low, and let her ripen😃 We also started looking at trichomes closer this week🧐🧐
Her frost really developed this week and has turned to primarily all cloudy. Took most of the week to get there. Tops are starting to show more amber in the buds and the lowers still show a number of clear.......didn’t want to rush her and let her go at her own pace. She is going to be running close to 80 days and expect that to be harvest day. She took some time but the leaves are light on Sunday and trichrome colour was a good balance.
Removed any unnecessary LST tie downs. She has really started to “pull-in” on herself with the long branches she has grown. They have also gotten really purple over the last two weeks. Discovered another problem with the darn pH pen this week and it was out by 5 full points. This also explains some of the unusual things I have seen and thoughts of her possibly being a little slow the prior week. It had been 4 weeks since last calibration so it wasn’t out that long but long enough. This girl weathered that curve ball pretty good💪🙏
She went into darkness on Sunday Feb 23rd for roughly 48 hours. Harvest day is around the corner😛 Goal of a two week flush is being achieved......should be smooth smoke!! Will see what using Green Planet’s Liquid Weight all the way to the end will do as well.
Again, this girl has been a surprise from the start with her vigour, beautiful leaves in early veg, and awesome bud to leaf ratio in late flower. She has taken pH and nutrient swings in stride. We had some PK issues late in veg and didn’t fully recover from it before flower set in but the narrow leaves have left for an easy trim job👍 Not rushing her so far has allowed her frost to come on strong and she should have a healthy THC percentage!! I have revisited the list of other diaries for this strain and there aren’t many to go by for comparison but this girl seems to be in there with the other top producers......time will tell. Awesome job Sweet Seeds🙏
More detail:
Feb 17/20 - Day 71
- nothing for feed today.
- SWELLING last night :)
Feb 18/20 - Day 72
- 3L water with Rezin & Liquid Weight @ 2ml/L = 80ppm and 5.8pH.
- Moved her under the HLG light today.
- Buds are getting dense and hardening towards the tops.
Feb 19/20 - Day 73
- 2L water with Rezin & LW8 = 80ppm and 6.1pH.
- still waiting on further ripening of lower trichomes but she is getting close.
Feb 20/20 - Day 74
- 2L water with Rezin @2ml and LW8 @1.5ml = 80ppm and 5.9pH
Feb 21/20 - Day 75
- Nothing today. Dry out.
- she will be done in days from now. Into darkness this weekend at some point.
Feb 22/20 - Day 76
- 2L water with Rezin and LW8 @ 1.5ml/L = 80ppm and 5.9pH.
- review trichomes again today.
- one more day.
Feb 23/20 - Day 77
- into darkness today.
- pot still had some weight so didn’t add water.
Thanks to all for your time and enjoy your week with the ladies in your life🙏😃

Likes
32
Share


@FlynnRyder
Follow
ugh just hate myself right now lol. I feel like it would have done AMAZING had I flipped sooner and SCROG way better. I was timid and had a lot of personal obligations preventing me from staying in the garden as much as I would have liked. Its a grower! and stretches so much in early flower. Stay on top of her but I think she may make some amazing bud based on what I did have drying recently. I wish I didnt mess up the timing but I just couldnt have the second wave be held up by these mistakes and felt it best to let it go

Likes
12
Share


@GeekSayWhat
Follow
Started documenting this plant a little late, apologies. Everything is going great though... started LST just after week 2 and she has a nice flat canopy. I can see 8 or 9 flowering points all nice and even.


Likes
10
Share


@PolezGardn
Follow
week two flower everything looks healthy :D
today i defoliated them
i watered them with 1.5l every 48h
the light i use was set to 80% and it hangs 80cm away from the tops


Likes
5
Share


@Tacofever88
Follow
My first outdoor grow.
This is around week 9 of growth. I got these 2 clones from someone and grew them indoors for about a month or so before hardening them off.
They have been through plenty of training and topping and even more since this picture. As of 5 days ago they were nice and wide so I'm excited to see the growth since the.
I have done a great deal to keep deer and bugs at bay. Neem oil, dog and human urine, dried blood, ground pepper and powdered, oregano, garlic and onion. The site is very difficult to access. Poison ivy, thorns, steep ravine and large logs to climb over. No paths there and I take different ways constantly, as well as through some fertilizer in my wake.
There's a small creek near by and a larger one it fees into about 75 yards away.
There's 3 bags of FFOF and 1 bag happy frog between the 2 holes, with amino acids and great white mixed in as well as some water polymer crystals.


Likes
2
Share


@burnercorona
Follow
Awesome week. Both plants are doing great. One is definitely praying to her Blue God lol.
Likes
3
Share

@AestheticGenetix
Follow
Oh man I'm excited about this one now. I think I may try and fill this tent out with this just this one plant.
Earth box and manual scrog on this Gelato. After getting her in there and realizing how easy she is to bend over and how easy it will be to get a monster plant with this set up, I'm super stoked. This will probably end up being a super long veg time but that's okay.
This is exciting for me. Something different.
Likes
13
Share


@420DeepGrow
Follow
Gracias al equipo de Royal Queen Seeds, en especial a @james, Marshydro y XpertNutrients y sin ellos esto no seria posible.
💐🍁 Gelato #44:
Los criadores de Tyson 2.0 criaron Gelato 44 a partir de cepas finas. Al cruzar la Sunset Sherbet y la Thin Mint Girl Scout Cookies, crearon un híbrido de dominancia índica que asesta fuertes golpes en el cuerpo y la cabeza.
Su contenido de THC del 22% crea sinergia con terpenos colocantes para ablandar los músculos
Mantenla hidratada y con una dieta constante y pasará por la fase de floración en unas ocho semanas. Las plantas de interior alcanzan una altura máxima de 120 cm y producen 400-450 g/m², mientras que sus homólogas de exterior alcanzan los 180 cm y producen hasta 600 g por planta.
🚀 Consigue aqui tus semillas:
https://www.royalqueenseeds.es/rqs-semillas-cannabis-tyson/663-gelato-44.html
💡FC6500: Eficiencia líder en el mercado: la lámpara de cultivo LED FC-E6500, que ostenta un estatus líder en el mercado, es una solución rentable con un PPE de 2,8 µmol/J y un rendimiento máximo de 2,5 g/vatio. Ofrece un PPF alto de 2026 umol/S y es adecuada para una cobertura de vegetación de 1,50 m x 1,50 m y una cobertura de flores de 1,20 m x 1,20 m.
Iluminación versátil y uniforme.
https://marshydro.eu/products/mars-hydro-fc-e-6500-730w-commercial-led-grow-light/?gad_source=1&gclid=Cj0KCQjw1qO0BhDwARIsANfnkv9IIrYSbmJqz8PqpJOIyWwJfp5bc3SGJgUV68USLQ4tjmXDYwoBuAsaAue3EALw_wcB
🚥 MarsHydro ADLITE UV/IR/RED:
Para lograr un crecimiento óptimo de las plantas y maximizar los rendimientos es un arte simple que depende en gran medida de las condiciones ambientales adecuadas. Reconociendo las limitaciones de la iluminación natural y las soluciones de iluminación tradicionales para satisfacer estas necesidades únicas, lanzamos ADLITE. Estas luces especiales UV, IR y roja están diseñadas para llenar áreas del espectro, proporcionando las altas longitudes de onda que las plantas necesitan para un crecimiento y desarrollo óptimos.
🚀 Consigue aqui tu Adlite:
https://marshydro.eu/collections/adlite-supplemental-lights/
🏠 : Marshydro 1.50 x 1.50 x 1.80, carpa 100% estanca con ventanas laterales para llegar a todos los lugares durante el grow
https://marshydro.eu/products/diy-150x150x200cm-grow-tent-kit
🌬️💨 Marshydro 6inch + filtro carbon para evitar olores indeseables.
https://marshydro.eu/products/ifresh-smart-6inch-filter-kits/
🍣🍦🌴 Xpert Nutrients es una empresa especializada en la producción y comercialización de fertilizantes líquidos y tierras, que garantizan excelentes cosechas y un crecimiento activo para sus plantas durante todas las fases de cultivo.
Consigue aqui tus Nutrientes:
https://xpertnutrients.com/es/shop/
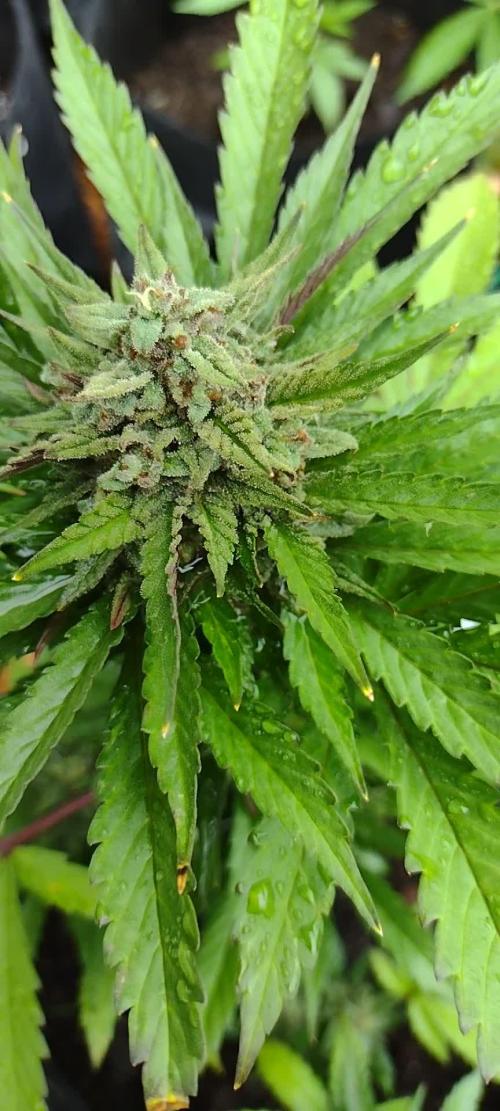
📆 Semana 7:
Equivale a la semana 3, ya que el con el error que tuve en el cambio ellas no florecian.
Los cogollos comienzan a formarse y por fin se detiene su crecimiento. La resina empieza a estar presente en la hojas.


Processing
Likes
33
Share


@ganjaman24
Follow
Started the flush with her last feed! She looks amazing can't wait to see her fill out!
Likes
18
Share


@cannasaxx
Follow
Alles im grünen Bereich 👍🏻💚🍉🌈🎄
Ja, viel gibt es nicht zu sagen außer das ich sehr zufrieden bin mit dem Grow. Adlite IR, UV, Deep Red sind mit angeschlossen, sie sind nämlich jetzt in der Pre-Bloom Phase das heißt 16std. Licht eine Woche und dann 12/12 Umstellung.
Euch eine fröhliche Weihnacht 🎄😇
Likes
4
Share


@amazingautoflowers
Follow
Howdy All,
Happy New Year!
The girls are getting close. The pictures were taken on the 29th. Today is the 3rd of Jan. They are getting close as you can see in the pictures. I began flushing last week with just Regeisys and still giving Terpinator. They are not going to finish at the same time, it looks like I have 2 that will go first and then the other 2 within a week or so.
They smell great, and as the Pics show they are frosty. Don't want the Trichomes to get to amber, maybe 25% of them and we are about there.
I will follow up early next week.
Happy Growing in 2020 everyone!.
Likes
7
Share


@Brickie74
Follow
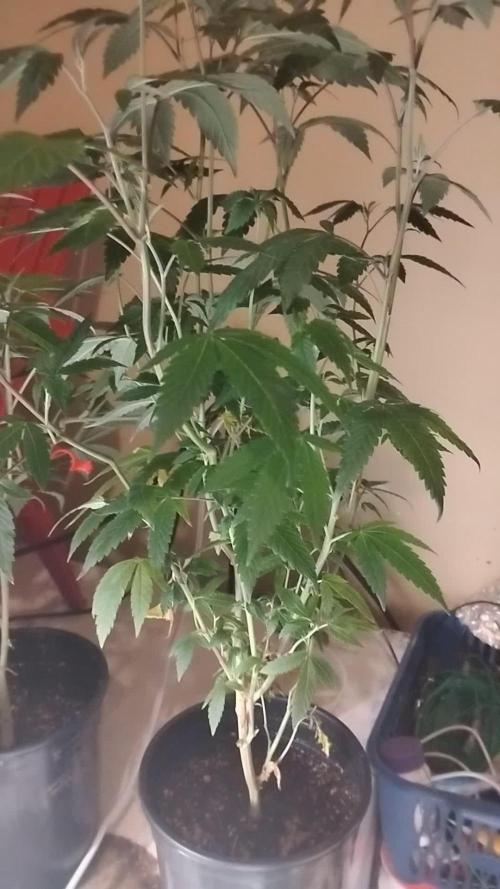
Well this is actually where i started. I had already germinated the Green Tea (Forbidden Fruit x Gelato) seed. Now i think i am caught up. I will try to post as many videos as possible. I suck at typing and with the dictation it takes longer to fix the f_ck ups than to just type what I wanted. I can just explain what I'm doing or what I've done for the week. This is my first ever grow journal so it may be all over the place....we will see.....
I have multiple grows happening at the same time....sometimes I get carried away...lol....and might have a few more than I expected to have. I will do my best to keep things up to date and current. I definitely want to start running right out of the gate and make a pretty decent journal.

Likes
Comments
Share

@JNSGenetics
Follow
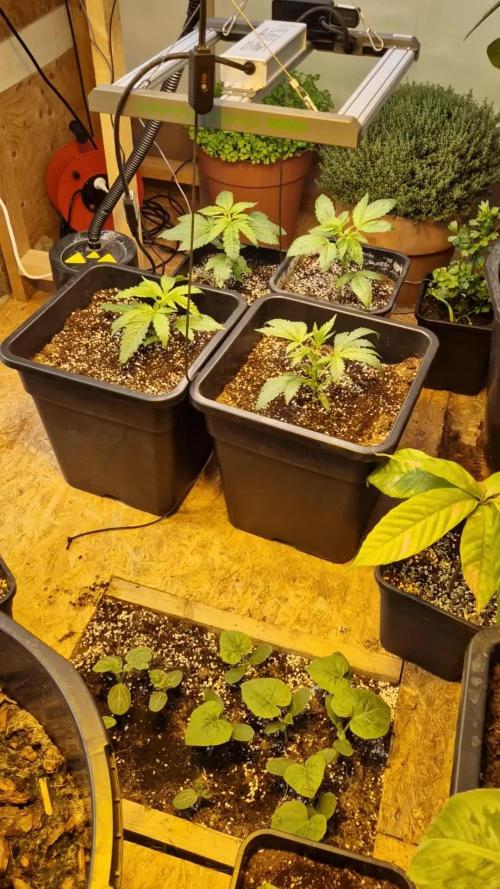
They are growing amazing. I suspect 15 degrees celcius night and 25 - 30 degrees celcius at day. All are growing well. The orange sherbert is the leader though. Lemon tree is a little stretchy and the rest are doing decent with more side branching. I keep 60% relative humidity. All were topped at day 22.

