
Likes
Comments
Share


@AestheticGenetix
Follow
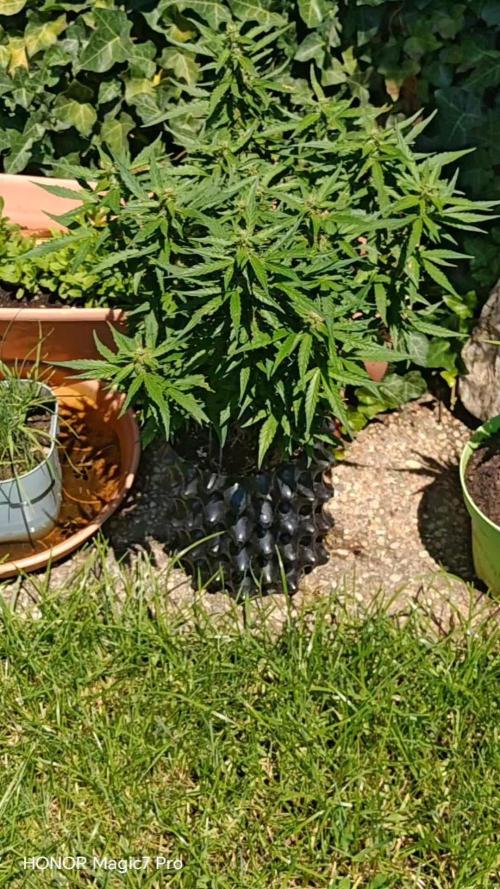
12/12/24 pulling her a bit earlier than i probably could but the largest buds are about 75% cloudy 20% clear and 5%

Likes
6
Share


@colla69
Follow
Waiting to get it up to speed for ScrOGging.
Quite impressed by the roots, loving the Dynomyco.
I also lowered the light a bit.. it should be getting about 20 DLI at the moment.

Likes
5
Share


@JerMeds
Follow
Day 43 Update. Well the tall girl stretched past my lights maximum height. So I LST her main branch. See the first 2 pictures. 😀
Its very hard to capture there true beauty with just pictures so I took a video. So give it a watch.
Well they exploded this week. The big one doubled her size and I had to move her down too the bottom level because she pushed her LED light out of her way to grow past it. Other ones only gained 5-10 inches. Very happy with these girls. 5 of them got defoliated, the other 2 didn't really need it.
I was able to give the 6 bigger girls 2 shots of Bud Igniter before I ran out. I will have to get some more when I have the money.
However I did just get Nirvana at the beginning of the week and they seem to love it. I'm still being careful I don't want to over feed them.
The 7th one is still in veg at day 28. She got LST and defoliated 2 days ago but now you can hardly tell. I don't think she has even started stretching yet. She could be massive.
They are being watered/feed every 1-2 days now.


Likes
1
Share


@Jordantone1
Follow
Nice and frosty, buds are finally looking like they’re getting dense and putting on some weight. Start flushing in a couple weeks when all the pistils get that orange color. So far about 50-70% are orange.

Likes
17
Share

@masterofsmeagol
Follow
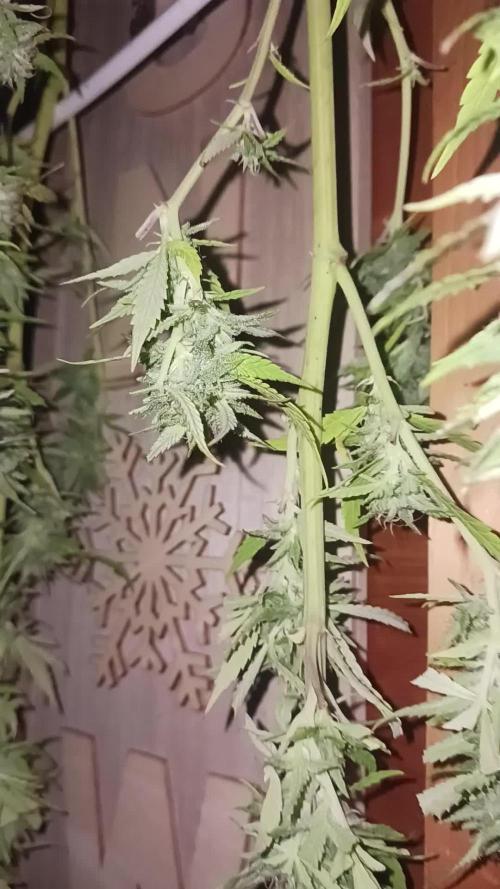
9/13 Took the last special Kush today. I had too. Those fucking locusts were eating more and more. At least the trichs looked good. The second plant is straight fire! They're ALL good. I'll have to do the review. Tenth planet is swelling up and trichs are getting cloudier. They are starting to eat the chem dog too but it needs to bulk up and the trichs aren't there yet. Mk ultra natural may be some of the best quality this year. I'm losing SOME to tje locusts but it seems they avoid the frostier stuff. At least I'm hoping. This is a great plantvand despite the nugs being so tight and stuff it just needs more time and im going to give it to her. Pink kush is actually look9ng like it might finish. But the locusts have STRIPPED a lot of that. I'll keep an eye on them and keep this uodated.


Likes
23
Share


@MartinMedicinal
Follow
Bud is unbelievable its everywhere. Strong smell for sure and ultra sticky. Frost is really coming out. Cut off the enzymes komplete I read in flower it can stress the plant.
45 days from the flip
Always 5.8 ph
600 ppm
A little h202
Plant goes through about 18.9 liter jug every 2 days. I feed it RO water. Try to change and scrub the rez every 2 weeks.
Likes
1
Share

@MrHazeAmaze
Follow
Now that she is standing in a tent, she develops much better. Let's see what she will do in flower mode
Likes
36
Share


@Erpollic3verde
Follow
Bene amici growers come potete vedere la fioritura procede senza molti problemi. Ho innaffiato le piante per la prima volta con una soluzione adatta alla fioritura e ora staremo a vedere come pian piano cominceranno a gonfiarsi i nostri amati fiori.
Le piante iniziano ad emanare un profumo inebriante, le Durban posion stanno già assumendo un colore violaceo mentre le critical sembrano un po' più in dietro. Vi ringrazio anticipatamente nel caso lasciate un like!!


Likes
5
Share

@SlickJames
Follow
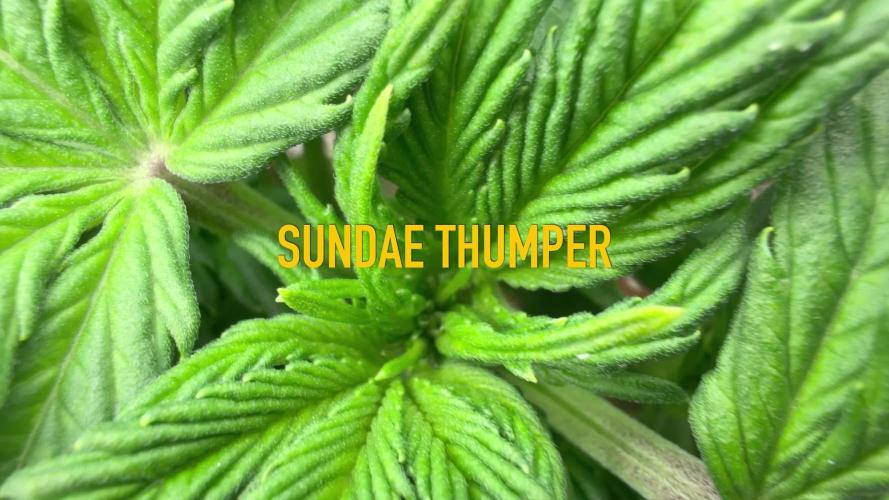
Week 4 was defined by the discovery and correction of a significant salt and nutrient buildup in the medium. On Day 21 (Jan 20), runoff opened at 2100 PPM — well above safe range — triggering an emergency flush. Feed input came in at 418 PPM at pH 6.99, and multiple plain water rinses at pH 5.8 were run through the medium until runoff dropped to 1180 PPM at pH 5.87, EC 2370 µS/cm, salt 0.11%. Medium was flushed down approximately 920 PPM in a single session. No further watering for 24 hours following the flush to allow the root zone to stabilize.
Environment ran well overall — temperatures holding 76–78°F lights on and ~70°F lights off, humidity steady at 68–70% with brief transient dips when the humidifier tank ran empty. VPD tracking ~0.9–1.0 kPa throughout the week. PPFD running 380–420 µmol/m²/s. CO2 ambient with no supplementation.
Day 25 (Jan 24) feed came in at 642 PPM at pH 5.91 — notably the water temperature was very cold at 4.7–6.0°C, well below the ideal 20–22°C range. Cold water can slow nutrient uptake and stress roots. Worth monitoring in future sessions to ensure water is allowed to reach room temperature before feeding. No runoff recorded this session.
By end of week, runoff had settled to 1440 PPM at pH 5.8–5.9 — trending in the right direction. Feeding plan reset going into Week 5: ½ gallon at 600–700 PPM, ¼–⅓ strength veg nutrients only, no boosters, pH 5.9 target with 10–15% runoff. Goal was a gentle nutrient reintroduction to signal roots to resume uptake without risking a salt rebound. The Sundae Thumper continued developing steadily through the stress of the flush week.

Likes
24
Share


@Pierrougarou21
Follow
bonjour les Growmies .merci de venir voir mon journal de culture.Cette semaine j' ai commencé a rincer la demoiselle en attendant que ces trichromes soient près

Likes
175
Share


@the_curious_grower
Follow
last week i got a lot of tips and tricks from some awesome growers on this platform. they shared a lot i didn't knew before which i'm trying to implement to my grow. i bought a jar of dark molasses which i will be using throughout the watering of the plants. i'll be using 1,5-2 spoons on 5 Liters of water. they will stimulate the soil microbes and give me the nutes my plants began missing during the last weeks.
i haven't add that much photo's this time, do you like it like this or should i add more? and what kind of photo's?
the plants from left to right in the picture and the current height of the plants are:
gorilla breath 1#: 212 cm
gorilla breath 2#: 208 cm
Sapphire scout: 198 cm
Sugar breath 1#: 195 cm
Sugar breath 2#: 180 cm

Likes
1
Share

@magicbudsgrow
Follow
Flora com regime 13/11.
Cultivo sem poda top com Vega curta para fins de seleção genética.

Likes
7
Share


@BlazingAngel420
Follow
Boy oh boy look at these babies grow I'm studying them more and more to ensure they are happy. I've notice that gelato 41 is producing bud spots like thats what it was ment for. Tropi cherry is coming along but not as fast as G41, and runtz muffin im a little disappointed in but i believe that is my fault for im still new and have only grown 1 plant prior to these 3. It also doesnt help i had to cut the vegitation cycle by 2 weeks as well. and further more I was at least able to give 2 clones away, the rest were still good but couldn't find them homes so i had to throw them away. Next time I'll have all the room they need and can't wait to make mother plants of my favorites.


Processing
Likes
24
Share


@Cogollo_eu
Follow
**Encontrarás la traducción a español al final de la descripción**
From/Desde: 23/09/19 || To/Hasta: 29/09/19
From day/Desde día: 63 || To day/Hasta día: 69
If you like this week, please hit a like, it costs you nothing! 👊. Thanks in advance 😉!
-----IMAGES & VIDEOS-----
I'm sorry to not having more Alice timelapses, the tent is too small to record some decent videos due to Alice size, a think that I must have in mind for upcoming grows.
-----WEEK SUMMARY-----
One week more that Alice overpass my expectations, I'm really not having any time to do nothing to her, but she's still beauty. Those buds are looking amazing on it's start, I can't wait more to see those full buds formed.
I'm not vey proud of using mineral s#@ts, but i already tested it and results are really appreciable. Anyway I'm not using it in excess, just the day 29 and probably at October 8, just 2 applications. I'm also using Bloombastic, Organic PK Booster & Overdrive.
-----WATERING CALENDAR-----
25/09/19 DAY 65 - 3 l with Rhino Skin, Bud Candy, Big Bud, MegaBud (1 g/l) @ (1.9 EC | PH 6.4 | 25.7ºc)
29/09/18 DAY 69 - 4 l with all week nutrients -(MegaBud) @ (1.65 EC | PH 6.2 | 25ºc)
*****ESPAÑOL*****
Por favor, si te gusta esta semana dale un like, no te cuesta nada 👊. ¡Gracias por adelantado 😉!
-----IMÁGENES & VÍDEOS-----
Siento no tener más timelapses de Alice, el armario es muy pequeño y no me permite grabar videos decentes dado el tamaño de Alice, una cosa que he de tener en cuenta para futuros grows.
-----SUMARIO SEMANAL-----
Una semana más que Alice sobrepasa mis expectativas, no estoy teniendo tiempo para cuidar nada de ella, pero por lo que parece ni falta que le hace. Los cogollos se ven hermosísimos en su inicio, no puedo esperar a que se unan y engorden.
No estoy muy orgulloso de usar mi@#¢das minerales, pero este producto ya lo he probado y los resultados fueron muy buenos. De todas maneras uso muy poquito, 2 aplicaciones durante todo el periodo de floración. También uso los demás PK's así que no hay problema.
-----CALENDARIO DE RIEGO-----
25/09/19 DÍA 65 - 3 l Con Rhino Skin, Bud Candy, Big Bud, MegaBud (1 g/l) @ (1.9 EC | PH 6.4 | 25.7ºc)
29/09/18 DÍA 69 - 4 l Con todos los nutrientes semanales -(MegaBud) @ (1,65 EC | PH 6,2 | 25ºc)

Likes
19
Share


@Grey_Wolf
Follow
FBT011 Northern Lights From Fastbuds 2nd week of flowering 29th December 2019
Well she's shot up a bit since last weeks update and now sits at 54cm from soil to tip. No noticeable aroma as of yet but there is some resin as the buds feel slightly sticky when gently rubbed. I fed her some Mr B's Green trees Bloom mix and a 1/4 tspoon of Great white.
*******As a side note the two cuttings I took have definately taken as they have both started to show their preflowers and have some tiny new growth.
So I mmediately sprayed with my STS Reversing Spray *******
Cheers for looking in and I'll be back next week in 2020.

Likes
2
Share


@Cornfed
Follow
This week I added a new controller to handle up to 8 functions. I installed a new heater, my old humidifier and some LED strips to the controller. Targeting a VPD at 1.0 day and night.
Trying to keep the nutrient ppm under 900 and ph at 6.0 in the reservoirs. Ordered a second ph pen because I don’t trust my readings. Will be here by Thursday.
Friday:
Checked the ppm in the reservoirs and it’s at 1,000. Added more RO water with extra nitrogen to bring the ppm level down to 925.
Saturday: I installed an updated AC Infinity controller 69 Pro Plus (controls 8 pieces of equipment) which allowed me to add a humidifier, corner LEDs and a heater to the controller. Overall I’m extremely impressed with this AC Infinity equipment. My VPD is within the range I want to achieve (.8-1.1). I programmed it to maintain 78 degrees and 67% humidity during the day, 73 degrees and 63% humidity at night. Charts posted also show the impact of an open tent compared to the closed environment. The heater is constantly pushing fresh air into the tent, so I don’t need to cycle the exhaust fan often.
Rewired the tent again and moved the controller later that night. I mounted the controller on the wall. Added Mars Hydro UV/IR lighting to fill out all 8 slots on the controller.
Sunday: I checked the ph in the reservoirs (6.8….i had filled it with 6.0 ph) and the ppm (1200 ppm…I had filled it with 900). So evaporation and possibly a mismeasurement of ph. I topped ff reservoirs with slightly stronger nutes and adjusted ph to 5.8 in the reservoirs. Poor magnesium absorption could be driving some leaf yellowing. Effective tomorrow, I’m switching over to Heads Formula which consistently feeds GH Flora series nutes at Micro (6ml/g), Bloom (9ml/g) and cal mag (3ml/g). Turned on the UV/IR lights for 3 minutes every 8 hours. I’m easing the plants up to 5 minutes every 6 hours which will provide the recommended 20 minutes of IR per day. This will help the plants stretch a little more.
Monday: checked ph and ppm in reservoirs. 6.1ph and 880ppm. VPD remains stable except when I open the tent.
Tuesday: checked ph (6.4) and ppm (880) in reservoirs. Added .5ml of ph down to two reservoirs. Still see slight yellowing between the veins but it’s not getting worse (might be improving). Adjusting ph down to 6.0 target might have solved this. The plants grew by 1-2” last night…..is the infrared light working already?
Decided to mix up fresh nutes for the reservoirs following Heads formula. 6ml Micro and 9ml Bloom per gallon of RO water. Added 5 ml of CalMag too. Ending ppm was 1080 which is too high, so I diluted down to 880 with RO water. 6.0 ph.
Wednesday: plants grew another .75 inches last night. I topped above the 5th node.
Thursday: added RO water with heavy cal mag to reservoirs to increase amount of CalMag available.

Likes
13
Share


@FlavoursUk
Follow
Day 15 - The start of week 3 and the girls are really taking off, from 1-2 Inches of vertical growth daily. Consuming a good amount of water, almost leaving the bucket empty. lol.
Lightly defoliating to keep the bud sites exposed to light, as they get bushy very fast and recovery is only taking a day for them to bounce back. Pretty happy with how things are going right now. Slightly increased the EC by .2 but not enough to burn them.. which is the goal. Grateful for my trolmaster unit as it has made keeping tracking of my parameters much easier and effortless.
Day 16- Topping up the res with RO water every two days. Otherwise I'm sure it would be empty! Pistils are showing and the bud sites are very visible. Seeing one pheno with slightly more sativa dominant traits. Luckily I took clones so I can run the best pheno next time around, although all these plants are special. Still going through the flower stretch. Excited for what is to come. Stay tuned for the results.
Day 18 - As you can see, the difference is night and day over a period of 2 days they have had an explosion of growth. They were
heavily defoliated on day 17 and bounced back within a day. Happy plants preying. Bud sites are forming everywhere now. Not much to report. Until the end of week 3 in a few days. Bring on week 4.
Follow my Instagram and YouTube (link in bio)

Likes
41
Share


@MrHightimes
Follow
maaaan, i cant wait to grow more of this! such a pretty plant!!!! Gonna be ready soon!