


Likes
Comments
Share


@Itashish
Follow
Jour 76
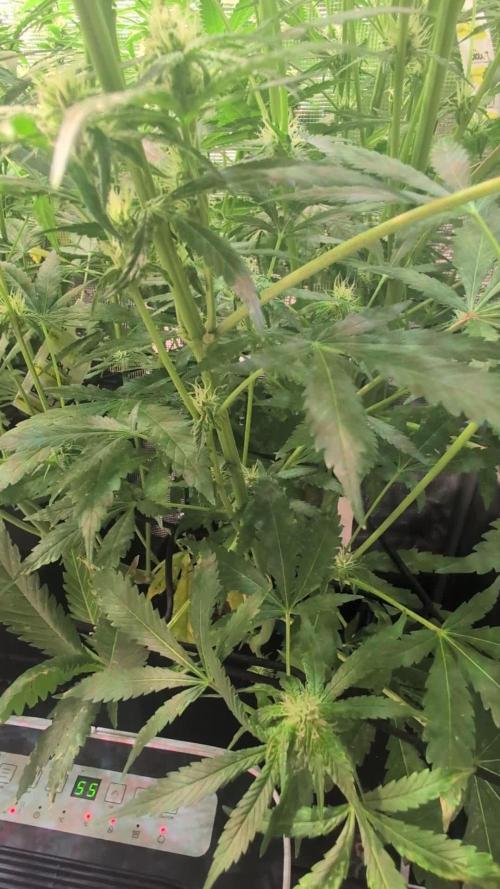
Et commence à développer leur pistils
Les plantes sont saine et prennent beaucoup de hauteur je dois en palisser quelques une
J’ai fais un thé de compost oxygéné pour les booster pour la floraison
Recette :
5g cendre coque de ricin
25g biochar
5 gr levure de bière
4gr pollen d’abeille
7gr ortie micronisé
5gr spiruline
10gr tourteau de karanga
8gr Kelp
20gr zéolithe chabasit
5gr de consoude
3gr hydrolysât de Kelp
5gr vers de farine
12,5gr bactérie soluble
5gr levure saccharomyces cerevisae souche myco 6420
12,5gr de prêle sauvage sécher
125gr lombricompost
2gr big foot mycorhize gold
Mycorrhizae (400 propagules per gram)
Endomycorrhiza
Glomus aggregatum -100 propagules/gram
Glomus etunicatum – 100 prop/gram
Glomus intraradices – 100 prop/gram
Glomus mosseae – 100 prop/gram
Bacillus subtilis – 350,000,000 cfu/gram
Bacillus licheniformis – 200,000,000 cfu/gram
Bacillus megaterium – 200,000,000 cfu/gram
Bacillus simplex – 200,000,000 cfu/gram


Likes
1
Share


@Nvchods3
Follow
esta semana se le realizo el lavado de raiz.
pronta cosecha de la planta.

Likes
3
Share


@MicroHidroGrow
Follow
Día 36.
Estamos en 6ta semana. Los esquejes se atrasaron debido a que han sido días muy fríos y no he logrado enraizarlos. Decidí poner el extractor de aire junto con la bomba de aire, así solamente se prende 15 minutos cada hora. Así estoy logrando temperaturas mayores a 24°C en el indoor y así voy a lograr el enraizado. La planta ya tiene un tamaño que ocupa casi todo el indoor. Pero lo importante es que la voy guiando y ya estoy proyectando como va a ir cada rama. El tamaño va a exceder lo que esperaba, pero aún así creo que si logro lo que tengo en mente, voy a sacar muy buenos resultados. Igual no me voy a arriesgar demasiado, así que si contando 10 días desde ahora, no logro que los esquejes enraicen, voy a pasar la madre a floración sola. Cómo pueden ver, las ramas están bastante gruesas, y el la ramificaciones van ganando su lugar cada una. Las raíces son demasiado grandes, aunque sé que voy a poder poner la planta en el sistema de arriba igual, aunque me voy a tener que ayudar de algo para meterlas. Es importante no utilizar las manos, ya que se pueden transmitir muchos hongos.
Voy a seguir actualizando e ir viendo que pasa. Pero ya estamos en los últimos días de crecimiento, haya o no esquejes. Incluso puede que ya pase la planta al indoor de arriba para darle mayor libertad de crecimiento. Esto me va a servir para tlmar en cuenta en la próxima camada que se vendrá. La idea de esto es hacer las cosas rápido, y no en gran tamaño. Pero siendo que ya estoy en el baile, no me queda otra que bailar.
Día 40
Los esquejes no estaban enraizando, así que decidí cambiarlos de lugar y los puse arriba de la luz, donde les da calor y luz tenue. Espero que ahora si agarren.
Y hoy fue el gran día, pasé la planta madre al módulo de arriba. Pero lo voy a dejar una semana más creciendo. De esa forma veo si los esquejes llegan a agarrar a tiempo. Y además tuve un problema en el trasplante. Primero que la planta se hizo más grande que lo esperado, y la raíz también. Cuando la pasé, hubo contacto de la raiz con prácticamente todo lo que había cerca. Sumado a que se enredó en el oxigenador, así que quedó una pidra difusora en la raíz.
Dado el alto riesgo de haberla contaminado con algún hongo, le puse una solución de agua con agua oxigenada, recirculando continuamente, para lavar las raices y de paso bajar el stress de teansplante. Mañana veremos cómo arranca el día.
En el aprendizaje me llevo que en la madre, es mejor hacer un corte en el primer nudo, o dejar las ramas del segundo y quitar las del primero. Y así que queden sólo dos ramas, para luego dejar a los esquejes en el medio. Eso planeo hacer con la próxima variedad.
Entre tanto ahora sólo me preocupa que la raíz no se haya contaminado en el traspaso. Ya en 8 días estaré pasando a floración si no hay esquejes. Si llegan a agarrar, habrá que dar unos días de crecimiento hasta que alcancen a la madre en altura. Pero ya está todo en definición. Ahora sólo queda esperar y seguir guiando a la planta. Ya tengo ganas de poner la próxima, pero falta bastante para eso. Tengo 10 semanas de flora, así que recién en 5 semanas voy a poner la nueva madre.
Likes
9
Share


@Headies
Follow
So I had a few issue. I over watered early on, took them out the seed tray early, started feeding them a week or two late, no humidifier yet but they recovered well.

Likes
10
Share

@CanOli95
Follow
Diese Woche verlief sehr entspannt. Wir haben nun Tag 28 und somit ein Drittel der Zeit geschafft. Der Stretch scheint gestoppt zu haben, zum Glück.
Die Dame steht gut im Futter, sodass wohl keine Nährstoffe wirklich nötig sind .
Ein leichter Tip Burn ist erkennbar, was mich in der Entscheidung bestätigt.
Interessant ist vor allem die Struktur der Blüten: sie scheint die Calyx wie bei einer typischen Sativa Dame eher nach oben zu stacken, anstatt gleichmäßig zu allen Seiten. Ich bin mal gespannt ob es bei dieser Form bleiben wird, immerhin passt es auch zum starken Stretch , wie man eine Sativa ursprünglich eingeordnet hätte. Die Auswahl der Eltern dieser Dame wurde ebenfalls gut zur Einordnung passen.
Alles in allem scheint diese Dame sehr pflegeleicht zu sein, abgesehen von dem starken Stretch.
Bis jetzt gefällt sie mir echt gut. Mal schauen was da noch kommt 🌻 um den Stretch besser darzustellen, habe ich mal ein kleines Video gemacht. Interessant ist der Vergleich vor allem mit der Wizard Trees aus dem anderen Diary.
Processing
Likes
32
Share


Likes
12
Share


@HIAZ_urbanbudfarmer
Follow
Every thing has been going well, plants looking very lush, & healthy, put on a bit of a stretch, added 2nd scrog net to train them through as they stretched. Been busy lollipoping & defoliating lower growth to allow more air & light through. Removed a lot of lower popcorn branching & lower bud sites, so they can now focus & send all their energy to the top bud sites. Going very well.
Likes
19
Share


@Troy_Farms
Follow
Entering the 12th week and she is looking and smelling great. Lots of bud sites developing nicely. Super happy with how well the mainlining worked out for this auto. And still few more weeks still to finish up! Cheers 😎

Likes
42
Share


@BigDickBazuso
Follow
Without a doubt the best bud I‘ve ever grown! I have nothing but positive things to say about the genetics of this plant. This was my first mephisto grow so very impressed. Buds are sticky and dense after weeks of 90-100 degree weather. No signs of stress or slowing. The plants tackled every hint of def or toxicity with ease. Got a little less yield than I expected, but not complaining as quality is incredible!!
Buds dryed for 6 days and cured for 7 as of review. Very dense and sticky.
Yielded 5oz dry A-bud, 2oz dry fluff, and 15oz of wet trim. Pressed the fluff with a 11% yield. Rosin is budder-like and smooth.
EDIT: Later edited on aug 17 to provide cure update.
—-smoke report—-
The finished cured bud reeks intensely of diesel, raspberry, and hash! The smoke itself is light on the lungs and heavy in texture. Smoke hints at flavors of raspberry and caramel with sweet notes.
High produces strong headband and couchlock effect. Potency is high without a doubt. Smoking a few under 30 day cured bowls produces a high for a solid 3-6 hours even at a high tolerance level.
As of mid-august, the cure is complete and stone has intensified. Feels waaay more indica this time. Fully cured bud can knock a seasoned stoner the fuck out. Blew my expectations out of the water
This was my first mephisto grow and it made me a diehard fan. Can‘t wait to grow more later in the year!
Processing
Likes
12
Share


@Tazard
Follow
Wow what a week. We are at 48” as of day 20 on the Enemy of The State plants (both are the same height now). The two White Criticals were 36 and 38 inches from the top of the tanks and the taller tops on Purple Purple are about 34”. Wedding cake is about 30” now. All my plants seem to love the 5.2 pH. Enemy of the state are on a lighter feed of about 950ppm and wedding cake is still eating from a vegetive reservoir at 1125ppm. Thanks for looking!

Likes
7
Share


@Cannabotanica
Follow
Pour cette 20ème semaine, le SCROG explose littéralement. La nappe de fleurs canopée + sous canopée fait bien 25-30cm d'épaisseur. J'ai compté une centaine de têtes sur moins de 20cm2. Les fleurs sont enormes et commence a resiner pour la AK Skunk (landrace). Tres beau SCROG

Likes
9
Share


@Guerillafarm
Follow
Ich habe die kleinen triebe von unten entfernt aber keine Blätter.
Mein zelt ist 100x100x200cm groß.

Likes
3
Share


@DogDoctorOfficial
Follow
Folder 13 — Blue Waffle — Pheno A
Week 2 Vegetation — A New Home Beneath the Surface
Welcome back, growers!
This week marks one of the biggest milestones since germination.
After spending the first week establishing a healthy foundation inside the starter container, Blue Waffle Pheno A has officially moved into her permanent home—a Plagron 8L Premium Coco Grow Bag, where the next stage of her journey truly begins.
Transplant day is always exciting. While the leaves tell us how a plant is feeling above the surface, it’s the roots that reveal the real story. And this week, that story was a very encouraging one.
⸻
The Environment
The Zamnesia ecosystem continues providing a stable and comfortable environment for these young ladies.
Current room conditions:
• Temperature: 29°C
• Relative Humidity: 68%
Airflow remains unchanged from last week:
• Extraction Fan: Level 5
• Circulation Fan: Level 4
Lighting also remains steady, with the LED running at 27% intensity, drawing approximately 86 watts from the wall.
At this stage, consistency is far more valuable than chasing rapid growth. Stable environmental conditions allow the plants to focus their energy where it matters most—building roots.
⸻
Feeding Program
Now that the plants have entered their coco home, the hydroponic feeding strategy officially begins.
The nutrient solution remains intentionally simple:
• Plagron Hydro A
• Plagron Hydro B
• Plagron Hydro Roots
Reservoir parameters:
• EC: 1.26 mS/cm
• pH: 5.83
• Solution Temperature: 23.1°C
Hydro Roots continues playing an important role during this stage, encouraging the rapid development of fresh roots as the plants begin colonizing their new substrate.
The objective isn’t explosive top growth just yet.
Everything starts beneath the surface.
⸻
Transplant Day
Last week the Plagron Premium Coco Grow Bags were slowly hydrated using distilled water, allowing the coco to expand evenly while creating a perfectly moist environment before receiving the plants.
Rather than forcing the transplant into a dry substrate or flooding the bags at the last moment, the coco had an entire week to stabilize.
When transplant day arrived, the process couldn’t have gone smoother.
Using the original nursery pot as a guide, I carefully created a perfectly sized cavity inside each coco bag. This simple step allows the entire root ball to slide into place naturally without compressing or disturbing the surrounding coco.
Sometimes the smallest details make the biggest difference.
A gentle transplant means less stress.
Less stress means faster recovery.
⸻
A Look Beneath the Surface
Before placing Blue Waffle Pheno A into her new home, I couldn’t resist taking a closer look at her root system.
And I’m glad I did.
While the roots haven’t completely filled the container yet, they are beautifully distributed around the entire root ball. Bright white feeder roots are visible across every side, with countless fine root hairs actively exploring the growing medium.
This is exactly what I was hoping to see.
There was no need for a heavily root-bound plant before transplanting. In fact, moving them at this stage allows the roots to continue expanding naturally instead of beginning to circle around the nursery pot.
Healthy roots don’t need to be massive.
They simply need to be active.
Blue Waffle Pheno A is giving every indication that she’s ready to explode into her new environment.
⸻
Blue Waffle Pheno A
Above the substrate, Pheno A continues to impress.
The compact structure remains intact, with tight internodal spacing and excellent symmetry across the canopy.
The leaves display a healthy green colour, while the petioles have started developing subtle purple pigmentation—a characteristic that can often appear naturally in younger plants depending on genetics and environmental conditions.
Most importantly, the plant showed virtually no signs of transplant shock.
Only a short time after moving into the coco bag, the leaves remained upright and turgid, while fresh new growth continued emerging from the center.
That’s always one of the best signs a grower can hope for after transplanting.
It means the plant is already getting comfortable in her new home.
⸻
Looking Ahead
With the transplant now behind us, the next objective is allowing the roots to colonize the entire Plagron Premium Coco Grow Bag.
As the root system expands, so too will the canopy.
The coming weeks should bring noticeably faster vegetative growth as Blue Waffle Pheno A begins taking full advantage of the increased root volume and hydroponic feeding schedule.
For now…
Healthy roots.
Healthy leaves.
Healthy future.
Exactly what every grower hopes to see.
⸻
Thank You
A huge thank you to everyone following along on this journey.
Special thanks to:
• Zamnesia for the incredible genetics, equipment, and complete ecosystem that make this project possible.
• Plagron for supplying the Premium Coco Grow Bags and the Hydro nutrient line that now powers this grow.
• GrowDiaries for providing an amazing platform where growers from around the world can learn from one another.
• And finally, thank you to every member of this incredible growing community. Whether you’re just starting your first grow or you’ve been cultivating for decades, your support, advice, and passion make this hobby something truly special.
The roots have found their new home.
Now it’s time to watch Blue Waffle Pheno A reach for the sky.
Growers Love and Keep Growing. 🌱💙🍁
Likes
12
Share


@BeHappyNtoke
Follow
Man I can not wait til she finishes drying and curing she smells amazing I will be trying to reveg her so I can hopefully try my hand at her again this time in a huge pot she definitely deserves it
Likes
4
Share


@Nookandplant42o
Follow
This girl is surprising every week her growth has doubled after changing from 20/4 to 18/6 I noticed that she accepted the nutrients better she took more color height referring to her sisters she is bigger, beginning of flower, something fast even as sprinters are accepting increases of 100 ppm by irrigation without burning the lights are not so close to the canopy, usually the autos that don't grow much, come in search of lights elongating their grow more without light deficit, (strong light, further from the canopy.

Likes
18
Share


@Barcelona_Farmers710
Follow
Esta semana apesar de tener temp Máxima de 28... se va recuperando bien de las podas, el led de TodoGrowled funciona perfectamente para sus 55w farmers!🍁


Likes
4
Share


@Reaper
Follow
6March: Start flower
first 2 weeks only blooming with 200watt
the purple kush didnt make it it was a bad seed,


Likes
9
Share


@Sauce_XL
Follow
3.2.2024: Start of week 7 from seed. Fed 1/4 fox farm trio nutes plus calmag. 64oz at 6.5ph. There's some clear nute burn on the leaf tips but she's doing well. Main cola is stacking nicely. Few random orange hairs here and there.
3.3.2024: Day 44 from seed. Steady as she goes. No change to current state.
3.4.2024: Watered 64oz at 6.5ph. Chugging along.
3.5.2024: Day 46. Buds are forming nicely. Clipped 8 fan leaves blocking bud sites.
3.6.2024: Day 47. Fed again at 1/4 strength probably around 3/4 gal at 6.5ph. Runoff is 6.49 at 1100ppm.
3.7.2024: Day 48. Nothing doing today. Main cola is stacking nicely, outer branches have some good but smaller buds. Long way to go but no idea how these will fatten up.
3.8.2024: Day 49, end of week 7 from seed. Watered 96oz at 6.38ph. Runoff ppm at 1050 with ph at 6.7. She appears to being doing great. Super stoked to see the bud development over the past week.
Likes
46
Share


@GanjaReaper
Follow
Day 21:
So we are currently in day 21, I finished all my work for my growroom.
They where pushed into flowering 5 days ago. They always need to settle first before even turning into that stage.
So my gues that in the end of the next week we will start to see the first indicators.
I still gave them veg nutrients this week since they are still in growing stage.
I did notice that many plants have weak stems and where sloppy underneeth. Didn't liked that, so in order to have thicker stems and branches I decided to top all the plants ( not showing in these picutues, i did that after making the pictures)
Topping your plants will create stronger thick stems and branches!
Also removed the first 1-2 internodes on each branch. I kept 5 or 7 branches each plant. I can't remember the ''science'' behind it but I have been told that many years ago by fellow OG Dutch growers and Family members.
Anyway It is importend to have uneven branches. So 5, 7 or even 9 but never 6 or 8.
Normaly I would have loved a huge main cola and it is known by many amnesia growers to not top the plants because they make beautifull thick main colas.
On the other hand, when having this much plants on each m2, it will create weak stems and branches.
I rather have strong plants with thick stems and branches to transport all nutrients properly and not breaking when having buds on them or having to mayor support them.
The leafs, stems and branches look fine to me. No stress or deficiencies. 1/3 of them like to drink thought which is a good thing but it really enjoying.
Now I have to weigh by lifting the pots which one needs more or less feedings lol. Instead of giving them all like 5 seconds of water.
Might show you guys my feeding ''barrel'' next week. It is a 250L one.
Untill next week.
