The Grow Awards 2026 🏆 


Likes
Comments
Share
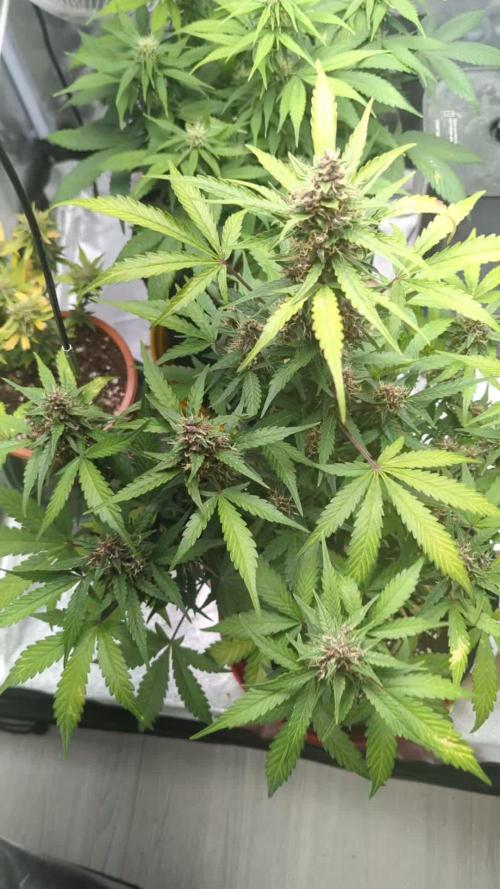
@gottagrowsometime
Follow
Weeks 7-9 Days 42-63-5
Both phenos got defoliation done to them and opened them up for fattening. They've stopped putting upwards hight and on day 42 I done their only heavy defol and put them back under my P1000 (100W led) which did this plant from start to finish. Kept steady feeds. The last 4 days or so it was put on water. After 6hrs dark rest both were chopped and hung upside down.
(More indepth 3 week review)
Phenos at the end of week 6 here, finished preflower both are around 62-65cm. Been the general hight for my other 2 pheno pot grow . Then on day 42 I done a hard defoliation and just put them back under the light for 3 weeks. Steadily kept feeding Xpert Nutrients but not in the way I should have. But, for the short time (9 weeks) and just making sure that the substrate never ran dry. I got some decent results. Again these were more tests. As I like to see how breeders phenos react in similar environments and you can't get closer than being in the same pot, got 2 small but more or less twins of Auto Fractal, giving me around 45-50 dry grams
Nutrients were given sparcely but always made sure NPK feeds were no longer than 3 days apart. Had I given everyday and focused more on flushing etc. Id of gotten bigger phenos. But, it was a test. And I got to try their autos and now know that I'm most cases you won't get 7-10g plants. Just give enough space and don't stress and you'll get big autos. Put on good bud mass just under a 100w in a crowded tent. Got really fruity bud and overall very happy with my 2 small lush phenos
1st 2pheno (separate strains, autos kabul/opium also showed how steady the genrics are I've got a 5 pheno SCROG of Euphoria fem by Divine coming along nicely.
I also have a white widow auto by divine in an 11L pot and its really big its still weeks out from being done. Proving to me. Their gentics are 🔥 and give good results if you put in the right effort.
Thanks to my sponsors & all who stop by.
Discount code from Xpert nutrients
20% off code:GGST

Likes
2
Share
@kerby
Follow
This plant is fo amazing I can’t hardly wait it’s just dripping with rezon and just gleaming in the light just about to stop feeding I’m going to probably flush with just water for 3-4 days then stop watering completely for 3-4 days then early mourning on that last day of dehydration chop chop chop
Likes
114
Share
@GMSgrows
Follow
First off. I DO NOT USE TERRA AQUATICA NUTRIENTS. I USE FLORANOVA GROW AND FLORANOVA BLOOM
Girls are lookin pretty. The Gelato is one big fat lady. She is trying to overtake the Breakup Cake and the Silver Widow. No problems to mention except the weight of this plant. Stems grow out and ge weighed down by their size. Measured one of the side branches. 6ft 3" on the side branches. If you could straighten them out, this plant would be over 12ft wide.
The Silver Widow is 6ft now and the Breakup Cake is over 7.
Thanks for the looks like and interest in my grows.

Likes
5
Share
@Saintgrower
Follow
Think these girls are about ready gonna check trichomes and see where we’re at but not far I reckon.
Likes
Comments
Share
@XanHalen
Follow
June 16: Topped and LST'd
Temperature: [Day 75-78°F/Night 73 - 75°F]
Humidity: [50 - 60%]
Weekly Comments:
J16: looking good, topped 2/3 just for fun to see.... ppfd around 4-500, next week is when I will begin runoff-waterings as I expect by then the roots will be well established post transplant
Likes
18
Share
@RakonGrow
Follow
Tag 82:
Hab mich nun doch entschieden , da die Trichome wirklich zu 90% Milchig sind , die Dame am Stamm abzuhacken . (Extra ein kleines Beil gekauft (scherz)) . Dann im Stück einfach Kopfüber . Abluft ist an , Ventilator unter der Spitze . Jetzt noch 4-5 Tage warten (je nach Temp und Feuchte) . Und dann schauen wir mal was es wird .Für mich wichtig , viel Feuchtigkeit im Raum , ich will das sie auch nach dem Trocknen noch kleben . Ergo hab ich den Stoftopf drinne stehen gelassen .
Tag 82-88:
Kopfübertrocknung
+ Temperatur : 21°C - 23°C)
+ Lüftfeuchtigkeit : 52%rH-60%rH
+ VPD kleiner gleich 1.2
+ 4 bis 5 Tage
Ich versuche maximal einen VPD von 1.2 zu halten für ca 4-5 Tage.
Tag 85:
Ein Video hinzugefühgt wo ihr das Trockenzelt sehen könnt. Die LED hab ich genau unter der Abluft angebracht damit kein einseitiger Luftzug entsteht, dafür mit mehr Power .
Tag 86:
Video von der Kopfüberhängenden hinzugefühgt.
Tag 88:
5 Tage lang getrocknet , Blüten vom Stiel getrennt und in Schalen in den Weinkühlschrank mit Silikatgel für die Feuchteregelung.
Tag 90:
Trichome aufgenommen.
CureBoxen geschlossen nach 2 Tagen im Weinkühler
Next Step:
Bouveda 58% , Sauerstoffabsorbierer

Likes
14
Share
@TrikesGrowLab
Follow
Besides the nutrients above, they received UAN 32-0-0, liquid worm castings, Neptune’s 2-6-4, Neptune’s seaweed 0-0-1, TPS chelated calmag, and molasses.
The roots seem to be bigger than the plant atm, from extra use of Mykos and azos... I would definitely expect exponential growth in the next 3 weeks.
The plants are exactly where I wanted them size wise for day 21. At least 10-12 strong bud sites already each plant and they definitely smell danker than most plants I’ve grown before.

Likes
3
Share
@Luke_Lee
Follow
—————————————————————
WEEK 5 / DAY 29-36
Mars Hydro FC-E3000
Floragard Professional GrowMix
11L Plant bag made of fleece
Light: 55cm / 55%;
Schedule: 24/0;
PPFD: 650 umol/m2/s
20° C - 70 RH
500ml per Plant
PH 6,5-7
2ml BioGrow; 0ml TopMax ; 0ml BioBloom; 1ml CalMag
1ml CalMag
#1 Royal Critical Automatic
#2 Royal Critical Automatic
Fan, extractor and pump ON 24/0.
—————————————————————
-17.02.2025
The fourth week of vegetation begins.
The plants are looking very good so far and I'm happy with the grow so far. There have been no significant complications so far.
The lowest few leaves have been removed and light LST applied using plastic benders.
-19.02.2025
The plants get their typical “white hairs”, pre-flowering has started.
-23.02.2025
The plants are doing well, I haven't been able to look after them for the last few days. But they have survived.
The fourth week of vegetation is coming to an end and as you can see the plants are starting to flower.

Likes
Comments
Share
@Casa_das_Arvores
Follow
Planta recém transplantada, sendo clones da minha colheita anterior das sementes originais.
Foi realizada poda top, além de amarras para moldar o formato das plantas.
Também liguei o compressor de ar, já que uso o sistema airpot com o airdome no fundo do vaso para oxigenar as raízes.


Likes
3
Share
@Kazbrownthumb
Follow
I got really busy towards the end and probably made a few mistakes. Probably cut it down a bit early too but she wasnt able to hold herself up anymore and broke some stems. All in all compared to the outcome of my last grow this one plant doubled my outcome so I dont believe I maybe improving on my growing skills.
I have her curing in jars right now. Out of the sample I have tried I really enjoy it. Smells like candy, tastes like candy with a little extra something something at the end. Smooth, burns clean I couldn't be happier.
Likes
27
Share
@adam_pawloski87
Follow
First off I just want to say for some reason it’s not letting me change the right temperatures on my diaries ! Each time when I put it in they stay at 50. My day air stays 75 degrees an , night degrees is 70 !
Today is day 58 for all these ladies! This week has been really great ! Girls really progressed a lot , especially for one the Forbiddin Runtz, looks like is gonna finish up in a week or 2 ! Other then that they are coming along well! Keep those eyes peeled for next week! Cheers😶🌫️💨💨💨💨
Likes
20
Share
@Green_Dream
Follow
Well, what to say other than the pictures can already show? I wish the GZkitz buds were just as large as the Critical ones :D Maybe they will surprise me and flower one week longer then their sisters :P :D
For some reason I get an error when I try to upload the time lapse video, hope it workes out in the end!

Likes
38
Share
@Oyziphar
Follow
Trichomes and strong smell. That's what we like 😋😍
👆 Largest plants = Triple G = 125cm
👇 Smallest plants = Wedding Gelato = 85cm
Likes
11
Share
@Hawkbo
Follow
Sorry for the delay was in a wedding this weekend came home and been trimmin like a dog the past few days and didnt have time to do the update but I'll do another one before tuesday to get back on track. As of Friday sept 6 its day 46. In the video the plants from back left to right are ..
Gelato-> Cream Cookies -> Gelato
Middle row from left to right are Lemon A.K 1 -> 6 Shooter-> Lemon A.K
Front is Tester 5 -> Lemon A.K -> Tester 26
Likes
7
Share
@Sunstonedgrows
Follow
Well the pas week has been a lot! We had some dehydration issues, did some defolitation, and additional LST to prep for flower. Starting today, this plant has been kicked into the flower tent and will be starting its journey!
Before we went to flower, I gave this guy 1tbsp of Dr. Earth tomato blend. Over the next week or so we'll be switching to Dr. Earth flower girl.
Cheers til next time!
-Dj Sunstone


Likes
14
Share
@exclusiveX420
Follow
Another really good week. We officially have flower sites as of Monday 3/27 first day of flower!!!!
She is such a monster now! I am really excited to move into flower. I have the plant opened up some more and hoping I can penetrate beneath the surface without side lighting this round. We will see !
The other sour clone I had running, same skunktek is doing well and just got setup with blumat Tropf drip Irrigation!
Stay tuned


Likes
8
Share
@20SYL
Follow
Début du rinçage pour la petite plante, les trichomes commencent à devenir laiteux donc la récolte est proche.
Les deux autres se portent bien, l'odeur est incroyable j'ai hâte de voir la suite !
Processing
Likes
23
Share
@WolverineGreens
Follow
🔥🔥🔥This heatwave is killin me.🔥🔥🔥
Thank God for the rain. Set kickin myself for deciding to hand water when I have everything I need to make an automated system.
Taking clones trying to decide which strains to keep.
Gave my gf's son 2 of the 3 pots that I had, so I'm down to 31 total.
Indoor and outdoor should finish at the same time for a 50 plants harvest in the fall.😀😀
Even if I gotta build my kid a hamster ball, I need schools to open.

