
Likes
Comments
Share


@PopsCycle
Follow
Day 52 - Deep Jealousy Auto from @anesiaseeds
Nutrients: @atami_deutschland / @atami.international / @stefan_atami / @daniel_atami
Soil: @promixgrowers_eur / @promixgrowers_global / @promixgrowers_unfiltered / @promixmitch
LED: @powerlux_spain
Tent: @secretjardin_
Thank you to everyone who follows and supports my work 🙏🏻💚
This means a lot to me and you should know you are a part of it and only with you all this is possible, you are the best community 😎
Growers love, love for everyone

Likes
7
Share


@Dairon
Follow
Hola tod@s, pues aquí tenéis las RQS North Thunderfuck
Como podéis ver en las imagenes están a tope, el resultado de las podas no puede haber sido mejor, plantas compactas con 3 - 4 colas principales, pues al hacer la poda apical las ramas inferiores han alcanzado la altura de las principales.
Al final no las trasplante a 11l, no quería que se hiciesen demasiado grandes para que tuviesen más espacio entre ellas y así fomentar la circulación de aire para evitar el oidio, en los últimos días ha estado lloviendo y como os he comentado en otras entradas, a no ser que tengas una sala de cultivo con opticlimate o te hallas gastado mucho dinero en aislamientos y equipo, el clima de fuera afecta al interior también.
Lo mejor es usar preventivos, así se evitan las sorpresas indeseadas.
Pronto empezarán a asomar los primeros pistilos blancos, iré subiendo la EC poco a poco, en esta ocasión creo que podré subir un poco más, esta variedad es una comilona de cuidado, así que llegaré a los 1.9 - 2.0 de EC.
Hace tiempo que buscaba una variedad que reaccionase así a las podas, al tener las ramas casi todas a la misma altura recibiran mucha más luz y más tratandose de iluminación LED que penetra menos que otro tipo de iluminaciones, lo cuál debe traducirse en una mejor producción.
he realizado una última poda de bajos, ya no podré hacer más, para estimular el crecimiento de las ramas superiores, aparte en estas variedades de hoja tan ancha hay que quitar bastante, sin miedo, por la misma razón que comentaba antes de la penetración de luz.
Espero que todo siga así y pronto empezarán a tener las primeras flores, saludos!!! 😃


Likes
14
Share


@TOMI08
Follow
101.nap nagyon meleg 32fok
A trainwreck napról napra nagyobb..
A specail kush szépen virágba van
Növeltem a viz mennyiséget két naponta 10liter
Elfogyott a canna flores hesi bloom van helyette
A special kush kapja canna pk 13/14 2ml/10l víz

Likes
7
Share


@JoeGrows420
Follow
Growing big and strong, theres some marks on the leaves nothing bad it seems, looks like a catterpillar is guilty hopefully. I added dr greenthumbs mycos because who doesnt like a funguy.

Likes
14
Share


@Mr_Dior21
Follow
Man this week has been taking forever, my theory is it will only get slower relative to harvest just because my excitement.
I top dressed with about 2 inches of worm castings with an eyeballed mix of 2tbps of bone meal (3-14-0, bloom fert.), 1.5-2tbps of Gaia green all purp.(4-4-4, I don’t have an actual potassium fert. Like leingbenite So I use this), 3tbps of dr earth kelp meal (1-.05-2 has many different vitamins, amino acids, carbohydrates) and 2tbps of mykos (for microbiology inoculation and nutrient uptake/upkeep).
So I every time I water I have this old 2gallon water tin that I usually fill up about a quarter to half way full. Using this amount of water and the 5 gallon bucket of my soil mix makes my watering schedule once every 3 days (on average). I do use bottle nutrients but it’s mainly for the supplementing. For feeding I use 2-3ml to half a gallon for all bottle nutrients, I have never gone over, and I have never had deficiency’s that can hinder plant development.
Deficiency's: PSA: Now if anyone happens to read and actually look at my plants please do look closely and maybe let me know if you see something that I have missed since I’m still very new. I noticed my plant was having a cal mag issue so that’s why I top dressed with worm castings, I also top dressed with about 3tbps of azomite (I feel using azomite it may help with all those unnoticeable deficiency’s that a new grower might miss). I’ve been noticing on some of the leaves the very tips are showing discoloring, since the color is still so vibrant mostly I can rule out nitrogen, phosphorus, Iron, manganese, and sulphuric. It’s still very early stage so I did an extremely light foliage feeding (in the dark to prevent UV damage) of 2ml of big bud, big bloom, and tiger bloom, mixed into half a liter of water, I then emptied the spray bottle and sprayed with tap water just to make sure there’s no nute burning. Today I fed the plant through water amendments with 3ml of big bud, 3ml of bud candy, 3ml of big bloom, and 2ml of tiger bloom;(my theory is hopefully the nutrient deficiency’s will go away)
My soil mix is pretty basic. 40% coco, 10% perlite, 10% well composted chicken manure, 20% black gold compost, 20% worm castings. I’m not going to put the fertilizer amendment percentage to be honest I eye ball it but there’s a rough general measurements that I do.

Likes
13
Share


@gadjoo
Follow
🔵⚪️🔴
Passer de 25cm à 80cm en deux semaines c'est fou, je suis un peu surpris ^^'. Changement de tout l'eau, passage aux engrais de floraison. J'ai construis le bio-filtre, j'attends que le silicone sèche et je le mettrais entre les deux cuves, connecté à la pompe de circulation.
🦅🇺🇸/🇬🇧🦁
Going from 25cm to 80cm in two weeks is crazy, I'm a little surprised ^^'. Changed all water, switched to flowering fertilizers. I built the bio-filter, I'm waiting for the silicone to dry and I'll put it between the two tanks, connected to the circulation pump.

Likes
114
Share


@Natrona
Follow
Lemon Cake & Lemon Drizzle
Week 9 6/2-6/8 Now at the start of week 9, my outside gals, except L. Cake are now in flower.
This is the first week I’ve had to add nutrients to her feeding. Some lower leaves were yellow. Since I’ve been using amended soil, this indicates Opium is a heavy feeder. Nutrients in soils are used up and she is starting to use her own food sources
5 gallons well water
TPS1 60ml used 1 gallon per plant =12ml
Cal-Mag 25ml used 1 gallon per plant =5ml
Recharge 5ml used 1 gallon per plant =1ml
Signal 1.25ml
PPM 1414, PH 6.93, Temp 82.5
Note I do not have to PH adjust my well water. However, our city water comes out of the tap at 8.2 ph so I must PH down using the hose or my inside grows,
============
Germination April 6.
Vegetation
Week 1 water only
Week 2 water only
Week 3 added recharge and TPS1 increased ppm to 570.
Week 4 continues with recharge and TPS1. I added Fox Cal mag increasing ppm to 685 - 805.
Week 5
TPS1 9ml/gal
Recharge 5 ml/gal
Fox Cal-mag 5 ml/gal
Week 6 5/12-19 Moved outside in 5 gal air pots receiving rain and well water.
Week 7 5/19-25 The Lemons received rain water for the last 2 weeks. They love the natural rain and sunshine evidenced by vigorous growth.
Week 8 5/26-6/1
Drizzle is in flower, stacking buds along the stalk that reaches 38 inches.
Cake is still vegging at 28 inches. Her new growth is starting to show the pistils at the bud sites.
============
Thanks for the visits, likes and comment, I appreciate all the plant love💚.
Have fun & love what you grow 💚
Sending you good vibes of love, light, and healing 💫
💫Natrona 💫
BARNEYS FARM- LEMON DRIZZLE
Lemon Drizzle Cannabis Seeds
Type: Feminized Weed Strain
Lemon Drizzle Strain by Barneys Farm
Indulge yourself in the tantalizing aroma of our Lemon Drizzle strain, a sensually crafted cannabis strain that is sure to tantalize your senses and leave you in a state of blissful euphoria. Bred from a seductive blend of Super Lemon Haze and OG Kush, this sativa-dominant weed strain will transport you to another plane of existence.
With a flowering time of 60-65 days, Lemon Drizzle's exquisite buds are bursting with a potent THC percentage of 20-25%, ensuring an unparalleled and satisfying high. The complex terpene profile of this alluring strain is sure to captivate your senses with notes of zesty lemon and a hint of earthy Kush undertones, providing a flavor explosion that you won't forget.
This tempting beauty grows to a height of 1m - 1.2m indoors and 1.5m - 2m outdoors. You'll be impressed by the generous indoor yield of 550g/m2, while the outdoor yield of up to 1.5 - 2kg is beyond substantial. Experience the ultimate in relaxation with Lemon Drizzle's outdoor flowering time, which begins in early October, allowing you to bask in the sweet sunshine and savor the heady effects of this tantalizing strain. Succumb to the charms of our Lemon Drizzle strain and discover a world of unadulterated pleasure that will leave you in awe.
Is Lemon Drizzle Indica or Sativa?
The Lemon Drizzle strain by Barneys Farm is 85% Sativa 15% Indica.
What is the best way to store my Lemon Drizzle strain seeds?
To properly store Lemon Drizzle seeds, it is recommended to keep them cool and dark in an airtight container ideally in a refrigerator with proper labeling and dating, avoiding freezing.
Lemon Drizzle Cannabis Seeds Strain Specifications
Type: Feminised
Genetics: Super Lemon Haze Strain x OG Kush Strain
Photoperiod: Normal
Sativa %: 85%
Indica %: 15%
Flowering Time (days): 60 - 65
Feminised Outdoor Harvest Month Week: 1st-2nd week - October
Indoor Height (cm): 100-120cm
Indoor Yield (g): up to 550-650 gr/m²
Outdoor Height (cm): up to 150-200cm
Outdoor Yield (g): up to 1500 gr/plant
Taste: Sour, Lemon, Sweet, Citrus Fruits
Aroma: Sweet, Sour, Citrus, Pine, Earthy
Effect: Energizing, Uplifting, Focused, Motivated
PREMIUN CULTIVARS LEMON CAKE
Lemon Cake Seeds
Lemon Cake strain seeds generate typical Sativa buds known for their heavy trichome covering against a bright green background. Let's look at this great strain and learn about its genetics, growing information, and how to obtain it.
Cultivar Profile
Terpenes Caryophyllene, Myrcene, Terpinolene
Strain Type Sativa
Difficulty Moderate
Height 30 in – 78 in
Yield (oz/ft2) 1 – 3
Flowering Time 9 – 10 weeks
Harvest Month October
Pack Size 3, 6, 12, 24
Seed Type Feminized
Brand Premium Cultivars

Likes
5
Share


@TheWeedaltor
Follow
She’s still a one floor house between skyscrapers but probably she will become bigger one day 😛

Processing
Likes
Comments
Share


Likes
26
Share


@Roberts
Follow
G13 auto has bounced back well after neem oil treatments. All the critters appear to be gone. She is growing good under the Medic Grow Mini Sun-2 in the Athena blended line nutrition. she got some basic training today. She should start making the switch to flowering soon. Thank you Medic Grow, Athena, and Weed Seeds Express. 🌱🌱👍🏻🌱🌱
Thank you grow diaries community for the 👇likes👇, follows, comments, and subscriptions on my YouTube channel👇. ❄️🌱🍻
Happy Growing 🌱🌱🌱
https://youtube.com/channel/UCAhN7yRzWLpcaRHhMIQ7X4g


Processing
Likes
4
Share


@Andres
Follow
new crop ... we'll see how it grows ... outdoors....let's see what she offers us outdoor ... and what color she can show us ...
Likes
11
Share

@420DeepGrow
Follow
📆 Semana 6
El engorde alcanza su punto más intenso y los cogollos aumentan de volumen rápidamente. La producción de resina se acelera, los aromas se intensifican y la planta registra uno de los mayores consumos de agua y nutrientes del cultivo.
⚡ EC: 1.8–1.9
💧 pH: 6.2–6.5
🌡️ Temperatura: 21°C
🌫️ Humedad: 45–50%
💡 Intensidad: 1000–1100 PPFD
🔥 Nota: Mantener un riego, una nutrición y un clima estables será clave para maximizar el engorde, la resina y la calidad de las flores.
¡Seguimos creciendo fuerte! 💪
Likes
2
Share


@Luke_Lee
Follow
—————————————————————
WEEK 9 / DAY 58-64
Mars Hydro FC-E3000
Floragard Professional GrowMix
11L Plant bag made of fleece
Light: 40cm
Schedule: 18/6;
PPFD: 1050-1150umol/m2/s
19° C - 45 RH
1L per Plant
PH 6,5-7
4ml BioGrow; 4ml TopMax ; 4ml BioBloom
1ml CalMag
#1 Blueberry Automatic
#2 Blueberry Automatic
Fan, extractor and pump ON 24/0.
—————————————————————
-17.03.2025
The fourth week of flowering begins.
Everything is going great, so far there have been no complications apart from the defects on one of the Blueberrys.
From this week onwards, the quantity of BioGrow, BioBloom and TopMax is increased to 4ml/1L.
The lamp is also turned up, the measured value with the PhotoneApp is 1050-1150.
-19.03.2025
Both plants were watered with 1.5 liters of water with fertilizer each.
In addition, an extra fan is now running for better air circulation.
-23.03.2025
The next week is coming to an end.
The plants look good, the buds are growing and getting nice and frosty.
I think the week after next will be the time to harvest the ladies.
Both plants were watered the last time with 1.5 liters of water and fertilizer mix.
From next week only clear water.


Likes
6
Share


@E5Jackalope
Follow
When I popped these seeds I was so excited. I first started off putting the seeds in a shot glass of RO water and once I seen the seed pop open I transferred them to a wet towel. After a few days I seen the sprout and I was so excited!! I transferred the sprouts into the baskets and started on my way using a small dose of clean grow a/b ppms were 200 for the first few weeks. These photos were from week 1-2

Likes
19
Share


@GoldenWeedGrower
Follow
Legend
Timestamp: 📅
EC - pH: ⚗️
Temp - Hum: 🌡️
Water: 🌊
Food: 🍗
pH Correction: 💧
Actions: 💼
Thoughts: 🧠
Events: 🚀
Media: 🎬
D: DAY, G: GERMINATION, V: VEGETATIVE, B: BLOOMING, R: RIPENING, D: DRYING, C: CURING
________________________________
📅 D84/B22 - 07/02/24
⚗️ EC: 1 pH: 5.0
🌡️ T: 19-26 °C H: 55-65 %
🌊 8L
🍗 CalMag - Bloom A-B - B52 - Bud Candy - Big Bud
💧
💼
🧠 The VPD rate was stable on the right value for all the day ! Great, and many thanks to TrolMaster Tent-X !
🚀
🎬 Added Timelapse video and screenshots
________________________________
📅 D85/B23 - 08/02/24
⚗️ EC: 0.8 pH: 5.2
🌡️ T: 19- 24 °C H: 45-80 %
🌊 2L
🍗
💧
💼
🧠 I'm lowering down the EC as I see signs of burns on tips
🚀 Humidity went out of control for about 2h
🎬 I made a photoset with "Garlic Puppy" enjoy the pictures 😋. Added Timelapse video and screenshots
________________________________
📅 D86/B24 - 09/02/24
⚗️ EC: 0.8 pH: 5.2
🌡️ T: 20-26 °C H: 50-70 %
🌊
🍗
💧
💼 Little defolation
🧠
🚀
🎬 Added Timelapse video and screenshots
________________________________
📅 D87/B25 - 10/02/24
⚗️ EC: 0.8 pH: 5.2
🌡️ T: 22-24 °C H: 55-65 %
🌊
🍗
💧
💼 Little Defolation
🧠 The buds are forming
🚀 Today VPD was very stable
🎬 Added Timelapse video
________________________________
📅 D88/B26 - 11/02/24
⚗️ EC: 0.7 pH: 5.2
🌡️ T: 20-25 °C H: 50-77 %
🌊
🍗
💧
💼 Little Defolation
🧠
🚀 Humidity went out of control for about 2h
🎬 Added 8 pics of Nicole, the timelapse video and the screenshots
________________________________
📅 D89/B27 - 12/02/24
⚗️ EC: 0.7 pH: 5.5
🌡️ T: 19-25 °C H: 50-70 %
🌊 4L
🍗 CalMag - Bloom A-B - B52 - Bud Candy - Big Bud
💧
💼
🧠
🚀
🎬 Added timelapse video and screenshots
________________________________
📅 D90/B28 - 13/02/24
⚗️ EC: 0.9 pH: 5.8
🌡️ T: 19-25 °C H: 50-70 %
🌊 4L
🍗 CalMag - Bloom A-B - B52 - Bud Candy - Big Bud
💧
💼
🧠
🚀
🎬 Added timelapse video and screenshots

Likes
2
Share

@MrWeeedWorld
Follow
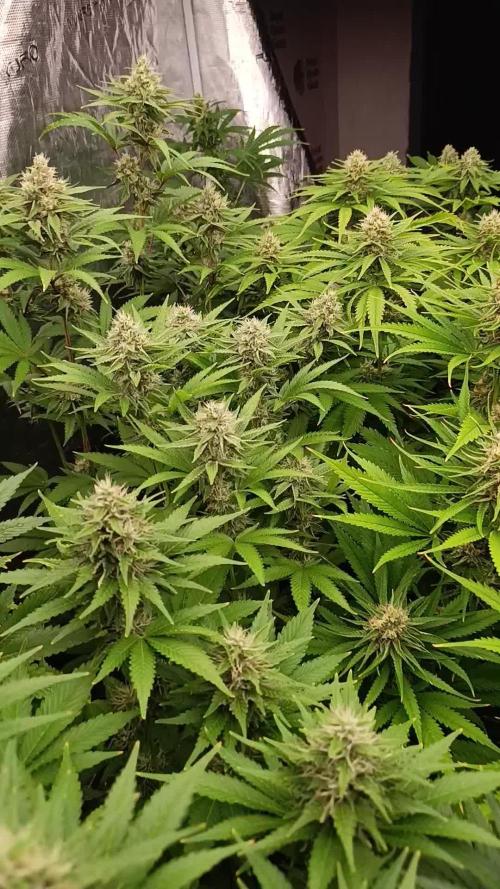
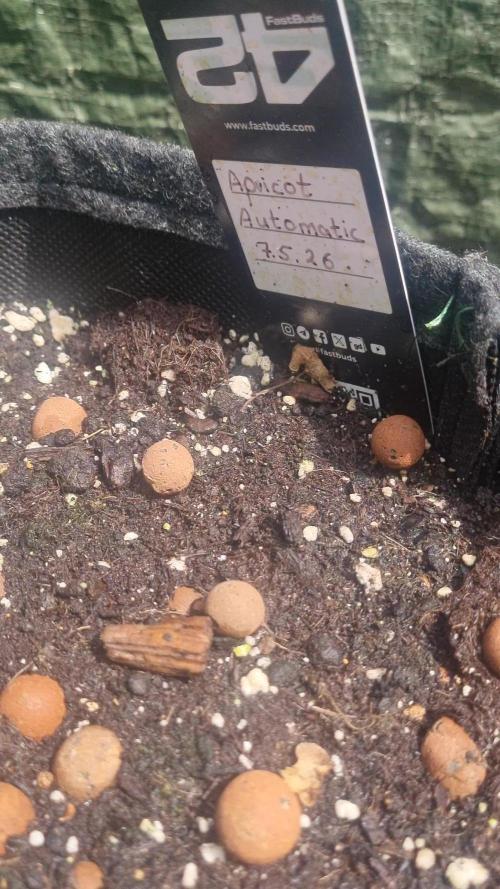
Woche 6 – Die Apricot zeigt ihr wahres Potenzial 🍑✨
Diese Woche hat meine Apricot offiziell die Blütephase erreicht und ich könnte kaum zufriedener mit ihrer Entwicklung sein. Von Anfang an zeigte sie einen kräftigen Wuchs, doch jetzt beginnt sie langsam ihren eigenen Charakter zu entfalten.
Die Pflanze hat eine wunderschöne Struktur entwickelt. Die Seitentriebe wachsen kräftig und bilden ein gleichmäßiges Dach aus potenziellen Budsites. Besonders gefällt mir die natürliche Verzweigung, die dafür sorgt, dass Licht nahezu jeden Bereich der Pflanze erreicht.
Trotz des Outdoor-Lebens mit wechselhaftem Wetter zeigt die Apricot keinerlei Schwächen. Die Blätter präsentieren sich gesund und vital, das Wachstum bleibt konstant und die ersten Blütenansätze sind inzwischen deutlich sichtbar.
Aktuell befindet sie sich mitten im Stretch und legt täglich sichtbar an Größe zu. Genau in dieser Phase entscheidet sich oft, wie beeindruckend die spätere Blütenstruktur ausfallen wird. Wenn sie diesen Weg weitergeht, könnte sie sich zu einer echten Schönheit mit zahlreichen dicken Colas entwickeln.
Die Vorfreude auf die kommenden Wochen steigt von Tag zu Tag. Die Apricot wirkt momentan wie eine Pflanze, die gerade erst warm läuft und ihr volles Potenzial noch längst nicht ausgeschöpft hat.
Die Bühne ist vorbereitet – jetzt beginnt die große Show.
--------------------------------------------------------------------------------------------------------------------------------------------------------------------
Week 6 – The Apricot Starts To Shine 🍑✨
This week my Apricot officially entered the flowering stage, and I couldn't be happier with her progress so far.
She has developed a beautiful structure with strong side branches and an even canopy full of promising bud sites. What stands out most is her natural branching pattern, allowing light to reach nearly every part of the plant.
Despite being grown outdoors and facing changing weather conditions, she continues to look incredibly healthy and vigorous. The leaves are lush and vibrant, growth remains steady, and the first flower sites are now clearly forming.
She is currently right in the middle of the flowering stretch and is gaining size every day. This stage often determines the final shape of the plant, and if she keeps growing like this, she has the potential to become an absolute beauty covered in large colas.
The excitement for the upcoming weeks keeps growing. Right now, she looks like a plant that is only getting started and still has plenty of surprises left to reveal.
The stage is set — now it's time for the main performance.
Likes
2
Share


@EtnoGrow
Follow
As the oldest one looks with 25 days of more approx 2 and a half weeks in advance as we can see, all calm advancing at the moment, enduring the high heat temperatures, the ones that were missing were transplanted into larger improvised pots.