Likes
Comments
Share


@JsGrowShow
Follow
Stress training hair cut water change fresh nutrient mix hit the numbers right on the head 💯👊☀️


Likes
Comments
Share


@PapaTerps
Follow
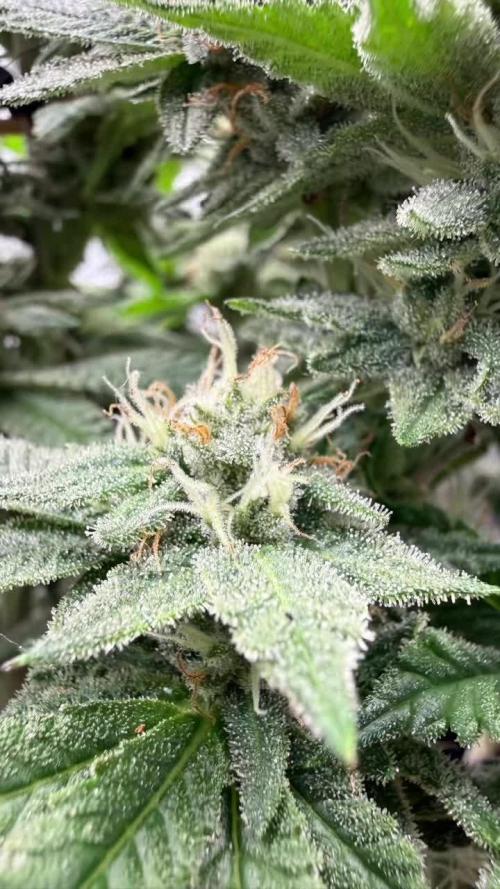
Zkittlez - Growers Choice
Day 66 - watered with 2L of RO tap water with defined above nutrients, mixed in order and pH'd to 6.3. She has finished her stretch and has developed her flower and is now focusing on bulking! That Zkittlez aroma has started to fill the tent and it's getting me so excited for her! Not much work on her this week, just a few fan leaves removed to improve light penetration and that's pretty much it, she has been super easy!!

Likes
21
Share


@krewgrew
Follow
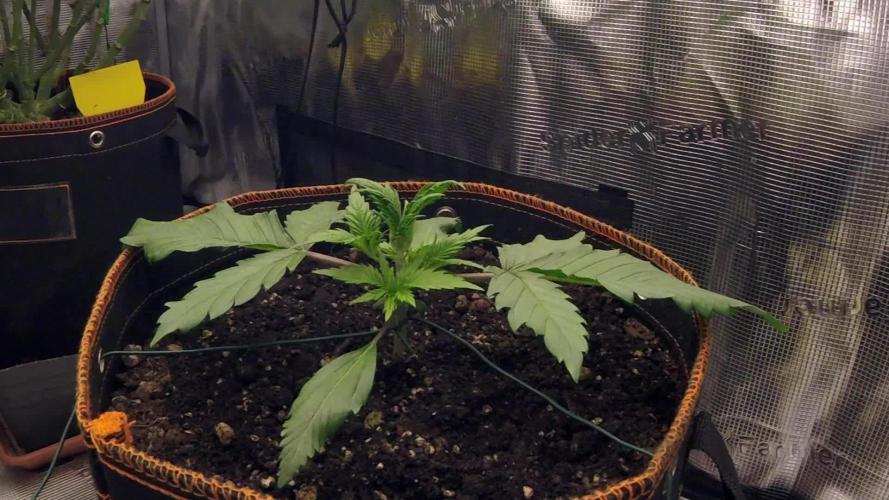
Hi
I would like to introduce you to my first ever, cobbled together, but so far so good, growers' garden.
I welcome and look forward to your ideas and advice.
Germination done in between cotton pads.
The one seed that didn't germinated was bigger and darker than the others(slightly).

Likes
252
Share


@Tropicannibis_Todd
Follow
Well folks we chopped the Last of the Strawberry Blast 😁 The Strawberry Banana 🍌
Strawberry Blast Series 🍓 🍓 🍓 🍓 was a real blast , ive now done 5 Strawberry Cultivars and I'm extremely happy with all the results 😀 Killer Stuff 😀
I want to thank all my growmies for stopping in and showing your support 🙏 it's been much appreciated 🙏
Well my friends that's it for me for awhile😌
So until next time my friends 👉 Happy Growing and of course 🙂 Happy Smoking ........ Later Growmies 👊👊 be well 👌
FC4800 from MarsHydro Lights being readjusted and chart updated .........I've added a RU45 to the mix
www.marshydro.ca
👉I am using Agrogardens for nutrients for my grows and welcome anyone to give them a try .👈
👉 www.agrogardens.com 👈
Agrogardens Cal MAG
Agrogardens Grow A B
Agrogardens Bloom A B
Agrogardens Bud Booster
Agrogardens PK13/14
I GOT MULTIPLE DIARIES ON THE GO 😱 please check them out 😎
👉THANKS FOR TAKING THE TIME TO GO OVER MY DIARIES 👈
Would you like to hang with the growdiary community 👉 https://discord.gg/gr4cHGDpdb 👈


Likes
18
Share


@naturalmedicineman
Follow
Actually top dressed with DTE about a week ago before flip. Also top dressed with a few tbsp of worm castings from the back yard.

Likes
3
Share


@FastbudsFanatic
Follow
Last few days of feeding for strawnana
Second week of flush for gelato
Likes
2
Share

@hassehujasse
Follow
Transformation de la chica a la mujer. Disfruta lo conmigo
Strong begining of the week, looking forward to give her all my love
Processing
Likes
15
Share


@MG2009
Follow
09/16/2020
Will be 72 days at end of the week. Should be done soon. Will begin flush at end of week and watch her trich's.
09/20/2020
76 days and milky trichomes are abundant still clear here and there but no any amber at all will monitor daily till done.
This strain will ripen mid to late September in my area so I'm happy with that.
😊😊😊😊😊😊
She be ready to smoke for the Holiday season!
Keeping her going in a Perpetual grow smoking my indoor cut as I write can't wait to see how they compare to mother nature 's outdoor version.


Likes
Comments
Share

@frigo_camelo
Follow
mid week 6 flower | really healthy plant | absolute pleasure | very small node distances | the cut looks exactly as advertised | now i will be gone for 2 weeks | i will close the water loop an install a drip ring | week 6,5 to 8,5 will be water only | lets see what will happen

Processing
Likes
15
Share


@Rainy
Follow
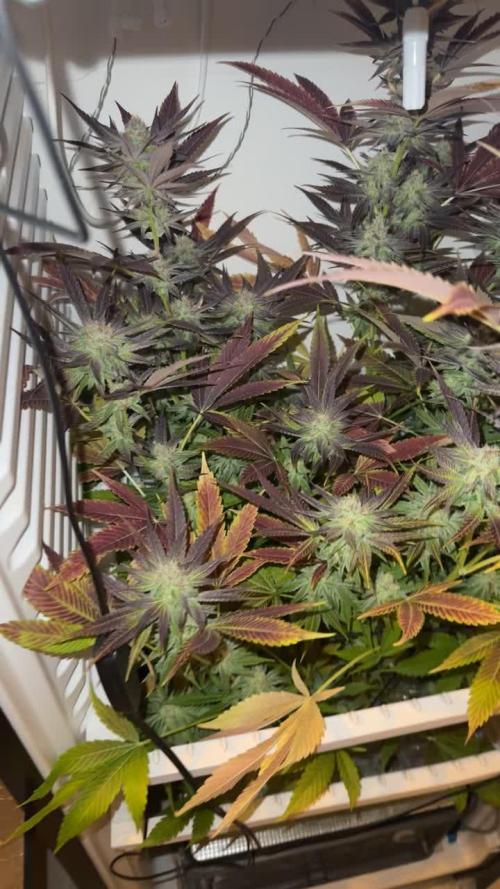
Hey guys they are both happy, didn't stretch much because I stressed her at the beginning of the week with lolipoping and some little lst together with change of nutritions but all good expecting some stretch in this week and let's see how she will go 💪

Likes
8
Share

@birdmountain
Follow
Die letzte Woche war sehr gemischt. Glücklicherweise waren die letzten drei Tage (ein Abgesang auf den Sommer) sehr sonnig, warm und ausreichend windig, so dass die Shaman trocken geerntet werden konnte. Sie zeigte, wie viele Bäume auch, ein beginnendes Herbstkleid in den Farben des Indian Summers. Einige sehr geringe Schimmelstellen waren vorhanden, hervorgerufen durch mein fehlerhaftes Entblättern. Die Verluste waren jedoch sehr gering. Ich freue mich nun auf die Trocknung und das Curing. Der Rotrim und der Endtrim werden noch einige Stunden in Anspruch nehmen, das ist der Nachteil an großen Outdoor-Pflanzen.😀👌
---
The last week was very mixed. Fortunately, the last three days (a swansong to summer) were very sunny, warm and sufficiently windy so that the Shaman could be harvested dry. Like many trees, it showed the beginnings of autumn in the colours of Indian summer. There were a few very small patches of mould, caused by my incorrect defoliation. However, the losses were very small. I am now looking forward to drying and curing. The rotrim and final trim will take a few more hours, which is the downside of large outdoor plants. 😀👌
Likes
17
Share


@Naujas
Follow
Although I am not a Super grower, I have not grown many plants, but for this girl, there were definitely bigger ones, but were there any more beautiful ones than this one?, I highly doubt it :) she looks fantastic, the finish is very close :)))) @FastBuds gorilla cookies auto. with small space, high temperature, high humidity, it copes without major problems :) which makes me very happy :) good luck to everyone :)
Likes
20
Share


@Canna_Enthusiast
Follow
The first week has passed.
Roots are starting to show on the bottem of the basket and the growth spurt can start!

Likes
1
Share


Likes
56
Share


@Aedaone
Follow
The temperatures, humidity, and watering volume(if measured) in grow conditions are all averaged for the week. The pH is soil pH. Any watering done by me is well water which is 7.6 pH and 50° F. Any listed nutrients are ml/gallon of soil to be spread evenly on top of the soil
Day 1 we had a high temperature of 80°F. The skies were partly cloudy with a healthy breeze. I water 2-2.5 gallons today.
Day 2 we had a high temperature of 79 and partly cloudy skies. This cooler weather has been nice. I watered 2-3 gallons each pot once.
Day 3 we had high temperature of 92°F. I watered 3-4 gallons from the hose.
Day 4 we had a high temperature of 85°F. Skies were cloudy to overcast with off and on rain until noon. Then partly cloudy in the afternoon. I added 50ml of blood meal and 50ml of iron spread evenly across the tops of the pots. No watering today.
Day 5 we had a high temperature of 86°F, a short rain shower, with cloudy to partly cloudy skies. Watering done today by the rain.
Day 6 we had high temperature of 81°F skies were cloudy to partly cloudy. We had some intermittent heavy rain so everyone was watered by nature today.
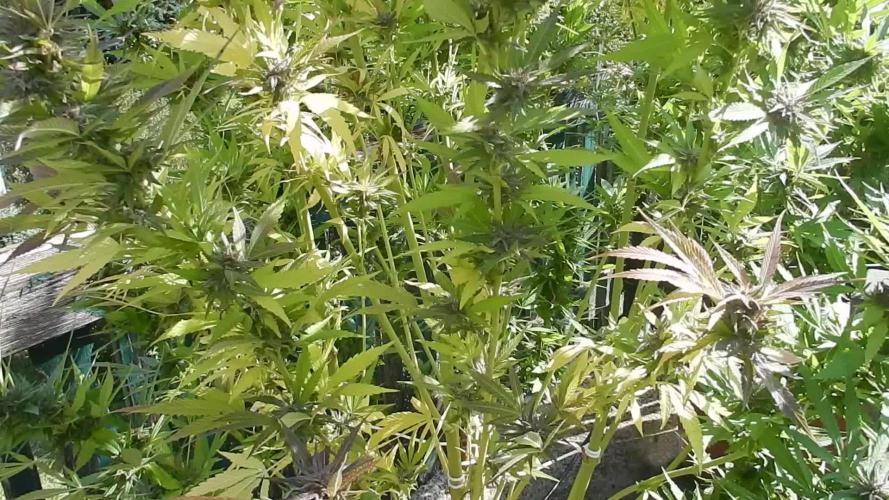
Day 7 we had high temperature of 85° F, with sunny skies. I watered 3-5 gallons each plant from the water hose.
This week was a success. These girls have really added some height. I need to do more work shaping these. They began to run low on nutes. The built of phosphorus from the recycled soil is beginning to play out finally. I added 45ml coop poop and 50ml plant tone spread evenly across the top of the soil. We had our first signs of flower today. I love these fast flowers