


Likes
Comments
Share


@7points
Follow
Very exciting as the tops are starting take formation and really become more developed.

Processing
Likes
45
Share


@Nordicislandgrower
Follow
Hello growers! Week 13 is here, a little cal mag issue but i’m On it 👌🏻
I had some issues with the night temperatures, but I have fixed that with a heater in my grow room. Thanks to the people that pointed out that would slow the growth of the girls.
But yeah other than that the buds are mad frosty and smelling super dank, i’m Just waiting for them to fatten up now 👌🏻
Good growing everyone!

Likes
41
Share

@Bncgrower
Follow
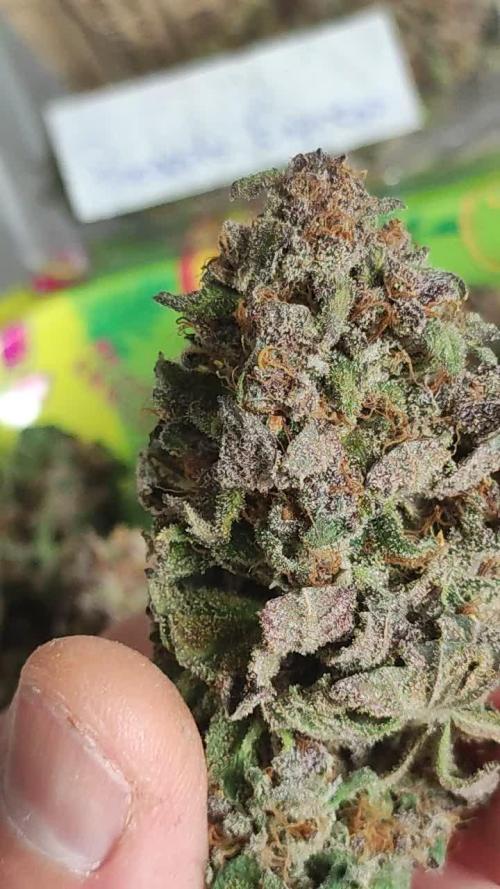
Another successful harvest. This time it was my perfect girl, a very good strain, easy to grow, fast, and without many demands. Besides the controlled environment, it has a wonderful smell. The buds were very dense and sticky. Every time I touched the scissors, a strong smell emitted that filled my room. I really liked the result, and this will definitely be the first of many. My favorite so far! ✌️💪🌿🍁

Likes
28
Share


@Cosmonauta
Follow
Tropicanna poison is easy to grow, connoisseur strain . I recommend to every grower here


Likes
Comments
Share

@JoeCNote
Follow
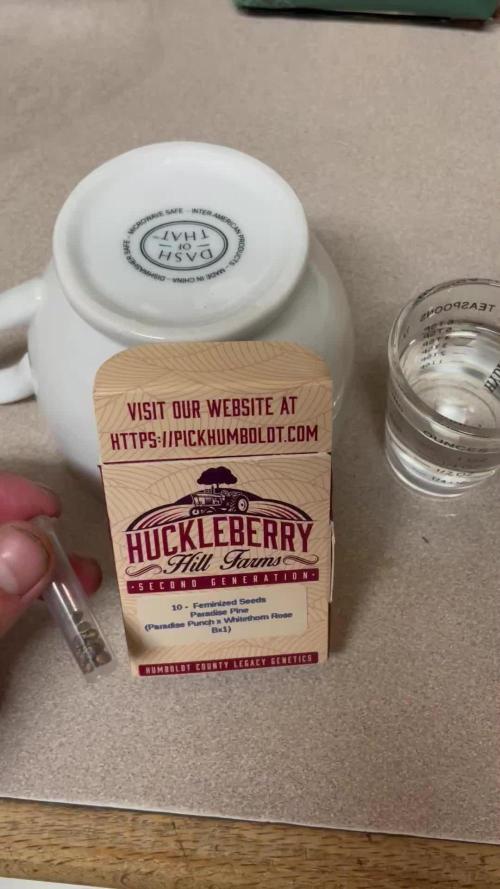
Successful germination, actually started first seeds in June, popped 4 beans but during early growth I lost two seeds to over watering so I ended up with on 2 plants to fill 3 pots. Ended up trying 4 more beans in the same method, a couple months down the road,only lost 1 to over watering this time. So now I have 5 pheno's, 3 plants for now and 2 I'm saving clones of for later.
Never had a problem with this kind of thing before so it speaks to the sensitivity of this strain.
(More evidence later) start of actual seeds on this first run was August 18th.
Processing
Likes
4
Share


@Fergie
Follow
hey guys so girls been transplant to new home for next few weeks to month all looking good under new LEDs . Got really nice node structure coming together on them and so far so good . Feeding them with plain r/o water with 5ml of calcium and magnesium supplements added to each 3 gallon bucket - started running my Aircon water back through my system as at current am recollecting around 20 litres a day with current temps outside soaring .til next week 😀

Processing
Likes
3
Share


@Ogbangbang2981
Follow
indoor plant looks healthy average height for a 2 week old plant no nutrients just bat poo tea and water let's see what's up .....
Likes
107
Share


@MrJones
Follow
Mr-Jones Strawberry Pie Auto by FastBuds
🍓╰⊰🍓´🍓⊱╮🍓╰⊰🍓´🍓⊱╮🍓╰⊰🍓´🍓⊱╮🍓╰⊰🍓´🍓⊱╮🍓
🌞Environment - Contenu to work on ensuring that the Humidity stays above 45%
💧 Feeding - Using "Super Coco" amended soil. compost teas, Dechlorinated H20 PH/6.5 Fish Fertilizer
🍃Training / None just keeping things defoliated.
🕷️ IPM - Will be using Green Cleaner" 1 OZ per Gallon, and CannControl from Mammoth alternating between product each month for Integrated Pest Management.
💡"960 Watts of LED's 4x8x8 Custom Grow Closet"💡
🍓╰⊰🍓´🍓⊱╮🍓╰⊰🍓´🍓⊱╮🍓╰⊰🍓´🍓⊱╮🍓╰⊰🍓´🍓⊱╮🍓
Rambling - Completing Week 10 here, and this girl continues to do much better, stacking on the bud weight.
🍓╰⊰🍓´🍓⊱╮🍓╰⊰🍓´🍓⊱╮🍓╰⊰🍓´🍓⊱╮🍓╰⊰🍓´🍓⊱╮🍓
▶️Monday 01.18.21 / Watered w/ Dechlorinated H20 PH 5.8 / 6.2
▶️Tuesday 01.19.21 / Watered w/ Dechlorinated H20 PH 5.8 / 6.2
▶️Wednesday 01.20.21 / Watered w/ Dechlorinated H20 PH 5.8 / 6.2
▶️Thursday 01.21.21 / Watered w/ Dechlorinated H20 PH 5.8 / 6.2
▶️Friday 01.22.21 / Watered w/ Dechlorinated H20 PH 5.8 / 6.2
▶️Saturday 01.23.21 / Watered w/ Dechlorinated H20 PH 5.8 / 6.2
▶️Sunday 01.24.21 / Watered w/ Dechlorinated H20 PH 5.8 / 6.2
🍓╰⊰🍓´🍓⊱╮🍓╰⊰🍓´🍓⊱╮🍓╰⊰🍓´🍓⊱╮🍓╰⊰🍓´🍓⊱╮🍓
SOIL MIX
COCO - 70/30% Tupur Royal Gold 30 GALLON
WORM CASTINGS 5 GALLON
LOBSTER COMPOST 5 GALLON
PERLITE 6 GALLON
INSECT FRASS 2 CUP
ORGANICALLY DONE GROW 5 CUPS
BUILD A SOIL COCO MINERAL MIX 6 CUPS
Likes
117
Share


@PEAKYPLANTERS
Follow
WELL WELL WELL BROTHERS OF THE WEED!
MY FIRST EXPERIENCE WITH THIS SEED HOUSE WAS SENSATIONAL !!!! AS WAS MY FIRST EXPERIENCE OF GROWING MY PLANT IN PHOTOPERIOD FOR THE FIRST TIME IN MY LIFE ...... THE RESULT ???? FANTASTIC QUALITY GEMS THAT SPILL WITH GLUE.
MY SUPER CHALLENGE WAS MAKING THEM GROW OUTDOOR FOR THE WHOLE VEGETATION, THEN PUSH THEM TO FLOWER IN THE TENT! IT WAS NOT SIMPLE ....
AT THE BEGINNING I HAD TO FACE MANY PARASITES .... BUT AFTER VARIOUS PRECAUTIONS WE WERE ABLE TO GO THE RIGHT TOWARD ME AND MY BELOVED CHILDREN .... I CUT THE BUDS FROM THE TOP TO THE BOTTOM, that is, I REDUCED THE CANOPY BY CUTTING FIRST THE TOP AND AFTER A FEW DAYS, THE UNDERLYING PART.
THEIR RESISTANCE WAS REALLY NOTABLE FOR THE LITTLE SPACE AVAILABLE IN THE TENT AND SINCERE I BELIEVE THAT I COULD NOT ASK MORE FROM SANTA CLAUS THAT A LARGE HARVEST IS EXCELLENT QUALITY FOR THE CHRISTMAS HOLIDAYS (IF THIS WE COULD HOLIDAYS)
AFTER AN EXPERIENCE SO CLEARLY POSITIVE .... I CANNOT TRY THEM ALL ... YOU CONTINUE TO FOLLOW ME AND SUPPORT ME AS ALWAYS
BEST REGARDS
PEAKYPLANTERS

Likes
25
Share


@Ratch33
Follow
Flipped May 2nd
*Selective defoliation (Open lower bud sites)
*PH 5.5 😶
*Hydrogen Peroxide Foliar Spray
*All set for now, hope all goes well from here!! Peace!🙌

Likes
52
Share


@MagicoVerde
Follow
Last week and flushing time using flawless finish from an and flushing with proper ph water 6 h later after applying the product . Can’t be more happy, plant Gad respond really well to all the stages and it’s as expected, and ve say the buds luckily got bigger than expected and the smell is brilliant.
Definately I’ll grow it again 😊
Likes
97
Share


@Van_Terpen
Follow
LIVING SOIL & TCO
DEMETEARTH SYSTEM
⚡CODE PROMO : VAN-TERPEN420⚡
-15 % + 2 Seeds The High Chameleon 🦎
https://linktr.ee/vanterpen

Likes
2
Share


@Green_Peace
Follow
This plant is beautiful, wish I had taken a clone!
Reaching peak flower now so added PK into the mix for extra Potassium and Phosphorous over the next 10 days or so. Never had plants soak up this much nutrients without any burn (touch wood) so I'm really impressed with the Vitalink range. This plant is at the front left of the tent, and to the rear of the screen in the timelapse.
Heavily defoliated for the final time this week, allowing for the light to reach as many bud sites as possible.
Likes
23
Share


@blazin_skywalker
Follow
My aggressive bud-blocker removal has resulted in an unruly bush who is trying to over-grow her space!
My hopes are that she can keep herself contained for the rest of the grow lol 😂.
I've done a LOT of defoliation to try and help with the humidy and airflow in the tent. Her bud sites look happy and healthy, and her branches are super strong! 💪 She is drinking a TON of water. I find myself adding a gallon every 2-3 days!

Processing
Likes
14
Share


@DUBDOLLASIGN100
Follow
It's been 4 days since I've watered them and there you have it #BOOM I can say at this point I'm excited on what's to come when I harvest this Gotti OG and Dtpg OG. This was a indoor veg and outdoor flower, these been outside since July 26 and has adapted to the outside like it's there natural habitat lol. There has not been any deficiency in there grow nor there leaves, I've been patient with a pattern water/feed scheduling every other day.
Likes
6
Share


@BB_UK
Follow
been such a great week, temps perfect, humidity is low enough (could be lower) but is what it is! i am going to start flush next week for my girls that are ready! I've introduced calmag at this stage too as they all needed it! maybe 1 week left on this girl, will use my mag lense to specify when ill chop her

Likes
91
Share


@DogDoctorOfficial
Follow
They are responding amazing to everything, they dont even look the same is just crazy retarded how well they are doing now , ate least to my eyes they do lol love the green, love how full is getting , love it all, if she keeps like this next week mb less i will put them in flower mode other way i wont have space for them after lol
For now i have my PPFD around 560 but i will bring this up wen in flower, i did IPM on them just in case with nematodes and a bunch of beneficial bugs and mites lol
As always thank you guys for your love , your time, your support and it all, i fell blessed and i am truly thankful <3 <3 <3
All i grow is medicine for myself, for me and for my best friend with is me nothing to sell, so don’t even ask
<3 <3 <3
All info and full product details can be find in can find @
https://www.zamnesia.com
https://aptus-holland.com
#aptus #aptusplanttech #aptusgang #aptusfamily #aptustrueplantscience #inbalancewithnature #trueplantscience #zamnesiaseeds #growerslove
With true love comes happiness <3 <3
Always believe in your self and always do things expecting nothing and with an open heart , be a giver and the universe will give back to you in ways you could not even imagine so <3 <3 <3
More info and updates @
https://growdiaries.com/grower/dogdoctor
https://instagram.com/dogdoctorofficial
https://youtube.com/channel/UCR7ta4DKLFMg2xxTMr2cpIg
Growers love to you all

Likes
96
Share


@Tropicannibis_Todd
Follow
💩Alrighty then Growmies We Are Back At it 💩
Well folks we just finished up the last run and so we are bad to do it all over again 😁
So what do you say we have some fun 👈 We got some Z & Z 🚗 🚘 🚗 🚘 👉 From Exotic Seeds
Well we are just 63 days and folks shes doing pretty good 👌
She's going to be chopped here in the next day or too 👈
So I am super happy thus far👍 smells awsome 😊 very sweet 😊
FC4800 from MarsHydro Lights being readjusted and chart updated .........👍I've added a UR45 to the mix👈
www.marshydro.ca
👉I am using Agrogardens for nutrients for my grows and welcome anyone to give them a try .👈
👉 www.agrogardens.com 👈
Agrogardens Cal MAG
Agrogardens Grow A+B
Agrogardens Bloom A+B
Agrogardens Bud Booster
Agrogardens PK13/14
I GOT MULTIPLE DIARIES ON THE GO 😱 please check them out 😎
👉THANKS FOR TAKING THE TIME TO GO OVER MY DIARIES 👈
Would you like to hang with the growdiary community 👉 https://discord.gg/gr4cHGDpdb 👈

Likes
16
Share


@Magic_frequency
Follow
How i wish i didn’t topped these 2 plants. :( too high too high alert😂😂😂


