
Likes
Comments
Share


@Bread_n_Buds
Follow
Our Jet Fuels are plants that promise very well, we have always loved the strains of the Diesel family, a bit gassy and for this particular taste we have great expectations. You could say that it is the favorite taste in the BreadandBuds house I have to study the terpenes a bit better to tell you better but one thing at a time we will delve into everything.
Never stop at the first good results guys, always improving is fuel for the next day, to keep the passion alive and have results.
Growing Projects ----- I will follow this procedure, it has given birth to a plant before that will be worked with topping x16 buds and various LST and I have just germinated the second plant that will be born about 13 days after the first and will go straight to the conclusion with the main cola. I have to tell you in the past I was a topping maniac, then I felt nostalgic for the main cola. It is always a major sacrifice to give up the Main Cola. To avoid depression and to give a better vision to our super trusted breeder, home breeder and Zamnesia heart breeder we make a plant in topping and a straight one preserving the main cola. Those videos with the rotating Main COla were liked and we produce the best Maincola of the situation-
The first week went only with Power Roots 1 Ml/l and Pure Zym 1ml/l from now on we start with ALga Grow. The plants were transplanted shortly after germination because the biodegradable pots were very small. The soil is Plagron Pro Mix 100% organic renewed with 30% new soil and 20% Perlite added. (Pro mix don't have perlite but is airy we added anyway)
Plagron fertilizers are available on Zamnesia in convenient Pack formats for all growing styles. I used this with a simple search you can find the other products.
---- https://www.zamnesia.io/en/12119-plagron-top-grow-box-100-natural.html
Try a seed of this strain that drives us crazy...
---- https://www.zamnesia.io/it/11258-zamnesia-seeds-jet-fuel.html
Zamnesia Description // Jet Fuel (also known as G6, Jet Fuel OG, and G6 Kush) is a modern hybrid rich in THC and terpenes with a diesel aroma. Originally created in Colorado by crossing Diesel with Aspen OG, this 60% sativa-dominant hybrid is a must-have for any smoker who enjoys an uplifting and energizing high. Now, thanks to the hard work of our breeders, the original Jet Fuel is even easier to grow at home. Order your seeds, plant them in soil, and enjoy their rapid growth. After just 9–10 weeks of flowering, you can expect a generous harvest of premium sativa buds!
Growbox and Air System - Secret Jardin DS120w + fans + Exhaust fans and filters DF16 kit ---- https://www.secretjardin.com
All the best that mother nature can offer is on ----www.zamnesia.com
Call for collabo: I am available for collaborations with companies of Lights and various equipment for growing (No Seeds and Nuts company please) I would like to renovate my 120x120 space that has slightly obsolete lights, and I would like to try some controllers. If you have proposals available.

Likes
17
Share


@DimiTryCool
Follow
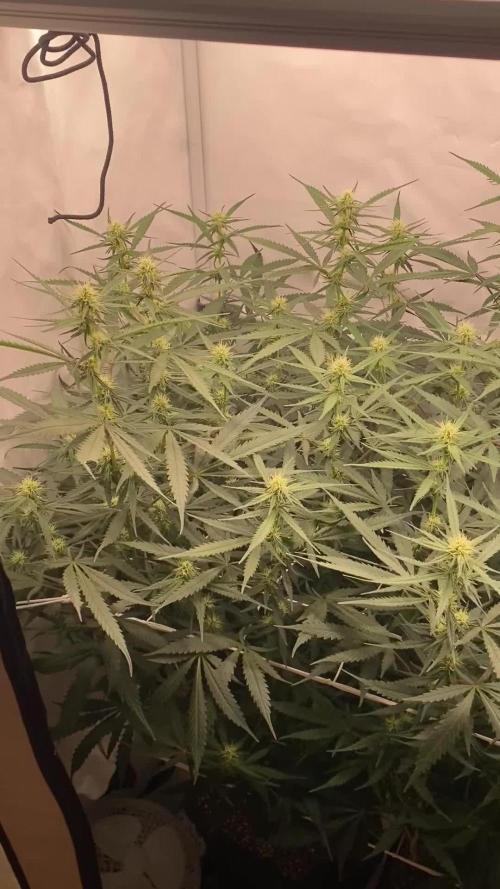
8 week
We have 12 strong plants and one skinny one. They start drinking more then 1.5 l with one application of water.
Smells really sweetly and fruity. I really love it!

Likes
1
Share


@Mr_Motalovah
Follow
Hello Growers and Tokers!
Welcome to another run where I'll be testing something from a local breeder.
The cultivar is Orange Apricot x Mimosa from Mallorca Breeders.
This cultivar is a treat, I've had the delight of smoking this grown from the actual breeder.
If it comes out anything like that I'll be more than happy.
Frosty buds, very oily, very tasty, very hard, very nice, very everything! It was a 10/10 smoke
Let's hope we have a 10/10 grow to have some 10/10 nugs.
Strain description from breeder:
Genetic Background: Orange Apricot x Mimosa
Type: Feminized
Sativa 50% Indica 50%
THC:
CBD:
Yield Indoor : gr/m2
Height Indoor: 0 - 0 cm
Flowering time: 8 - 9 weeks ( 55 - 60 days)
Aroma:
Effect:
Expectations and training method:
I know these genetics are a bit delicate so I’ll be taking things very easy.
The breeder suggests waiting until the fan leaves come out to decide the training technique.
If the fan leaves are thinner then it’s leaning more towards Orange Apricot and will be a bit more sativa and has more ramifications so most likely LST. Thicker fan leaves would be leaning towards Indica which is what I actually want, the Mimosa side. Breeder recommends topping this Pheno to increase yields. Let’s hope they’re Mimosa leaning..
As for the yields I’m not expecting more than 40 grams per plant but always shooting for more.
I’ve already smoked this strain grown by the breeder and other local breeders, which is what made me want to grow it myself. I expect nothing but trichomes and terps from these ladies.
Equipment used in this cycle:
Tent: Dutch Masters 120x240x220cm
Lights:
1 x Mars Hydro TSW2000
1 x Mars Hydro FC3000
Ventilation:
Garden HighPro - ProFan TT Extractor Fan - 150mm
Garden Highpro - ProActiv Carbon Filter - 150mm
Garden Highpro - ProFan Oscilating Clip Fans - 25cm
Blauburg - Inline Fan - 125mm
Humidifier:
Garden Highpro - Humipro Digital Humidifier - 4 liters
Pots: Garden Highpro 11L Fabric pots
Medium: Biobizz Light Mix
Nutrients:
Grotek - Mycrorizo
Plagron- Alga grow, Alga Bloom, green sensation and royal sugar.
PH down
Calmag
Measuring instruments:
Hygrometer/Thermometer - Govee:
EC Meter - HM Digital: COM-80S Hydrotester
PH Meter - Vanguard Hydroponics
Happy Growing! 😃
Likes
26
Share


@Hydro_Bins
Follow
Excellent quality and quantity with this harvest! Will look to to control the stretching phase of flowering next grow.
Likes
15
Share


@Litngrn
Follow
Harvest went great but couldn't be happier with 12 oz of off of this girl. I did take a clone that I'm going to try to reveg. I think it's awesome that she turned out to be a photo. At 50 days she was selling those signs of flour until I say River in to 1212 flower lighting and she took off
Likes
10
Share

@Gorillanonymous
Follow
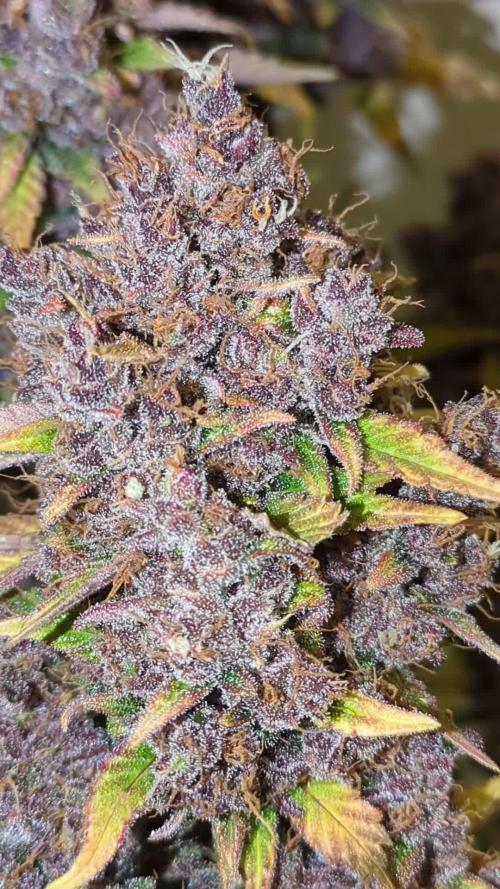
She's ready for the chop! What an incredible strain. Super easy to grow, the purples look stunning, she smells of gas, cream and fruit . Gna dry her at 20°C at 50-55 RH for about 7-10 days before weighing her up and updating here. Highly recommended! Thank you @Fast_Buds !


Likes
2
Share


@WeedM8
Follow
Pumping up with this Chinese led lights
The environment its small for the way they got larger
Likes
11
Share


@Lahuertade_Bototo
Follow
🌱🌱🌱Continuamos este cultivo, con esta hermosa cepa de FastBuds, Girl Scout Cookies Auto, de lleno en el periodo de Floración .🌱🌱🌱
👨🍳👨🌾🏻 Nutrición y Bitácora 👨🌾🏻👨🍳
-Día 43. Sigue aumentando el engorde de las flores y el aroma es cada vez mas intenso 👌.
-Día 44. Se riega con 3 litros de una solución nutritiva NPK de Plagron Alga Bloom (6 ml) Plagron Sugar Royal (1.5 ml) y Plagron Green Sensation (1.5 ml).
-Día 45. Los aromas se intensifican, ya seco el sustrato.
-Día 46. Se riega con 3 litros de una solución nutritiva NPK de Plagron Alga Bloom (6 ml) Plagron Sugar Royal (1.5 ml) y Plagron Green Sensation (1.5 ml).
-Día 47. Sigue todo excelente 🙌.
-Día 48. Ya seco el sustrato.
-Día 49. Se riega con 3 litros de una solución nutritiva NPK de Plagron Alga Bloom (6 ml) Plagron Sugar Royal (1.5 ml) y Plagron Green Sensation (1.5 ml).
🚀Equipamiento🚀
Indoor de 60x60x159 cm y una iluminación BlackCob F320, se activa solo 1 modulo (160w) a 45 cm del canopy por el resto del cultivo. Intractor de 135mm, extractor de 135mm, filtro de carbón, ventilador "oscilofan", ventilador "clip fan", este ultimo ventilador se ajusta en la parte baja de la carpa para mejorar la circulación de aire bajo el canopy, 2 termohigrometros y una malla SCROG de kanovi a 15 cm de la maceta.
Acompáñenme para ver los resultados de este hermoso desafío, un saludo cultivadores 🔥🔥🔥
Likes
12
Share


@Ieiogrow94
Follow
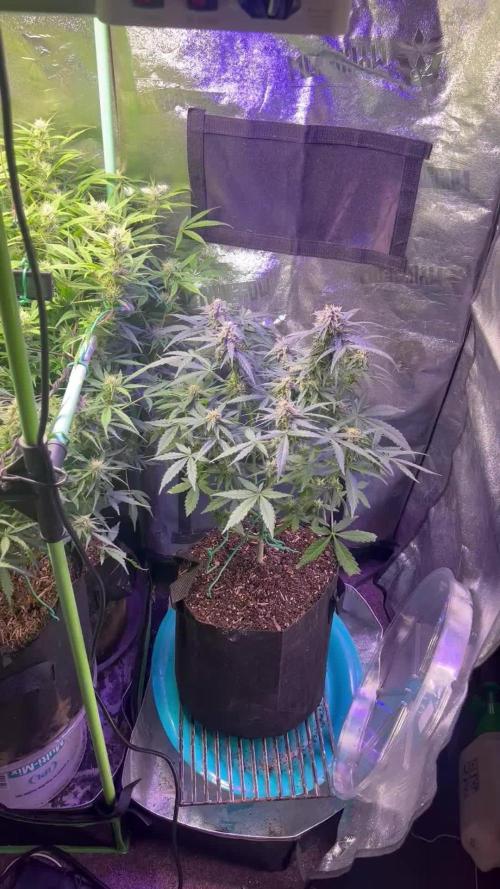
Eccoci qui...
WOW!! Che colori che ha!!!!
Finalmente stiamo ammirando come si stanno formando le cime ed è uno spettacolo, tutte queste sfumature di viola mi fanno venire l’acquolina in bocca!!!
Grazie a @KhalifaGenetics e @xpertnutrients per la collab e a tutti per il supporto🔥🌲❤️

Likes
8
Share


@Spliffi
Follow
Heya👍🤙👍🌱
I started a growers Tips videos.
Check out my Facebook profile:
https://www.facebook.com/share/v/H6PnoahTHrEzm63U/?mibextid=oFDknk
Big BIG BIG thank you to Sebastien, Heather from Fastbuds420. You guys are the best. Can't wait for the next live.
Even Bigger shout out to Hydroponic.co.za. My local Hydro Shop and Sponsor. Thank you Sir.
👍🤙👍🌱
Likes
5
Share


@4Haut
Follow
Hi@all,
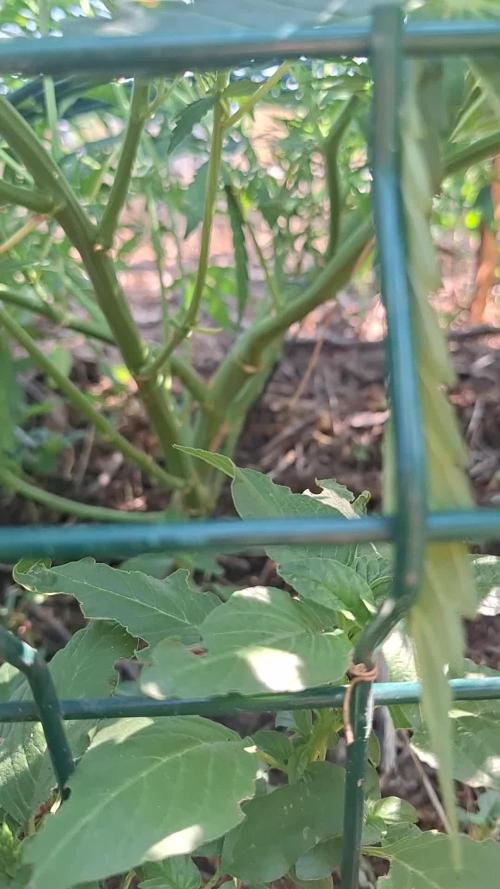
week five. Again, not much exciting happened here. It’s growing and growing. Small and bushy with thick branches. 💪🌿👌
It looks very healthy. Every week, I have to defoliate and tie down the branches, otherwise, it would look like a jungle 😄
greetings 😎👋
Grow.Hard.Go.Pro
Likes
55
Share


@Hempface86
Follow
Ladies and gentlemen we are on day 82 and this girl is no more, through the loophole I can't find one clear trichome I understand the white hairs but I also understand the trichomes is what we go by.. also wanted to get her down because I was worried of possible root issues and did not want to ruin such a beautiful little plant.. Divine seeds has some great genetics this thing was topped and in such a small cup handled the training well and rewarded me with what I'm assuming is going to be between 28 and 35 grams so I'm thinking over a gram per ounce of dirt that's not too shabby.. I hope everyone in the contest is doing well and I hope everyone else is doing just as good.. we are all in this together, to be able to grow our own medicine at our own discretion and know what we're smoking is worth its weight in gold.. again big shout out to Divine Seeds for putting together this competition I thought I would do something a little different to stand out by doing a mini pot grow I don't know if it'll get me a trophy or not but it was sure fun growing it and was very beneficial to me in my personal development as a grower.. until next time folks and a month or so I will have the smoke report.. I tried to upload today for another strain and it wasn't working so hopefully grow diaries fixes the bug of not being able to update a smoke report.. happy growing everyone ✌️😎
ladies and gentlemen after 8 days of drying I trimmed her up today and as you can see from the video 46 g or 1.625 Oz which is extremely good considering the small amount of medium... Now I know during the cure I will probably lose around 1/8 of my total weight but still I will be definitely over 40 grams my guess will be at least 42 to 43 .. now for 28 Oz of soil I could not be happier.. between the genetics being great and the plants loving my feeding remedy all has been well.. I want to thank Divine seeds for throwing such an awesome contest and giving us enough time to do it right and also for providing the seeds but not just that they really hooked it up.. Big ups to them and I have more genetics that I will be running from them in the future.. hope everyone is doing well good luck to everyone in the contest and to everyone happy growing ✌️😎
Likes
23
Share


@adam_pawloski87
Follow
It has been another great week for these Fastbuds ~ Wedding Cheesecake Autos!! Today is day 22 from seed and this upcoming week all 5 will be getting Tied down for LST ! All are getting same veg feed just but make sure if you are using rapid start your gonna have to mix in PH up in your feeds! Light is at same height and is at full power just letting the plants grow into it! Well hope you all enjoy, and please let me know if y’all have any questions I’ll be glad to answer! Bless y’all and stay tuned for next week! Peace y’all
Likes
7
Share

Likes
98
Share


@Tropicannibis_Todd
Follow
💩Holy Crap We Are Back At It And Loving It💩
Growmies we are at DAY 21 and she's just killing💀it👌
So Shit , I gave them just a tad to much nutes 👈 But I have since fixed it
So I'm starting to pull her over and do some low stress training 🙃
Lights being readjusted and chart updated .........👍rain water to be used entire growth👈
👉I used NutriNPK for nutrients for my grows and welcome anyone to give them a try .👈
👉 www.nutrinpk.com 👈
NutriNPK Cal MAG 14-0-14
NutriNPK Grow 28-14-14
NutriNPK Bloom 8-20-30
NutriNPK Bloom Booster 0-52-34
I GOT MULTIPLE DIARIES ON THE GO 😱 please check them out 😎
👉THANKS FOR TAKING THE TIME TO GO OVER MY DIARIES 👈
Likes
1
Share


@Highgrade_Harvests
Follow
Watching this plant grow has been really fun and taught me a lot about taking care of a plant and what to watch out for. Can't wait to see what i can do on my next grow already!
Likes
18
Share


@DaddyPrime
Follow
7/17 she is SUPER fucking frosty 😍💚 buds are filling out too. Cant wait to see her a couple weeks from now
7/21 she was getting super bushy so I defoliated alot of the bigger fan leaves
Likes
5
Share

@MetallicaDave
Follow
Starting week 9 on 3 plants in the tent week 8 for 1 week 7 for 3 more. Today my 3 youngest got repotted in great recycled soil new amendments mi teals and Carfully cut a way the 1 gallon fabrics added Mychro all along the roots and bottom pots, I put them tin 3 gallon Potts and a 5 gallon pot all fabric I extended my grow by completely opening the tent sides and added a 75 and 50 watts of light
The lights are 16 inches above the stretched canopy.i had a slight PH downshift so I purchased PH up and I’m back to 6.4 soil. Oh I was doing 800 and 400 ppm into all pots all are in flower. I always water to 10% runoff and I use a Turkey baster and DEWALT ShopVac to suck up the extra water, 333 is the pppm at the run off. I’ll try and do better pictures I’m wanting to CHOP on day 85 (21 days to go ). The Net is great took some leaves off watching it all come together PH is making my leaves soft very green and healthy looking. I moved branches for better light exposure clippped lower buds and skinny branches ( Larf). Smoke em if you got em 🤘🏻


Likes
92
Share


@MrCOCO
Follow
The photos speak for themselves, I can only add that it was a pleasure ...