The Grow Awards 2026 🏆 


Likes
Comments
Share
@TGriner420
Follow
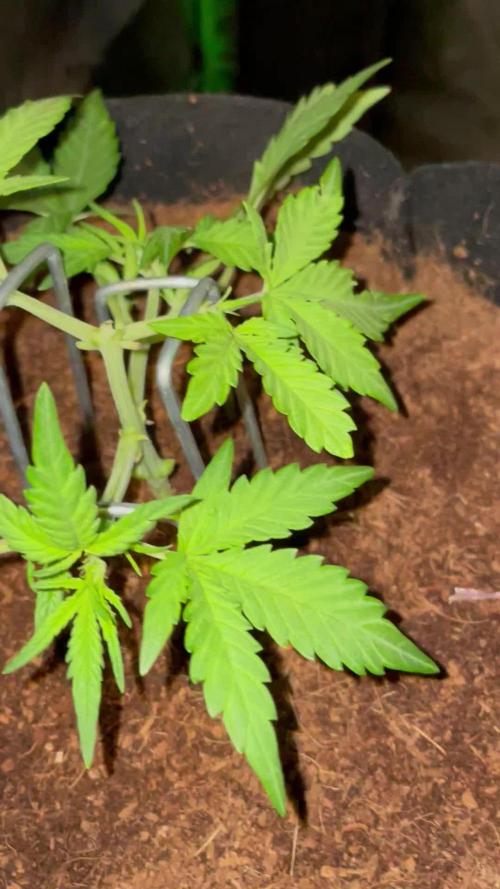
This week went by quick but they grew a lot! I didn't do anything different than last week but just increase their water intake from 1L to 1.5L and then followed my same nutrient regiment. I use the Fish Poop then the next day I just water. Then I use the Real Growers Soil Recharge and then I just water the next day. Then I use the MaxiGrow and then I just water the next day. Then I use the Stash Blend and then I use just water the next day. You can pH (using soil) between 5.5 and 6.5 so I always pH my Nutrient Solutions at 6.2 and use my pH'd water which is a 6.8 (7.0 for soil) but I pH my H20 after adding my Nutrient Solutions. I use my H2O that's always 65 degrees! I find it's better and easier to have a bucket with pH'd water ready to go at all times. It makes it easier when watering and feeding your plants especially if you have a few to care of!

Likes
3
Share
@TonySmietana
Follow
This week was cloudy and rainy but it doesn't look too bad. Usually in the fourth week autoflowers start to grow rapidly - time will tell. I watered the plants with water only. Anny suggestions?

Likes
37
Share
@MG2009
Follow
GTH SEED #1 in training, just super cropped on one side to even conopy.
The first site im recording will be a clone,it is on back side of plant and will not produce. #2,#3,#4 pics,#2 is stripped of leaves at about 12 inches.
06/16/18
#4 is showing
pre-flowers,#2,#3, no sign yet. #1 check in the morning.
06/19/2018
Still no pre -flowers on #1,#2,#3, #4 however is female so I Fimmed her to encourage side shoots to grow biggest of wider canopy. #1 reacting well to supercropping 20 tops as of today. Praying she is female🙏🙏. She is a stretchy girl in flower 2 to 3 x her vegged height so trying to be low profile as possible.👍


Likes
13
Share
@Arkain_Jenetics
Follow
Everything is going good. Some are showing some sort of deficiency . Lowered lights a little bit. Going to start watering every other day. One of the critical thunder autos is like 8 inches tall lol definitely breeding her.


Likes
4
Share
@The_Projexx
Follow
Welcome to week 4! The plants are really growing along now so we will be looking to transplant as soon as possible into their final homes ( 5 gallon ) I will be topping the plants this week to get some of that branching going and we will be looking to start the flowering process sooner then later. Im aiming for 2 weeks more of veg then flower time if things are in order.
Huge shout out to @MarsHydroLED for allowing me to grow with their kick ass equipment!
Huge huge shout out goes to all my followers and to the people who stop into the diary alike you guys are kick ass keep on keeping on!
-The Projexx
Day#22 Pictures N/A Things are starting to grow along nicely , aiming to transplant in a few days!
Day#23 Pictures N/A Transplanted plants into their 5 gallon homes except for 2 went into 7s and 2 stayed in their same buckets. Watered 1/2L each at 550PPM
Day#24 Plants are digging their new homes , we took some video action. Its getting hard to fit all the plants in 1 frame haha.
Day#25 Pictures N/A Plants are just growing along , going to top in the near future.
Day#26 Watered ladies 1L each from the bottom at 550PPM. Going to be bottom feeding from here to see if it makes a difference.
Day#27 Topped the plants let the branching begin!
Day#28 Ladies look unhappy but thats them adjusting for their new nodes!
Recap: Things are pushing strong this week we topped the plants and they are growing like nothings happened. I dont know that Im a fan of bottom feeding the plants but well see how things develop in the near future, I may have to practice the technique until im comfy with it as I would normally top feed.
Processing
Likes
17
Share
@Ashbash
Follow
Made a big error this week and forgot to water these guys for about 5 days.
They did not enjoy it and dried up a lot, but theyre not dead yet! The Zkittlez shouldnt have been affected too badly cos it was nearly done, i hope the lemon ak will revover tho and keep bulking up. I am going to cut down the Zkittlez this week, and leave the lemon a couple more. It looks much bulkier just not dense so gonna leave it a little longer.
Likes
9
Share
@TheGreenGroomer
Follow
Guys, I did it! I managed to get to the end of my grow with no problems and a whopping dry weight of 189 grams (6.6 oz). I am over the moon with the outcome, especially considering this was my first time. The buds have been curing for 12 days now, breaking down extra chlorophyll for a smoother smoke.
The aromas are subtle when putting your nose in the jars—nothing crazy—but when you break into a bud, it smells absolutely amazing. It has an aroma almost like Stardog, with a diesel, piney, and gassy scent.
As for the taste, the buds are just as impressive! They taste exactly how they smell: diesel, piney, and gassy, much like a Stardog. The effect is incredible; it numbed my whole body and put me in a couch lock state. This strain is probably not the best for daytime smoking due to its potent, body-numbing effect.
I can't wait to continue this journey with my next grow!


Likes
7
Share
@420lor
Follow
🌿💋 Otra semanita más con nuestra Kiss de @kannabiaglobal y sigue poniéndose guapa 💋🌿
La Kiss está sacando su lado más dulce, gente. Los cogollos se están poniendo cada vez más gorditos y llenos de resina, y el aroma que empieza a soltar ya es una locura. Un toque dulce con fondo herbal que te dan ganas de cosecharla ya, pero aún le daremos un poquito más de amor. 🌱✨
Esta semana se ha notado cómo las flores están apretándose y cubriéndose de tricomas. Se ve saludable, vibrante y sigue mostrando ese verdor intenso. Cada día más cerca de la recompensa, ¡esto promete! 🙌🔥
#KissCannabis #KannabiaGlobal #SeguimientoDeCultivo #Floracion #CannabisGro

Likes
5
Share
@pzwags420
Follow
I installed a PH controller but it didn't work right and only the ph up peristaltic pump is working. I will use this over my vacation as my PH drifts down naturally so this should work until i get a replacement. I watered in my gsc and other seedlings until runoff with 850 ppm heavy in nitrogen to green them up as the organic top dressing is taking too long.will see how they respond.on week 4 day 4 They are responding well to nitrogen Gsc is taking off!!!will continue nitrogen until end of this week as needed.


Likes
8
Share
@valiotoro
Follow
Hello everyone 😎
Week 4 of flower for the Orange Sherbet auto from Fast Buds 💥
She grew fast with a beautiful green color,for the nutrient 4ml/L terra bloom & 1ml/L power buds from Plagron
Spider Farmer SE-7000 70%
Have a nice day 😋
Likes
7
Share
@HeavyHead
Follow
Nutrients and water this week ;p
Starting to really get a sweet berry like smell to the room :)
Will be dropping temps slightly at the end of this week.

Likes
22
Share
@Spliffi
Follow
Week 11👍🤙👍🌱
I can see the end. This Contest have been a eye opener!!
Jon Dabs
Check them out here:
https://jondabs.com
@jondabs Instagram
The Sponsors
Check them out here:
Dutch Passion
https://dutch-passion.com/en/
Hydroponic.co.za
https://hydroponic.co.za/hydroponic/harvesting-and-growing-accessories/
Bud Juice
https://www.gohydro.co.za
The Best Grow
https://thebestgrow.co.za
Dynomyco
https://www.dynomyco.com
Nuclear Roots
https://www.nuclearroots.co.za
Photronic
https://shop.photronic.net
Special Thanks to Hydroponic.co.za. I buy all my products from them. Best service.
Daily updates coming...

Likes
6
Share
@MisterFlavonoid
Follow
This one was In-Z-Air by PerfectTreeSeeds, grown with GreenPlanetNutrients only! Check the other weeks to see the ones with AptusPlantTech!
Great zkittles terpz, awesome structure, beautiful colours!

Likes
7
Share
@Snakeking
Follow
One thing is obvious they are all same in structure and bud formation and even maturing and this is very good for who wants to plants in land in quantity.
I plant 6 gorilla skittlez from barneys farm and the came out 6 different pheno but this 3 gorgeous persian mood from art genetix are like real sisters.
I believe heaven should smells like my balcony:))

Likes
28
Share
@Professor_Chaos
Follow
Beginning of week..
They are starting to show pistils everywhere.. They both already showed preflower.. But you can really see more and more pistils popping out every day.. And the Mandarin Cookies is already stretching WAY too much lol.. This isn't gonna work out as I wanted it to.. Ugh.. This one Mandarin Cookies could easily fill this 2x4 tent by herself at this point.. Poor ETHOS Cookies is gonna be drowned out or deprived of light.. But this Mandarin Cookies is gonna produce more than enough by herself as well.. Even if she isn't a huge yeilder! The ETHOS Cookies is showing some hints of some possible early bag apeal?? Maybe?? The stems that connect the leaf to the main stem is showing some cool designs.. Usually they are just solid red or purple.. Or solid green or yellow.. This one is green with red stripes.. Not a deficiency because the plant is healthy. If there were any signs of issues then the coloring on the stem would be an issue.. In this case, it is genetics and usually is in my case.. I've always had 99% of my plants show the red/purple stems.. From autos to photos.. From ilgm to fastbuds.. They almost have all showed this "sunburn" type coloring on the stems that are exposed to the heavy lighting.. Usually nothing to worry about.. Now if you see other issues and that begins to pop up out of nowhere.. Then yes.. It would be a deficiency.. But this is why I love growing in coco.. Its quicker to fix issues than soil.. I can flush all day and still add my nutrients after without having to wait for the medium to dry out.. Hydroponics would be the easiest, I suppose.. Just change the reservoir lol.. Damn.. That was alot of nonsense lol.. Sorry I've been smokin my cheese harvest! Yum! Lol
Mid week..
Ok so the Mandarin Cookies was stretching 2-3 inches daily! I went ahead and dropped the Mandarin Cookies off of the crate I still had her on.. Now she is on the ground.. The ETHOS Cookies is still up on 2 larger crates.. A good 10 inches from the ground maybe.. I vegged this Mandarin Cookies a little too long.. I bet one week earlier would have made a HUGE difference.. But whatever.. I am content woth the way things are going.. Runoff pH is still trippin on the Mandarin Cookies.. Usually 5.7.. It has spit out 5.5 once or twice but it seems to jump back up to 5.7 the next watering.. The ETHOS Cookies has been dialed back in.. Runoff is the same as it goes in.. But the ladies are both lookin healthy.. Slowly spittin out more and more pistils.. Within the next 5 days or so, there should be little clusters of pistils at each top.. I'm so excited to see what these girls do under the Optic SLIM 320H!!!.. Beast of a light! Bad ass genetics.. It doesn't get any better than that! Lol...
End of week...
I am seeing some leaf tips being burnt on the very top leaves (newest sprouts).. Which is understandable.. I have been really pushing these girls.. Really just wasting nutes.. But I am going to down the nutes a bit next week for sure.. Big changes will be made.. No more MYCO Plus.. No more FloraGro.. No more Armor Si (Silica).. Instead of 1400 - 1500 PPM, I think I want to get it down to 1000 - 1200 PPM. We are starting to dry out around here.. And I'm getting close to running out of rain water lol.. But filtering my tapwater should be ok.. Still got the power of the light at 50%... About 12 - 14 inches from the canopy.. For the most part lol.. About 750 μmols at the center and about 500 - 550 μmols at the far ends of the tent. Thinking I may go ahead and upgrade to a 6 inch exhaust system.. I like the Vivosun 6" fan (the black with red blades and adjustable speeds) along with the ducting and a carbon filter.. All for $79.. Not bad.. Anyways.. Next week we should see alot more pistils! On to the next!...


Likes
6
Share
@rvabudman
Follow
Graduated, and am off from work for a few weeks, so went overboard on photos. Plant is doing well, leaves are starting to turn yellow (strain trait).
Can't wait for the harvest and being able legally gift my xmas ornaments to my cousins during our "cousins walk" at our family xmas party.
