The Grow Awards 2026 🏆 


Likes
Comments
Share


@Fat_Olsh_Farms
Follow
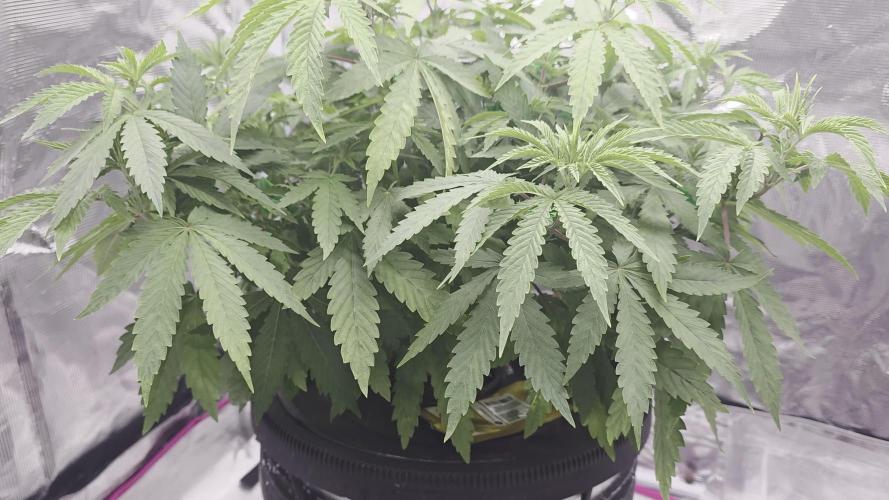
Day 22. Strong and healthy. General Hydroponics maxigro every other watering til 15% runoff.
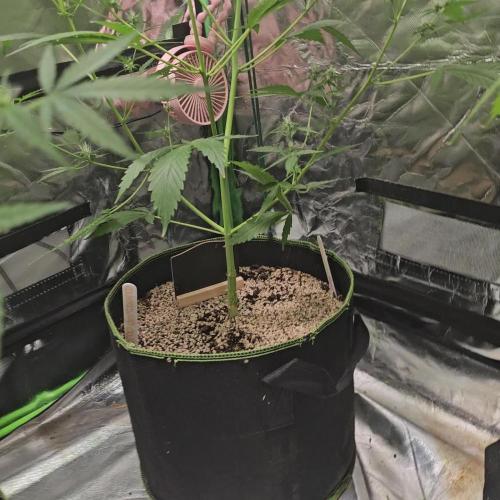
Day 25. Continuing with LST & HST daily.
Likes
2
Share


@Daidai
Follow
I basically followed the same steps as last week only different is i didnt top her off. I was going to do a full h20 change at the end of the week but more important things came up when I was about to do it. Plan on doing a full h20 change at the beginning of week 6.
Need to find my trellis net a spread her out a lil more. I need to raise the light intensity jus a tad. Also raise the light this upcoming week.
So far this has been a decent grow. Hope things continue this trend.
Likes
9
Share


@TheBulldozerSicily
Follow
Inizio nuovo ciclo
Giovedì 26 settembre 2024
Aggiungo 75 lt acqua osmosi inversa ec 146 ph 9
Aggiungo tutti I nutrienti ottenendo ec 908 ph 6.5
Venerdì 4 ottobre
Inizio controllo ec 1196 ph 7
Aggiungi 20 lt acqua osmosi portando l'ec a 950
Likes
22
Share


@Kirsten
Follow
Blackberry Moonrocks is really building the buds now, they are looking beautiful! Exciting times with this lady 😁
I am eager to see the buds continue to develop.
17.8.25:
I watered with 3.5L of dechlorinated water PH'd to 6.0 with;
💜 2ml Trace
PH: 6.0
PPM: 391.
Thanks for checking in and hanging out 😁💚✌️🍃🙏
Processing
Likes
2
Share


@DIRTYKEG
Follow
Wow I love it so crazy and fun at this stage the defoliation was allot more work then I thought jeez..... but there looking beautiful but hope you like now I got to go defoliat the last 2...
Likes
75
Share


@Roberts
Follow
Ice Bomb grew well under the Unit Farm UF4000, and UF2000 that was added in flowering. She was 1 of 5 in a group grow under the lights. She got nice and frosty. Smells like strawberries 🍓 to me anyway. She is suppose to be a good medical cannabis so curious to the smoke report when I get there. Thank you Bomb Seeds, and Unit Farm. 🤜🤛🌱
Thank you grow diaries community for the likes, follows, comments, and subscriptions on my YouTube channel. 🍻🌱👍 Happy Growing 🌱
https://youtube.com/channel/UCAhN7yRzWLpcaRHhMIQ7X4g
Likes
11
Share


@Nookandplant42o
Follow
Big resinous and compact buds, strong smell of the tent its elongated stems are the buds on top getting fatter every week I hope to be surprised with this girl her looks are beautiful great coloring and leaves to go where I need to let her gain more weight and the amber colors are necessary in trichomes, feeding well and requiring more water than the others, even without pure water 😚
Likes
4
Share


@Phatlad187
Follow
Week 6 sticky wasabi. plants growing and bounced back from LST they are growing fast with no problem, a few of them are growing with tight nod spacing and they still loving the 24 housrs of light under 580wats led lighting, THIS FEED they av took 40l between the 14 of them,..
@growerchoice
@SHOGUN COCO A 4ml/L
160ml
@SHOGUN COCO B 4ml/L.
160ml
@SHOGUN ACTIVE BOOST 2ml/L.
40ml
@SHOGUN CAL MAG 1ml/L
20ml
@SHOGUN ZENZYM 2.5ml/L.
100ml
Processing
Likes
23
Share


@GreenISR
Follow
Day 43 - added water 0.5L
Day 44 - added water with filtlizer 0.5L .
Day 45 - added water 0.5L .
I have stop use humidifyer .
Day 46 - added water with filtlizer 0.5L .
Day 47 -added water 0.5L .
Day 48 - added 1 L water + 1 liter water with filtlizer .
Having some mite issuie ,I went to the store and got some neem oil lets see how it went .
Sprayed on each plant 1 L water . NeemBe (biobee) 10 Mg.
Day 49 - added 0.5 L water and tie up the big plant becuse of the hight .
Likes
10
Share


@NSABND
Follow
today Day 22 and Hilde still goes well 🙏
Speedrun video 21 Days 😉
Day23 was cloudy an alot of rain 😩
Day24 was cloudy and alot of rain 😳
Day25 there was sun and not too hot 🙏
Day26 in the afternoon a really sunny day but it started cloudy and rainy oh lord 😯
Likes
17
Share


@masterofsmeagol
Follow
8/23 I WATERED THE NATURAL MK ULTRA AND THE 10TH PLANET IN THE BACK WITH A GALLON AND THE TWO TENS SPLIT A GALLON. It's hotter today and the wind is picking up. I wish I had gotten rid of that plant when I thought to. Oh well. I'm going to have to bite the bullet and treat things. Smell is increases as well as flower size. However I'm noticing more leaves that are yellowing and falling off. Smell has intensified. The special kush in late flower doesn't seem to be producing trichomes like it should. Or maybe it's still early. I see some but by this time I would think it would be frosty as hell! It's rained like once this summer. I've put tons of work into defoliating. I'm not sure if I'll try a controlled spray trying to avoid buds or if I should use a sponge and just hit every leaf. At least I'm seeing that the buds are still expanding and smelling despite these invisible Bastards. It's not like I see them. Even my traps only caught like one. I'll update as I go.
EDIT: WATERED THE TENTH PLANET AND THE LATE SOECIAL KUSH 1 GAL. PLAN ON FEEDING TOMORROW. I DID A SHIT TON OF DEFOLIATION. I DONT SEE ADULT THRIPS BUT I SEE THE EGGS AND SHIT IN THE CREVICE AND SOMETHING IS COMING AND EARING SMALL LOWER FOLIAGE. I RIPPED TWO INTERIOR BRANCHES OFF THE PLANTS I TREATED BEFORE WITH CITRIC ACID BECAUSE I FOUND A COUPLE STOPS OF MOLD ON THE STEM. AFTER RESEARCHING THRIPS WITH A.I. UNTIL IT LITERALLY CHANGED PROTOVAL AND STOPPED HELPING ME SAYING IT DANT HELP CULT8VATE CANNABIS AFTER GIVING ME SEVERAL DIFFERENT INSTRUCTIONS AND OPTIONS. I SCREENSHOTTED THEM THOUGH. I USED THE SAME MIXTURE OF CITRIC ACID AMD DAWN ONLY HALF STRENGTH AND HIT THE 10TH PLANET AND PINK KUSH THAT ARE PATIENT ZERO. THEN I TOOK A SPONGE AND EITHER DEFOLIATED OR WIPED THE LEAVES WITH A SPONGE AND SAME CONCOTION ON THE SPECIAL KUSH IN THE TEN. I DEFOLIATED MORE AND THEN "SPOT TREATED" A FEW LEAVES ON A BOTTOM BRANCH OF THE 10TH PLANET WITH MITE X. I'M WAITING UNTIL THE MORNING TO SEE THE RESULTS AND BEFORE I MOVE FORWARD. I HAVE ORGANOCIDE BEE SAFE AND I KNOW IT WORKS GOOD BUT IT SMELLS LIKE SHIT. IM HOPING ILL FIGURE THIS OUT.
8/24 Didn't have time to do a video or take any pictures. I pit a lot of work in the garden yesterday. I removed a couple small branches that had mold on the stem. If I had listened to my intuition and moved that plant (instead of listening to my dad) I probably could've negated this mess. Windy as hell yesterday. Maybe that's why I don't see mich damage from the thrips. The runt in the 50 has some silver ingredients on it. I'm considering using spinosad. Those are way earlier in flower and that shit WORKS. WATERED TODAY;BIG MK ULTRA 1.5, THREE IN THE BACK ROW, CHEMDOG AND TENTH PLANET ALL GOT 1 GALLON. THE TWO TENS SPLIT A GALLON. I THEN FED EVERYTHING WITH A QUART OF FOOD. I'll keep an eye out on the dosage and see what the can handle. I left out plant doctor as I'm dealing with thrips. Took a leaf that looked like sep off the pink kush in the 50 with half used soil. I didn't have much time to look around but I will when I get back and I'll put some vids/pics up. The plants that I treated with citric acid looked no worse for the wear and actually BETTER than they hadcthe day before. The other 10th planet and the Pink kusg in the ten are the worst. If I can't beat it I may junk them. I'm planning on treatingvtge plants I didn't yesterday tonight. I may use a different treatment I'm not sure.
EDIT: Went back over and took a few pics and a video. I defoliated a SHIT TON of leaves. I can just tell the ones that the thrips have been sucking and laying eggs. It's windy as hell. Plants are going crazy. I'm wondering if the wind will hurt the thrips. Maybe I should've just stood with the wind at my back and throw a buNch of D.E. in the air and have it coat the plants. I'm scared of using d.e. because it absorbs so much water. It's like 80%! The year I had fusarium I put a bunch of d.e. on the soil and it retained water like a mofo. The plants I treated showed no I'll effects. I'm th8nkobg I'm going to remove patient zero and isolate it. And I'm considering using spinosad on the pink kush. What would you do? If you had to use something in the middle of flower or loss your crop which would you choose? I'll probably just use citric acid or the rubbing alcohol. I don't know. I'll keep it updated.
UPDATE: WENT OVER AROUND FIVE AND DEFOLIATED. I CHECKED THE PLANTS I TREATED AND THE ONE IN THE TEN HAD A FEW LEAVES THAT LOOKED LIKE SEP. ITS EXTREMELY WINDY SO I DECIDED AGAINST SPRAYING TONIGHT. I LOOKED ONLINE FOR PREDATORS BUT IT APPEARS TO BE TO LATE OR EXPENSIVE. I MAY LOOK FOR AN OVERNIGHT SHIPMEBT OF LOST COAST PLANT THERAPY OR SOMETHING BUT WILL THAT WORK SUBSTANTIALLY BETTER THAN A DIY VERSION? ILL EITHER ORDER SOMETHING TONIGHT OR PICK UP THE LAST FEW INGREDIENTS I NEED TOMORROW. LOOKING THROUGH THE GARDEN THOUGH EVERYTHING LOOKS GREAT! I WISH THE TRICOMES WOULD DEVELOP A LITTLE FASTER ON THE EARLY SPECIAL KUSH BUT IT IS WHAT IT IS. THESE GIRLS HAVE BEEN THROUGH HELL AND BACK ARE REAL TROOPERS.
8/25 I thought about putting the late flowering special kush in the barn because it looks cloudy and we are supposed to get rain. I chose to wait until I got back but it started raining already. It's not raining right now but it will probably start again. I'm just worried because I haven't staked the branches. It's a strong plant though. I'll check on her when I get back. I'm looking for some Castille soap this morning and the rest of the things to make a diy lost coast plant therapy. The plants look good though and the flowers are really stacking up. I don't see that silvery shit so it doesn't look like it's spreading real fast. The pink kush is in early flower and I'm considering spinosad for them. They have a long ways to go. I'm not sure. I may just use the diy spray. I'm not sure.
Likes
200
Share


@Ferenc
Follow
Day 86, 5th of December 2020:
Craziest group I have ever had...
Honestly I just want to see the end. I will be away for 2 weeks almost.
Original Sensible Seeds ladies are dope.
Gelato is very nice proper shape one of my favourite she is just nice and not problematic.... :)
Runtz Gum is amazing nice big buds are on the way really nice! The same no problem with her at all!!!!
Do-Si-Dos OG is just crazy.... She is not an easy lady... problematic... never met a plant like this one. ...
Too much strech and now I need to tie and stand her up somehow i broke one branch.... I put a tape arounf so hopefully saves that bud tho....🤣
Her flowers kill her lol
Black Ghost OG is sweet and good girl she is the easiest player from them she is good for begginners similar to Wedding Gelato even is shape haha....
Wedding Gelato from RQS is just perfect no problem with her at all... good for begginners as well... :)
So This is how it is 5th week has started I just wanna get it done really long journey :)
The lamp is now on 11 hours and off 13 hours. Every week 15 minutes was taken off and after 4 weeks here we go. Strated 12/12 and now 13/11 wanted try to imitate the nature as the light days are getting shorter.
Fertilization has changed no more epsom salt from this week and I will stop giving nitrogen as well from next week.
Likes
7
Share


@GoodFeel420
Follow
Topping 04/03/2023 18.00 (DD/MM/YYYY HH.MM)
Strength of light 12000-15000 Lux


