
Likes
Comments
Share


@WEEDMANconnect
Follow
So week 15 and she’s been chopped she’s is massive and she smells great the colour oof her is mesmerising I can’t wait to smoke her 🔥🔥🔥💨💨let these hang for 5 days then started removing buds from stalk and gave her a little trim I’ll leave her on nets for a few more days before putting her in jars it’s taken hours to get through these two plants some parts Easyer to trim than others buts it worth the hard work in the end the colours are amazing and the smell is ridiculous so sweet leaves my mouth watering the buds are very dense aswell very happy with her 🍒🍒🔥🔥🔥💨💨💨💨🍒🍇🍇

Likes
44
Share


@RakonGrow
Follow
Note : Jegliches Equipment aufgelistet welches ich nutze findet Ihr in der Germinations Woche !!!
200PPFD 20/4
Day 14:
+ Düngen
+ + 0.5L Flaschenwasser (EC 0.36)
+ + Canna Terrar Vega 2.9ml
+ + Canna Rhizotonic 2ml
+ + PH 6.0

Likes
15
Share


@MrGrowDiarie
Follow
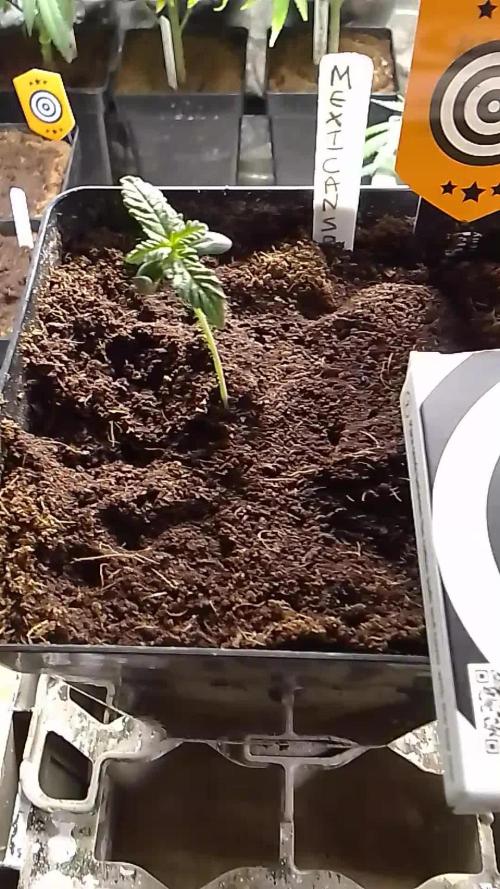
Day 21
The plant looks more on the sativa side and is already showing a small bud, indicating that it's almost entering the flowering stage. However, there's still a chance that it will grow more in size. That’s why I’m very optimistic that it will still gain some height, if not she will be Chopped down

Likes
2
Share


@Strangelet
Follow
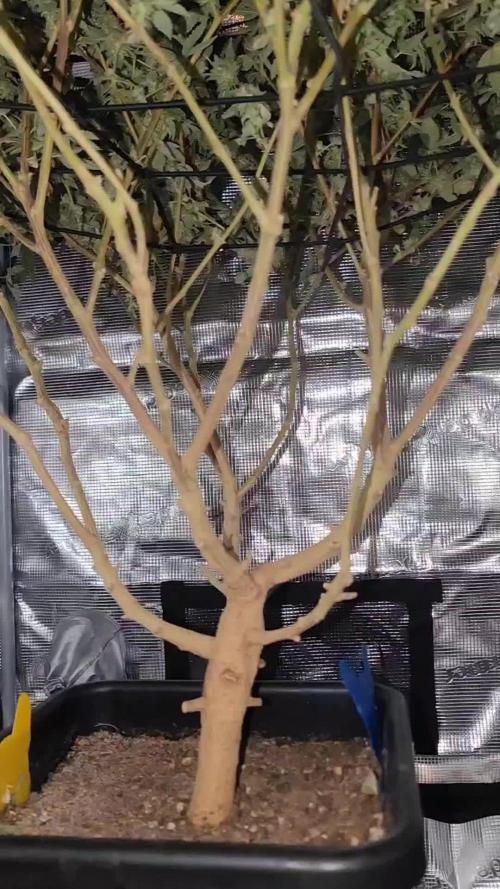
Day 43. Plant isn't growing much, cut all nutrients for the week, just water, seems better right now but hope she gets taller.
Likes
3
Share

@Pompeyblue
Follow
Seed's went in to the sproutly smart germinator 1 week ago and 2 days later went into a root riot cube then in my propagator 5days later have now been potted up BOOM
Starting them on the seedbooster plus ready for them to go on to nutrients

Likes
41
Share


@Santica_Garden
Follow
Not much to update guys, harvesting the ladies 1 by 1 when they are ready, hopefully I can take the rest down at the same time. Can't wait to do the smoke and bud review for you guys. 👍🏾

Likes
8
Share


@Creme_De_La_Creme
Follow
All photos are fromDay 35 for Sour Jealousy from FB, the growth is absurd, she is already 5ft tall, no LST, no Defoliation at all!!
Pre flower stretch is going on, which scaries me, is she going over my tent size? hahaha

Likes
44
Share


@Chedderbob112
Follow
Rite troops new diary here hav planted three kings kush hav the chronic at the bak well there finishing av potted up so Am @ it again hav a skittles fae grizley seed bank n that lovely chronic ghank you delicious seeds rite well troops al try ma best tae keep youz updated there will be a harvest video of the other diary but had to start a new one for the kush n remember am starting fae seed on 12 /12 light cycle a hav monster cropped clones in here and will be switching light schedule very soon to a 18 / 6 vegging and revenging 😎


Likes
37
Share


@Wrongholn519
Follow
The Blackberry auto by Fastbuds has been a thrilling plant to grow. Starting off as a tri-cotyledon seedling, she's been a rush from the start.
When she came out mutated I didn't even know if I wanted to keep her; I asked the growdiaries.com community for help. After speaking with a few experts I decided to keep it and see what would happen.. Since then she has developed thick healthy stocks stalks and dark leaves with ripe purple flowers bursting out between them add every node.
Using a home mix super soil with Promis Organic as the base, I decided to feed compost extracts laced with Golden Tree & CalMag which helped kick this girl into over drive and push out these dense sticky buds.
I'm expecting around 3 ounces from her and it's day 73 since she popped out of the soil. She has a sweet aroma and is completely covered in trichomes.
Drying/ Curing process:
- she will be hung upside down by the main stock until she is dry (8-12 days)
- My humidity will be set to 55 - 60 % and my temps will range from 65-70 degrees F
- Will store in Glas Mason jars with 2-way Boveda humidty packs. These are a lifesaver for new growers. They will keep the humidity in the jar at 62%.
- after 2 weeks I'll throw down a mad sesh
Thanks to everyone who offered me tips and help when I needed it.
Thanks Fastbuds for all you do for the community, including growdiaries.com
Processing
Likes
18
Share


@Organic_LarF
Follow
High GD community,
Week 4.
Starting to veg real good. As writing this, ive just bended those 2 ladies all the way down.
1 week left for them to grow potential, friday transplant into the 12 liter pots.
That will give them 5 days to recover and spread their roots before they get the switch.
See yall next week For more,
Grow safe buds
🙏🍀🍀🍀🙏


Likes
15
Share


Likes
13
Share


@dillande3
Follow
Hello, Day 56, Flower Phase , Gelat.OG, Final week of flower phase is started, Day 63 or week 9 I am planing to harvest the plant, Trichomes still cloudy but in some buds I can see slightly amber color on Trichomes, I ll ask a QUS before I do the harvest anyways.
PS there is BUD ROT Prob just seen it Yesterday 31-12-22 - Seeking answer for that grow QUS, Guys pls help Thanks. Pls check last Video for BUD Rot Problem. Thanks
Day 56 - 29/12/22
Day 58/59 - 31/12/22

Likes
Comments
Share


Likes
11
Share


@DeepRootsGrowTrees
Follow
FORBIDDEN 🚫 RUNTZ/ FASTBUDS
WEEK #6 Overall
Week #5 Veg
This week she still in veg and short in stature but she a bunch of bud sites or tops all around her so I'm sure she'll stretch out shortly. Stay Growing!!


Likes
5
Share


@GuroKC
Follow
Week 7 and 8 in the bag. One more light feed then the flush. Fall colors are coming in nicely and they are starting to purple up. They seem to have wanted a bit more water this week, had one plant start to droop before the watering but everyone perked up. Last dose of Great White microbes this week as well.

Likes
15
Share


@CraigGrowsOK
Follow
This plant was a dream to grow, responded like a champ to topping and LST, I had 4 main colas, each 45-55g wet, one was 70g wet. My total wet weight is 719g!! Holy cow.
The bud its self is dense and tightly packed, while it's not absolutely covered in trichomes ot has a nice even layer that gives it a nice sparkle in the light.
I'm curious to see what the final weight will be as well as a full smoke report when it is fully dry, until then enjoy a handful of pictures.


