The Grow Awards 2026 🏆 


Likes
Comments
Share


Likes
1
Share
@Anon73
Follow
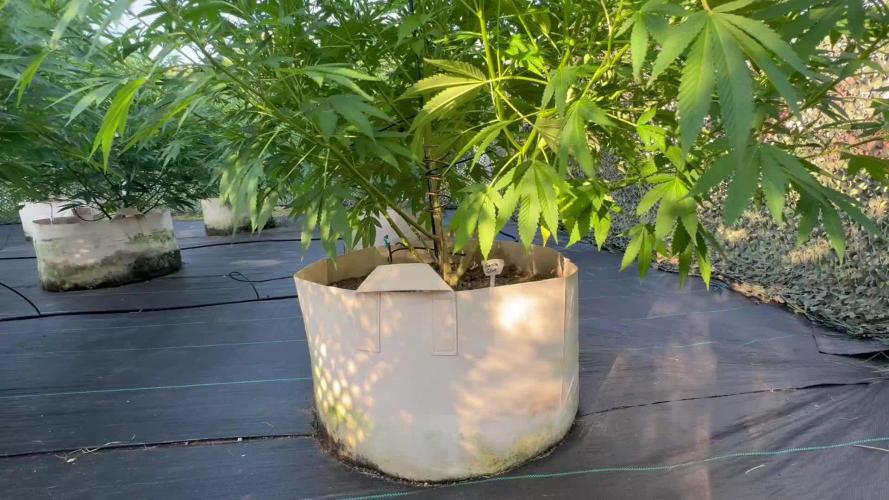
Performed final lollipopping of the inside and lower plant areas. Growth has slowed and flowering is more pronounced.
The puffball stage has arrived.
Top dressed with Gaia Green 70% flower and 30% grow.
Almost zero bug damage, which is shocking.

Likes
1
Share
@Iamelteddy
Follow
This Blue Dream’Matic from 420 Fast Buds is on the same timeline as my Purple Lemonade Auto.
We’re entering week 10 from seed.
I haven’t topped this one unlike the Purple Lemonade .
Been a pleasure to grow.
The smells are amazing, trichome production has been great , and the buds have been getting pretty thick!
Definitely one of the stickiest plants I’ve handled.
No complaints with this strain.
I’ll post a harvest post next week or so once they get chopped down.
Thanks for the progress follow! 🤘🏼

Likes
2
Share
@PriinzzFarmz
Follow
End of week 5
Nono start drybag Moments so i don’t get them to much water the next 2 days
And Than Instant last 2 weeks of fertilzer before Fish in week 7-8
3-4 weeks left


Likes
3
Share
@BudBeat
Follow
Zur Zeit ist es echt sehr warm. Die Kabul steckt die Hitze weg, als wär es nichts. Sie fühlt sich pudelwohl. Sie wächst und gedeiht. Sie hat in der letzten Woche noch ein wenig an Höhe zugelegt. Jetzt ist es aber Zeit, mehr Masse aufzubauen. Ich sehe aber dahingehend keinerlei Probleme, da alles wunderschön grün ist und die Kabul ihre Energie in die Blüten stecken kann 😉. Unter anderem sind die unteren Blüten von mir entfernt worden, damit mehr Masse aufgebaut werden kann. Bis die Tage ✌️

Likes
9
Share
@NONSENSE
Follow
Good day everyone,
3 days ago I harvested the Pineapple express.
I can say only one - this was VERY fast grow. The fastest one I had ever.
So I know why - Fast buds genetic
DWC simple system
I can not say anything about the strain yet, but the aroma is amazingly sweet and fruity.
The buds are fully covered with the white crystals.
I will update the DRY bud weight within 1 week
the smoke report.
Good luck
Likes
16
Share
@LittleBigTrees
Follow
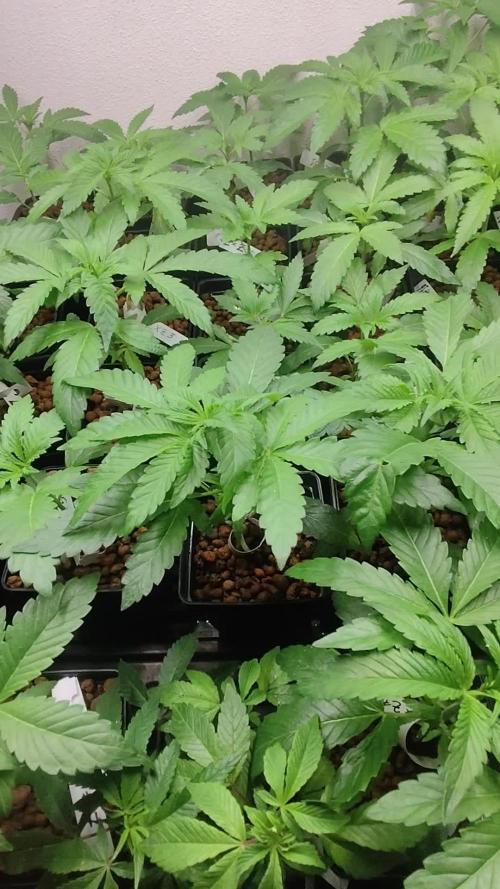
Strawberry lemonade and Acapulco gold Potted into 4ltr pots with peat Moss based soil and fresh Bunny buttons.
I'll put pineapple chunk into bigger pots soon.
Started some other seeds to as spares, some will get the chop soon as I've got way to many !!
Light at 16000 lux.

Likes
2
Share
@PINUFLA
Follow
Día: 72
Riego: 1L x Pl.
- SoloTek Bloom 3mlxL
- HeavyBud 3mlxL
- Vitamax 1mlxL
- MonsterBloom 0,3gxL
Día: 75
Riego: 1L x Pl.
- ProSilicate 1mlxL


Likes
40
Share
@Hempface86
Follow
Today is day 77 so we are starting week 12 .. all the plants are doing great 👍 Gummiebears is the real star of the show as she's double any other girls I have going right now.. she in 4 gallon pot and is around 44 to 45 inches tall and has so so many bud sites that are stacking fast.. she is 2 weeks behind in flower but you wouldn't know it .. Grease Gun and Froot by the foot are almost ready for the flush stage , today I fed them next to nothing.. Cream however is still getting full dose and she taking it well ...... Early on I cut the lowest 2 branches and cloned them and stuck them in a vase with nutrient water fore 10 days then stuck them in dirt and boy have they takin off .. they started to reveg and I look forward to seeing how crazy that gets ... pictures about illustrating what they once where vs now .. hope all is well.. God bless everyone 🙏 Happy growing ✌️


Likes
3
Share
@The_Lonely_Farmer
Follow
This diary will be solely too showcase as I go along also too help me keep track here and there when needed.
Not all will be correct or down too perfection but is still a journey you can join along with 🌱
Gifted these great beans from across the water and glad to finally see them pop through the soil 💚

Likes
6
Share
@HUMO_Cultiva
Follow
Update of Goofiez 2 of compound genetics!! On RDWC it’s literally super fast grow !! We are doing a pheno hunting of 12 plants and we seed 4 of them that are the best at the moment
Likes
31
Share
@THCpapa
Follow
Week 7 in the comedy of my garden journey, and my green squad has decided to embrace the art of being vertically challenged – they're like the plant version of a pocket-sized superhero team. "Short and sassy" seems to be their new motto.
In an attempt to uplift their spirits, two of the ladies scored a new, roomier 3-gallon final home – it's like they moved from a cozy apartment to a botanical mansion, hoping a change of scenery would inspire some vertical ambition. They're probably comparing their new homes and deciding who has the fanciest leafy chandelier.
However, the plot thickens as one plant emerges with a leafy fashion statement that's a bit too avant-garde – discoloration that could rival a Picasso painting. Is it a magnesium deficiency or an oxygen rebellion? The plant might as well be holding a tiny protest sign that says, "Give me answers or give me wilting!"
Playing the role of a plant detective, I cranked up the fans, turning my grow tent into a botanical wind tunnel. It's like a leafy hurricane is sweeping through, and my plants are either loving the breeze or planning their escape. As a bonus, I threw in a leafy spa day – deformation and topping, because who doesn't love a good horticultural makeover?
But wait, there's more! In the midst of the botanical sitcom, the humidity decided to play the villain in this leafy drama. It's like the humidity gauge is staging a rebellion of its own. So, armed with misters and perhaps a leafy motivational speech, I'm on a mission to turn my grow tent into a tropical paradise and give my plants the humidity vacation they didn't know they needed.
Week 7 – where the plants are short, the homes are upgraded, the leaves are avant-garde, and the humidity is throwing a curveball. Stay tuned for the next episode of "The Green and the Humid" – because in the world of my garden, every week is a new episode filled with laughs, surprises, and a touch of leafy chaos! 🌿🌧️🎭


Likes
50
Share
@DogDoctorOfficial
Follow
Week 8 Flower — The Frosted Finale Approaches
As we enter Week 8 of flower, our Sundae Driver ladies have transformed into something truly spectacular. The tent feels alive with energy, coated in that glistening, diamond-like frost that every grower dreams of. These girls have come a long way—from seed to strength, from gentle sprouts to towering beauties—and this week’s photos capture that evolution in every sparkling detail.
A Quick Recap for New Friends
For anyone joining us now, welcome to the ride. This grow began with three seeds from Zamnesia Seeds, all of which germinated successfully. We selected two phenos—our Sundae Driver #2 and #3—and nurtured them through an exciting, experimental journey.
They were fed a balanced blend of Aptus Holland and Plagron nutrients, grown in a rich super soil mix, and guided by the precise control of TrolMaster systems and the steady illumination of Future of Grow and ThinkGrow LEDs. Along the way, we explored advanced techniques—most notably, the Super Crop, which became a highlight of this grow.
The Scene This Week
Now in full bloom, both girls are thriving under the lights. Their colas are massive—one could easily compare the main stem to the size of my arm. Dense, weighty, and coated with trichomes from tip to base, they’re the very definition of healthy flower formation.
The aromas are complex and sweet, a creamy mix that hints at their Sundae heritage. Even from a distance, the frost catches the light in a way that makes you pause and admire.
Environmental conditions are holding steady despite the hot season outside.
• Room temperature: around 28°C
• Humidity: 62%
• VPD: approximately 1.3 kPa
With the AC doing its best and airflow dialed in through dual 6” carbon-filtered extractions, the girls are comfortable, breathing easily, and continuing to bulk without stress.
Feeding & Formula
This week, we continue with our refined nutrient mix:
• Aptus Regulator: 0.15 ml/L
• CalMag Boost: 0.25 ml/L
• Plagron PowerBuds: 1 ml/L
• Plagron Green Sensation: 1 ml/L
• Plagron Sugar Royal: 1 ml/L
EC hovers around 1.7, and pH remains close to 6.1. The soil, enriched and alive, holds an EC near 2.9, providing a self-sustaining foundation for these late-flower demands.
Watering now follows the natural rhythm of the soil, ensuring each feed balances moisture and oxygen at the root zone—key for healthy ripening.
The Art of Super Cropping
Remember that bold super crop on Pheno #2 back in Week 4? She’s the living proof that resilience meets reward. The bend healed perfectly, redirecting energy and light into multiple bud sites. The result? An even canopy, incredible bud density, and a plant that carries herself like a true champion.
For those hesitant to try this technique—let this be your sign. Super cropping, when done with care, can unlock your plant’s full potential. It’s a gentle stress that brings powerful returns. Don’t fear it—learn it, trust it, and apply it with love.
Looking Ahead
Week 9 will mark the start of the ripening stage. Expect pistils to darken, trichomes to shift from clear to milky, and the terpene profile to deepen even further. Patience becomes the grower’s greatest tool here—this is when the real magic happens. We’ll soon be talking about fade, flush, and preparation for harvest.
Thank You, Family
To everyone following along—thank you from the bottom of my heart. Whether you’ve been here from seed or you’re just joining now, your presence means everything. To the lovers, the haters, the curious, the passionate—thank you. Because together, we grow.
And to the partners who make this possible—Zamnesia, Aptus Holland, Plagron, Future of Grow, ThinkGrow, Spider Farmer, and TrolMaster—your innovation fuels these gardens.
This project is more than just growing plants; it’s about learning, sharing, and celebrating life itself. Love, patience, and curiosity—these are the lights we all grow under.
Let’s keep shining.
Dog Doctor Official
P.S.
For those of you still hesitant to try new techniques like super cropping—this grow stands as living proof that it works. When done gently, with care and understanding, it brings structure, strength, and new potential to your plants. Don’t be afraid to experiment. Each new method is a lesson, and growth—both for you and your plants—comes from curiosity and courage.
📲 Don’t forget to Subscribe and follow me on Instagram and YouTube @DogDoctorOfficial for exclusive content, real-time updates, and behind-the-scenes magic. We’ve got so much more coming, including transplanting and all the amazing techniques that go along with it. You won’t want to miss it.
• GrowDiaries Journal: https://growdiaries.com/grower/dogdoctorofficial
• Instagram: https://www.instagram.com/dogdoctorofficial/
• YouTube: https://www.youtube.com/@dogdoctorofficial
⸻
Explore the Gear that Powers My Grow
If you’re curious about the tech I’m using, check out these links:
• Genetics, gear, nutrients, and more – Zamnesia: https://www.zamnesia.com/
• Environmental control & automation – TrolMaster: https://www.trolmaster.eu/
• Advanced LED lighting – Future of Grow: https://www.futureofgrow.com/
• Root and growth nutrition – Aptus Holland: https://aptus-holland.com/
• Nutrient systems & boosters – Plagron: https://plagron.com/en/
• Soil & substrate excellence – PRO-MIX BX: https://www.pthorticulture.com/en-us/products/pro-mix-bx-mycorrhizae
• Curing and storage – Grove Bags: https://grovebags.com/
⸻
We’ve got much more coming as we move through the grow cycles. Trust me, you won’t want to miss the next steps, let’s push the boundaries of indoor horticulture together!
As always, this is shared for educational purposes, aiming to spread understanding and appreciation for this plant. Let’s celebrate it responsibly and continue to learn and grow together.
With true love comes happiness. Always believe in yourself, and always do things expecting nothing and with an open heart. Be a giver, and the universe will give back in ways you could never imagine.
💚 Growers love to all 💚
P.S.²
As these girls start to pack serious weight, make sure every branch has proper support. Heavy buds are a blessing, but they can easily become a heartbreak if left unsupported. A single snap can cost you a beautiful cola. Use plant ties, yo-yos, bamboo stakes—whatever fits your setup—and keep a close eye daily. The last stretch is when your plants give their all, so it’s our job to help them carry that gift safely to harvest.
Likes
26
Share
@Cultivomedellin
Follow
Así van las niñas 42 días de vida todas están drenando de EC 1,2-1,4 y pH 6,5-7,0
Así como vamos. 2 quedarán de color 🍇

Likes
10
Share
@oldtimer6455
Follow
Ok these are Seedsman Zkittlez Auto I got as a replacement. The strain is awesome. This is happy weed that tastes great. I highly recommend. 3 plants have given me 9 ounces WET, so I figure it will be around 4 or 5 when dried. I will update when the product is finished being dried and cured
Likes
2
Share
@RebelSeedBank
Follow
Week 7 il phenohunting procede bene
35piante tra cui #1 e #15 stanno mostrando una vigorosita esplosiva 5/5
N4 e 6 4/5
N23 3/5
Ma non scarto le altre...
Profili terpenici e flawor sono la mia priorità
Likes
2
Share
@Solocultivo
Follow
29 macetas de 20-18 litros aproximadamente
Dia 32 de Floracion Super Suelo
Sin fertilizantes
Apoyado con biortilizantes @bioinsumoschakrana
Melaza
Te de Bokashi
Humato Postasico
Potenciado
@Knactive
Knactive el mejor bioestimulante 100% orgánico para todo tipo de plantas , el cual activa la autodefensa contra el estrés oxidativo y potencia la síntesis interna de todas las fitohormonas.
https://instagram.com/knactive_?igshid=MzRlODBiNWFlZA==
Vital Juice
Es un producto Chileno hecho en base a algas: durvillaea antarctica y ascophyllum nodosum.
Likes
2
Share
@AZTERPHUNTER
Follow
trimmed them up little topped at 3 nodes on main and others. Defoliation little by little over time.

Likes
2
Share
@Lifesgarden420
Follow
Did not have much success with the first run but hopefully this one will be great especially inside of the groot