
Likes
Comments
Share


@TGriner420
Follow
For germination I took the seeds and did the paper towel method and then once they developed tap roots I placed them into Root Plugs. Then I placed them directly into the AC Infinity Seed Starter for best results until they reach Seedling phase.

Likes
11
Share


@Skunkiest_bender39
Follow
Ende von Woche 4 ist zu sehen, die Mädels wurden geFIMt allerdings mit einer Rasierklinge.
Die beiden krumble brauchten dringend Dünger, der verbrauch steigt deutlich an. Habe von 5 auf 7 ml/L erhöhen müssen auch bei den Zake.


Likes
56
Share


@JuanHaze_Arg
Follow
Bueno!!!!
hay una punta, Justo la que da en el centro de las dos lamparas que tiene un tono más amarillo que las otras, pareciera una deficiencia de magnesio pero en las hojas más jóvenes, pienso qué hay un exeso de luz en esa zona entonces decidí apagar 50w de cálidos para ver si mejora, próximo riego voy a hacer run off para ver si no estoy sobre fertilizando y creando un bloqueo de nutrientes. La planta se ve saludable pero no de un color correcto cómo está su hermana.
19/04 Se encuentran pulgones negros en el piso de la carpa, muchos. Se pulveriza con aceite de neem y bioprotect. Además se colocaron muchas trampas cromáticas con fabricadas en casa con aceite de giralsol
Se riega con 2 litros de agua (50% grifo + 50% Osmosis) + 2ml de cal mag de top crop PH: 6.4 con el nuevo medidor ya! EC:0.9
21/04/2022 se pulveriza foliar ambas plantas con Big One 1ml x L PH: 6.4 antes que se apaguen las luces y empiece la noche
22/04/2022 se riega con 2,5 litros de agua (2000cm3 osmosis inversa + 3000cm3 de la red) + 3 ml de Cal-Mag para reforsar el calcio, se baja el PH del agua a 5 y se agrega BioEnhancer de Green House Feeding 1 Gr x Litro

Likes
1
Share

@Canivent11
Follow
Topped and still only watering. Fox Farm OF doing the heavy lifting and the girls are thriving


Likes
2
Share


@Weedwithwes
Follow
Day 72 from seed
Just feed water ph to 6
Both veg and bloom mode on the light.
Day 77 (D14 flower )
MoonBow112XUnicornPoop9
Top dressed again for flower.
1 tbsp 2-8-4 gia green
1 tbsp super fly insect frass
1.5 tsp bat guano
1.5 tsp langbeinite
Day 80 (D17 flower )
MoonBow112XUnicornPoop9
Feed microbial tea.
For 2.5 gal brew
* Fish Bone Meal: 1 tbsp
* Bat Guano (High Phosphorus): 1 tbsp
* Kelp Meal: 1 tbsp
* Molasses: 1 tbsp
* Power Bloom (2-8-4): 1tbsp
Help support early flower transition and bud development and soil health overall.
Eventually will add silica and fish shit to my mixes when
Likes
27
Share


@adam_pawloski87
Follow
Over all was an amazing grow, super sticky dense nugs with smell of berries, highly recommended for everyone!!

Likes
15
Share


@Korinthius
Follow
So this plant is phenomenal with her recovery abilities. At this point, she recovered from her previous topping only 7 days ago, and grown the final 2 inches I was waiting for. As of 4/26, she is now on 12/12. Additional nutrients will be added to her for her flower period.
Time-lapse again had an error, this time, I swear, it was not me. Looks like the camera and server stopped communicating until both were restarted.
So as a reference, this plant is now 10 weeks from seed. She has been topped 3 times for a total of 8 crowns. I expect harvest to be approximately 10 weeks from now. But we all know how far expectations can take us.


Likes
Comments
Share


@JayGrows96
Follow
They got a mild deficiency , fixed with marine bio grow and cm plus with humic acid
Likes
5
Share


@most_dope
Follow
Did some lst on one of the taller main colas because I started 2 more and needed the smaller light for them. I turned my 150w Marshydro the way it normally goes so it can cover both plants and tried to get an even top canopy for both plants to get the most out of the lamp. I think the 1 is gorilla zkittlez I was thinking stardawg at first but the leaves are very similar to the gorillaz. I keep worrying about giving higher doses of nutrients because it looks like I burned them a little bit feeding twice in 1 week. It’s hard to tell the difference between defeciency and burn sometimes which is making me want to switch to organic lol. The leafy one is starting to bud finally it seemed like even after pre flower was in full bloom it was still pushing out too many Leaves and almost no trichomes compared to the zkittlez. I’m thinking that one may be an afghan kush or something. It was really woody smelling hazelnut almost and now I’m getting some pine hints now that the buds seem to be getting back on track
Likes
19
Share

@adam_pawloski87
Follow
What a fun run this was ! These Ogreberrys finished up from 81 days to 102 days with nice hints of gassy , sour purple , sweetness and glistening with frost! These ladies will cure up for a month an will be ready to test out ! So much fun , I highly recommend this strain if your looking for some oooy gooohy resiny grape smelling nugs !

Likes
18
Share


@valiotoro
Follow
Hello everyone week 2 of flower has passed for this Vanilla Latte auto 🍼
Same feeding schedule
Mars hydro FC-E6500 75%
have a great day and wish you all happy growing 😎👨🌾🏻


Likes
36
Share


@TerpTurtle
Follow
Took some clones & defoliated/lollipopped
I started building a veg tent and went with a 2x2 AC Infiniti equipped with the 4inch cloud line duct system
was a boring grow week.. ready for flower
Likes
175
Share


@the_curious_grower
Follow
as the second week of June is just on it's end and the weather has had it's ups and downs with a lot of rain and some nice sunny days the plants keep growing day by day.
The tallest plant reached a height of 86 centimeters or 33.85 inch so i'm getting close to the 1 meter mark. But hopefully they will grow much bigger as they have plenty of time left. Last year i a grew Blue Dream and a Chocolope in pots which reached a total height of 1,38 meter, which both yielded 30 grams each. What i should mention about the plants from last year is that the seeds weren't bought but came out of a friends weed. So this year it was all out with premium seeds, more knowledge and experience, great soil and hopefully the best weather


Likes
23
Share


@HideAndFly420
Follow
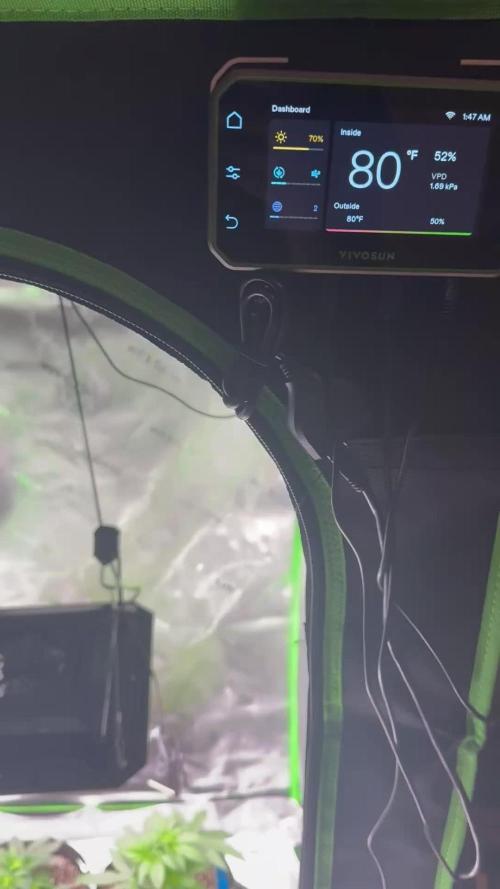
I may have a little problem with humidity and temperature cause unexpected cold is came.
Next week will be fixed.
I really have to fix the temperature and humidty problem, cause i think there is too much thermal shock.
Day 34, now i’m sure about thé température problem.
Likes
13
Share


@DeepRootsGrowTrees
Follow
JOANNE'S CBD / ROYAL QUEEN SEEDS
WEEK #9 OVERALL
WEEK #8 VEG
This week she starting to look much healthier and she growing at a nice rate overall a good week! Stay Growing!!
Thank you for stopping by and taking a look it's much appreciated!!
Thank you ROYAL QUEEN SEEDS!!
JOANNE'S CBD / ROYAL QUEEN SEEDS
Likes
170
Share


@Tropicannibis_Todd
Follow
👉Alrighty Then👈
This plant finished out just around 90 days from seed
👉Puffed a bunch of it , and its fire i finally found the one ive been searching for 👈 the buds are tight and smoothered in resin 👌
The terps on this is out of this world fire , some sweet lime crossed with sprite soda 😍 Amazing 👏
Would definitely grow this one again and would recommend 😳 Facts
Persian Pie from Greenhouseseeds
Full Gas from Greenhouseseeds
Babba Kush from Greenhouseseeds
Rainbow Melon from Fastbuds
Papaya Sherbet from Fastbuds
Weddingcheesecake FF From Fastbuds
Purple Oreoz F1 From Seedsman
Slurricane From Premium Cultivars
Soil by Promix
Nutrients by Cronks
This was a crap ton fun 🙃
Thanks to all my growmies out there for stopping by its much appreciated 👈
👉Happy Growing👈

Likes
Comments
Share


@cookingwithninja
Follow
30% indica, bagseed, amazing smell, berry, fruit punch. So sticky, beautifully cured. Was smoking immediately 2 days into jars.