


Likes
Comments
Share


@Ninjabuds
Follow
Man, it's been a crazy week. These past few days have been brutal – seriously cold with this crazy humidity. I don't know about you, but I'm sick of the chills and the way my skin feels all sticky. It's been a struggle, but I'm finally getting on top of things. I think I've figured out a good routine to dry things out around here, so hopefully, I'll be feeling a lot more comfortable soon.
My three Bubble OG plants are looking awesome. Two of them are super tall, and it's gonna be crazy when they're done. I can already tell they're going to have huge buds. The little one might be short, but it's so dense, it looks like it's just stacked with buds all the way down.

Likes
34
Share

@DarbGrowDiaries
Follow
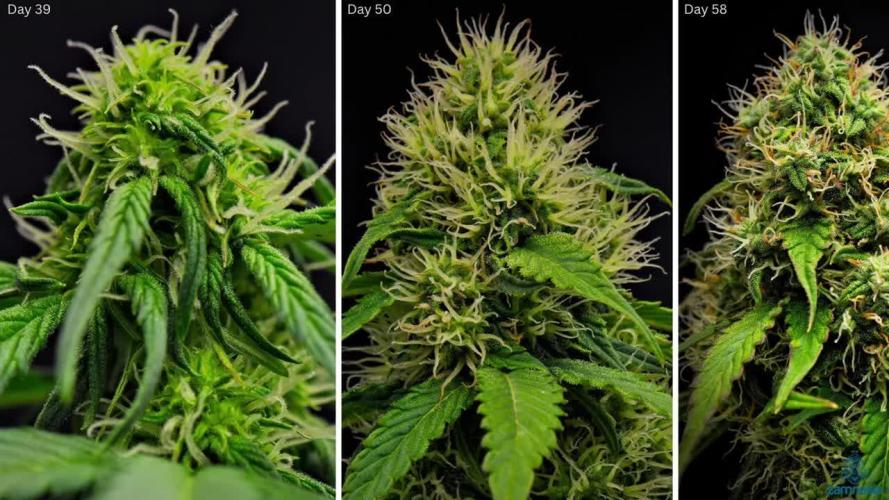
Such crazy plants, the buds are hard as rocks and already feel dry and cured while still flowering.
It has a very sweet smell and some beautiful crazy shaped buds.
Very happy to try out this genetic as well as growing Zamnesia for the first time.


Likes
37
Share


@Aedaone
Follow
The temperatures, humidity, and watering volume(if measured) in grow conditions are all averaged for the week. The pH is soil pH. Any watering done by me is well water which is 7.6 pH and 50° F. Any listed nutrients are ml/gallon of soil to be top dressed.
Day 1 we had high temperature of 89°F. We had scattered thunderstorms and roughly two hours of rain. No watering today
Day 2 we had a high temperature of 80°F. The skies were partly cloudy with a healthy breeze. I water 2-2.5 gallons today.
Day 3 we had a high temperature of 79 and partly cloudy skies. This cooler weather has been nice. I watered 2-3 gallons each pot once.
Day 4 we had high temperature of 92°F. I watered 3-4 gallons from the hose.
Day 5 we had a high temperature of 85°F. Skies were cloudy to overcast with off and on rain until noon. Then partly cloudy in the afternoon. I added 50ml of blood meal and 50ml of iron spread evenly across the tops of the pots. Watering done by rain today. The roots have begun to grow out of the soil on top and down through the pots into the ground.
Day 6 we had a high temperature of 86°F, a short rain shower, with cloudy to partly cloudy skies. Watering done today by the rain.
Day 7 we had high temperature of 81°F skies were cloudy to partly cloudy. We had some intermittent heavy rain so everyone was watered by nature today.
This week was a success.bthe plants topped out at 70" of height. They've begun to feed heavy, so I added blood meal and iron. Next week I'll add some plant tone and coop poop. I defolated the #2 plant as it was getting super bushy. I've not shaped these as much as they need so they don't have a great shape. I'll work on getting them spread out next week.

Processing
Likes
22
Share


@Yiyis_Grow
Follow
Buenas noticias para esta semana.
1. La semana pasada comenté que tenía una planta desordenada, pues no me había percatado que la karpa tenía un orificio abierto en el techo y estaba entrando contaminación lumínica cuando dormía y por eso estaba débil.
2. Un loco que sabe más que yo, me dijo que las puntas amarillas es algo bueno en mis plantas y no algo malo, por lo que están saludables.
3. Las flores tuvieron un gran avance y ya se notan de mejor tamaño y un excelente aroma.
4. El calor y la humedad hacen que cada planta consuma 2 lts de líquido al día.
5. Voy a iniciar Pk1314 esta semana que sigue.
Malas noticias
1. Ya no tengo mota seca jajaj
Buenos humos


Likes
44
Share

@RakonGrow
Follow
+
data+charts online rakongrow.lima.zone/growme-mango-kush-auto-015.html
Tag 106:
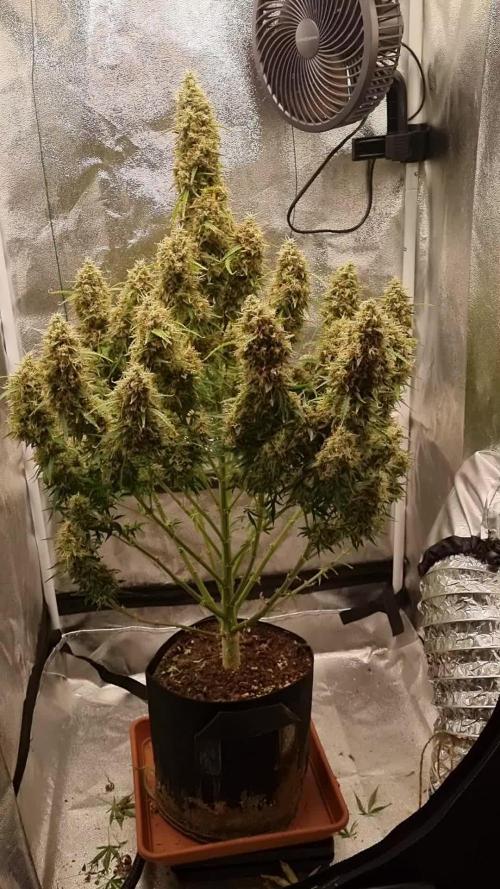
trocknet schon seit 3 tagen kopfüber .
Tag 102 :
Entlaubung und Vorbereitung zur Ernte , nach 4 tagen wasser gibts nichts mehr , reduziertes licht und langsames ausstrocknen .
Tag 99:
ja , da ist noch einiges dazu gekommen , ich bleib jetzt bei Wasser pur
+
Likes
16
Share


@Comfrey
Follow
The plant doing well. She have a good smell but it‘s not really intense yet. The flowers look healthy and it‘s already possible to see how she produce the purple berry colors in trichomes. I have an eye on nitrogen. This was too much and I‘m thinking about a flush, which already helped my first cannabis plant Tropicana. So Blackberry Kush is not ready yet. I think we‘ll end in the middle of July or later. I like to vape my cannabis cause I‘m a medical user. And for this it‘s good to have a fully ripe flower. I need to water in the mornings and late afternoons.

Processing
Likes
19
Share


@creichs
Follow
both lights are about 8 inches away and holy punch is now 11 inches tall.
did a lot lollipoping on day 54 hop it wasn't to much for the smaller power flower it seems to be coming back fine though


Likes
17
Share


@Northern_Ent
Follow
Oct 19: warm October continues and this plant will be harvested in a few days. Three days with snow starting 3 days from now so that’s it for the season.
Drilled a couple of holes in the trunk. Idea is to stress the plant to spur trichome production. Did this before and not entirely sure it helps, but why not?
Oct 20: these buds are getting stinkier and frostier just in time for the season here to end. Smell was quite noticeable this morning so I’ve bumped it up to Strong. All the buds are looking fairly frosty too so this Gelato is finishing strong. 👍👍
Oct 21: harvest day because in two days, Monday, it will be below zero all day and likely snow. Oh well, a longer than expected season allowed this gelato to finish fairly well. Trichomes are still white, and actually I rarely see amber trikes on my plants and I think that’s due the weak sunlight here in the fall. My best option here is to aim to harvest by the end of September. This plant was not billed as being fast flowering so I expected it to be a bit slow, plus it is a sativa pheno, so I feel lucky that it has finished as well as it did. The weather here was definitely good for cannabis this year with the only real hassle being wildfire smoke.

Likes
9
Share


@Jbuttch
Follow
Fertilizante organico a base de platano, el proceso inicio desde la deshidrataciòn hasta llegar ser polvo. Rico en potasio.
Likes
10
Share


@Hempire
Follow
Hello growers !
This week started the pistils colours white into orange /red. Let’s check at the final of the week it should be ok for the harvest :)
Likes
Comments
Share


@kalikusher
Follow
Just in 1.5 day roots went really big 😁
I wasn’t watering plant since 17.02.25
So it still drink drenaje. Don’t know is that really good. Haven’t check what it shows. Next time will do it. But I think I can damage plant if won’t give oxygen in water.
Help please





Likes
32
Share


@midEastern
Follow
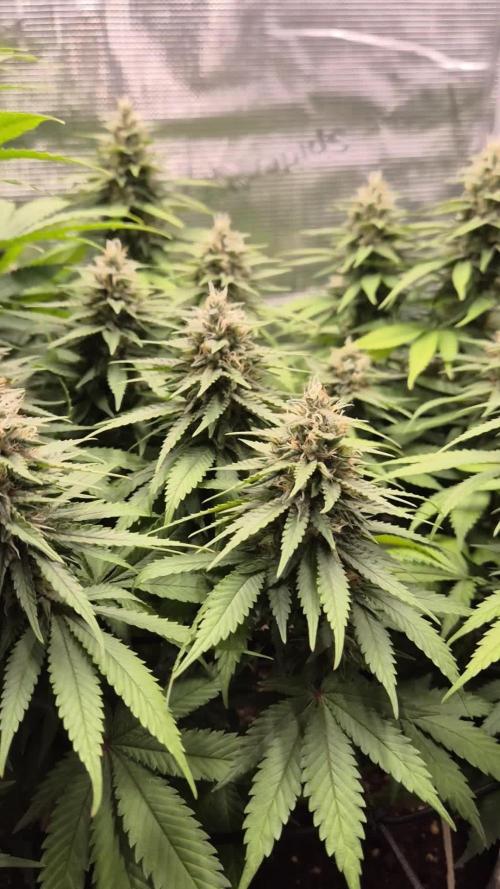
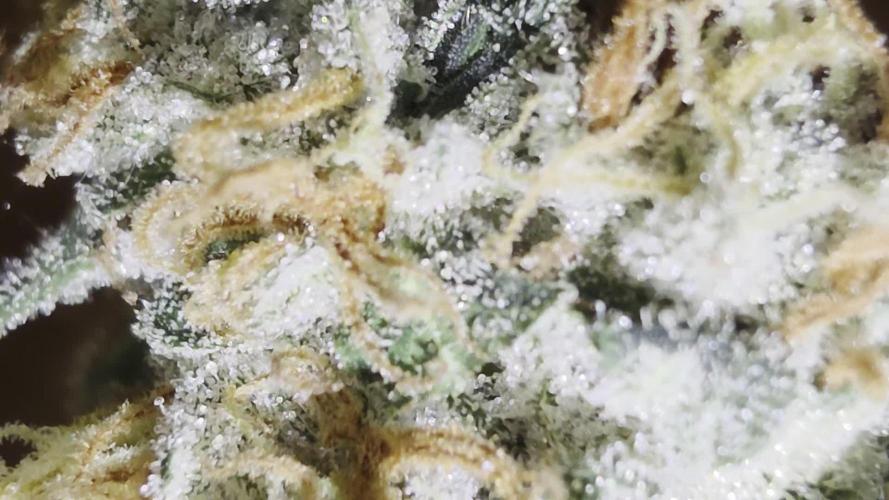
Girls look fresh and healthy..green and vigor.
Almost too big for those pots..last week in those pots and then to 5 gal + some clones to cut and go to flower in the sun.
Got BF Pineapple Chunk seeds shipping right now so will be reported next diary.
Likes
72
Share


@Schnabeldino
Follow
_____ Week 12 | Day 85 - 92 | 5th week blooming 💮 ______
Day 85 🌞
oh yes... the smell when I open the tent becomes more and more intense. The buds also look more and more frosty...
I think the extra side light pays off, where normally there is little or no light, the buds look just as frosty as the top colas. I hope you can see that well in the pictures... unfortunately I don't have much space to take good pictures of the pages... Only LPH 2 & 3 can be seen well from the front.
Amnesia Haze: Amnesia, as expected, is much slower in development than LPH and Biscotti. Number 1 looks a bit wilder and scruffy than 2 and 3. Also from the development 2 and 3 are further and form already diligent trichomes
Biscotti: both biscottis look identical, same pheno I think. development is very good and already looks very frosty
Lemon Power Haze: LPH 2 & 3 look identical, with number 3 looking frostier and furthest along in terms of development.
LPH number 1 looks totally different, the buds look quite small, and it also looks different.
I have to think about something for watering. I love my plants but watering 8 pieces in such a small space is no fun hehe. At the moment I water them manually via a small water pump, the whole thing is very fast but I still have to dislocate myself every time to get to the back plants. this is not the yellow from the egg :D For the next grow, the plants have to be higher and I'm thinking of an automatic water supply. Actually, watering my plants calms me down when I do it with the watering can, but under different conditions...Possibly also fewer plants but more training. When the tent is empty again, I start to implement my plans. I'm also thinking about growing 1 or 2 plants in a DWC system. Whether I make something myself or buy something ready-made is not yet clear. If you have any tips, feel free to write to me.
Day 86 🌞💧
- Today was feeding time again, as announced again after the 3rd day. I mixed a little more than 25 liters and provided each plant with ~3 liters
Day 89 🌞💧
- Three days are over again and the plants are hungry again. 3 liter each Plant, small drain.
____________________________________________________________________________________________
Light - 12/12 h - 560 Watt
- 2x 200 Watt Toplight
- 4 x 40 Watt Lightbars
PPFD - 900 - 1000 µmol
Temp. avg. - 22,1°
Hum. avg. - 56,3 % RLH
Likes
2
Share


@eldruida_lamota
Follow
Que pasa familia, vamos con la segunda semana de floracion de estas Gorilla Melon feminizadas de fastbuds.
Vamos al lío, de las 3 plantas, me quede con 2 por espacio, siempre pongo alguna semilla de más por si no abriese alguna por no perder ese hueco del indoor.
Y ya superaron el shock provocado por el mismo trasplante.
El ph se controla en 6.2 , la temperatura la tenemos entre 20/22 grados y la humedad ronda el 50%.
Hasta aquí todo, Buenos humos 💨💨💨
Likes
52
Share


@Hashy
Follow
Grow diary 11 Stage 2
Days 11-20
The light schedule was altered to 19/5 on day 11 and the 6 inch distance was maintained until she went into the main tent. Lights on 7pm off 2pm
Day 12 was the 1st time she was watered/fed since day 6 when it was soaked for transplant. After day 12 she was fed 300ml every day and the run off checked to make sure everything was in range.
Day 17 she was topped after the 2nd set of nodes. I'm thinking of removing the lowest set of nodes in a few days and doing a small mainlining project,
Day 18 she was moved into my new main tent (gorilla shorty gt225). The light is my mars hydro TS1000 set at 50% power 20 inch above the canopy. The wilma system is just hydroton/clay balls, and the feeds are on at 8pm for 15mins and on at 12.30pm for 15mins.
Day 20 she seems to be adjusting to the topping and the transplant.
I'm happy with how the last 9/10 days have gone, its still been mega hot and i have managed to battle the heat quite well so the plants haven't suffered.
At the moment all 4 strains are at about the same point in growth.
Temp
Max 27.8c
Avg 23.8c
Min 19.4c
Humid
Max 69.5%
Avg 55.7%
Min 45.4%
VPD
Max 1.98
Avg 1.32
Min 0.71
Hope to be back in 10 days without hitting any problems.


