
Likes
Comments
Share


@Ninjabuds
Follow
Man, it's been a crazy week. These past few days have been brutal – seriously cold with this crazy humidity. I don't know about you, but I'm sick of the chills and the way my skin feels all sticky. It's been a struggle, but I'm finally getting on top of things. I think I've figured out a good routine to dry things out around here, so hopefully, I'll be feeling a lot more comfortable soon.
It's been interesting watching these permanent marker plants grow. One of them is still kinda lagging behind, but I think I've got the other one figured out. It's stacked so perfectly, and it's starting to look super sparkly, almost like it's got little crystals on it. I'm curious to see if the other plant will catch up.

Likes
7
Share


@Cultivatorcarlos
Follow
everything in the second week of flower went well. she really stretched and the buds quickly started getting fat. also every watering i would notice a very strong odor of weed.
december 22nd 2021: gaver her last half of gallon used in last feeding. also nothing was tested. ph tested at 6.6 last feeding and it usually comes out a little higher after a few days.
january 1st 2022 i noticed the first trichomes.


Likes
4
Share


@Terpio1500
Follow
Week 4
Last week was good gave the last defoliation for day 21. Adding a higher feed for her.
This one got crazy pistil produced & it’s going all the way down the plant it’s the shortest out of the 3 but has the 2nd most pistil producing on it
Check out my IG for more content @therealterpio & check out my other dairies (jungle verde & Gelato Cake)


Likes
3
Share


@GermanNoob
Follow
This is just very very impressive.
Just a month after germination and this thing is growing like there is no tomorrow.
I am doing nothing to the plant. No training, no pest control. Just ph water and occasionally some selfmade wormtea.
So excited where this one will go.
Will keep you updated

Likes
13
Share


@CanabisLoverHobbyGrower
Follow
Great week,.. put some real size on and can honestly see the buds growing daily, check and feed in a morning and at night and can visibly see a difference,.. ones gone purple ones stayed green but both look healthy, really happy so far, roll on next week 👌
Processing
Likes
7
Share


@greenflipcali89
Follow
Another week in the books and significant growth as I increase dosage of nutrients, closer to 100% full dosage. I have read mixed messages about feeding every watering, to every other, to once a week...full strength, 1/2 strength, etc etc. I decided to ease into the nutes and work my way up, and feed only weekly. Less is more! Wait for her to get a little bigger and more mature and will feel better feeding at 100% full dosage. Did some more LST, pulling down higher stems and continue to build the table.
Day 37: more growth; did some light defoliation to open up center; raised light to 18" (was at 15" in some spots) as it continues to grow.
Day 41: more growth; transplanted into 5 gal fabric pot; installed ScROG and will continue veg stage until rest of the plant catches up to at least a few inches above the screen


Likes
14
Share


@Kakui
Follow
16 Diciembre: El runoff ha alcanzado los 10EC, las plantas siguen creando puntos de floración con espacio internodal corto, gracias al stress generativo, están de 80~85cm de alto aprox. Hay una sola planta que tiene más de 90cm. En unos 2 días más se alcanzarán los 21 días de floración, ese día se hará una defoliacion grande y Lollipop, después de esa defoliacion se volverá a riego vegetativo para estimular el engorde de los cogollos.
18 Diciembre: hoy la EC del runoff alcanzó los 12EC, mañana se harán más disparos de riego para bajar la EC del sustrato. Hoy también se realizó una defoliacion agresiva + Lollipop, para que haya mejor penetración de luz en el Canopy y mejor flujo de aire. Queda solo una semana de riego Generativo, después de eso se vuelve al riego vegetativo para engordar los cogollos.

Likes
75
Share


@DogDoctorOfficial
Follow
Week 3 Veg Report: Growth, Innovation, and Transition Unveiled!
Hello, my green-thumbed comrades! Week 3 with our Panty Punch Auto has been an absolute whirlwind of growth, innovation, and exciting developments. Let's dive into the vibrant tapestry of green wonders that unfolded during this time, enriched by both our plant's progress and the exciting sponsorship from TrolMaster.
Week 3 has been a testament to the resilience and vigor of our Panty Punch Auto. The marvels of her growth never cease to amaze, with each day unveiling new heights of green glory. So astounding has her progress been that I felt compelled to elevate her journey by moving her to her final fabric pot.
In a bold move, I opted for a 50 L fabric pot, though using only 25 L of soil. The idea? To observe how her roots would influence her growth. Into this soil, I pre-mixed a special concoction: Aptus Holland all-in-one pellets, substrate buffer powder, and micromix soil. This super soil recipe is a testament to the meticulous care I've put into ensuring our plant's nourishment. Upon transplanting, her roots were impeccable. I even took the extra step of applying Aptus Holland Mycor Mix to further enhance her transition.
Exciting news! TrolMaster has graciously joined as a sponsor of this diary, infusing our journey with cutting-edge technology. They've sent us their Tent X Controller, a marvel of modern horticulture. This device offers precise environmental control, managing factors like temperature, humidity, and CO2 levels. It's a game-changer in optimizing our growing conditions. I can't wait to share the unboxing video and assembly process in the upcoming weeks!
To Seedstockers, Aptus Holland, Grow Diaries, TrolMaster, and the entire green community, your unwavering support fuels this journey of growth and discovery. Together, we celebrate the wonders of nature and the boundless possibilities of innovation.
Here's to the Panty Punch Auto, to growth, innovation, and the vibrant green community that propels us forward!
Genetics - Panty Punch Auto - https://seedstockers.com/
Plant nutrition - Aptus Holland - https://aptus-holland.com
LED Photons - Lumatek - https://lumatek-lighting.com
Controls - Trol Master - https://www.trolmaster.eu/
Watering - myself
Love and attention - Me, myself and i
As always thank you all for stopping by, for the love and for it all , this journey of mine wold just not be the same without you guys, the love and support is very much appreciated and i fell honored and blessed with you all in my life, With true love comes happiness. Always believe in your self and always do things expecting nothing and with an open heart , be a giver and the universe will give back to you in ways you could not even imagine so
More info, the ocasional give-away and exclusive updates from all my adventures can be found - links in the profile description
Friendly reminder all you see here is pure research and for educational purposes only
Growers Love To you All 💚 💚 💚

Likes
11
Share


Likes
45
Share


@JaramnieJazz
Follow
01.07.26 Ja weiter geht's sind richtige Monster geworden und so wie sie im Moment aussehen werde ich wohl nicht entblättern müssen das Licht dringt schön in die Pflanzen ein ich denke Apple Betty wird wohl am meisten Ertrag bringen zusammen mit Chocobang aber GDP braucht sich nicht verstecken wir werden sehen die Frage ist nur wann in Blüte entweder in 2 Wochen oder am 01.08.26 in 2 Wochen wäre wohl besser da ich paar Sorten diese Runde hab die bis zu 11 Wochen gehen dann wäre Anfang Oktober ende sonst ende Oktober und da ist das Wetter Mist mal schauen Daumen drücken für gutes Wetter Peace 🕊️


Likes
2
Share

@eldruida_lamota
Follow
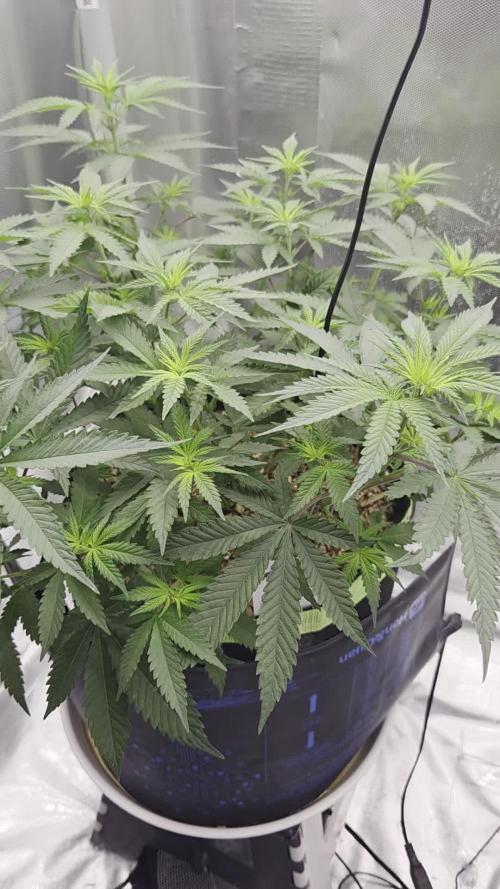
Vamos familia, actualizamos la tercera semana de floración de estas Runtz de MSNL.
La temperatura que estuvo entre los 24-26 grados y humedad dentro de los rangos correctos.
En cuanto a las plantas las veo verde sano, estiraron bien y ensancharon bastante también.
Se nota que los nutrientes de la marca Agrobeta cubre todas las necesidades de cada ejemplar.
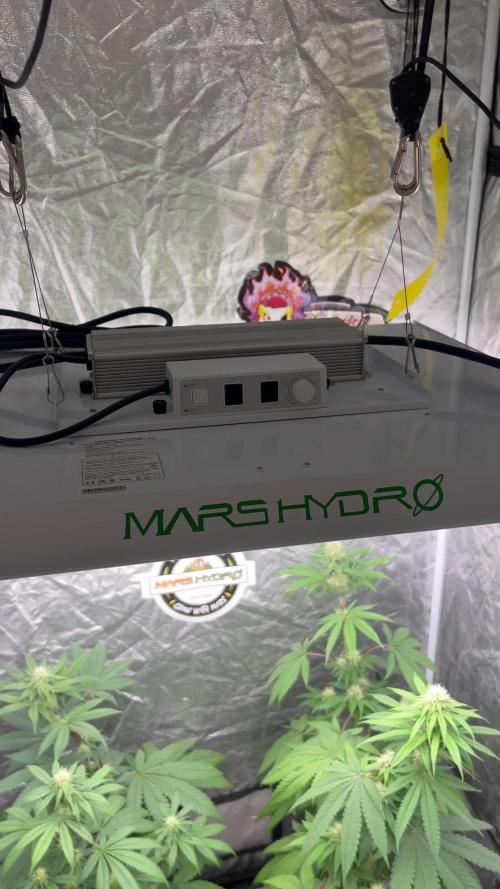
Las flores empezaron a formarse, por el momento todo correcto, os dejé también alguna novedad y un cambio en la sala, agradecer al equipo de Mars hydro por el nuevo TSW2000. (los últimos 5 años cultive solo con los leds de esta marca).
- os dejo por aquí un CÓDIGO: Eldruida
Descuento para la tienda de MARS HYDRO.
https://www.mars-hydro.com
Hasta aquí todo, Buenos humos 💨💨💨

Likes
27
Share


@adam_pawloski87
Follow
Ladies and Gentlemen we are back!! This project started last Sunday an Germination week was a success for these Purple punch’s an Forbiddin Runtz from Fastbuds 😍! I went with my paper towel method, sprayed down paper towel with pure water, folded it up inside sandwich bag un seeled in a dark cupboard. Checked everyday to make sure paper towel was still moist and on 3rd day we had all 6 pop open! I planted them Wednesday and all 6 popped up in soil on Friday in my Ac Infinity pots using Fox Farms Happy Frog soil! Tomorrow we will give them a small dose of nutrients, will be doing nutes on Monday, Wednesday and Fridays only rest get pure water! Well y’all let’s have another great week , keep them eyes peeled for next weeks photos an pics !!


Likes
45
Share


@Reyden
Follow
Per questa settimana hanno mostrato una bella crescita anche loro sono state toppate e pulite al primo nodo, ho aggiunto un pizzico di radicante per aiutarle a superare lo stress dell allenamento ma ho visto che si sono riprese bene quindi vediamo se tra una settima riusciamo a cambiare luce anche a queste Gorilla Glue 🦍

Likes
1
Share


@AestheticGenetix
Follow
6/24/25 she is frosty and stacking incredibly well. everything in my tent right now is exceeding any and all expectations and i feel blessed.